Want to make your Canva designs look more professional? Fading images helps your pictures blend smoothly with backgrounds or text.
Imagine turning a sharp photo edge into a soft fade that makes your design feel polished—like magic!
This guide shows you easy ways to create fade effects, whether you’re making social media posts, presentations, or invitations. You’ll learn to use Canva’s built-in tools, like the transparency slider, and free apps like Easy Reflections to make parts of your image see-through.
For a more advanced effect, you might even want to learn how to slice in Canva to create unique compositions.
These tricks help highlight important details, hide rough edges, or create cool transitions between photos.
Best part? No design experience needed—just follow the steps, and you’ll be fading images like a pro!
Understanding Image Transparency in Canva

What is Transparency in Canva?
Transparency in Canva means making something see-through.
When you change the transparency of an image or shape, you can see through it to what’s behind it. The transparency tool in Canva lets you decide how see-through something is. You can make it a little bit see-through or almost fully see-through. This is different from learning how to cut out an image in Canva, which removes parts of the image entirely.
This is measured from 0% (you can’t see it at all) to 100% (you can see it fully).
Making parts of your image transparent is how you create a fade effect. The fade effect helps to blend images with the background color or with other pictures.
This makes your design look smooth instead of having hard edges.
Benefits of Image Fading
Fading your images has many good points:
- It helps your text stand out when put on top of images. For even more emphasis, you can also learn how to highlight text in Canva.
- It makes your design look smooth and clean.
- It helps draw attention to the most important parts.
- It creates a soft look that many people like.
- It helps your images blend with your background color.
When you use the fade effect well, it makes your whole design look more put together. People who see it will focus on what’s important.
How to Fade an Image in Canva?

Method 1: Using the Transparency Tool
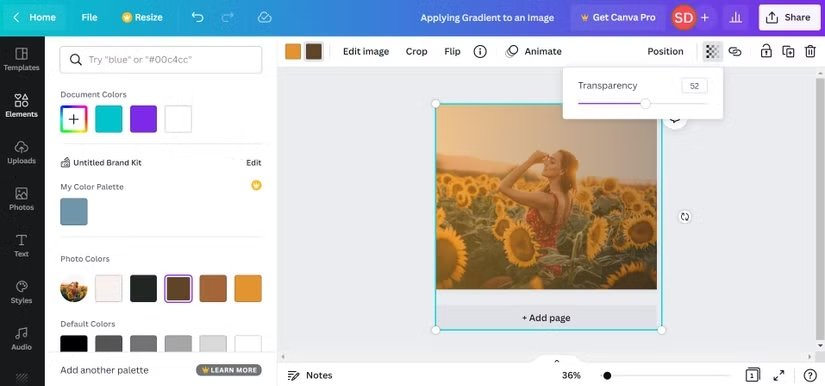
Using the transparency tool is the easiest way to fade an image in Canva. Here’s how to do it:
- Open your Canva project and add the image you want to fade. If you change your mind, it’s easy to learn how to replace an image in Canva.
- Click on the image to select it.
- Look at the top of your screen. You’ll see a toolbar with many options. From here, you can also discover how to flip an image in Canva.
- Find the “Transparency” option in this toolbar.
- Click on it to show a slider.
- Move the slider to adjust how see-through your image will be. Moving left makes it more see-through, moving right makes it less see-through.
- When you like how it looks, click anywhere else to apply the change.
This method is great because it makes the whole image fade the same amount. If you need only part of the image to fade, you’ll want to try one of the other methods.
Method 2: Using the Easy Reflections App
The Easy Reflections app in Canva is a special tool that can help you create fade effects. Here’s how to use it:
- In your Canva design, add the image you want to fade.
- Select the image by clicking on it.
- Click on “Apps” in the bottom left corner of your screen.
- Search for “Easy Reflections” in the search bar.
- Click on the Easy Reflections app to open it.
- Choose where you want the fade to be (top, bottom, left, or right).
- Set the opacity to 100% if you want to keep most of the image clear.
- Adjust the “offset” slider to control how much of the image fades.
- Click “Add to Design” when you’re happy with how it looks.
- You might need to move the faded image to line up perfectly with your original.
This method is great for making just one side or edge of your image fade out.
Method 3: Creating Transparent Gradients
Transparent gradients are another way to make your images fade. This method uses a see-through gradient that goes from solid to clear:
- Open your Canva project and add your image.
- Click on “Elements” on the left side.
- Search for “transparent gradient” in the search box.
- Find a gradient that goes from solid to transparent. You can also get creative and learn how to curve text in Canva to complement the gradient’s shape.
- Drag the gradient onto your image.
- Resize the gradient to cover your image.
- You can change the color of the gradient by clicking on it and using the color tool at the top. For more text effects, you might also want to know how to outline text in Canva.
- Move and rotate the gradient until you get the fade effect you want.
This method gives you more control over how and where your image fades.
Advanced Fading Techniques
For the more detailed Canva projects, you can make your designs better with advanced fading methods.
Creating Directional Fades
Directional fades let you fade your image from one side to another. Here’s how to make them:
- Add your image to Canva.
- Go to “Elements” and search for “gradient transparency“.
- Choose a gradient that fades in the direction you want (top to bottom, left to right, etc.).
- Place this gradient over your image.
- Resize it to fit your image.
- Change the color of the gradient to match your background color.
This creates a smooth fade in one direction. It’s great for making text more readable when placed on top of images. If you have a lot of text, you should also learn how to wrap text in Canva.
Fading Multiple Images
When you want to fade multiple images that are next to each other or overlapping:
- Add all your images to your design.
- Arrange them however you want. You can even learn how to landscape in Canva to change the orientation.
- For each image, use any of the methods we talked about earlier.
- Make sure the fade directions match where the images meet.
- Adjust the transparency until all images blend well together.
When fading multiple images, it helps to create a new layer with a solid color behind all the images. This way, all images fade into the same color.
Creating Fade-In Animations
You can also make your images appear to fade in when making videos or presentations in Canva:
- Add your image to a Canva presentation or video.
- Click on “Animate” at the top of the screen.
- Choose an animation type like “Fade” or “Fade in.” You could even explore how to put a timer in Canva for more dynamic presentations.
- Adjust the speed if needed.
- Preview your animation to make sure it looks right.
This creates a nice effect where your image slowly appears on the screen.
Layer Management For Complex Fades
For more complex designs with many layers and fades:
- Keep your original images on separate layers.
- Make copies of images before applying fades.
- Use groups to keep related items together.
- Use the “Position” tools (forward/backward) to control which faded images appear on top of others.
- Save versions of your work as you go so you can go back if needed.
Good layer management makes it easier to create complex fade effects without getting confused.
Tips For Professional Image Fading

Choosing The Right Fade For Your Design
Not all fades work for all designs. Here are tips for choosing the right fade:
- For text over images: Fade the image where the text will go. Learning how to add shadow in Canva can also make your text pop.
- For a dreamy look: Use a soft, all-over fade with higher transparency.
- For focus on one part: Fade the less important parts more.
- For blending with colored backgrounds: Match the gradient color to your background color.
The best fade depends on what you want people to notice first in your design.
Maintaining Visual Hierarchy
Visual hierarchy means making sure people look at the most important things first. When using fade effects:
- Fade less important parts of images more.
- Keep important parts clear and bright.
- Use fading to make text stand out better. You can also learn how to flip text in Canva for a unique look.
- Don’t fade everything the same amount, or people won’t know where to look.
Good fading helps guide the viewer’s eyes to what matters most.
Common Mistakes To Avoid
Here are some mistakes people often make when fading images:
- Making the whole image too faint so it’s hard to see.
- Fading in the wrong direction so text is hard to read.
- Using fade effects that don’t match the rest of the design.
- Not saving the original image before applying fades.
- Using too many different fade styles in one design. Another common issue is typos; it’s useful to know, Does Canva have spell check?
Avoiding these mistakes will help your designs look better.
Examples of Effective Image Fading
Let’s look at some ways faded images work well:
- A product photo that fades out at the bottom with text in the faded area. If you’re showcasing products, you might also want to learn how to create a lookbook in Canva.
- A background image fades to be less bright so text shows up better.
- Two images side by side that fade where they meet, making them blend.
- A profile picture with edges that fade into the background.
- A collection of photos that all fade to the same background color.
These examples show how fading can make designs look better when used well.
FAQ’s:
Can I Adjust the Fade Effect After Applying It?
Yes, you can change the fade effect after applying it. If you used the transparency slider, just select the image again and adjust the slider. If you used a gradient or the Easy Reflections app, you can select those elements and change their settings. It’s always good to keep a copy of your original image just in case.
Does the Easy Reflections App Work With All Image Types in Canva?
The Easy Reflections app works with most image types in Canva, including JPG and PNG files. However, it works best with images that have had their backgrounds removed. If you don’t know how, you can learn how to cut out an image in Canva. If your image has a transparent background already, the app will create cleaner fade effects.
Can I Use The Fade Effect With Transparent PNG Images?
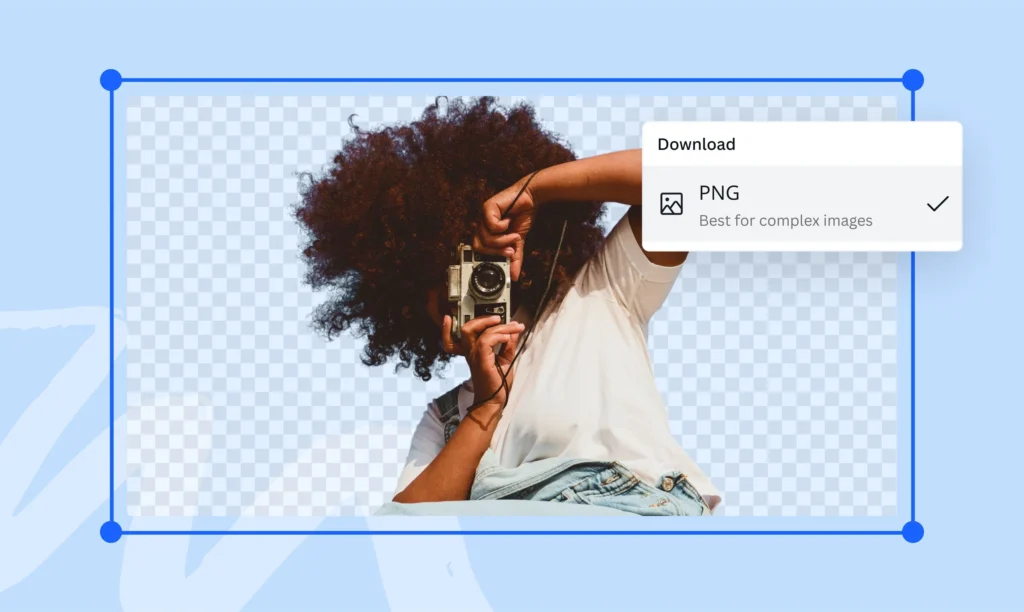
Yes, you can apply fade effects to PNG images with transparent backgrounds.
In fact, these often work best because the transparency in the PNG lets the fade blend more naturally with your background. When using the transparency tool or gradients with a PNG, only the visible parts of the image will fade.
Is The Easy Reflections App Available On The Free Version Of Canva?
Yes, the Easy Reflections app is available to use in the free version of Canva. You don’t need Canva Pro to access this tool. Just go to the Apps section and search for “Easy Reflections” to find and use it in your designs.
Can I Save A Custom Fade Setting To Use Later In Canva?
Canva doesn’t let you save custom fade settings by themselves, but you can save entire designs as templates.
If you create a fade effect you like, save that design as a template.
For those looking to monetize their creations, it’s useful to learn how to sell Canva templates on Etsy. You might also wonder, “Can I sell Canva designs on Etsy?”, and The platform provides clear guidelines for this.
When sharing your templates, knowing how to add a clickable link in Canva PDF is also a valuable skill.
Then, when you want to use the same fade effect again, open the template and replace the image while keeping the fade settings.
Conclusion
Fading images in Canva is a simple way to make your designs look better. You’ve now learned several methods to create fade effects, from using the basic transparency tool to more complex techniques with apps and gradients. It’s also helpful to know if Canva images are copyright-free when selecting your visuals.
Each method gives you different options for how your images fade. You can even expand your design skills by exploring whether you can upload fonts to Canva to further personalize your work.
Good fading is about balance. It should not be too much or too little. You should practice with these tools. This will help you find what works best for your designs. Try fading just one edge of an image. You can also create a soft blur effect by using transparency. To add more professional text formatting, you can also learn how to indent in Canva.
With the skills you’ve learned, you can now make text more readable over images, blend photos with your background color, and create designs that look smooth and professional. The best way to get better is to try different fade effects and see which ones you like best.
Keep these tips in mind as you work on your next Canva project, and your designs will stand out with beautiful, smooth image fades.
