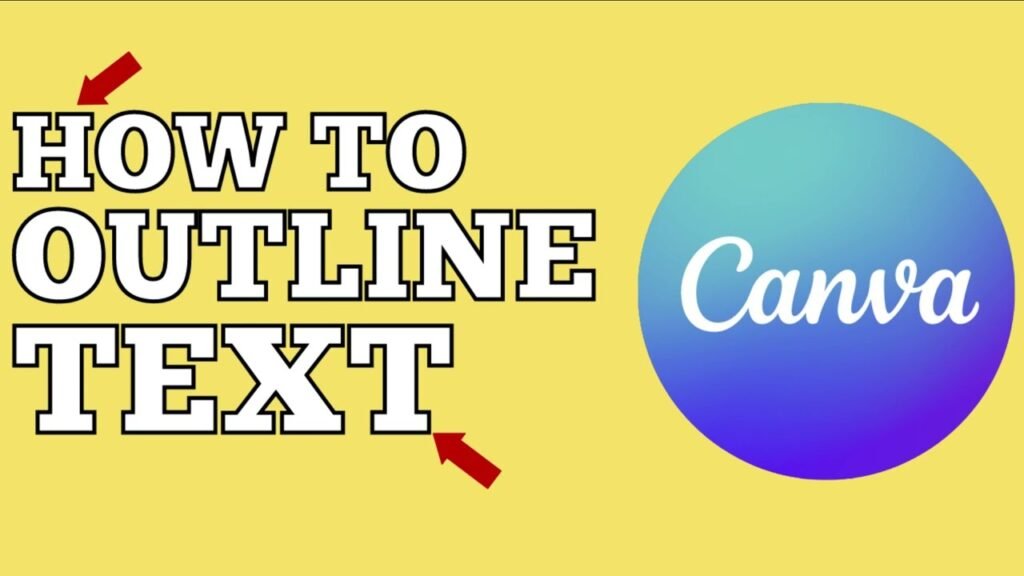
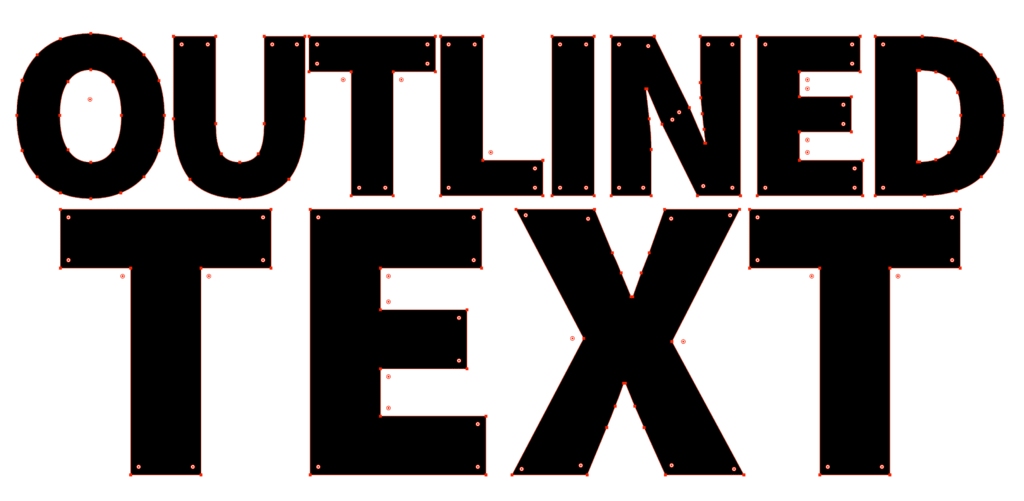
Adding outlines to text in Canva helps your words stand out, especially on busy photos or colorful backgrounds.
Imagine creating social media posts where your text never gets lost, YouTube thumbnails that grab attention, or logos that look professional by adding a simple border around letters, like how to properly replace an image in Canva to find the perfect backdrop.
When I started designing, I struggled with text blending into backgrounds until I learned Canva’s outlining tricks.
Whether you use the free version of Canva or Canva Pro, you can master this skill quickly.
You’ll use tools like the Effects panel and color picker to customize outlines, adjust thickness with sliders, and even create 3D effects.
Mastering these small details, including learning how to flip text in Canva, can elevate your designs significantly.
I’ll guide you through three easy methods: the one-click Hollow effect, the versatile Splice effect, and the manual duplicate-text technique for full control. No need for complicated software-these steps work for social media graphics, bloggers, or anyone wanting polished designs.
Let’s make your text pop!
How to Outline Text in Canva?
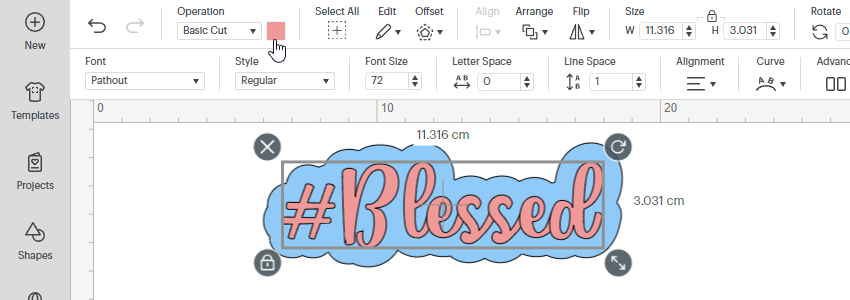
Method 1: Using the Hollow Effect
The Hollow effect is one of the quickest ways to create outlined text in Canva. It removes the fill from your text, leaving just the outline.
- Open Canva and start a new design or open an existing one. For instance, you might be working on a design where you need to know how to landscape in Canva.
- Click on the text box tool in the side panel to add text.
- Type your text and select it.
- Click on “Effects” in the top toolbar.
- Select “Hollow” from the effects panel.
- Your text now has an outline instead of being filled.
Adjusting Thickness and Appearance
Once you’ve applied the Hollow effect:
- Use the thickness slider that appears to adjust how thick or thin your outline is
- Move it to the right for a thicker outline
- Move it to the left for a thinner outline
- The changes will show up right away on your text
Customizing Color Options
To change the color of your outlined text:
- With your text still selected, click on the text color option
- Use the color picker to choose any color for your outline
- You can select from the color palette or enter a specific color code
- The outline of your text will update with your chosen color
The Hollow effect works best for larger text and headings rather than body text, where you might be more focused on learning how to indent in Canva for readability. Thin outlines can be hard to see at small sizes.
Method 2: Using the Splice Effect
The Splice effect is another built-in Canva tool that creates outlined text with more customization options.
It’s almost as intuitive as learning how to slice in Canva.
How to Apply the Splice Effect?
- Add a text box to your design and type your text
- Select your text
- Click on “Effects” in the top toolbar
- Choose “Splice” from the effects panel
- Your text will now have an outline applied to it
Adjusting Offset and Direction
The Splice effect gives you more control:
- Use the thickness slider to adjust the width of your outline
- Change the offset slider to control how far the outline sits from your text
- Select a direction (horizontal, vertical, or diagonal) to change how the outline appears
- Each adjustment gives your text a different look
Creating 3D Text Effects
The Splice effect can create a 3D text effect, which pairs nicely with other depth-creating techniques. For example, you can learn how to add shadow in Canva to enhance this effect even further.
- Apply the Splice effect to your text
- Set the offset slightly to the right and bottom
- Choose a lighter color for your text and a darker color for the outline
- This creates a shadow effect that makes your text look three-dimensional
Method 3: Duplicate Text Method
For more control over your outlines, especially if you want multiple outlines, you can use the duplicate text method.
This technique gives you the ultimate freedom, similar to how you can learn how to cut out an image in Canva for precise layering.
Creating Layered Text
- Add a text box and type your text
- Format it with your desired font and size
- Select the text and use the keyboard shortcut Ctrl+D (or Cmd+D on Mac) to duplicate it
- Make sure the duplicate text is in exactly the same position as the original
- Use the three dots menu, go to “Layer” and select “Send to back“
- The text that’s now in the back will become your outline layer.
Positioning Tips
Getting perfect alignment is key:
- Select both text layers by holding Shift and clicking on each one
- Use the “Position” tab to align them in the center, both horizontally and vertically
- Make the back layer slightly larger than the front layer if you want the outline to be visible all around
- Use the white circle handles to resize text if needed
Color Combinations
Playing with colors can create striking effects:
- Make the front text layer a different color from the outline layer
- For a double outline, create a third text layer behind the others
- Give each layer a different color and thickness
- Try contrasting colors like white text with a black outline, or bright colors against darker outlines
- Use your brand colors for a consistent look
What Must You Consider Before Adding An Outline To Text?
Before adding an outline to your text, think about:
- Font Choice: Sans-serif fonts like Arial or Verdana often work better for outlines than complicated fonts
- Size Matters: Outlined text works best at larger sizes, as small outlined text can be hard to read
- Letter Spacing: Adjust the letter spacing if your outlined letters are too close together
- Background Complexity: The busier your background, the more your text needs to stand out
- Purpose: Make sure the outline helps your message, not distracts from it
Benefits of Outlined Text
Outlined text offers several advantages:
- Better Readability: Text outlines help words stand out against busy backgrounds or images
- Visual Appeal: Outlines add style and dimension to otherwise flat text
- Attention-Grabbing: Outlined text draws the eye to important information
- No Background Needed: Outlined text can float over images without needing a solid background box
- Matches Design Styles: Outlines work well for gaming, sports, or bold marketing materials
When To Use Outlined Text In Your Designs?
Outlined text works especially well in these situations:
- Over Photographs: When text needs to be placed directly on images
- For Headings: To make titles and headers stand out
- Logo Design: To create memorable and legible logos
- YouTube Thumbnails: To ensure text is readable at small sizes
- Social Media Graphics: To catch attention while scrolling
- When Space is Limited: Instead of adding a text background box
Best Practices For Outlined Text
Font Selection Tips
Choose sans-serif fonts like Verdana or Arial because their simple shapes make outlines clearer.
Avoid decorative fonts with swirls or uneven thickness- they can look messy when outlined. Bold fonts work better than thin ones since their thicker letters hold outlines well.
Always test your font at different sizes using the size slider to ensure it stays readable, especially for social media graphics or YouTube thumbnails.
Design Principles
Use contrasting colors between your text and outline (like white text with a black outline) to make words pop.
Stick to your brand palette for consistency. Your logo uses blue, so use blue outlines in designs. Don’t add more than two outline layers; too many can make text look cluttered.
Match the border weight to your design style: thick outlines for bold posters, thin ones for subtle logo designs.
Legibility Considerations
Always check if your text is easy to read after adding outlines. Avoid outlining body text or small fonts- they become blurry.
Test your design on phones and tablets using the preview feature to ensure it looks good everywhere.
Ensure high contrast between the outline and background (like dark outlines on light photos) so words don’t disappear. Larger text (like headings) can handle thicker outlines without losing clarity.
Following these tips, your outlined text will look clean, professional, and easy to read in any design!
Practical Applications
Social Media Graphics

Outlined text makes your social media posts stand out:
- Create eye-catching Pinterest pins with outlined headings
- Make Instagram quotes more readable with text outlines
- Design Facebook headers with outlined text that pops against cover images
- Add outlined text to profile pictures for temporary announcements
- Use outlined text for hashtags or calls to action on promotional graphics
YouTube Thumbnails
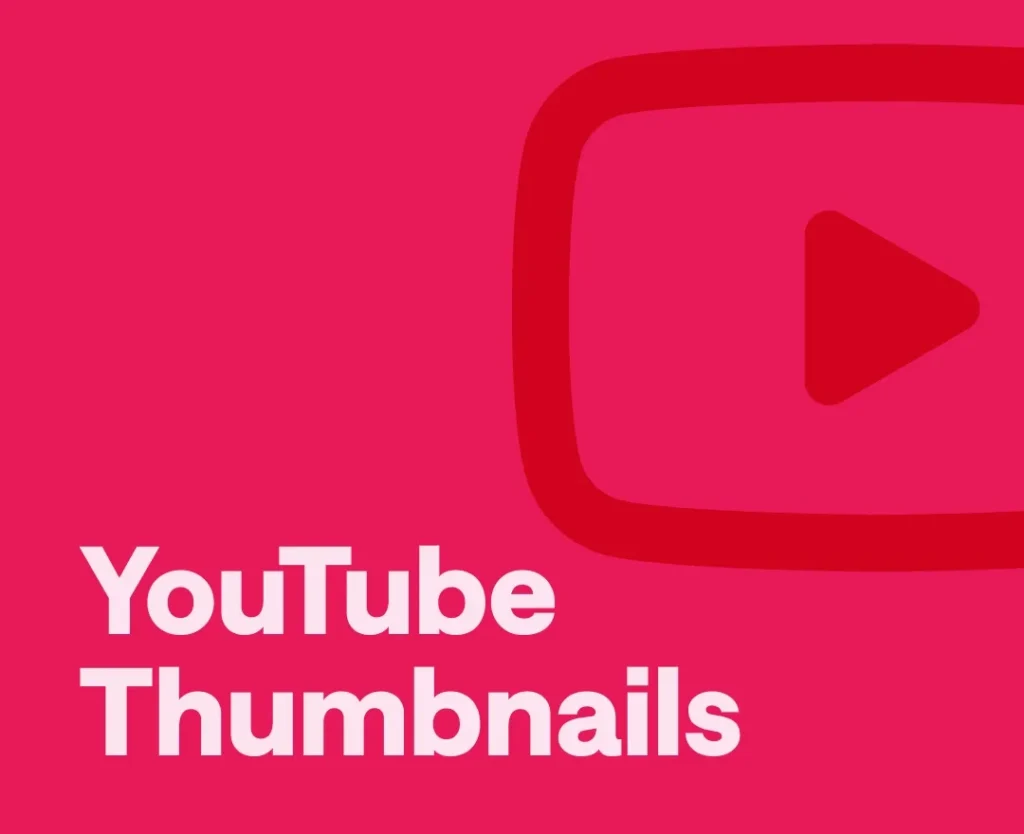
YouTube creators can benefit from outlined text:
- Make your video titles readable at thumbnail size
- Use contrasting colors for maximum visibility
- Apply the Splice effect for a 3D look that stands out in search results
- Keep text large and the message simple
- Use outlined text to build your channel’s recognizable style
Logo Design
For logo design, outlined text can:
- Create a distinctive brand mark
- Make text readable across different backgrounds
- Add a professional touch to simple text-based logos
- Work well for export as a PNG with transparent background
- Be easily scaled without losing clarity
Marketing Materials
Marketing materials benefit from outlined text in many ways:
- Create attention-grabbing headlines for flyers
- Design readable text for banners and posters
- Make coupon codes stand out in promotional materials
- Highlight important dates or deadlines
- Create watermarks that don’t obscure images
FAQ’s:
Can I Outline Text in the Free Version of Canva?
Yes! The Hollow and Splice effects are available in the free version.
However, a Pro account offers more features. If you’re wondering how much Canva Pro costs, the pricing is competitive.
Many users ask Is Canva Pro worth it, and for frequent designers, the extra tools are often a game-changer. There are even ways to learn how to get Canva Pro for free through special programs.
How Do I Make the Outline Thicker Or Thinner?
After applying the Hollow or Splice effect, use the thickness slider that appears in the effects panel. Move it to the right for a thicker outline or to the left for a thinner one. With the duplicate text method, you can adjust the size of the background text to change the outline thickness.
Can I Outline Any Font in Canva?
Yes, you can apply outline effects to any font in Canva. However, some fonts work better than others.
Sans-serif fonts with consistent thickness usually look best with outlines. Very decorative or thin fonts might not show outlines as clearly.
How Do I Remove An Outline Effect?
To remove an outline effect, select your text and click on “Effects” in the top toolbar. Then click on the currently applied effect (like Hollow or Splice) to deselect it.
This will return your text to its normal appearance without an outline.
Can I Save My Outlined Text As A Template?
Yes! After creating the perfect outlined text, you can save your entire design as a template for future use.
Simply click the “Share” button in the top right corner of your screen and select “Save as template.” You can also save it as an element by grouping your text layers and using the “Save as element” option.
Conclusion
Adding outlines to your text in Canva is a simple way to make your designs stand out. Whether you use the Hollow effect, Splice effect, or duplicate text method, outlined text can improve readability and visual impact.
Remember to choose fonts that work well with outlines, keep your designs clean and readable, and use outlines where they add value – like headings, social media graphics, and YouTube thumbnails.
With these three methods and best practices, you’re ready to create professional-looking outlined text in Canva for all your design needs. Try each method to see which works best for your projects, and soon you’ll be creating eye-catching designs like a pro!
