
Quick Answer: To use Microsoft Designer, visit designer.microsoft.com, sign in with a free Microsoft account, then type a description to generate AI designs and images instantly. No download needed it works entirely in your browser. DALL-E powers the AI image generation. Templates can be customised after AI generates them. Completely free with no credit card required.
Here is something most people do not realise Microsoft has a genuinely powerful AI design tool, and it is completely free. No subscription. No credit card. No watermarks. If you have a Microsoft account (the same one you use for Outlook or Xbox), you already have everything you need to start using it today.
Learning how to use Microsoft Designer takes about 15 minutes. The tool runs entirely in your browser, is powered by DALL-E for AI image generation, and lets you create social media posts, posters, invitations, and more without any design experience. This guide walks you through every feature step by step with clear instructions.
Before diving in, check out our full Microsoft Designer review for a deeper look at how it compares to other tools. And if you are exploring free options more broadly, our guide to the best free graphic design tools for beginners covers everything worth knowing.
Getting Started with Microsoft Designer
Step 1 — Visit designer.microsoft.com
Open any browser and go to designer.microsoft.com. You do not need to download anything. The tool runs entirely in your browser on any device Windows, Mac, Chromebook, or tablet.
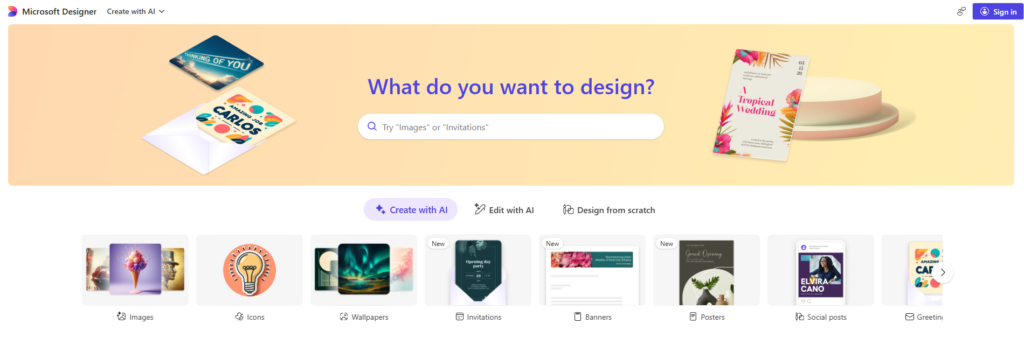
The homepage shows a prompt bar at the top and a grid of design examples below it. This is your starting point for everything.
Step 2 — Sign In With Your Free Microsoft Account
Click Sign in in the top right corner. Use your existing Microsoft account the same email you use for Outlook, Teams, or any other Microsoft product. If you do not have one, click Create one and set up a free account in about two minutes. No credit card is ever required.
Once signed in, your account saves your designs automatically so you can come back and edit them anytime.
Step 3 — Explore the Dashboard
After signing in, the dashboard shows:
- A prompt bar at the top this is where you describe what you want to create
- A row of design type buttons Social post, Invitation, Flyer, Presentation, and more
- A template gallery below pre-made designs you can customise immediately
Spend a minute clicking around before starting. The interface is intentionally simple Microsoft built this for people who have never used a design tool before.
How to Create Your First AI Design
This is the core workflow in Microsoft Designer describe what you want, and the AI builds it for you.
Step 1 — Type a Description of What You Want
Click the prompt bar at the top of the dashboard and type a description of your design. Be specific about the type, purpose, and style. For example: “A birthday party invitation with colorful balloons, confetti, and a fun modern font” or “A professional LinkedIn banner for a marketing consultant with a dark blue background.”
The more detail you include colors, mood, style, purpose the better the AI results will be. Vague prompts like “make a flyer” will give you generic output.
Step 2 — Review AI Generated Options
After typing your description and pressing Enter, Microsoft Designer generates several complete design options within a few seconds. These are full layouts with colors, fonts, images, and text already placed not just templates.
Scroll through the options. You will usually see four to six variations that interpret your prompt in different ways.
Step 3 — Select and Customise Your Favorite
Click any design you like to open it in the editor. From here you can change every element text, colors, fonts, background, and images. The design is fully editable and you are never locked into what the AI generated.
How to Generate AI Images with DALL-E
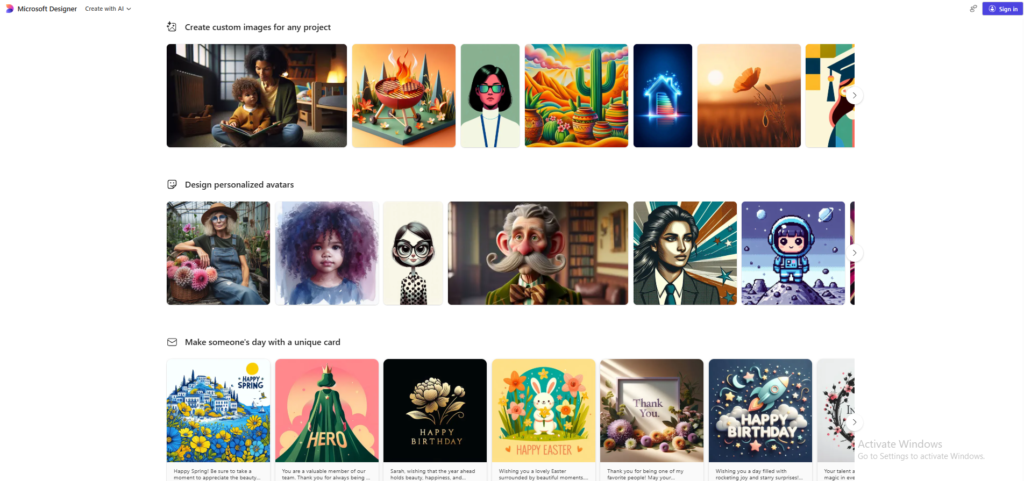
Microsoft Designer uses DALL-E the same image generation model behind ChatGPT’s image features to create original images from text descriptions. This is completely free and produces genuinely impressive results.
Step 1 — Open the Image Creator Tool
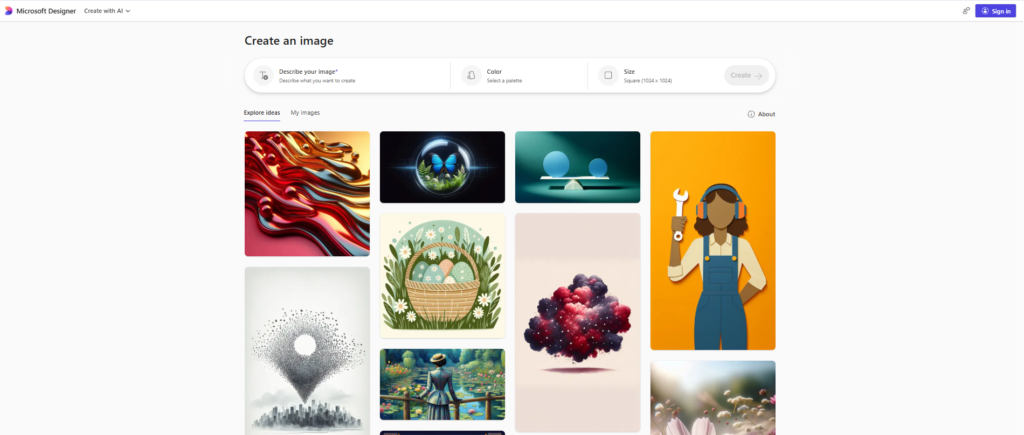
From the dashboard, click Image Creator in the left sidebar or look for the image generation option within the editor. A dedicated prompt bar and style options appear.
Step 2 — Write Your Image Prompt
Type a detailed description of the image you want. Include the subject, setting, lighting, style, and mood. For example: “A flat lay photo of a coffee cup, notebook, and succulent plant on a white marble surface, soft natural light, lifestyle photography style.”
The more visual detail you include, the more useful the result. Think about what a photographer would need to know to recreate your image.
Step 3 — Choose Your Preferred Style
Below the prompt bar, Designer offers style options including Photorealistic, Digital Art, Watercolor, Sketch, and more. Select the style that fits your project before generating. This single setting changes the output dramatically.
Step 4 — Download Your Generated Image
DALL-E generates four image options. Click your favorite to select it. Use it directly inside your current design by clicking Insert, or hover and click Download to save it to your device as a PNG file. No watermarks. No credits to worry about.
How to Customise AI Generated Designs
Once you have a design whether AI generated or from a template the editor gives you full control over every element.
Step 1 — Edit Text and Fonts
Click any text block in your design to select it. A text editing toolbar appears at the top of the screen. Change the words, adjust the font family, increase or decrease the size, and change the color using the options in the toolbar. Designer includes a solid library of fonts covering modern, classic, and decorative styles.
Step 2 — Change Colors and Layout
Click the background or any colored element to select it. A color picker appears in the right panel. You can choose from the suggested palette, enter a hex code for an exact brand color, or use the color wheel for custom shades. To move elements around, click and drag them to a new position on the canvas.
Step 3 — Add Your Own Images or Logo
Click the Media option in the left sidebar to upload your own photos or logo. Drag the uploaded image onto the canvas and resize it by dragging the corner handles. Use the Remove background button that appears in the toolbar to cut out the background of any uploaded photo instantly.
How to Use Microsoft Designer Templates
If you would rather start from a template than generate from scratch, Designer has a solid library of ready-made designs organised by category.
Step 1 — Browse the Template Library
From the dashboard, click any design category Social post, Flyer, Invitation, Card, and so on. A grid of templates appears. Scroll through and click any one to preview it full size.
Step 2 — Apply AI Suggestions to a Template
Once a template is open in the editor, look for the Inspire me or AI suggestion button. Designer can automatically restyle the template based on a short description changing the color palette, font pairing, or layout to match a mood you describe. This is a faster way to personalise a template without manually changing every element.
Step 3 — Export Your Final Design
When your design is ready, click Download in the top right corner. Choose your file format PNG works for most uses, JPEG for photos, and PDF for print. Your file downloads immediately with no watermark.
Tips for Better Results in Microsoft Designer
Be descriptive in your prompts. “A social media post” gives generic results. “A bold Instagram post announcing a summer sale for a women’s clothing brand, coral and white color scheme, clean modern font” gives Designer the context to produce something actually useful.
Try multiple variations before settling. Designer generates several options from every prompt. Do not just pick the first one scroll through all of them. The fourth or fifth option is often the strongest.
Use templates as a faster starting point. If you are in a hurry, browse templates first and use the AI suggestion feature to personalise them rather than generating from a blank prompt. It is faster and the results are more polished.
Combine with Microsoft 365 for extra features. If you have a Microsoft 365 subscription, Designer integrates with Word, PowerPoint, and Teams letting you apply AI design suggestions directly inside those apps without switching tools.
Common Problems and Solutions
| Problem | Solution |
| AI image does not match your prompt | Add more specific style details include lighting, color, and photographic style |
| Cannot find the export or download option | Look for the Download button in the top right corner of the editor |
| Design looks too simple or generic | Layer additional AI generated elements or try a more detailed prompt |
| Slow generation speed | Try during off-peak hours early morning or late evening typically faster |
Final Thoughts
Microsoft Designer is one of the most underrated free tools available in 2026. Most people assume it is a basic Microsoft product it is not. The DALL-E image generation is genuinely impressive, the AI design workflow is fast and intuitive, and the fact that it is completely free with no watermarks puts it ahead of many paid alternatives for basic design needs.
If you are a beginner and you want to create social media content, flyers, invitations, or simple graphics without spending anything, start here. You can be producing professional-looking designs within 20 minutes of your first login.
For a full breakdown of Microsoft Designer’s features and honest pros and cons, read our full Microsoft Designer review. If you want to compare it with the most popular alternative, our guide on how to use Canva AI shows exactly how the two tools differ in practice. And for the widest view of free tools available, see our best free design tools for beginners.
Frequently Asked Questions
Q: Do I need to pay to use Microsoft Designer? No. Microsoft Designer is completely free at designer.microsoft.com. You only need a free Microsoft account to sign in. There is no credit card requirement and no hidden fees for the core AI design and image generation features.
Q: How do I generate AI images in Microsoft Designer? Open the Image Creator tool within Microsoft Designer, type a detailed description of the image you want, and the DALL-E powered AI generates several options within seconds. You can then download your favorite image or insert it directly into a design no watermarks and no credits to track.
Q: Can I edit designs after Microsoft Designer creates them? Yes. Every design Microsoft Designer generates is fully editable. You can change text, fonts, colors, layout, and images after the AI creates the initial version. The editor works like a simplified drag-and-drop design tool everything is clickable and adjustable.
Q: What can I create with Microsoft Designer? You can create social media posts, posters, flyers, invitations, presentations, banners, cards, and general graphics. It is particularly strong for social media content thanks to its DALL-E image generation and platform-specific template sizing.
Q: Does Microsoft Designer work without a Microsoft 365 subscription? Yes. Microsoft Designer works fully without a Microsoft 365 subscription. A free Microsoft account gives you access to AI design generation, the full template library, and DALL-E image creation. Microsoft 365 subscribers get some additional integration features but they are not required for the core tool.
Q: Can I use Microsoft Designer images for commercial projects? Yes, images and designs created with Microsoft Designer can generally be used for commercial purposes. As with any AI generation tool, it is worth reviewing Microsoft’s current terms of service for specific commercial usage details since policies can be updated over time.
