
Quick answer: To remove background in Photoshop in one click, select your image layer, make sure it’s unlocked and choose Remove background in the Contextual Task Bar under the image. Photoshop finds the subject, hides the background with a layer mask and leaves you with a cutout you can save as a transparent PNG. For hair, fur or busy backgrounds, refine the result with Select and Mask.
Below you’ll find four ways to cut out a subject, from the one-click option to manual tools, plus how to clean up edges, swap in a new background and export a PNG that keeps its transparency.
Steps checked against Adobe’s Photoshop help pages and tested in Photoshop on the web in November 2026. Menu names can differ slightly between Photoshop versions.
Before You Start: Unlock the Image Layer
When you open a JPG or PNG, Photoshop often names the layer Background and shows a small lock next to it. Background removal needs a normal, unlocked layer.
- Open the Layers panel (Window > Layers if it’s hidden).
- Click the lock icon on the Background layer. Photoshop turns it into a regular layer called Layer 0.
- Keep that layer selected before you use any of the methods below.
Method 1: Remove the Background in One Click
This is the quickest option and it works well on product shots, portraits and pets with clear edges.
- Select the unlocked image layer in the Layers panel.
- Find the Contextual Task Bar floating under the image. If you can’t see it, turn it on with Window > Contextual Task Bar.
- Select Remove background.
- Wait a few seconds while Photoshop detects the subject. The background turns into a gray and white checkerboard, which means it’s transparent.
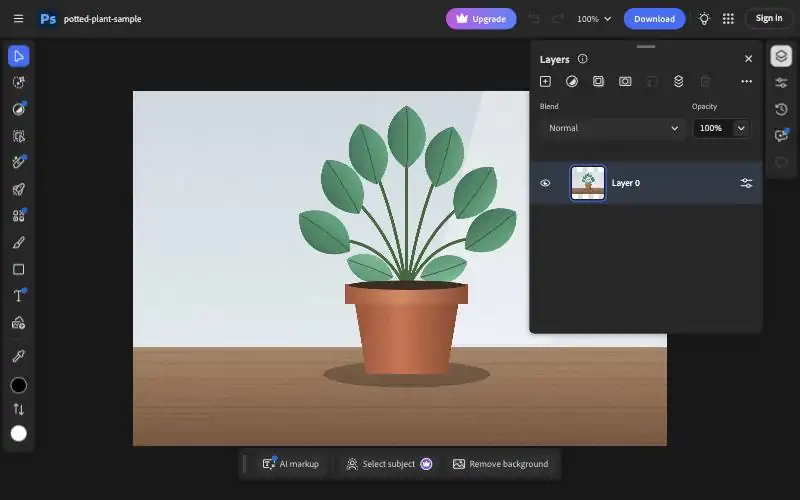
You can run the same action from two other places. In the Properties panel, look under Quick Actions and select Remove Background. Or open the Discover panel with the search icon (or Ctrl+F on Windows, Cmd+F on a Mac), then go to Browse > Quick Actions > Remove Background.
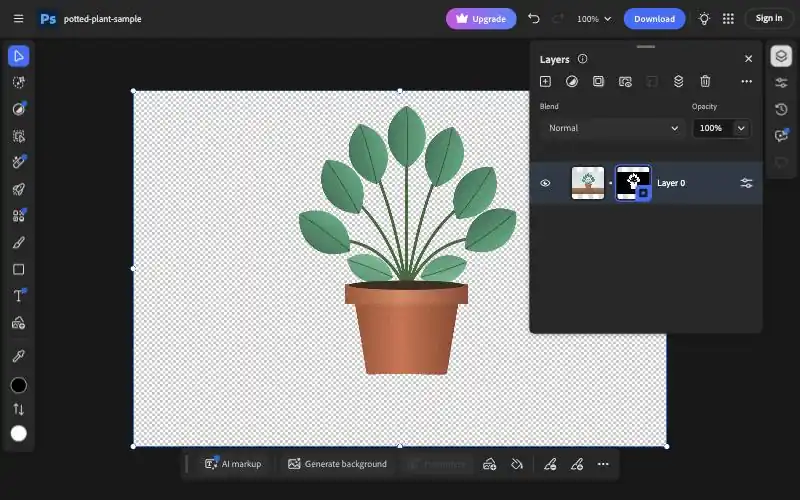
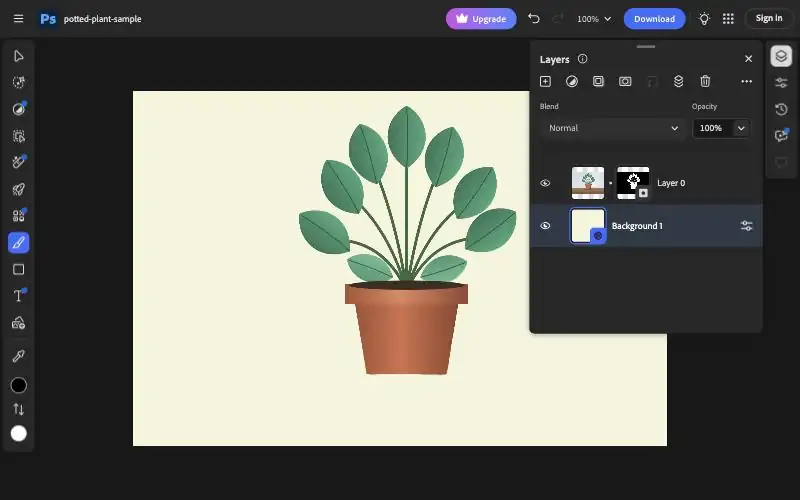
Photoshop doesn’t delete anything. It adds a black and white layer mask next to your layer thumbnail: white areas stay visible and black areas are hidden. That means you can fix mistakes later by painting on the mask.
Method 2: Select Subject and Select and Mask (Best for Hair)
Use this method when the one-click result chops off strands of hair, fur or fine details.
- Pick a selection tool, such as the Object Selection tool or the Quick Selection tool.
- Select Select Subject in the Options bar at the top. Photoshop draws a selection around the main subject.
- Use Add to selection or Subtract from selection in the Options bar to fix any obvious gaps.
- Select Select and Mask in the Options bar, or go to Select > Select and Mask.
- In the Properties panel, set the View Mode to Overlay, On Black or On White so you can see the edges clearly. Press F to cycle through the views.
- Under the refine mode, choose Object Aware for hair and fur, or Color Aware for simple, high-contrast backgrounds.
- Brush the Refine Edge Brush tool over wispy edges to pick up fine detail.
- Set Output To to Layer Mask and select OK.
For tougher photos, change how Photoshop processes subjects. Go to Settings > Image Processing on a Mac or Edit > Preferences > Image Processing on Windows and switch Select Subject and Remove Background between Device and Cloud. Adobe says cloud processing can give more detailed results.
Method 3: Object Selection Tool (For One Object Among Many)
Select Subject grabs every main subject in the photo. If you only want one of them, such as a single product on a crowded table, use the Object Selection tool.
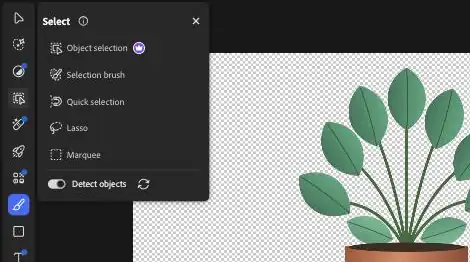
- Select the Object Selection tool in the toolbar.
- Hover over the image. Photoshop highlights the object under your pointer.
- Click to select it. Switch the Options bar to Add to selection to include another object, or Subtract from selection to remove part of one.
- Select the Add layer mask icon at the bottom of the Layers panel. Everything outside the selection disappears.
Method 4: Background Eraser Tool (For Plain Backgrounds)
The Background Eraser is handy for a subject on a flat, single-color backdrop. Unlike the other methods, it erases pixels for good, so duplicate your layer first (Ctrl+J or Cmd+J).
- Select the Background Eraser tool in the toolbar.
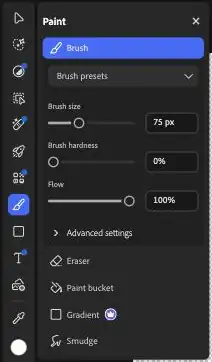
- In the Options bar, set the brush size and hardness.
- Choose a sampling option. Once erases only the color you first click on, which is ideal for a solid backdrop. Continuous keeps sampling as you drag.
- Set Limits to Contiguous, Discontiguous or Find Edges. Find Edges keeps sharper edges on your subject.
- Raise or lower Tolerance to control how much color variation gets erased.
- Turn on Protect Foreground Color if part of your subject is close to the background color.
- Drag over the background, keeping the crosshair in the middle of the brush off your subject.
How to Clean Up the Edges
Most cutouts need a quick touch-up. Because the methods above use a layer mask, you can repair them without starting over.
- Paint on the mask: click the mask thumbnail, choose the Brush tool and paint with white to bring back missing parts or black to hide leftover background. Press X to swap between white and black.
- Use Enhance edge: select the layer mask, then choose Enhance edge in the Contextual Task Bar. It removes leftover background color along fine details like hair. Each use costs 20 generative credits.
- Go back to Select and Mask: with the mask selected, open Select and Mask again and switch to Object Aware for a cleaner edge.
How to Replace the Background
Once the subject is cut out, you can drop anything behind it.
- Generate a new background: after Remove background, choose Generate background in the Contextual Task Bar. Type a prompt such as “sunlit wooden shelf” or leave it empty, select Generate and pick a variation in the Properties panel.
- Use a solid color: choose the color fill option in the Contextual Task Bar and enter a hex code. We used beige, #F5F5DC, from our gold and beige color codes.
- Use your own photo: choose Import background, or drag an image onto the canvas, resize it and move it below your subject in the Layers panel.
How to Save an Image With a Transparent Background
- Hide or delete any color or photo layers you added behind the subject. You should see the checkerboard again.
- Select Share > Quick export as PNG, pick a folder and select Save.
- If Quick Export saves the wrong format, change it in Edit > Preferences > Export (Windows) or Photoshop > Settings > Export (macOS).
- Also save a PSD copy so you can edit the mask later.
Always choose PNG for transparency. JPG can’t store transparent pixels, so the empty area turns into a solid color.
Remove a Background in Photoshop on the Web
Photoshop also runs in a web browser, so you can remove a background without installing anything. The steps are almost the same:
- Open Photoshop on the web and select Upload file, or drag your image onto the start page.
- The image opens with the Contextual Task Bar underneath. Select Remove background.
- Fix edges with Add to mask and Subtract from mask in the task bar.
- Add a new backdrop with Solid color, Import background or Generate background, or leave it transparent.
- Select Download, then Download on computer.
In our test, Remove background worked in the browser without signing in, while Select subject and Object selection carried a premium badge. Adobe changes which web features are free, so you may see an upgrade prompt.
Common Problems and How to Fix Them
| Problem | Fix |
|---|---|
| Remove background is grayed out | Select a pixel layer (not text or a shape) and unlock the Background layer. |
| Part of the subject disappeared | Paint white on the layer mask, or use Add to mask. |
| A halo of old background around the edges | Use Enhance edge, or refine the mask in Select and Mask with Object Aware. |
| The background turns white after saving | You saved a JPG. Export as PNG instead. |
| Photoshop picks the wrong subject | Use the Object Selection tool, or switch image processing to Cloud. |
Don’t Have Photoshop? Try These Instead
If you only need a quick cutout, you don’t have to open Photoshop at all. Canva can do it in one click (see our Canva background remover guide), and you can even export a transparent PNG from Canva without Pro. For a free web tool, read our review of a one-click AI background remover. If you need to cut out just part of a picture, follow our guide to cutting out an image in Canva.
Frequently Asked Questions
What is the fastest way to remove a background in Photoshop?
Select the unlocked image layer and choose Remove background in the Contextual Task Bar, or Remove Background under Quick Actions in the Properties panel. Photoshop hides the background with a layer mask in a few seconds.
Can you remove a background in Photoshop for free?
Photoshop on the desktop needs a paid plan or the free trial. In our November 2026 test, the Remove background button in Photoshop on the web worked without signing in, though Adobe can change which features are free.
How do I remove a white background in Photoshop?
Try Remove background first. For a plain white backdrop, the Background Eraser tool with Sampling set to Once also works well, but it deletes pixels, so duplicate the layer first.
Why did Photoshop remove part of my subject?
The automatic selection can miss areas with low contrast, such as dark hair against a dark wall. Click the layer mask and paint with white to bring those parts back, or refine the edge in Select and Mask with Object Aware.
How do I save a Photoshop image with a transparent background?
Hide any background layers, then choose Share, Quick export as PNG. Don’t use JPG, because it can’t store transparency.
Does Remove background delete the original background?
No. It adds a layer mask that hides the background, so you can paint it back at any time. The Background Eraser tool is the exception, because it deletes pixels permanently.
