Categories
Design

Best Photo to Anime Converter: Top Tools & Apps For 2026

At Designers Choice, we love finding new ways to make art. We know that turning a simple picture into something special can be hard.

But today, technology helps us do amazing things. Have you ever seen those cool cartoon pictures on the internet? They look like they came straight from a Japanese movie. Well, you can make them too!

You do not need to be a pro artist. You just need the right tool.

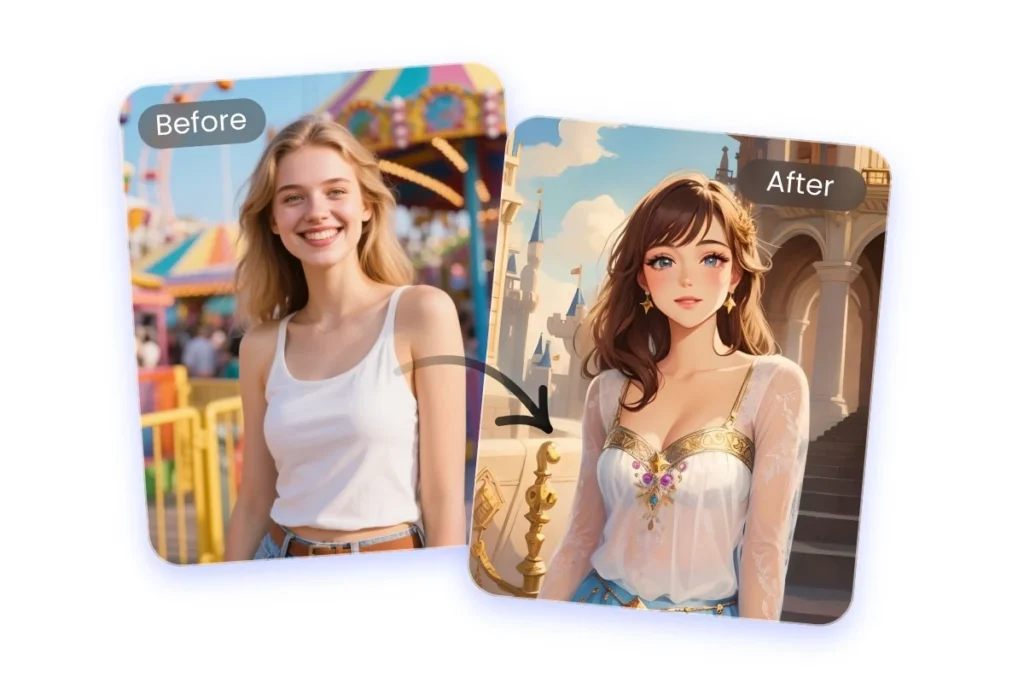
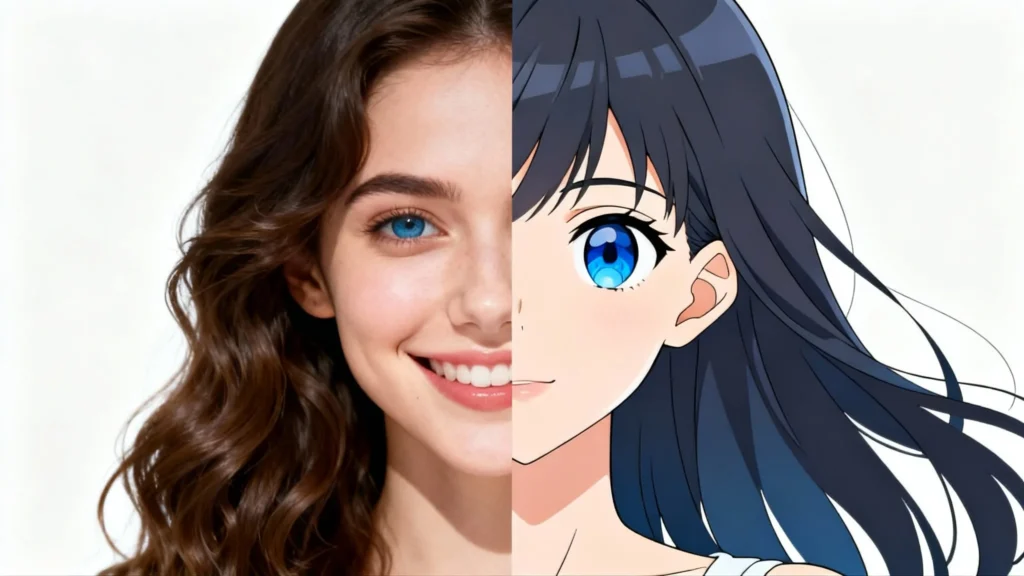
We want to help you find the best photo to anime converter. This tool changes your regular photos into anime style. It is fun and easy.

In this article, we will talk about the best tools you can use.

We will look at free tools and paid ones. We want to help you bring your boldest visions to life. We believe in creativity and quality.

So, let us look at how you can turn your photos into an anime masterpiece.

Why You Need the Best Photo to Anime Converter For Your Social Media?

Why You Need the Best Photo to Anime Converter For Your Social Media?

Social media is a big place. Everyone shares photos every day.

To stand out, you need something different. A regular selfie is nice, but an anime avatar is exciting. It shows your personality in a new way.

The Rise of AI Art and Anime Filters

Anime art is very popular right now. People love the vibrant colors and unique look.

In the past, you had to pay an artist to draw you. Now, AI tool options make it fast. An anime filter can change your look in seconds.

This is why AI art is rising. It lets anyone be a creator. You can make anime creations without drawing a single line.

It is like magic on your phone or computer.

Benefits of Turning Personal Photos Into Anime Style

Why should you change your photo?

First, it protects your privacy. You can show your face without showing your real face. An anime character looks like you but is still a drawing.

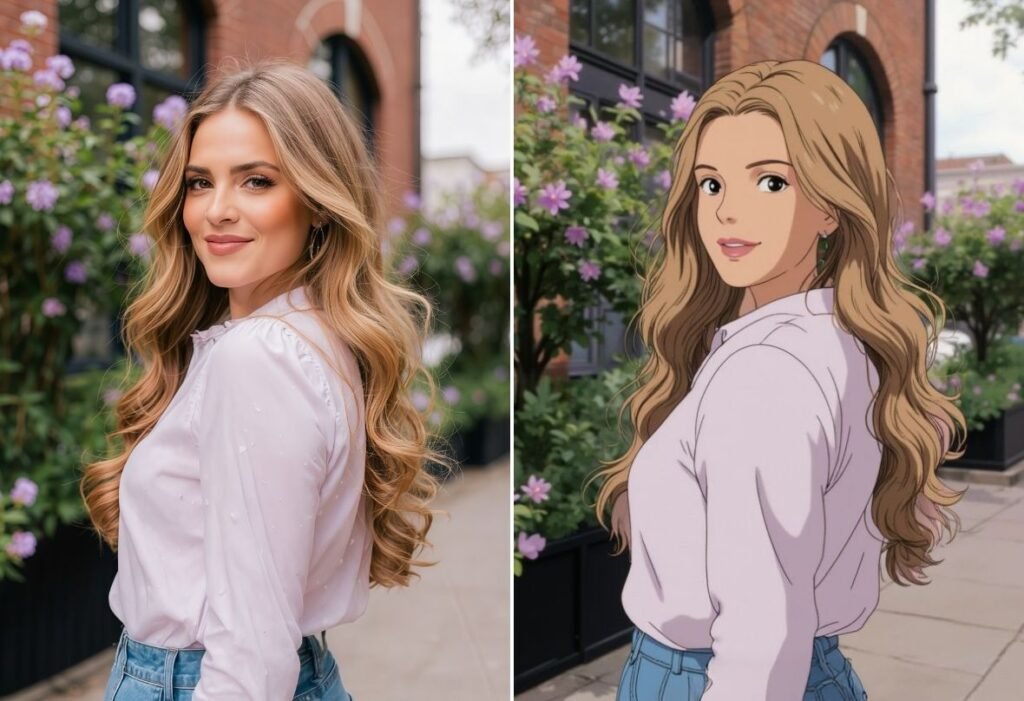
Second, it is fun! You can look like a hero from a classic Japanese anime. You can change your background to a fantasy world.

It helps with content creation too. If you make videos or posts, anime images catch people’s eyes. It makes your profile look cool and artistic.

Top 7 Best Photo to Anime Converter Tools Reviewed

Best Photo to Anime Converter Tools

Here are the best tools we found. We tested them to see which one is the best photo to anime converter.

Fotor – The All-in-One AI Editor

Fotor

Fotor is a very famous tool. Many people use it because it does everything. It is not just for anime. You can edit photos, add text, and fix colors.

But its anime converter is really good.

When you use Fotor, you have many choices. You can pick a manga style, which looks like a comic book.

Or you can pick a studio ghibli style. This style is soft and beautiful. It looks like a dream.

Fotor is an all-in-one AI editor because it is easy for beginners. You do not need design skills. You just upload your photo and click a button.

The image quality is great. The facial features stay clear. You can even use it for pet photos. Imagine your dog looking like a cartoon! Fotor has a free tool version, but some best features might cost money. It is safe and fast.

If you want a quick anime transformation, Fotor is a top choice.

Drawever – High-Quality Anime Transformations

Drawever

Drawever is a great tool if you want high quality. It focuses on making your picture look like a real piece of art. The anime conversions here are very detailed. It uses a smart AI model to read your photo.

This tool is good for creative projects. If you are making a story or a game, Drawever helps. It has a background remover too.

This means you can take your anime character and put them anywhere. You can put them in space or a forest.

Drawever gives you free credits to start. This lets you try it without paying. The anime style choices are many. You can make it look 3D or flat, like a drawing. It is very simple to use. The steps are clear. We like how the vibrant colors pop out. It makes your digital art look professional.

If you want a unique anime character, try Drawever.

ZMO.AI – Real-Time AI Generation

ZMO.AI is a powerful AI image generator. It is known for being fast. It works in real-time. This means you do not have to wait long.

As soon as you upload, it starts working. One cool thing about ZMO.AI is the image to anime ai feature. It takes your image and keeps the important parts. Your pose and smile stay the same. But the style changes completely. It feels like magic. It also has a community.

You can see what other people made. This gives you ideas for your own anime artwork. ZMO.AI offers different styles.

You can look like a cyberpunk hero or a classic anime school student. The text prompts feature lets you describe what you want.

You can say “make me wear a hat,” and it might do it. It is a fun AI tool to play with. It is good for making an anime avatar for gaming.

Media.io – Best For Avatar Creation

Media.io

Media.io is one of the best if you want a new profile picture. It is a best photo to anime converter free option that works in your browser.

You do not need to download anything. This makes it safe and easy.

This tool is great for making an anime avatar. It focuses on the face. It captures your emotions well.

If you are smiling, your anime self smiles too. It has a Ghibli-style filter that is very popular. It makes the picture look soft and cute.

Media.io is very safe. It deletes your data after a short time. This is good for privacy. You can use it for social media pictures on Instagram or TikTok. It is a simple anime photo maker. You just upload, pick a style, and save. It is perfect for ordinary photos that you want to make special.

Meitu – Popular Mobile Anime Filter

Meitu

Meitu is a very famous app on phones. It is huge in Asia. People love it for selfies. It is not just an anime converter; it is a beauty camera too.

Meitu has a feature called “Anime Avatar“. It is very smart. You can see your face moving.

It can turn your selfie into a japanese anime style picture instantly. The anime filter effects are very cute. You can add sparkles, cat ears, and more.

It is great for content creation on your phone. You can snap a photo and change it right away.

The anime creations from Meitu are colorful and shiny. It is very easy to use. Even kids can use it. It has many different types of filters.

Some are free, and some are VIP. But the free tool part is enough for most people. If you want a cute anime photo for your phone, get Meitu.

SnapEdit – Simple and Fast Conversion

SnapEdit

SnapEdit is known for being simple. It does not have too many confusing buttons. It is a clean tool. It is great for a quick anime transformation.

SnapEdit is also an editor. It can remove things you do not want in the photo. Then, it can turn the photo into anime.

The processing speed is very fast. You get your best results in seconds. It uses ai anime generator technology to make the lines sharp.

This tool is good for regular photos that are a bit blurry.

It can fix them and then turn them into art. It produces high quality images. You can use it to make anime images for your friends.

It is a straightforward image to anime converter free of complex steps. If you want speed and simplicity, SnapEdit is for you.

AnimeAI – specialized Style Options

AnimeAI is a tool made just for anime. It is very special. It was trained on thousands of anime pictures.

This means it knows exactly what anime art should look like. You can pick styles from famous shows. Do you want to look like a pirate or a ninja?

AnimeAI can do that. It has specialized style options. It is great for fans of japanese anime. The ai model is very smart. It changes your clothes and hair to match the style. It is a great ai anime filter for fans.

You can make an ai action figure version of yourself.

The anime world feels real with this tool. It might have a small cost for the best features, but it is worth it. It creates unique anime characters that look just like you. It is a top anime generator for serious fans.

How to Choose the Best Photo to Anime Converter For Your Needs?

How to Choose the Best Photo to Anime Converter For Your Needs?

Choosing the right tool can be tricky. Here is how to pick the best photo.

Processing Speed and Quality

Time is important. You do not want to wait an hour for one picture. Look for a tool that is fast.

Tools like SnapEdit and ZMO.AI are very quick. But quality is key too. You want the picture to look clear, not blurry. Check the image quality. The best photo to anime converter balances speed and good looks.

It should keep your facial features so people know it is you.

Pricing: Free Vs. Premium Subscriptions

Many tools are free. A free photo tool is great for fun. But sometimes, they have ads or watermarks. Premium tools cost money but give better results.

They might give you higher resolution or more styles. Think about what you need. If it is just for a funny post, a free tool is fine.

If it is for a professional project, you might pay for a premium subscription. Watch out for hidden costs in some apps.

Privacy and Data Security

Safety is the most important thing. When you upload a photo, you want to be safe. Read the rules of the tool.

Good tools delete your photos after you use them. Media.io is good at this. Do not use tools that keep your real photos forever.

Your privacy and data security matter. Always check if the site is safe before you upload your personal or pet pictures.

Step-by-Step Guide: How to Use A Photo to Anime Converter?

How to Use A Photo to Anime Converter?

Using these tools is easy. Here are the simple steps.

Uploading Your Image

First, go to the website or open the app. Look for a button that says “Upload” or “Choose Photo“. Click it. Pick the photo you want to use.

It could be a selfie, a group photo, or a pet. Make sure the photo has good light. Clear photos give the best results.

Selecting the Right Anime Style (Manga, 3D, Cyberpunk)

Now comes the fun part. You will see many options.

You can pick manga style for black and white comics. You can pick 3D for a movie look. Or cyberpunk for a cool robot look. Think about the vibe you want. Do you want a ghibli style nature look? Or a cool anime effect? Click on the style you like. The AI tool will show you a preview.

Downloading and Sharing Your Art

Once the AI finishes, look at your picture. Do you like it? If yes, click “Download“. Save it to your phone or computer. Now you can share it! Post it on Instagram, Facebook, or send it to friends. Show off your new anime masterpiece. Is it that easy to join the anime world?

FAQ’s:

What is the Best Photo to Anime Converter App For Free?

There are many, but Fotor and Media.io are excellent. They are best photo to anime converter free options. They let you make anime images without paying upfront.

Which Photo to Anime Converters Do Not Require Sign-Up?

Media.io often lets you use it without signing up. This is great for a quick anime transformation. You just go to the site and start.

Are These AI Anime Converters Safe to Use With Personal Photos?

Most are safe. Reputable tools like the ones we listed delete your photos later. Always check the privacy policy. It keeps your real photos secure.

Can I Convert Group Photos Into Anime Style?

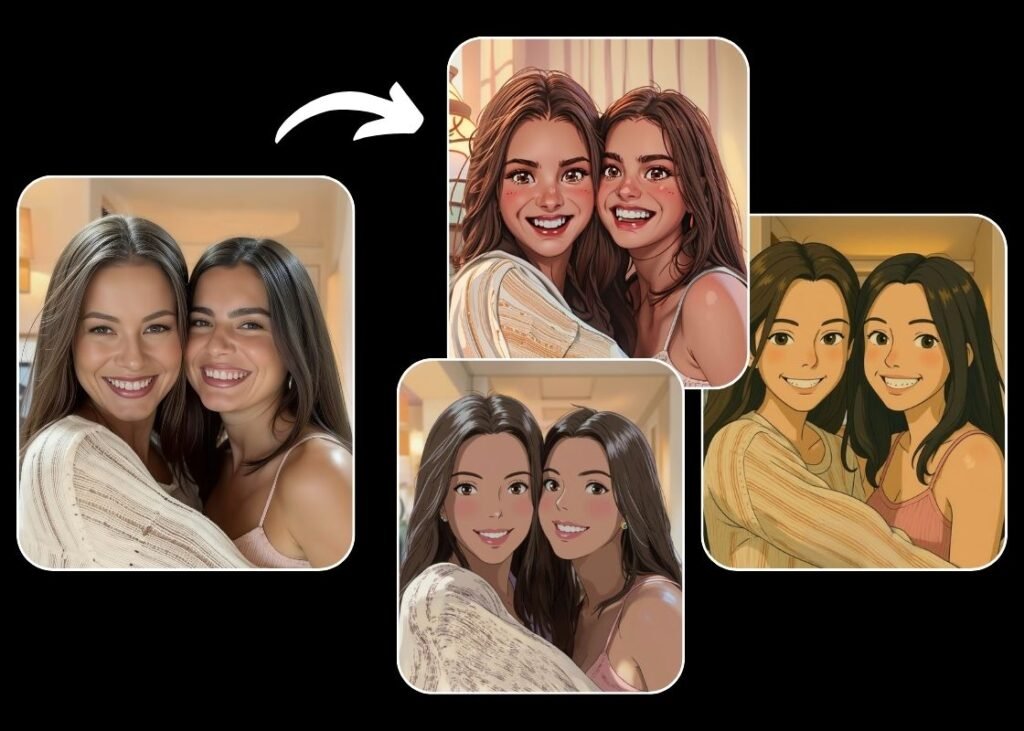
Yes! Many tools can handle group photos. The ai model detects multiple faces. It turns everyone into an anime character. It is fun for family pictures.

Can I Use These Tools to Turn Selfies and Portraits Into Anime Automatically?

Yes, that is what they do best. They are 100% automatic. You upload, and the anime generator does the rest. It changes your facial features to look like anime.

Do I Need Professional Editing Skills to Use These Tools?

No. You do not need any design skills. These tools are made for everyone. They use simple steps. If you can click a button, you can use it.

Can These Tools Convert Videos to Anime As Well?

Some tools can. Media.io and Meitu have video features. Converting video takes more power, but it is possible. You can make your own anime version movie!

Conclusion

We hope this guide helps you. Turning your photos into anime art is a great way to be creative. You can express yourself with vibrant colors and cool styles. Whether you use Fotor, Drawever, or any other tool, the result is magic.

At Designers Choice, we want you to have the best resources.

These AI photo tools are powerful and fun. They let you step into the Japanese anime world. So, go ahead. Pick a tool. Upload a photo. create your own anime masterpiece today. It is time to let your imagination fly with the best photo to anime converter!

Categories
Design

Remove BG.com – The Ultimate Guide to Free Background Removal

At Designers Choice, we know that creating great images can be hard work. We have spent years working on designs, and we understand the struggle. You have a great idea, but then you get stuck on the boring parts.

One of the hardest parts of graphic design is trying to remove background from a picture. It used to take a lot of time and required technical skills to get it right. You would have to sit there and erase pixels one by one. It was tedious editing.

But things have changed. We want to help you make your work easier and faster. That is why we look for the best tools to share with you.

Today, we are talking about a popular website called remove bg.com. It is an online background remover that uses computers to do the hard work for you. Whether you are making product photos for a store or funny pictures for social media, this tool claims to help.

In this article, we will look at how it works, if it is free, and what other tools you can use. Our goal is to give you the trusted insights you need to do your best work.

What is Remove BG.com and How Does It Work?

What is Remove BG.com and How Does It Work?

Remove bg.com is a website that does exactly what its name says.

It is a background remover tool that takes your photo and deletes the background automatically. You do not need to use complicated software like Photoshop. You just need a web browser or their mobile app.

It is made for people who want professional results without spending hours on a computer. It is very popular for people to make marketing materials or just fix personal photos.

The Technology Behind AI Background Removal

The secret behind this tool is artificial intelligence. This might sound like a big, scary word, but it is actually quite simple. The website uses an ai algorithm. Think of this algorithm like a very smart robot. When you upload a picture, the robot looks at it carefully.

It guesses which part is the main subject of your image (like a person, a car, or a shoe) and which part is the background.

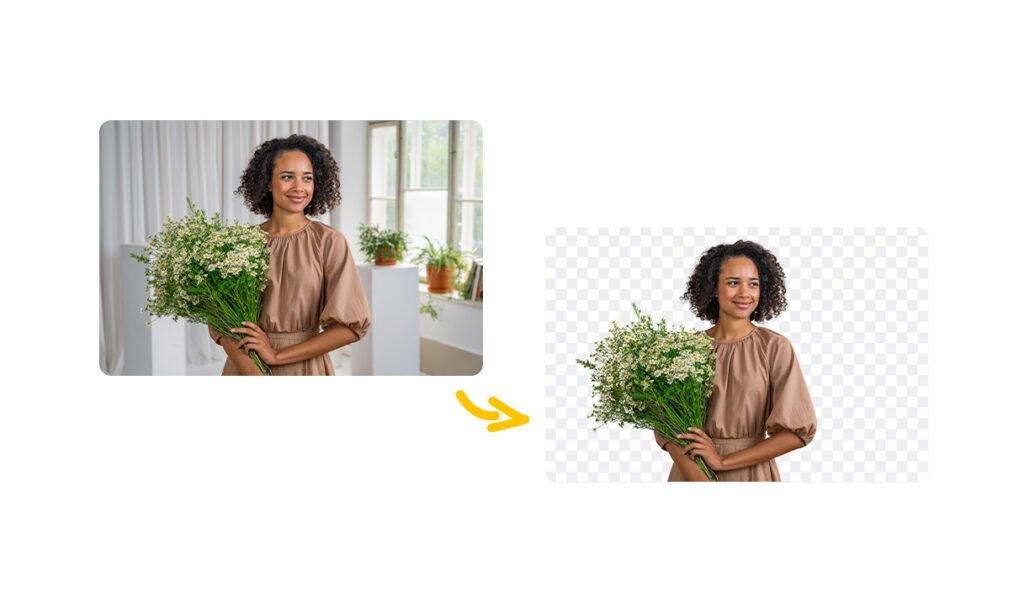
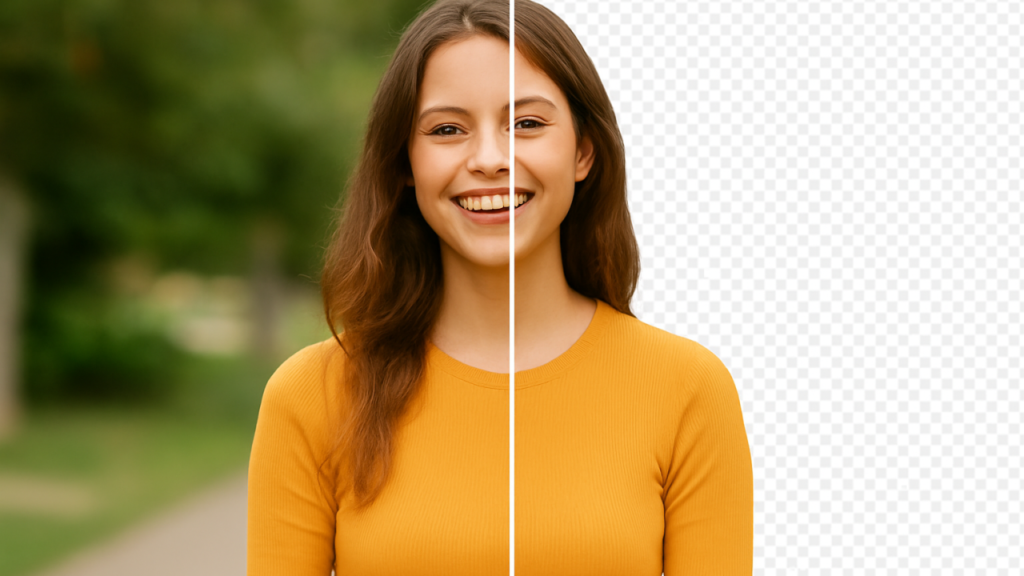
Once it knows the difference, it cuts out the person or object. It creates a transparent background behind them. This is called AI background removal. It is much faster than a human could ever be. In the past, you needed a green screen to do this easily.

Now, the powerful generative AI can handle messy backgrounds with hair or fur and still give you clean results.

Key Features of the Remove.bg Platform

There are many reasons why people like this tool. First, it is a free background remover for standard quality images. It is built for speed.

You do not have to wait long. It usually takes just a few seconds. Another key feature is that it handles unwanted backgrounds very well.

It also has tools for manual editing. Sometimes, the computer makes a small mistake. If that happens, you can use a digital brush to fix it.

You can change the brush size to get the tiny details right. Also, it is not just for one photo. It helps with product images and can even be used as a video background remover in some cases.

It creates a seamless experience from start to finish.

How to Use Remove BG.com to Edit Your Photos?

How to Use Remove BG.com to Edit Your Photos?

Using this background remover is very easy. You do not need to be a pro. Even if you are in 5th grade, you can do it.

Here are the steps to get a transparent backdrop.

Step 1: Uploading Your Image

First, go to the website. You will see a big button that says “Upload Image.” Click on that.

You can choose a file from your computer or mobile device. You can also just drag and drop your picture onto the screen.

This works for product photos, selfies, or pictures of your pet. Make sure the file size is not too huge, but it handles most normal pictures well.

Step 2: Automatic Background Erasure

Once you upload an image, you do not have to press anything else. The advanced algorithms start working right away.

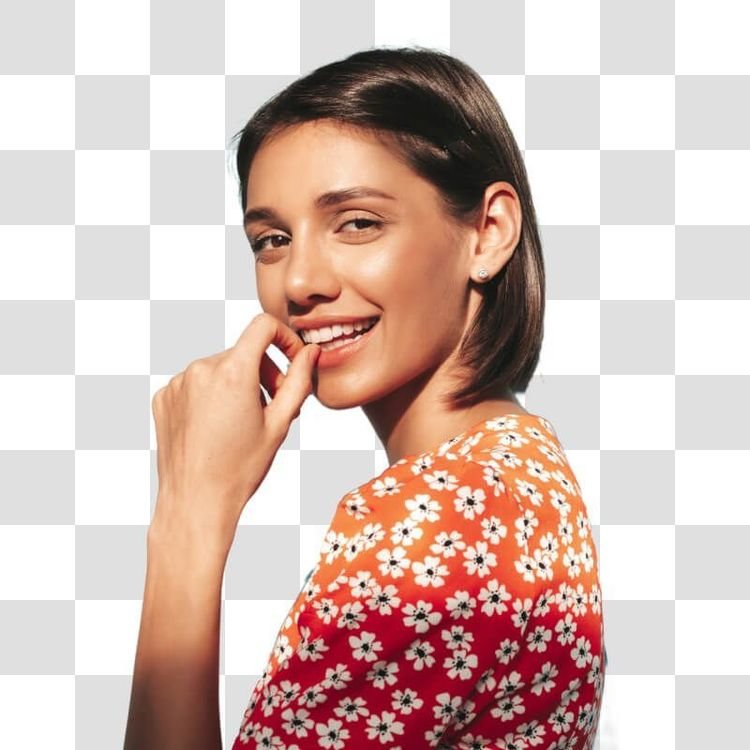
You will see a loading bar for a second. Then, poof! The old background is gone. You will see your object sitting on a checkerboard pattern.

That pattern means it is a transparent background. This happens automatically, saving you less time than doing it by hand.

Step 3: Editing and Adding New Backgrounds

Now comes the fun part. You have a few choices. You can keep it transparent, or you can add a new background.

The tool has a library of background templates you can pick from. You can choose a beach, a city, or a solid color background.

If you are selling things online, a white background is usually best.

This helps boost sales because it looks neat. If you want to fix something, click the “Edit” button.

Here, you can use the manual editing tools to erase or restore parts of the picture. You can change the background color to anything you want.

Step 4: Downloading High-Resolution (HD) Images

When you are happy with how it looks, you need to save it. For free users, you can download a “Preview Image.”

This is good for social media. If you need HD quality for product catalogs or big posters, you usually have to use a “credit” or pay money.

High-resolution images are sharp and clear. Just click the download button, and the file is saved to your device.

Why You Should Choose Remove BG.com For Your Projects?

Why You Should Choose Remove BG.com For Your Projects?

At Designers Choice, we believe in using tools that make life easier. Remove bg.com is one of those tools.

Here is why it might be the right choice for you.

Speed and Efficiency For Personal Use

The biggest reason to use this ai background remover is speed.

If you are making a birthday card or a funny meme, you do not want to spend an hour cutting out a face.

This tool gives you impactful social posts in seconds. It removes the tedious editing work so you can focus on being creative.

It is perfect for personal projects where you want to look good but do not want to work too hard.

API Integrations For Developers and Businesses

This part is for the computer experts. Remove BG has something called an API. This allows other apps and websites to talk to the remove BG software. If a company has a website where people upload thousands of photos, they can use the API to remove background automatically for everyone. This is great for businesses that have huge product catalogs.

It helps them process a lot of images without hiring a hundred people.

Desktop Vs. Mobile: Which Version is Better?

You can use remove bg.com on a computer or download the free background remover app. The computer version is great because you have a big screen. It is easier to see details when you do manual editing.

The mobile app is great for quick edits on the go.

If you take a picture on your phone and want to post it to Instagram immediately, the app is better. Both versions use the same powerful generative ai, so the quality is the same.

Pricing and Plans: Is Remove BG.com Truly Free?

Is Remove BG.com Truly Free?

Is it really free? Yes and no. Let’s break it down so you know what to expect.

Free Account Limitations

You can use remove bg.com as a free tool forever if you want. But there are rules. You can upload as many images as you want and remove the background. However, when you download the result, it will be a smaller size (Standard Quality). This is fine for the web or social media.

But if you want to print it out big, it might look a little blurry. Also, you only get 1 free “credit” for a full HD quality download when you sign up.

Subscription Credits and Pay-As-You-Go Options

If you need the big, HD quality images regularly, you have to pay.

They use a “credit” system. One image equals one credit. You can buy a monthly plan where you get a certain number of credits every month.

Or, you can just buy a pack of credits whenever you need them.

This is good for professionals who need the best results for client work. It is an investment to get clear background images that look perfect.

Top Alternatives to Remove BG.com

Top Alternatives to Remove BG.com

While remove bg.com is great, there are other tools out there. At Designers Choice, we want you to have options.

Here are ten other tools that can remove background and help you create.

Adobe Express

Adobe Express

Adobe Express is a very famous tool made by the same people who made Photoshop.

It is an online background remover that is very powerful. It is not just for removing backgrounds; it is a full design app.

After you use the remove background tool, you can add text, stickers, and shapes. It connects with adobe stock design assets, so you have thousands of photos and fonts to choose from. It is great for making marketing materials because you can do everything in one place.

You can start with a free account, and it gives very clean results. It is a great choice if you want to make a full poster, not just cut out a photo.

Canva

Canva

Canva is huge in the design world. It is very popular because it is so easy to use.

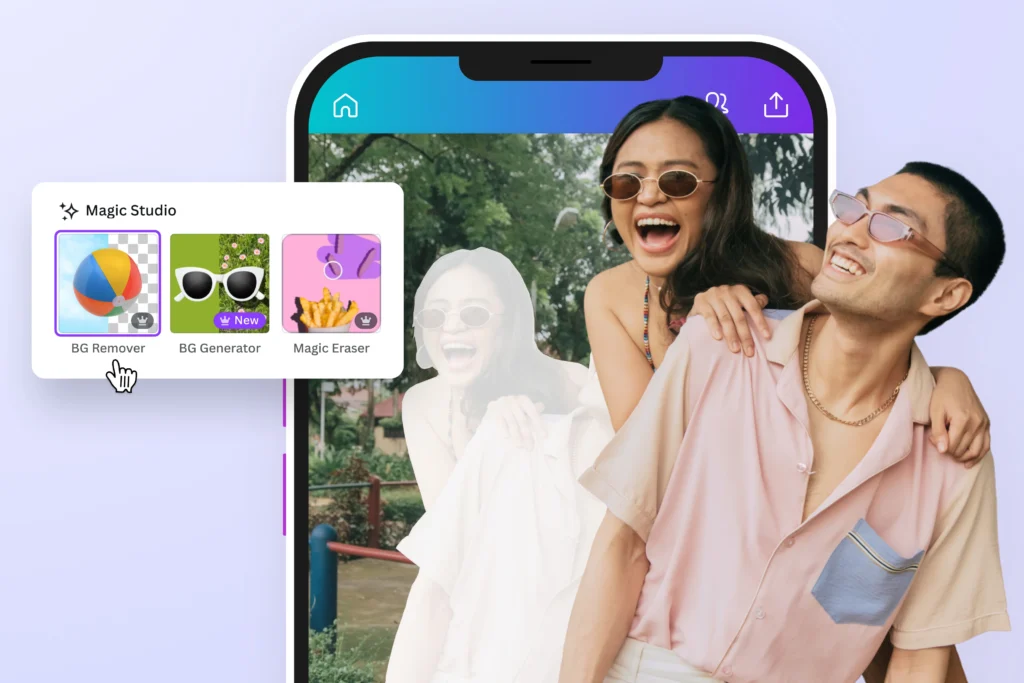
Canva has a built-in background remover, but you usually need the “Pro” (paid) version to use it. However, it is worth it for many people.

Once you remove background with one click, you can instantly put your image into a presentation, a video, or an Instagram post. It has a massive library of background templates. You can turn a boring photo into a cool design in minutes. It uses ai background removal to keep lines sharp.

If you already use Canva for school or work, using their BG remover saves you time because you do not have to switch websites.

Slazzer

Slazzer

Slazzer acts and looks very similar to remove bg.com.

It is an ai background remover focused on speed. It is excellent for handling product images. One of the best things about Slazzer is that it is very good at doing many pictures at once (bulk processing).

If you have 50 photos of shoes for a store, Slazzer can process them quickly. It has an ai algorithm that handles hair and fur nicely. It also offers a desktop app. It allows you to add a white background or a custom image instantly. It is a strong competitor if you need professional results fast.

Pixelcut

Pixelcut

Pixelcut is mostly known as a mobile app, and it is fantastic for people who sell things online.

If you have an online shop, Pixelcut is a great friend.

You take a picture of your product, and the app uses artificial intelligence to remove background. Then, it suggests really cool new background styles that make your item look expensive.

It is very easy to use on a mobile device. It has “Magic Eraser” tools to clean up dust or scratches on your item.

It helps you create product photos that look like they were taken in a studio. It is very popular for its ease of use.

Erase.bg

Erase.bg

Erase.bg is another simple and effective free background remover. It supports high-resolution images up to 5000 x 5000 pixels.

This is great if you need HD quality without paying a lot. It is very straightforward. You upload image, and it does the work.

It allows you to download the image with a transparent background or add a solid color background.

It is lightweight and fast. It works well for logos, signatures, and profile pictures. It is a good choice if you just want a quick image background removal without any confusing buttons or extra features you do not need.

ClipDrop

ClipDrop

ClipDrop is a very fancy tool that uses powerful generative AI.

It does more than just remove the background. It can also change the lighting on your face or remove objects you do not want.

Its background remover tool is exact. It is great for creators who want to do cool artistic things. It has a feature that lets you take a picture of something in real life with your phone, and it “drops” it onto your computer screen with the background already removed.

It feels like magic. It creates clean results and is great for people who want to experiment with the latest tech to get kind content.

Photopea

Photopea

Photopea is a bit different.

It looks almost exactly like Photoshop, but it runs in your web browser.

It is free. It has a “Remove BG” feature, but it also has every other tool you can imagine. You can change colors, draw, add filters, and use layers.

It requires a higher skill level than the other one-click tools.

If you want total control over every pixel, this is for you.

You can use the “Magic Wand” or “Lasso” tools to select the background yourself if the AI misses a spot. It is the best free option for doing complex manual editing and getting professional results.

PhotoRoom

PhotoRoom

PhotoRoom is very similar to Pixelcut. It is a free background remover app that is super famous among resellers and small business owners.

It focuses heavily on product photos. After the automatic background erasure, it lets you resize the image perfectly for eBay, Amazon, or Etsy.

It has a feature called “Instant Backgrounds” where it uses AI to generate a scene around your product. For example, if you sell a candle, it can create a cozy table scene behind it. It turns a simple photo into a professional ad. It saves a lot of time for sellers and helps boost sales.

Pixelbin.io

Pixelbin

Pixelbin.io is a tool for people who have a lot of images to manage. It offers real-time image transformation. It has a strong remove background feature powered by AI. It is great for technical people and developers.

It helps companies store their images and edit them automatically.

It ensures that product images look consistent across the whole website.

It provides transparent backdrop options and lets you crop and resize at the same time. While it might be a bit complex for a beginner, it is very powerful for businesses that need to handle thousands of image background edits every day.

Retoucher.online

Retoucher

Retoucher.online is a simple and helpful tool. It allows you to remove the background and then add shadows to make the product look realistic.

Sometimes when you remove a background, the object looks like it is floating in space. Retoucher.online helps you add a shadow underneath so it looks grounded. It offers a white background or other colors easily.

It is good for people who want their product catalogs to look neat.

It does not have too many confusing options. It focuses on doing one thing well: making your object look good on a clean background.

FAQ’s:

Is Remove BG.com Safe to Use and Are My Images Private?

Yes, remove bg.com is safe. They state that they care about your privacy. When you upload image to their server, they process it to remove the background. After about an hour, they usually delete the file from their system. They do not share your personal photos with other people.

However, you should always be careful with very private or secret images on any website.

Does Remove BG.com Provide A Mobile App For Background Removal?

Yes, there is a mobile app available for both Android and iPhone.

It is free to download. It brings the ai background remover power right to your phone. It is very convenient for editing photos from your camera roll. You can get a transparent background in seconds while you are on the bus or at home.

Do I Need an Account to Use Remove BG.com’s Free Services?

No, you do not need an account to use the basic features.

You can go to the site and use the background remover right away. However, if you want to download high-resolution HD quality images or save your work for later, you will need to sign up. Creating an account also gives you that one free credit we mentioned earlier.

How Do I Change the Background Color After Removing the Original One?

After the automatic background erasure is done, click the “Edit” button on the image preview.

A menu will pop up. Look for the “Background” tab. There, you will see options for “Color.” You can pick a solid color background like red, blue, or the popular white background. You can also choose a photo from their list.

Does Remove bg.com Support Bulk Image Processing?

Yes, but usually not on the free web version.

To process many images at once (bulk processing), you usually need to download the desktop software for Windows or Mac. This is very helpful for businesses with hundreds of product images. It saves a lot of time compared to doing them one by one.

Conclusion

Creating great images does not have to be a headache.

At Designers Choice, our mission is to empower you to bring your boldest visions to life.

Tools like remove bg.com are perfect examples of how technology can help us. Whether you are a student, a seller, or just someone who loves photos, using an ai background generator or remover can save you hours of work.

By removing unwanted backgrounds quickly, you can focus on the creative part of your project. You can make impactful social posts, clean product catalogs, and fun memories. We hope this guide helps you find the right background remover tool for your needs.

Remember, the goal is to work smarter, not harder, and let your creativity shine with clean results.

Categories
Design

Colorify AI: Reviews, Features, Pricing, & Use Cases

At Designers Choice, we know how much fun it is to make art.

We love finding tools that help people show their creative ideas.

Being a designer or an artist is not just about having great skills. It is about having the right help to make your work shine. Our team looks for the best items to help you. We want to share a special tool with you today. This tool is changing how we look at photos and art. It is called Colorify AI.

Many people have old photos that are black and white. You might wish they had color. Or maybe you want to make creative stickers for social media. Perhaps you want to make a coloring book for your kids.

Doing this by hand takes a long time.

It can be hard if you do not know how to draw well.

But now, there is a fun way to do it all. Colorify ai is a free online tool that uses artificial intelligence to help you. It can fix old pictures. It can also be a coloring page generator. It works fast and is very easy to use.

In this article, we will talk about what Colorify AI is. We will show you its key features. We will see how it compares to doing work by hand.

We will also look at the price. If you want a sticker generation tool or a way to save old memories, keep reading.

Let us see how this tool can help you express creativity.

What is Colorify AI and How Does It Work?

What is Colorify AI and How Does It Work?

Colorify ai is a smart computer program on the internet. It uses machine learning to look at images. It understands what is in a picture.

Then, it can add color to it or change it into something new. It is like having a smart art assistant. You do not need to be a pro to use it.

It is made for everyone. You can use it for personal use or even for commercial purposes. The tool has two main jobs.

First, it puts color into black and white photos. Second, acts as a coloring page generator. It can take your own photos and turn them into line art. It can also take a text prompt and make a unique coloring page.

This makes it a great choice for creative projects.

The Technology Behind AI Image Colorization

How does it put color in a photo? It uses artificial intelligence.

The computer has seen millions of photos. It knows that the sky is blue and grass is green. When you upload a black and white photo, Colorify AI guesses the right colors. It looks at the shapes and shadows. It fills in the blanks with colors that look real. This technology is very smart.

It can tell the difference between a shirt and a tree. It knows what skin tones look like. It does all the math and thinking for you.

You just wait a few seconds, and the picture is ready. It is much faster than painting by hand. It brings life back to sad or dull photos.

Why Automated Restoration Outperforms Manual Editing

Fixing photos by hand is hard. You need to know how to use big programs. It takes hours to paint every little part.

If you make a mistake, you have to start over. Automated restoration with Colorify AI is different. It is super fast. You do not need design skills.

Manual editing relies on your eyes only. But the AI has a huge brain full of data. It can see details you might miss. It keeps the photo looking smooth.

It does not leave messy brush marks. For most people, this is the best way to save time. You get a great result without the hard work.

Key Features That Make Colorify AI Stand Out

Key Features That Make Colorify AI Stand Out

There are many art tools online. But Colorify AI has some special things. These key features make it a favorite for many users.

It is not just a line art colorizer. It is a full package for image fun.

One-Click Auto Colorization

The best part is how simple it is. You do not need to press many buttons. You just upload your picture. Then you click one button.

The AI does the rest. It is a true “one-click” tool. This is great for beginners. You do not need to learn a hard menu.

This feature works for old photos and sketches.

It can also colorize line art you drew. If you have a unique coloring page you want to fill, it can do that too. It saves you so much effort.

You get amazing coloring pages or photos in seconds.

High-Resolution Upscaling Support

Sometimes, old photos are small or blurry.

When you make them big, they look bad. Colorify AI helps with this, too. It has a feature to make images bigger and clearer.

This is called upscaling. It keeps the edges sharp. This is very important if you want to print your work.

If you use the coloring book generator to make pages, you want them to look crisp. Upscaling ensures your printable coloring pages look professional. It makes sure your creative stickers look good on social media too. You can print them out and they will not look fuzzy.

Batch Processing For Multiple Images

What if you have a whole album to fix? Doing one by one is slow. Colorify AI lets you do many at once. This is called batch processing. You can upload a group of photos. The tool will colorize all of them at the same time.

This is also great for making full coloring books. You can upload twenty simple text prompts. The tool will act as a coloring pages generator for all of them. You get a stack of coloring book pages quickly. This is good for teachers or sellers. It helps you get more work done fast.

Step-by-Step Guide: How to Use Colorify AI?

How to Use Colorify AI?

Using this tool is very easy. You do not need a manual. But we will show you the steps so you know what to do. Whether you are using the ai sticker generator or fixing a photo, the steps are similar.

Uploading and Prepping Your Images

First, go to the website. You will see a box to drop your image. If you are fixing a photo, choose a clear scan if you can. If you are using the page generator, you can type a description. This is the text prompt.

For example, you can type “a cute cat in a hat“. The ai coloring page generator will understand. It will get ready to make generated coloring pages. If you upload your own photo to turn into a coloring sheet, make sure it has good light. This helps the tool see the lines better.

Adjusting Saturation and Tone Settings

After the AI works, you see the result. Usually, it looks great. But sometimes you want to change it. You might want brighter colors.

Or you might want a different mood. Colorify AI lets you tweak things.

You can slide a bar to make colors pop. You can change the tone to look warm or cool. If you are making artistic styles for stickers, you can play with these settings. It helps you add your own touch. It allows for personal expression. You are the boss of how the final image looks.

Exporting Your Final Colorized Photos

When you are happy, it is time to save.

You can download the image to your computer. The tool lets you choose the format. You can save it as a picture file like JPG or PNG.

If you made printable line art, you can print it right away.

You can use these for coloring sheets at home. If you made a sticker, you can use it online. The quality is high. You can even use these images for commercial use if you have the right plan. It is very flexible.

Colorify AI Vs. Manual Photoshop Editing

Colorify AI Vs. Manual Photoshop Editing

People often ask if they should use AI or big software like Photoshop. Both have good points. But for most people, AI is better.

Let us look at why.

Speed and Efficiency Comparison

Photoshop is a giant program. It takes a long time to open. Then you have to select tools and layers. To color a photo, you have to paint every spot.

It can take hours for one picture.

Colorify AI is instant. You upload and boom, it is done. It is a fast coloring page converter, too. If you want to make detailed coloring pages from a photo, AI does it in seconds. Photoshop would take all day to trace lines.

The AI gives you speed. You can make more art in less time.

Cost Effectiveness For Beginners

Big editing software costs a lot of money.

You have to pay every month. It is expensive for a hobby. Colorify AI is much cheaper. It even has free coloring pages features.

For a beginner, free or low-cost is best. You do not want to spend hundreds of dollars just to try generating coloring pages. With Colorify AI, you can start for free. You can see if you like it. It is a smart choice for your wallet. You get beautiful coloring pages without breaking the bank.

Pricing Plans: Is Colorify AI Worth the Investment?

Is Colorify AI Worth the Investment?

Is it worth paying for? Let us see what you get. There are different plans for different needs.

Free Trial Limitations

You can use Colorify AI for free. This is great for testing. You can try the AI sticker generator to see if it works for you.

You can make a few free printable coloring pages.

But the free version has limits. You might not get the highest quality. You might have a limit on how many images you can do.

You might not be able to do batch processing. It is good for personal use now and then. But if you want to do a lot, you might need more.

Premium Subscription Benefits

If you pay a small fee, you get more power. You can make custom coloring pages in high quality.

You can use the coloring book generator to make big books. You get faster speeds. The paid plan is good for commercial purposes.

If you want to sell coloring books on Amazon, this is for you. You can make unique coloring books that no one else has. You unlock all the art styles. You can make endless creative stickers. For a pro or a serious hobbyist, the price is fair. It pays for itself with the time you save.

Common Use Cases For Colorify AI

Who uses this tool? Many kinds of people. It is not just for photographers. It is for teachers, parents, and artists.

Restoring Family Heritage Albums

This is the most popular use. We all have boxes of old photos. They are fading away. Colorify AI saves them. You can scan them and add color.

It makes the people in the photos look real again.

You can also use the tool to turn these photos into line art. Imagine making a coloring page of your grandparents’ wedding photo.

It is a unique coloring page idea. Kids can color their family history. It connects the past with the present in a fun way.

Colorizing Historical Documents For Education

Teachers love this tool. History books can be boring with black and white pictures.

Adding color makes history feel alive. Teachers use Colorify AI to show students what the past looked like. They also use the page generator for class. They can type “George Washington” and get a coloring sheet.

It is an AI coloring page generator that helps kids learn.

They can color their favorite characters or historical figures. It makes learning fun and visual. It helps with creative projects in school.

FAQ’s:

Is Colorify AI Free to Use, Or Are There Limitations?

Yes, colorify ai free version is available.

You can use it to try features like the sticker generator. However, the free version has some limits on size and number of pictures. For unlimited access to generated coloring pages, you might need to upgrade.

Does Colorify AI Require an Account to Access Its Features?

For some basic tools, you might not need one.

But to save your work or use the batch processing, it is best to make an account. It keeps your artistic styles and history safe.

Does Colorify AI Leave A Watermark On My Photos?

The free version might leave a small mark.

This is common with free online tools. The paid version removes all watermarks. This is important if you want printable line art for selling.

Is My Data Safe When I Upload Photos to Colorify AI?

Yes, the site uses security to keep files safe. They respect your privacy. Your own photos are not shared without your permission.

Can Colorify AI Fix Damaged Or Scratched Photos?

Yes, it does more than color.

It can help smooth out scratches. It cleans up the image before adding color. It makes restoring family heritage albums much easier.

What File Formats Does Colorify AI Support?

It supports common files like JPG and PNG. You can upload these formats to make coloring book pages or stickers easily.

What Do Users in the United States Say About Colorify AI In Their Reviews?

Users in the US love it. They say it is an amazing coloring pages tool. They like the colorify ai art features.

Parents love the free printable coloring pages for rainy days.

Many people praise the sticker generation tool for making chat stickers. They say it helps them express creativity without needing hard skills.

Conclusion

Colorify AI is a powerful tool for everyone. It mixes the best of technology and art.

Whether you are restoring family heritage albums or looking for a coloring page generator, it does the job well. It is easy, fast, and gives great results.

At Designers Choice, we think this tool is a winner. It opens doors for creative ideas. You can make custom coloring pages, creative stickers, and beautiful restored photos. You do not need years of training. You just need your imagination. The machine learning does the hard work.

If you want to try something new, give it a go. Turn your text prompt into art. Fix that old photo of your grandma.

Make a coloring book for a friend. The possibilities are endless. It is time to bring your visions to life with Colorify AI.

Categories
Design

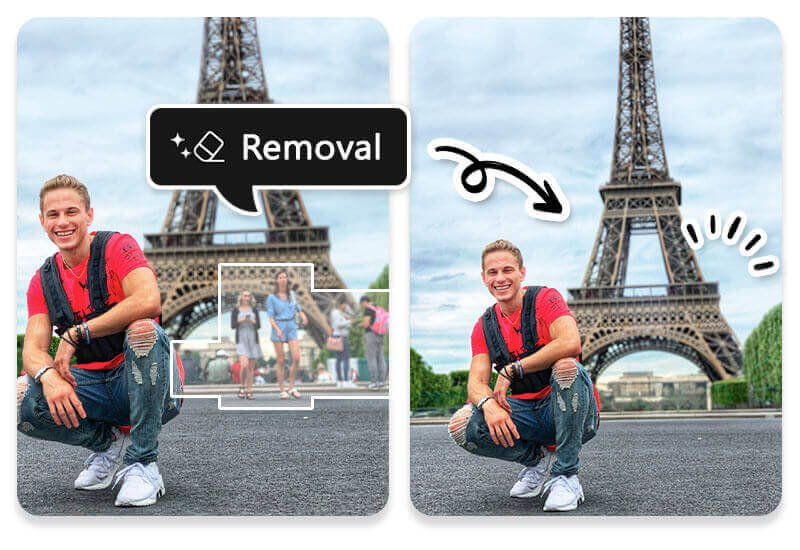
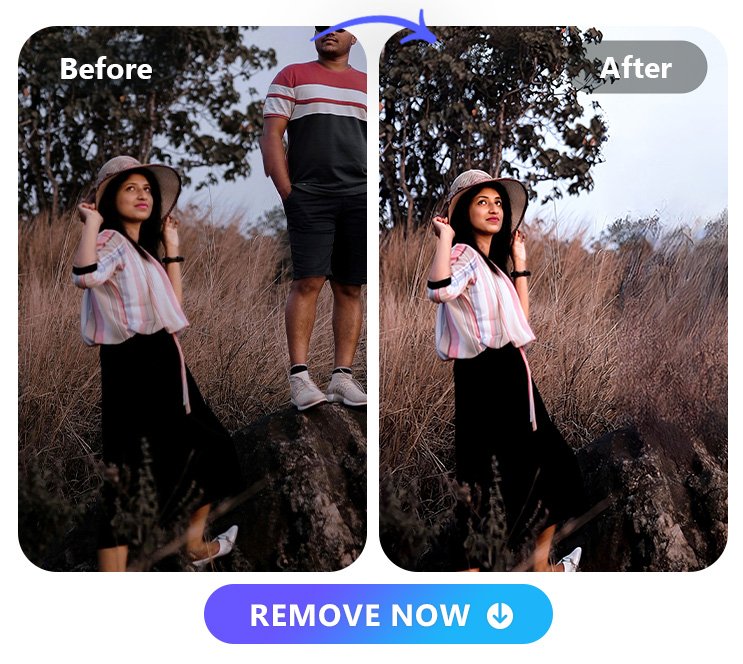
How to Edit Someone Out of a Picture: The Complete Guide (PC & Mobile)

Have you ever taken the perfect shot only to find a stranger walking in the background? It happens to everyone.

You hold your camera steady, get the lighting right, and smile. But when you look at the original image, there is someone you don’t know standing behind you. This can be frustrating, especially if it was a special moment.

At Designers Choice, we know how important it is to keep your creative vision clear. We want to help you turn your ideas into reality without letting small mistakes ruin the big picture.

The good news is that you do not need to be a computer expert to fix this. Learning how to edit someone out of a picture is easier than ever before.

In the past, you needed expensive software and years of training to fix a photo. Today, photo editing has changed.

Whether you are fixing travel photos or cleaning up product images for your online store, there are simple tools available. You can use online AI tools, mobile devices, or professional software to get the job done.

This guide is made for everyone. We will explain everything in simple steps so you can get professional results.

We will show you the best way to remove unwanted people and unwanted objects so your photos look exactly how you imagined.

Let’s get started on making your photos look amazing.

Why You Might Need to Edit Someone Out of a Picture?

Why You Might Need to Edit Someone Out of a Picture?

There are many reasons why you might want to learn how to edit someone out of a picture.

The most common reason is to clean up the background. When you visit a popular tourist spot, it is almost impossible to get a photo without other people in it. You might have a great picture of yourself in front of a landmark, but a crowd of tourists makes the image look messy.

Using an object removal tool helps you put the focus back on the main subject.

Another reason is for social media. We all want our photos to look their best before we share them. Sometimes, a random person in the background can distract from the story you are trying to tell. Removing them makes the photo look cleaner and more professional.

You might also need to edit photos for work.

If you are taking photos for an online store, you need impactful product visuals. Unwanted elements, like a hand holding a product or a person standing in the reflection, can ruin the shot. Background removal or editing out distractions ensures your customers look only at the product.

Sometimes, relationships change.

You might have a nice photo of yourself, but it includes an ex-partner or a friend you no longer speak to. You don’t have to delete the memory of how good you looked. You can simply use a people remover tool to keep yourself in the frame while removing the other person.

Lastly, you might just want to remove unwanted objects like trash cans, power lines, or signs that clutter the view.

The goal is to create a clean, beautiful image that represents your vision.

How to Edit Someone Out of a Picture Using Free Online AI Tools

How to Edit Someone Out of a Picture Using Free Online AI Tools?

If you do not want to download an app, using an online tool is the easiest way to fix your photos. These tools use artificial intelligence to guess what the background should look like after you remove a person.

Here are some of the best tools you can use in your web browser.

Using Canva Magic Eraser For Quick Edits

Canva is a very popular design tool. It has a feature called Magic Eraser. This is a great tool for quick edits. It is very simple to use.

First, upload your photo to Canva. Click on the photo and then click on “Edit Photo” at the top.

You will see the Magic Eraser tool in the menu. When you click it, you can adjust the brush size. This is helpful because sometimes the person you want to remove is small, and sometimes they are large. Paint over the person you want to remove. Make sure you cover them completely.

When you let go of the mouse button, the AI tool works its magic.

It will remove the person and fill in the space. If it misses a spot, you can brush over it again. This is a quick fix for simple backgrounds.

It is a good thing for beginners because the interface is very friendly.

Removing People with Fotor Object Remover

Fotor is another great online tool. It has a dedicated object remover that is very powerful. Fotor uses smart algorithms to analyze your photo.

To use it, go to the Fotor website and upload your image. Select the “Remove Object” feature. You will get a brush tool.

Use the mouse to paint over the unwanted people in your shot. You can change the size of the brush to get closer to the edges.

Once you highlight the person, click the “Remove” button.

Fotor will process the image and show you the result. It usually does a great job of matching the lighting and colors.

This tool is excellent for travel photos where the background might be a beach or a sky. It helps you get better results without much effort.

How to Use Cleanup.pictures For High-Quality Results?

Cleanup.pictures is a specialized clean up tool. It is known for giving high-quality results. The best part is that it is very fast.

Go to their website and drag your photo into the box. You will see a green brush. You can make the brush size bigger or smaller using a slider. Paint over the person or unwanted objects you want to gone. The tool removes them almost instantly.

This tool is great for first time users because there are no confusing buttons. It just does one thing and does it well. If you have a photo with power lines or small distractions, this is the best way to clean it up.

It keeps the image quality high, so your photo doesn’t look blurry.

How to Edit Someone Out of a Picture on Mobile (iPhone & Android)

How to Edit Someone Out of a Picture on Mobile?

Most of us take photos with our phones. It is convenient to edit them right there on the device. Whether you have an iPhone 14 Pro Max or an Android, some apps can help. Here is how to edit someone out of a picture on iPhone and Android devices.

Using Google Photos Magic Eraser (Android & iOS)

Google Photos is one of the best apps for photo storage and editing. It has a famous feature called Magic Eraser.

Originally for Pixel phones, it is now available on more devices, including iPhones, if you subscribe to Google One.

Open your photo in the Google Photos app. Tap on “Edit” at the bottom of the screen. Then, look for “Tools” and select “Magic Eraser.”

The app will scan your photo. It often finds unwanted people or power lines automatically and suggests removing them.

You can just tap “Erase all” for a quick fix. If it doesn’t find them automatically, you can use your finger to circle or brush over the person.

The magic eraser will remove them and fill in the background. It uses advanced AI features to make it look natural. This is often considered the best tool for mobile users because it is fast and effective.

Removing Objects with Snapseed (Free Method)

Snapseed is a completely free app owned by Google. It is a powerful image editing app available on the App Store and Play Store. It is perfect if you are looking for how to edit someone out of a picture for free.

Open your photo in Snapseed. Tap on “Tools” and select “Healing.” This acts like a spot healing brush tool. Zoom in on your picture so you can see the person clearly. Use your finger to paint over the person.

Snapseed will replace the person with pieces of the background near them.

It works best on simple backgrounds like grass, sky, or water. If the background is complex, you might need to do it in small steps.

It takes a little more patience, but it is a great free method to remove person from photo iPhone free.

Using TouchRetouch For Complex Edits

If you are willing to pay a small amount, the Touch Retouch app is amazing. It is designed specifically for object removal.

Open the app and load your image. Select “Object Removal.” You can use a brush or a lasso tool to select the person. The app uses smart technology to understand what is behind the person.

One great feature is the “Line Removal” tool, which is perfect for removing power lines or cables in one tap.

For people, use the brush. The app handles complex backgrounds better than many free apps.

If you want professional results on your phone, this is a great choice. It helps you keep the image quality high while removing distractions.

With new phones, we are also seeing Apple Intelligence starting to play a role in how photos are processed, making these edits even smoother on the latest iPhone models.

How to Edit Someone Out of a Picture with Professional Software?

How to Edit Someone Out of a Picture with Professional Software?

For those who want the absolute best results, professional software like Adobe Photoshop is the answer.

These tools give you total control over the editing process.

The Content-Aware Fill Method in Adobe Photoshop

Adobe Photoshop is the industry standard. One of its most famous features is Content-Aware Fill.

First, open your image in Photoshop. Use a selection tool (like the Lasso tool) to draw a circle around the person you want to remove. You don’t need to be perfect; just make sure the whole person is inside the selection.

Go to the “Edit” menu and choose “Content-Aware Fill.” A window will pop up showing you what the result will look like.

Photoshop analyzes the original image and looks for pixels to fill in the empty space. You can tell it which parts of the background to use.

This is great for handling complex backgrounds. When you are happy, click OK. The person is gone, and the background looks real.

Using the Clone Stamp Tool For Precision Control

Sometimes automated tools make mistakes.

That is when you need the Clone Stamp Tool. This tool allows you to copy one part of an image and paint it over another part.

Select the Clone Stamp Tool from the toolbar. Hold down the Alt key (or Option on Mac) and click on a clean part of the background.

This is your “source.” Then, let go of the key and paint over the person you want to remove.

This takes more time than AI tools. You have to be careful to match lines and patterns.

However, it gives you the best results because you decide exactly what goes where. It is the best way to fix tricky areas where the AI gets confused.

You can change the brush size and hardness to blend the edges softly.

Removing People Using Lightroom’s Healing Brush

Adobe Lightroom is great for color correction, but it also has a good Healing Brush. This is good for smaller objects or people in the distance.

Open your photo in Lightroom. Click on the “Healing” icon (it looks like a band-aid). You can choose between “Clone” or “Heal.”

Heal” is usually better because it blends the colors and textures.

Adjust your brush size and paint over the person.

Lightroom will pick a source area automatically. You can drag the source area to a different spot if the first guess isn’t right. This is a non-destructive way to edit, meaning your original image is always safe.

Tips For Natural-Looking Edits

Tips For Natural-Looking Edits

Knowing how to edit someone out of a picture is just the first step. You want the photo to look natural, so no one knows it was edited.

Here are some tips.

Managing Complex Backgrounds and Textures

Complex backgrounds like brick walls, crowds, or patterned carpets are hard to edit. When you remove a person, the lines in the background need to match up. If you are using a clone tool, take your time.

Align the bricks or lines carefully.

If you are using an AI tool, try removing the person in smaller chunks rather than all at once. This helps the AI understand the pattern better.

Sometimes, zooming in and using a very small brush helps you fix the tiny details that make the texture look wrong.

How to Handle Shadows and Reflections?

A common mistake is removing the person but leaving their shadow. This looks very strange.

When you edit someone out, make sure you also remove their shadow on the ground. Reflections are also tricky.

If you remove a person standing near a window or water, check if their reflection is visible. You must remove the reflection too.

If you don’t, the brain knows something is wrong. Using the clone stamp is often the best way to fix shadows and reflections because you can paint over them with the surrounding floor or water texture.

Avoiding Blurry Patches After Removal

Sometimes, after using an eraser tool, the spot looks blurry. This happens if the software stretches the pixels too much.

To avoid this, use a tool that copies texture, like the clone stamp or a high-quality AI object remover. If you see a blurry patch, you can try using the “Sharpen” tool in your editing app to bring back some detail.

Another trick is to add a little bit of “Noise” or grain to the edited area so it matches the rest of the photo. This makes the edit blend in and stops it from looking like a smooth, plastic smear.

FAQ’s:

Can I Edit Someone Out Of A Photo Without Using Photoshop?

Yes! You do not need Adobe Photoshop to get good results. There are many simple tools and online AI tools like Canva, Fotor, and Cleanup.pictures. You can also use apps on your phone, like Google Photos or Snapseed.

What Is the Easiest Way to Remove A Person From A Picture For Free?

The easiest way to remove a person from a photo iPhone for free is using the Snapseed app. It is completely free and has a healing tool.

Another option is the free version of Google Photos if your phone supports the magic eraser.

For desktop, Cleanup.pictures allows free edits for smaller images.

Are There Any Online AI Tools That Erase People From Images Instantly?

Yes, tools like the Fotor object remover and Canva Magic Eraser work almost instantly. You just highlight the person, and the artificial intelligence removes them in seconds. It is a very quick fix.

How Do I Remove A Person Without Ruining the Background?

To protect the background, use a variable brush size. Zoom in close and only paint over the person, not the area around them.

If the background is complex, try using a clone stamp tool for precision control so you can align the background lines manually.

Can I Edit Someone Out of a Picture If They Are Hugging Me?

This is difficult but possible. It requires more time.

You will have to rebuild the part of your body that they were covering (like your shoulder or arm). You might need to use the clone stamp to copy the texture from your other shoulder or clothes. Professional software like Adobe Photoshop is best for this type of complex edit.

Does Editing Someone Out Reduce the Image Quality?

It can if you use low-quality apps. However, if you use professional software or high-quality online tools, the image quality should stay high. Always try to save your photo in the highest resolution possible after editing.

Conclusion

Learning how to edit someone out of a picture opens up a world of creativity.

It lets you rescue travel photos, perfect your social media posts, and create professional product images. You no longer have to worry about a stranger ruining your shot or unwanted elements distracting from your subject.

Whether you choose to use simple steps on your mobile devices with Google Photos or dive into Adobe Photoshop for precision control, the power is in your hands. The good news is that technology is getting better every day.

With smart algorithms and AI features, what used to take hours now takes seconds.

At Designers Choice, we want you to feel confident in your skills. Try these best apps and tools.

Experiment with the brush tool and the clone stamp. Don’t be afraid to make mistakes—that is how you learn. With a little practice, you will be able to remove unwanted people and create the perfect shot every time.

We hope this guide helps you take your photo editing to the next level. Remember, the goal is to bring your vision to life. So go ahead, clean up those photos, and share your creativity with the world. You have the tools, and now you have the knowledge to create amazing, clean images.

Categories
Design

How to Fix Grainy Photos: A Step-by-Step Guide

We have all been there. You snap what you think is the perfect picture. You are excited to share it on your social media posts.

But when you zoom in, your heart sinks. The clear, sharp picture you wanted is full of tiny specks. It looks rough and sandy.

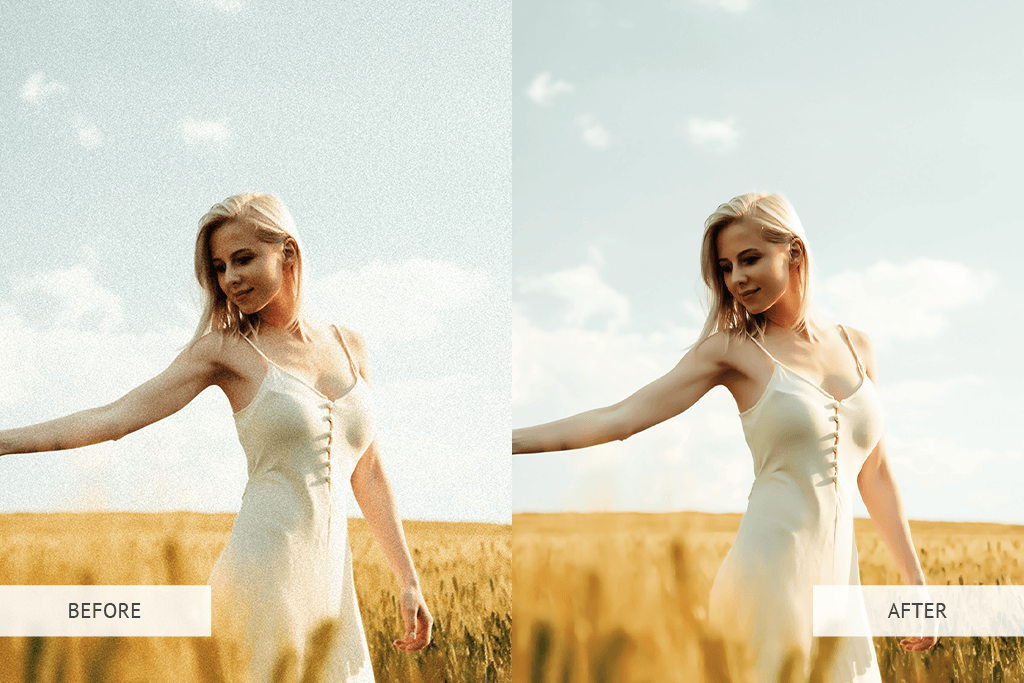
This is what photographers call grainy photos. It can ruin a great moment and lower your image quality.

At Designers Choice, we know how frustrating this feels. We are a community of creators who want our work to look its best.

Whether you are a pro or just love taking pictures of your friends, dealing with digital noise is a common struggle.

But here is the good news: you do not have to delete those pictures. You can save them.

In this guide, we will teach you exactly how to fix grainy photos. We will look at why it happens in the first place and show you the best tools to fix it. We will cover big computer programs and simple phone apps.

We will explain how to fix grainy photos in Lightroom, how to fix grainy photos on iPhone, and even fix grainy photos online for free.

Our goal is to help you get a clear image every time. We believe that with a little knowledge and the right tools, you can turn a messy, grainy shot into a masterpiece. Let’s get started and clean up those images.

Understanding Image Noise: Why Do Your Photos Look Grainy?

Why Do Your Photos Look Grainy?

Before we start fixing things, it is a good idea to learn why grain appears. In the world of digital images, we call this “noise.”

Think of it like listening to the radio. If the signal is weak, you hear static hiss. Digital noise is visual static. It usually happens when your camera sensor is struggling. The sensor is the part of the camera that catches light. When there is enough light, the sensor works easily. The image is smooth. But when there is a lack of light, the sensor has to work extra hard. This effort creates those ugly specks we call grain.

There are a few main reasons why your digital camera or phone makes grainy images.

High ISO Settings and Their Impact

The biggest cause of grain is usually your iso settings. ISO is a setting that controls how sensitive your camera’s sensor is to light.

When you are outside in the bright sun, you usually use a low iso, like ISO 100 or 200. At a low iso, the signal is clean. You get very little noise.

However, when it gets dark, you might raise the ISO to make the picture brighter. You might bump it up to ISO 1600 or 3200. This tells the camera to be more sensitive. It brightens the photo, but it comes with a cost.

The higher the ISO, the more digital noise you get. This is why high iso settings almost always lead to grainy photos. It is a trade-off. You get a brighter image, but you lose that smooth, photo quality look.

Underexposure and Low Light Conditions

Sometimes, you might keep your ISO low, but the photo still looks grainy. Why? This often happens because of underexposure. This means the photo is too dark. When you shoot in low light or low lighting without adjusting your settings, the camera does not get as much light as it needs.

When you put that photo into a photo editor and try to brighten it up, you will see a lot of grain appear in the shadows. The information just wasn’t there. The camera sensor tries to guess what is in the dark parts, but it makes mistakes. These mistakes show up as speckled noise.

It is very hard to fix a photo that was taken in near darkness. Low light is the enemy of a clean, sharp photo.

The Difference Between Luminance Noise and Color Noise

Not all grain looks the same. When you look closely at a grainy photo, you will see two types of noise.

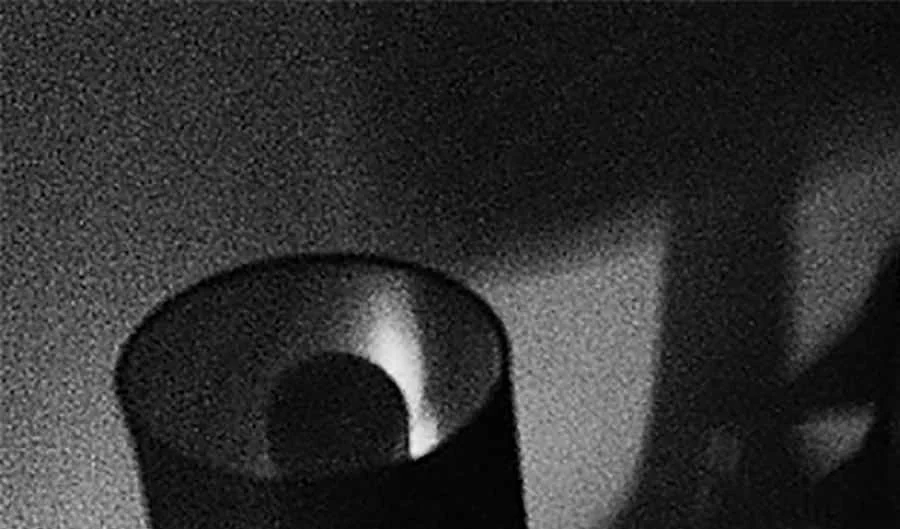
  • Luminance Noise: This looks like film grain. It looks like black, white, and gray sand sprinkled over the image. It affects the brightness of the pixels. A little grain like this is not always bad. Some people even like it because it looks like an old movie. It is easier to fix and less distracting.
  • Color Noise: This is the ugly one. These are random splotches of red, green, and blue pixels that do not belong there. If you take a photo of a gray wall in the dark, you might see purple and green specks. This is color noise. It makes the image look unnatural and messy.

Most noise reduction tools treat these two types differently. You will usually want to reduce color noise completely, but you might keep a tiny bit of luminance noise to keep the photo looking sharp.

Step-by-Step: How to Fix Grainy Photos in Post-Processing?

How to Fix Grainy Photos in Post-Processing?

Now that we know what causes the problem, let’s talk about solutions. Post-processing is just a fancy word for editing your photos on a computer or phone. This is where the magic happens.

We will look at how to save your images using different software.

Using Adobe Lightroom’s Detail Panel

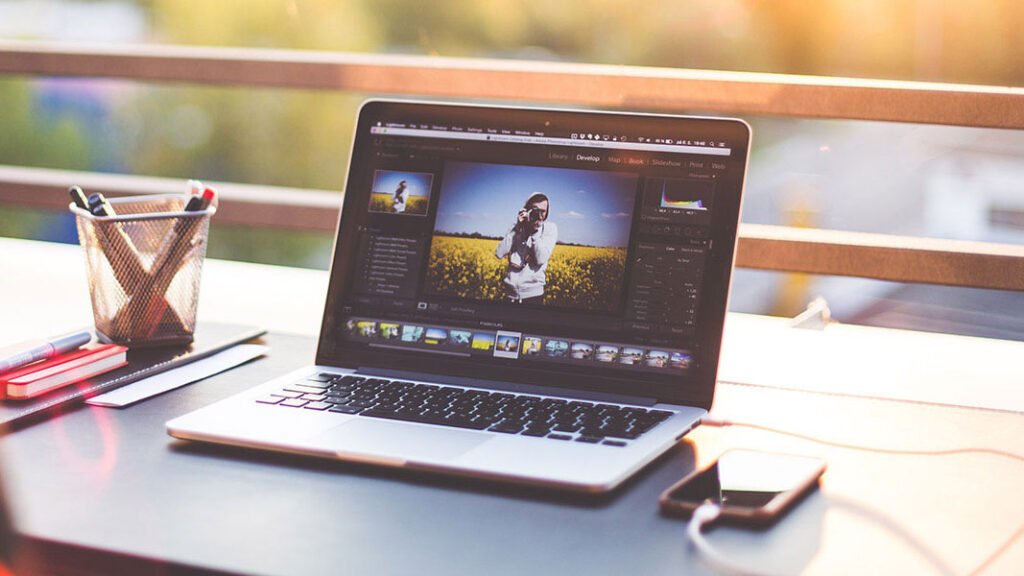
Adobe Lightroom Classic is one of the best tools for photographers. It gives you a lot of control over your files.

If you want to know how to fix grainy photos in Lightroom, follow these steps.

  • Import Your Photos: Open Lightroom and import your grainy images. It is best if you work with raw files (or raw images) because they hold more data than JPEGs.
  • Go to the Develop Module: This is where you do all your editing. Look for the “Detail” tab on the right side.
  • The Detail Panel: Click on the detail panel to open it. You will see a section called “Noise Reduction.”
  • Fixing Luminance Noise: Find the Luminance slider. Slowly move it to the right. Watch your image closely. You will see the grain start to disappear. The photo will get smoother. Be careful not to slide it too far, or the photo will look blurry.
  • Fixing Color Noise: Look for the color slider. Usually, Lightroom sets this to 25 automatically. If you still see weird color spots, move this slider to the right. This will blend those red and blue specks away.
  • Detail and Contrast: Under the noise sliders, there is a Detail slider. This helps bring back some texture so the photo doesn’t look like plastic. There are also contrast sliders that help keep the edges sharp.

Using the detail panel in Lightroom is the standard method for adjusting photos. It offers excellent noise reduction without being too hard to use.

How to Remove Grain in Photoshop (Camera Raw Filter)

If you have Adobe Photoshop, you have a very powerful tool. You might be wondering how to fix a grainy photo in Photoshop. The best way is to use the Camera Raw Filter. It works very similarly to Lightroom.

  • Open your image in Photoshop.
  • Go to the top menu and click on “Filter.”
  • Select “Camera Raw Filter.”
  • A new window will pop up. Look for the “Detail” section (it looks like two triangles).
  • You will see the same noise reduction sliders as Lightroom.
  • Adjust the Luminance to smooth out the grain.
  • Adjust the Color to fix the color specks.

This method is great because you can apply it to just part of the image if you want, or the entire image.

It is a quick way to clean up grainy photos before you do other edits.

Best AI De-Noising Software (Topaz DeNoise AI, DxO PureRAW)

Sometimes, the standard tools are not enough. If your photo is very grainy, you might need the power of AI. New software uses Artificial Intelligence to fix photos in ways we could not imagine a few years ago.

Tools like Topaz DeNoise AI and DxO PureRAW are amazing.

They act as an AI image denoiser. Instead of just blurring the grain, the AI looks at the image and understands what it is seeing. It knows the difference between a bird’s feather and a speck of noise. These programs can remove a huge amount of noise while keeping the image sharp.

They are often separate programs, or they can plug into Lightroom. If you have old photos that are very grainy, using an AI photo enhancer like this is a good tip. They can even help unblur image details that seemed lost.
How to Fix Grainy Photos on iPhone and Android Apps?

You do not always need a big computer. You can learn how to edit grainy photos right on your phone.

Whether you need to know how to fix grainy photos on android or how to make a photo less grainy on iPhone, the process is similar.

  • Lightroom Mobile: This is a free app (with paid features). It has a “Detail” tab just like the desktop version. You can slide the noise reduction bar to smooth out your shot.
  • Snapseed: This is a very popular free app. Open your photo, go to “Tools,” and select “Details.” It does not have a specific “noise” slider, but increasing the “Structure” and smoothing it out can help.
  • Google Photos: The built-in editor on Android often has a “Denoise” slider.
  • Apple Photos: On the iPhone, open the photo and hit “Edit.” Go to the noise reduction icon (usually a circle with dots). Slide it to fix the grain.

These apps are great for fixing social media posts on the go. They can help turn a bad shot into a clear one quickly.

Balancing Noise Reduction and Detail Preservation

Balancing Noise Reduction and Detail Preservation

Fixing grain is a balancing act. If you remove too much noise, you ruin the detail. You have to find the sweet spot.

Avoiding the “Plastic” Look

The biggest mistake beginners make is sliding the noise reduction slider all the way to 100. When you do this, the skin on people looks like plastic. Leaves on trees look like green paint blobs. The photo loses all its texture.

You want the image to look natural. It is better to have a little grain than a fake-looking plastic photo. When you use the luminance slider, stop as soon as the worst grain is gone. Do not try to make it perfectly smooth.

Check the eyes and hair of your subject.

If the eyelashes disappear or look blurry, you have gone too far. Back off the slider. You need to keep the color detail and texture real.

Using Masking to Target Specific Areas

A pro trick is to only fix the parts that need it. This is called masking.

Grain shows up most in the dark shadows and the blurry background. It is less obvious on the bright parts or the main subject.

In programs like Lightroom and Photoshop, you can create a mask. You can tell the software, “Only do noise reduction on the background.” This keeps your subject sharp and crisp, while smoothing out the messy darkness behind them.

This is how you get excellent noise reduction results that look professional.

Prevention Tips: How to Avoid Grain Before You Shoot?

Prevention Tips: How to Avoid Grain Before You Shoot?

The best way to fix grainy photos is to not take them in the first place. Fixing it later is okay, but getting it right in the camera is better.

Here is how to prevent grainy images.

Mastering the Exposure Triangle

Photography is all about three things: ISO, Aperture, and Shutter Speed. This is called the Exposure Triangle.

To get less grain, you want to keep your iso settings as low as possible. But if you lower the ISO, the picture gets dark.

To fix that, you need to change the other two settings.

  • Aperture: Open your lens wider (a lower f-number like f/1.8 or f/2.8). This lets in more light.
  • Shutter Speed: Keep the shutter open longer.

When you balance these three, you can get a bright photo with a low iso. This results in a clean, clear image.

The Importance of Proper Lighting

Since lack of light causes noise, the easiest fix is to add more light.

If you are indoors, turn on more lamps. Move your subject closer to a window. If you are taking photos of a product for your website, use a desk lamp. The more light you give the camera sensor, the less it has to struggle.

When you have enough light, the camera doesn’t have to boost the signal. This means no static, no noise, and high image quality.

Don’t be afraid to use a flash if you have one. Even a phone flash can help reduce grain in a dark room.

When to Use A Tripod to Lower ISO?

If you are shooting a landscape at night or a still object in a dark room, use a tripod. Why? Because if you hold the camera in your hands, you need a fast shutter speed to stop camera shake. Fast shutter speeds let in less light, so you have to raise the ISO. High ISO equals grain.

If you put the camera on a tripod, it is perfectly still. You can use a much slower shutter speed. You can leave the shutter open for 1 second, 5 seconds, or even longer. This lets in tons of light.

Because of this, you can keep your ISO very low (like ISO 100). The result is a night photo that is bright but has almost zero noise.

A tripod eliminates motion blur and allows for different exposures without ruining the quality. It is a simple tool that solves big problems.

FAQ’s:

Can You Fix Grainy Photos Completely Without Losing Quality?

It is hard to fix them completely without losing some tiny details. Noise reduction works by smoothing out pixels.

This naturally softens the image a little bit. However, using modern tools and the power of ai, you can get very close.

You can make the photo look great for the web and social media, even if it isn’t perfect for a huge print.

What is the Best Free App to Fix Grainy Photos on a Smartphone?

For a free app, Snapseed is a fantastic choice for both Android and iPhone. Adobe Lightroom Mobile is also excellent and very powerful, even the free version. They both allow you to control the details and smooth out the grainy images.

Does Increasing Resolution Help Fix Grainy Photos?

Not really. Just making the file size bigger or increasing pixel count doesn’t remove noise.

In fact, if you just make a grainy photo bigger, the grain gets bigger too. However, some ai photo enhancer tools can upscale images and remove noise at the same time. They add new pixels to smooth things out.

But simply resizing a standard image won’t help with the grain.

Is Grain Always Bad in Photography?

No! Sometimes grain is a mood. In black and white photography, film grain adds texture and feeling.

It can make a photo feel gritty, real, or vintage. Some photographers even add grain on purpose. But color noise (the colorful splotches) is almost always bad. It looks like a mistake. Artistic grain should be a choice, not an accident caused by low lighting.

Why Do My Photos Look Grainy Even At Low ISO?

If you are using a low iso and still see grain, you probably underexposed the photo. This means the picture was too dark when you took it.

When you brighten a dark photo in a photo editor, you reveal noise that was hiding in the shadows.

Also, older cameras or cameras with a small camera sensor (like old smartphones) produce more grain naturally, even at lower settings.

Conclusion

Dealing with grainy photos is a normal part of being a photographer. Whether you have a fancy Canon Rebel or just a smartphone, you will face low-light situations eventually. But now you know what to do.

We have learned that high iso and underexposure are the main culprits.

We have looked at how to use the detail panel in Lightroom Classic and the filters in Adobe Photoshop. We explored the power of AI with tools that act as an image sharpener and ai image denoiser.

We also discussed how simple changes, like adding light or using a tripod to allow a slower shutter speed, can stop grain before it starts.

Remember, the goal isn’t always perfection. It is about making the image look its best. Don’t be afraid to experiment with the contrast sliders and noise reduction tools. Watch your file size and keep your original image safe just in case.

At Designers Choice, we want you to feel confident in your creativity.

Don’t let a little digital noise stop you from sharing your work. With these tips, you can rescue those blurry photos and grainy images and turn them into something beautiful. So, go out there, shoot with confidence, and make your boldest visions a reality.

If you found this guide helpful, why not try editing one of your old grainy photos today? You might be surprised at how good it can look!

Categories
Design

How to Fix Blurry Photos: The Ultimate Guide to Sharpening Images

Have you ever taken a perfect picture, only to find out later that it is not clear? We know that feeling at Designers Choice. You look at your screen, and the image is fuzzy. It can be very sad, especially if it was a special moment with friends or a great shot for social media.

Blurry photos can happen to anyone, even if you have a great camera. But do not worry! We are here to help you fix this problem.

At Designers Choice, we want to help you make your creative ideas real. We know how hard it can be to get everything right. That is why we picked the best tips and online tools to help you fix blurry photos. We want to share our knowledge so you can have clear photos every time.

Whether you are taking product shots or family photos, image quality is very important.

In this guide, we will show you how to unblur image files and improve picture quality. We will talk about AI technology, photo editing software, and mobile apps. You do not need to be a pro to get crisp details. We will explain everything so you can learn the easy way to get great results.

Let us help you turn those blurry pictures into high-quality images that you will be proud to share.

Why Do Your Pictures Look Blurry?

Why Do Your Pictures Look Blurry?

Before we learn how to fix blurry photos, it is good to know why they happen. There are a few reasons why an image might look soft or fuzzy.

Knowing these reasons can help you take better photos in the future.

Understanding Motion Blur Vs. Out-of-Focus Blur

There are two main types of blur.

The first one is called motion blur. This happens when the subject moves, or your camera moves while you are taking the photo.

If a car drives by fast and you take a picture, it might look like a streak of color. That is motion blur. It can make social media posts look messy.

The second type is out-of-focus blur. This happens when the camera lens does not focus on the right spot.

If you want to take a photo of a flower, but the background is sharp and the flower is soft, that is poor focus. This can lead to a blurry image that hides the fine details you wanted to show. Both types ruin image clarity, but you can fix them with the right photo editor.

The Role of Low Light and ISO Noise

Low light is a big enemy of clear photos.

When there is not enough light, your camera has to work harder. It might raise something called ISO to see better. But high ISO creates “noise” or grain. This makes the photo look sandy and less sharp. Also, in low light, the camera might keep the shutter open longer to let in light.

If you move even a tiny bit, you get blurry photos. This is common in vintage photos or pictures taken at night parties.

The image resolution stays the same, but the quality of your image drops because of the noise and blur.

Camera Shake and Stabilization Issues

Camera shake is when your hands shake a little bit while holding the phone or camera. You might not feel it, but the lens sees it. This slight movement spreads the light out and causes a blurry image. This is why many people use a tripod or hold their breath when they click the button.

If you do not hold the device steady, you will lose crisp details. Even the best photo quality camera cannot fix a big shake without help.

But do not worry, we have advanced features in software that can help unblur photos caused by this shake.

Top Tools to Fix Blurry Photos on Desktop

Top Tools to Fix Blurry Photos on Desktop

If you work on a computer, you have powerful choices.

Desktop software gives you the best control to fix blurry photos. You can use professional editing skills to bring life back to your images.

How to Use Adobe Photoshop to Sharpen Images (Smart Sharpen)

Adobe Lightroom and Photoshop are famous for a reason.

In Photoshop, there is a tool called “Smart Sharpen.” It is a powerful tool that helps you control how much you want to clean up the image.

First, open your original image in Photoshop. Go to the Filter menu, choose Sharpen, and then Smart Sharpen. You will see sliders. Move them to see the changes. This tool looks for edges in your photo and makes them stand out. It helps restore fine details that were lost.

It is great for product photos where you need everything to look perfect. It takes a little practice, but it gives you a very professional photo look.

Using Lightroom to Enhance Detail and Reduce Noise

Adobe Lightroom is amazing for color correction and detail. It is very good if your photo is blurry because of low light noise.

In the Develop module, look for the “Detail” panel.

Here, you can use the Sharpening slider to make edges crisp. You can also use the Noise Reduction slider to smooth out the grain.

This balance helps you get a high-quality image. Adobe Lightroom is great because it does not change your original image forever.

You can always go back. It is a favorite for improving image quality with minimal effort.

Top AI Desktop Software to Deblur Images Automatically

If you do not want to adjust sliders, you can use AI technology. There is software that uses artificial intelligence to fix blurry photos ai style.

Programs like Topaz Sharpen AI use the power of ai to understand what the photo should look like. You just put your blurry pictures in, and the software does the work. It can unblur image files, remove motion blur, and even fix poor focus. This is the next level of editing.

It uses advanced features to upscale images and add back texture. It is like magic for old photo restoration or fixing a quick snap.

How to Fix Blurry Photos Online For Free?

How to Fix Blurry Photos Online For Free?

Not everyone has big software on their computer.

Sometimes you need to fix blurry pictures online free. There are many websites that let you do this quickly.

Best Browser-Based Tools For Quick Fixes

If you search for “fix blurry photos free“, you will find many online tools. Websites like Fotor, Canva, or specialized ai photo enhancer sites are very popular. They are easy to use. You do not need to download anything. These sites often have an unblur tool that works with a single click.

You upload your photo, click a button, and the AI image enhancer does the rest. It is perfect for social media posts or when you are in a hurry. You can find a free plan on many of these sites, though some might ask you to pay for the best features.

Pros and Cons of Using Free Online Sharpeners

Using a free plan online is great, but there are things to think about. The good thing is that it is fast.

You can unblur photos without learning hard software. It saves much time. The bad thing is that sometimes the image resolution is lower when you save it for free. Also, you have to upload your family photos to the internet, so you must trust the site.

Sometimes, a free online photo editor will leave a watermark on your image. But for a quick fix for social media, they are often good enough.

Step-by-Step: Uploading and Enhancing Your Image

Here is the easy way to use these tools.

  • Go to an online photo editor website.
  • Look for the button that says “Upload Image” or “Open Image.”
  • Select your blurry image from your computer.
  • Find the tool called “Sharpen,” “Unblur image tool,” or “AI photo enhancer.”
  • Click it. The AI technology will analyze the photo.
  • Wait a few seconds. You will see the unblurred image.
  • If you like it, download it. This process takes very little effort. It is great for fixing face blur or making blurry text readable again.

Best Mobile Apps to Fix Blurry Photos (Android & iOS)

Best Mobile Apps to Fix Blurry Photos

We use our phones for everything.

So, it makes sense to use a photo enhancer app on your phone, too. There are amazing apps in the App Store and Google Play Store.

Using Remini and AI Enhancers on Your Phone

One of the most famous apps is Remini. It is known for its AI photo enhancer power. It is very good at face blur.

If you have old photos or vintage photos where faces are not clear, Remini can draw the face again. It uses artificial intelligence to guess what the face looks like and makes it sharp. It can turn a low-quality memory into a high-quality portrait. You just upload the photo, watch a short ad (if you use the free version), and get a clear photo result.

It is a powerful tool that fits in your pocket.

How to Use Snapseed’s Structure and Sharpening Tools

Snapseed is a free app from Google. It gives you more control than just a single click fix. In the Tools menu, go to “Details.”

Here you will see “Structure” and “Sharpening.” Structure brings out the texture in the photo, which is great for product shots or buildings.

Sharpening fixes the edges. By moving these sliders, you can improve image clarity significantly. It takes a bit more editing skills than an auto-fixer, but the quality of your final image will be very natural.

It helps fix fuzzy photos without making them look fake.

Adobe Lightroom Mobile For On-the-Go Edits

If you like the desktop version, you will like Adobe Lightroom mobile. It has many of the same advanced features.

You can use it to fix blurry pictures on your phone. The app allows you to adjust sharpening and noise masking. It is very good for fixing white photos that are too bright or dark photos that are grainy. It helps you get better quality images before you post them.

It is a professional photo tool made for mobile screens. You can start with a free trial or use the free features to improve your picture quality.

Tips to Prevent Blurry Photos Before You Shoot

Tips to Prevent Blurry Photos Before You Shoot

The best way to fix a blurry photo is to not take one in the first place! At Designers Choice, we believe in learning.

Here are some tips to help you get clear photos from the start.

Mastering Shutter Speed and Focus Modes

Shutter speed is how fast the camera takes the picture. If the shutter is open for a long time, any movement will cause motion blur.

To freeze action, use a fast shutter speed. This is key for clear photos of moving things.

Also, check your focus. Tap the screen on your phone to tell the camera where to look. If you leave it to the camera, it might focus on the wrong thing, giving you poor focus on your subject.

Getting the focus right ensures fine details are sharp.

Using Tripods and Burst Mode For Sharpness

To stop camera shake, use a tripod. It keeps the camera perfectly still. This is very important for low-light shots or product photos.

If you do not have a tripod, try “Burst Mode.” This takes many photos very fast. Usually, one of them will be sharp because your hands were steady for a split second.

This is a simple trick to get better quality images without extra gear.

Proper Lighting Techniques

Light is your friend. The more light you have, the better your image quality will be. Good light lets the camera use a fast shutter speed and low ISO.

If you are inside, go near a window. If it is dark, turn on more lights. Better lighting helps you avoid grainy, fuzzy photos.

It brings out the image details naturally. You will spend less time using a photo editor if you have good light.

FAQ’s:

Can AI Really Make A Blurry Photo Clear?

Yes, AI technology has changed how we edit. An ai photo editor can guess what the missing details look like. It can unblur image files very well, especially faces in old photos. It is not always perfect, but it is very powerful.

Can You Completely Fix an Extremely Blurry Photo?

If a photo is totally grey or just a big blur, it is hard to fix completely. AI image enhancer tools can do a lot, but they cannot create magic from nothing. They work best on photos that are just a little bit soft or have slight motion blur.

Does Increasing Sharpness Affect Image Quality?

Yes, if you sharpen too much, the photo can look grainy or fake. It can add “halos” around objects. The goal is to improve image clarity without making it look edited. Use minimal effort on the sliders to keep it natural.

Is There A Totally Free Way to Fix Blurry Photos Online?

Yes, there are sites to fix blurry photos online free. Many offer a free plan where you can edit a few photos a day. Just search for “fix blurry photos free” to find them.

How Do I Fix Blurry Photos On My Windows PC Or Mac?

You can use the built-in Photos app on Windows or Mac for basic fixes. For better results, use Adobe Lightroom, Photoshop, or desktop AI photo enhancer software. These give you the best image resolution and control.

What is the Best Free App to Fix Blurry Photos on iPhone?

Snapseed is a great free choice. For AI power, you can try the free version of Remini or other photo enhancer app options in the App Store. They are easy to use for social media pictures.

Conclusion

We hope this guide helps you solve the problem of blurry photos.

At Designers Choice, we want you to have the best image quality for your projects and memories. Whether you use AI technology, a simple online photo editor, or professional editing skills, you have the power to fix your images.

Don’t let camera shake or low light ruin your shots. With these tips and tools, you can unblur photos and reveal the fine details hidden inside. Try an unblur tool today or practice with your camera settings. You will be amazed at how clear photos can change the look of your work.

Remember, great design starts with great visuals. Keep creating and capturing the world in high quality!

Categories
Design

Best Free Animated Twitch Emotes for Streamers (2026 Guide)

Welcome to Designers Choice. We are very happy you are here. We know that design is not just about making things look good.

It is about solving problems and making your ideas come to life. We have spent years working with designs, materials, and creative projects.

We built this website to be the helper we always wanted. We want to share our tips and tools with you.

Today, we are talking about streaming. If you stream on Twitch, you know that the chat is very important.

It is where your viewers talk to you and to each other. One of the best ways to make your chat fun is by using free animated emotes for twitch.

When you watch big streamers, you see cool moving pictures in the chat. These are animated emotes.

You might think you need a lot of money to get them. But that is not true. You can get free animated emotes for Twitch or even make them yourself.

In this guide, we will show you exactly how to make animated emotes for twitch free. We will look at the best place to download them and the best online tools to make them. We want to help you build a great twitch channel without spending a single penny.

Let’s get started on making your stream look amazing.

Why You Should Use Free Animated Emotes For Twitch on Your Channel?

Why You Should Use Free Animated Emotes For Twitch on Your Channel?

You might ask, “Why do I need moving emotes?” A static image (a picture that does not move) is good. But an animated one is much better.

Here is why you should add them to your stream.

Increasing Chat Engagement and Viewer Retention

When you are streaming, you want people to stay. You want them to type in the twitch chat. When a viewer types in the chat, they feel like part of the show. Animated emotes give them a fun way to react.

If something funny happens in your game, a simple smiley face is okay. But a laughing cat that shakes and cries tears of joy? That is a good idea.

It shows more emotion. When viewers see sweet animated emotes popping up, they want to use them too. This creates a chain reaction.

More people start typing. The chat moves faster. This is called engagement. When engagement is high, new people who find your stream are more likely to stay. They see a busy, happy community.

Twitch animated emotes are like little toys for your audience. They make the experience interactive.

It keeps the energy high, even if you are just sitting and talking.

Adding Personality to Your Stream Without Spending Money

Every streamer is different. You have your own style. Your Twitch channel should show that style.

Using Twitch’s default options is fine for beginners. But if you want to stand out, you need custom emotes. Maybe you are a cozy streamer who likes tea. You could have a steaming cup of tea emote. Maybe you play scary games. You could have a ghost that fades in and out.

These unique emotes tell a story about who you are. The best part is that you do not need to hire a professional artist right away.

By finding free Twitch emotes, you can test what your viewers like. It is a good way to add personality. You can have special animations that become inside jokes for your community. It makes your brand look professional. It shows you care about the details.

And you can do all of this for free.

Top Websites to Download Free Animated Emotes For Twitch

Top Websites to Download Free Animated Emotes For Twitch

You do not always have to make emotes from scratch. There are many great websites where artists share their work for free.

Here are the top places to find free animated emotes for twitch.

7TV: The Modern Standard For Animated Emotes

7TV is very popular right now. It is a twitch extension.

This means it is a tool you add to your browser. It lets you and your viewers see many more emotes than Twitch allows by default.

7TV is loved because it allows for very high-quality animations. It supports a wide variety of fun emotes. You can find almost anything here. If you want a dancing cat, a spinning logo, or a funny meme, 7TV likely has it.

It is very easy to use. You log in with your Twitch account. Then you search for emotes.

When you find one you like, you click a button to add it to your channel. It is the best solution for streamers who want a huge library of options. It is completely free. The community on 7TV is very active, so there are always new emotes appearing every day.

BetterTTV (BTTV): The Classic Extension

BetterTTV, or BTTV, has been around for a long time. It is one of the first tools to bring animated emotes to Twitch.

Many big streamers use it. If you see an emote like “CATJAM” (a cat bobbing its head), it is likely from BTTV.

To use it, you and your viewers need to install the browser extension.

Once you have it, you can go into the BetterTV settings and pick the emotes you want. You can pick from a list of shared emotes.

BTTV gives you customization options, too. You can choose which emotes are active. It is a very stable and trusted platform.

It is a baseline emote tool that almost every content creator should know about. It helps fill the gaps that Twitch leaves open.

FrankerFaceZ (FFZ): Community-Driven Designs

FrankerFaceZ is another great site. It is very focused on the community. Real people make these designs and upload them.

While FFZ is famous for static emotes, they also support animated emotes now. The nice thing about FFZ is the quality control. Real people check the emotes. This ensures they are safe and look good.

You can find many own designs from talented artists here. You can also use FFZ to see emotes from BTTV and 7TV. It can act as a bridge.

This makes it a best place to start if you are confused by having too many extensions. You can browse thousands of free twitch emotes here.

It is a great resource for finding unique creation styles that match your specific game or vibe.

Gumroad and Ko-fi: Finding Artist Freebies

Gumroad and Ko-fi are different from the extensions above. These are websites where artists have their own shops.

Usually, artists sell things here. But, many artists offer free animated emotes for twitch as a gift.

They do this to get their name out there. It is like a sample. You can search for “free twitch emotes” on these sites. You will find packs of emotes.

You might find a pack of 5 animated hearts or a pack of animated text bubbles. When you download from here, you get the actual file.

This is great because you can upload them directly to your creator dashboard if you are an Affiliate.

It gives you full control. It is a nice way to support artists.

Even if the price is zero, leaving a nice comment or a small tip is a good idea. You can find some very sweet animated emotes that no one else has.

How to Make Your Own Free Animated Emotes For Twitch (DIY)?

How to Make Your Own Free Animated Emotes For Twitch (DIY)

If you cannot find the perfect emote, you can make your own! Creating emotes for Twitch is fun. You do not need to be a pro.

Here is how to do it yourself.

Best Free Tools For Creating Emotes (Canva, Photopea, Ezgif)

You need the right tools. The best online tools are free and easy to use.

  • Canva: Canva is very popular. It has an animated emote maker feature if you know how to use it. You can take a small graphic and animate it. You can make it bounce or fade. It is very simple to drag and drop items.
  • Photopea: This is like a free version of Photoshop that runs in your browser. It is great for editing a static image or removing a background. You can use it to prepare your layers for animation.
  • Ezgif: This is a website for editing GIFs. You can take a video and turn it into a GIF. You can resize images. You can optimize the file size. It is a very powerful tool for fixing your own animated emote.

You can also look at the own3d emote maker.

They have a tool where you can build a character. While some parts cost money, they often have free options or trials.

It is a unique creation tool. Own3d’s animated emote maker is helpful if you want a character that looks like you, but you cannot draw.

Converting Video Clips Into Twitch-Ready GIFs

Do you have a funny video clip? Maybe you made a funny face on stream. You can turn that into an emote.

First, take the clip of your video. Keep it very short. An emote is only a second or two. Next, go to Ezgif.

Upload your video. Use the tool to crop the video. You only want to show your face or the action. Remove the extra space.

Then, convert it to a GIF. You might need to remove the background to make it transparent. A transparent background is very important.

If you leave the background in, it looks like a box in the chat. You want just the head or the object to show. Ezgif has a tool to remove backgrounds, or you can use other free sites like Remove.bg before animating. This is a quick way to get custom emotes that are 100% you.

Understanding Twitch File Size and Resolution Limits

Twitch is strict about files. You cannot just upload a big 4k movie.

For animated emotes, the file must be a GIF format. The file size must be small. Usually, it needs to be under 1MB. If your file is too big, Twitch will reject it. The resolution is also key. Twitch used to ask for three sizes (28×28, 56×56, 112×112). Now, they have an auto-resize feature, but it is best to upload a square image, usually 112×112 pixels.

If you have a lot of frames or little movement, the file size changes.

Special animations with lots of colors take up more space. You have to balance the quality.

You want it to look good, but it must be small enough. Make sure the animation is of high enough quality so it is not blurry, but keep it simple.

How to Upload and Manage Free Animated Emotes For Twitch?

How to Upload and Manage Free Animated Emotes For Twitch?

Once you have your files, you need to put them on Twitch. Here is the guide.

Step-by-Step Guide For Twitch Affiliates and Partners

If you are a twitch affiliate or a twitch partner, you can upload emotes directly to Twitch. This is a great perk.

  1. Go to your Creator Dashboard on Twitch.
  2. Look for the “Viewer Rewards” section on the left menu.
  3. Click on “Emotes.”
  4. You will see a section for “Animated Emotes.”
  5. Click the plus sign (+) to upload.
  6. Select your GIF file from your computer.
  7. Twitch will show you a preview. Name your emote. This is the code people will type (like “MyNameHi”).
  8. Click “Upload.”

After you upload, there is an approval process. Twitch staff or bots check the emote to make sure it is safe. This can take a few hours or a few days. Once approved, your Twitch chat can use them!

How to Enable Extension Emotes For Non-Affiliates?

If you are just starting, you might not be an Affiliate yet.

You have the least affiliate status. That is okay! You can still use emotes using the extensions we talked about earlier (7TV, BTTV).

  1. Go to the website (like BetterTTV.com).
  2. Log in with your Twitch ID.
  3. Go to the dashboard on that site.
  4. Upload your emote file there.
  5. Or, choose existing Twitch emote options from their library.
  6. Click “Add to Channel.”

Now, you must tell your viewers to install the extension.

If they have the extension, they will see your new emotes. It is a free bonus for your community. It works on such a platform very well.

Troubleshooting Common Upload Errors

Sometimes things go wrong. Here are common errors:

  • File too big: The file size is over 1MB. Go to Ezgif and use the “Optimize” tool to make it smaller.
  • Wrong dimensions: The image is not a square. Crop it to be a perfect square.
  • Too fast/slow: The animation speed is weird. Adjust the frame delay.
  • Copyright: You used a character you do not own. Twitch might reject copyrighted characters. Try to use your own emotes or royalty-free art.

If you cannot see the emote, check your Betterttv settings or other extension settings. Make sure “Emote Menu” is on.

FAQ’s:

Do I Need to Be A Twitch Affiliate to Use Animated Emotes?

To upload them directly to Twitch’s servers, yes, you usually need to be a Twitch affiliate or partner.

However, anyone can use Twitch extension tools like 7TV or BTTV to have animated emotes for free. It is a good idea for new streamers.

Can I Use Canva Or Similar Platforms to Design Free Animated Emotes For Twitch?

Yes! Canva is a great emote maker.

You can design a graphic and download it as a GIF with a transparent background (if you have the Pro version, or use a background remover after). It is one of the best online tools for beginners.

Are There Free Twitch Emote Makers That Support Animation?

Yes. Aside from Canva, you can use the own3d emote maker (check for free assets) or MakeEmoji.

There are many simple web tools. You can also use a static image and add effects in photo editors to create little movement.

What File Format Is Required For Animated Twitch Emotes?

Twitch requires the GIF format for animated emotes. The image must be a square. It must be under 1MB in size.

If you use extensions, they also prefer GIF or WEBP formats.

Can I Use Copyrighted Characters In My Free Animated Emotes?

It is risky. Twitch can reject emotes that use copyrighted characters. It is better to create unique creation designs or own designs.

If you use a famous cartoon character, you might get in trouble. Using own emotes is the safest path.

Why Can’t I See My Animated Emotes in the Chat?

If you uploaded them to Twitch, they might be stuck in the approval process. If you used an extension, make sure you and your viewers have the extension installed. Also, check your chat settings to ensure “Animate Emotes” is turned on.

How Many Animated Emotes Can I Upload For Free?

If you are an Affiliate, you start with one or a few slots. As you get more subscribers, you unlock more exclusive options and slots. Extensions like 7TV allow you to add a lot of animated emotes, sometimes over 50 or 100, for free!

Where Can I Find Communities For Sharing and Downloading Free Animated Twitch Emotes?

Discords for streamers are great. Also, the Reddit community for Twitch is helpful. The websites 7TV and FFZ are basically big communities sharing available options. You can find sweet animated emotes shared by others there.

Conclusion

Adding free animated emotes for Twitch to your channel is a smart move. It brings life to your Twitch chat. It helps you build a brand.

Whether you download existing Twitch emote packs or use a Twitch emote maker to create your own, the effort is worth it.

At Designers Choice, we believe in giving you the power to create. You do not need big budgets to have awesome rewards for your viewers.

You just need a little creativity and the right tools. We hope this guide helps you find or make the perfect custom emotes.

Start today. Go download a funny emote or try to make one. Your viewers will love the new features.

Remember, the goal is to have fun and connect with people. Animated emotes are just one tool to help you do that. Good luck with your stream!

Categories
Design

The Ultimate Guide to the Correct Size of Twitch Emotes

At Designers Choice, we know how exciting it is to start a twitch channel. It feels like opening a door to a whole new group of friends.

We have spent years helping content creators build their personal brand. We know that getting your graphics right is a big part of that journey.

One of the most important things you will need is a set of custom twitch emotes. These little images are huge for the twitch community.

They let your viewers share feelings, jokes, and hype during your live stream. But we also know that making them can be tricky. There are so many rules about file size, image sizes, and formats. It can feel confusing when you just want to create something cool.

That is why we wrote this guide. We want to help you make twitch emotes that look sharp and clear. We will explain exactly what size of twitch emotes you need. We will also talk about the Twitch profile picture, Twitch offline banner size, and more.

We want to make sure you have all the right custom graphics to make your channel stand out.

We believe that with the right help, anyone can make a great channel. Let’s look at how to get your own emotes ready for the world.

What is the Standard Size of Twitch Emotes?

What is the Standard Size of Twitch Emotes?

When you act as a creator in the world of Twitch, you need to know about pixels.

A pixel is a tiny square of color on a screen. Twitch emote size is measured in these pixels. If you get the numbers wrong, Twitch might not let you upload your art. Or worse, the image might look blurry and bad.

For a long time, you had to make every emote in three different sizes. This was a lot of work. Now, Twitch’s guidelines have changed to help you.

You have two main ways to handle the size of Twitch emotes. You can let Twitch do the work for you, or you can do it yourself to be safe.

Using Twitch’s Auto-Resize Mode (Single File)

This is the easiest method. Twitch now has a great way to handle uploads called Auto-Resize.

With this, you only need to upload one single file. Twitch will then shrink it down for you.

For this to work, your image must be a square. This means the width and height are the same. This is called a square aspect ratio.

The file you upload should be big and clear. Twitch recommends a size of Twitch emotes between 112 x 112 pixels and 4096 x 4096 pixels.

We suggest using a larger size, like 500 x 500 pixels. This helps your art look crisp before it gets resized.

However, there is a file size rule. The file cannot be heavier than 1MB. If your PNG file is too heavy, the creator dashboard will reject it.

This mode is perfect if you want to save time. But some artists prefer the manual way to ensure small sizes still look good.

Manual Upload Mode (Three Separate Sizes)

Some designers at Designers Choice prefer this method. Why? Because when a computer shrinks an image, it can lose detail.

If you resize it yourself, you can fix little pixel errors. This makes sure your custom emotes look perfect on any screen.

If you choose this path, you must upload three specific files.

  1. 28 x 28 pixels: This is the smallest size. It is very tiny. This is the version people see in the chat room on a web browser. Because it is so small, you cannot use too much detail. Simple lines and bright colors work best here. If you try to fit a whole reference photo into 28 pixels, it will look like a blob. You have to zoom in and check your work carefully.
  2. 56 x 56 pixels: This is the medium size. Twitch uses this for the Retina display or high-definition screens. It is twice as big as the chat version. You can show a bit more detail here. It is also used in some parts of the Twitch overlay size setups or extension panels.
  3. 112 x 112 pixels: This is the largest standard size for the manual upload. When someone hovers their mouse over an emote in chat, this is the big version they see. It needs to look very sharp. This is often the output size artists start with before shrinking down to the smaller ones. Even at this size, you must respect the maximum file size limits.

Dimensions For Animated Twitch Emotes

Animated emotes are very popular. They move, dance, or flash. They grab attention in the chat much better than still images. But because they move, they take up more memory. This means the rules for file size are strict.

Frame Rate and Animation Length

The animation cannot go on forever. Twitch allows a maximum animation length of 60 frames.

If your animation is too long, it will be rejected. You also need to watch the frame rate. This is how many pictures flash per second to move.

Twitch generally supports up to 60 frames per second (fps).

However, most animated emotes run at a lower speed to keep the file small. A smooth animation is a great way to hype up your chat.

But remember, the dimensions are the same as standard emotes. You still need that square shape.

File Size Limitations For Animations

This is where many people get stuck. An animated GIF is much heavier than a PNG-format image.

The maximum file size for an animated emote is usually 1MB. This might sound like a lot, but it fills up fast with animation.

If your file is too big, you might need to remove some frames.

Or you might need to use fewer colors. There are free tool websites online that can help you compress your GIF.

We always check the file weight before we try to upload it to the Twitch account. It saves a lot of frustration during the approval process.

Twitch Sub Badges and Bit Badge Sizes

Twitch Sub Badges and Bit Badge Sizes

Sub badges and bit badges are different from emotes. A twitch profile has emotes for everyone to see.

But badges are special. They sit next to a user’s name to show they support the channel. They show loyalty to the twitch community.

Subscriber Badge Dimensions (18×18, 36×36, 72×72)

These badges are even smaller than emotes. The standard sizes are:

  • 18 x 18 pixels
  • 36 x 36 pixels
  • 72 x 72 pixels

Notice that the smallest one is only 18 pixels wide! That is tiny. You cannot put text on a badge this small.

It will not be readable. You must use simple shapes like a star, a heart, or a simple character face.

If you use a reference photo of a person, it might just look like a dot. These badges also need to have transparent backgrounds.

Bit Tier Badge Dimensions

Bit badges show how much money a viewer has cheered.

These use the same sizes as subscriber badges. As a viewer gives more, the badge changes. You can create custom graphics for each level.

Just like the sub badges, the file type is usually PNG. You must stick to the size limit, or they will not upload.

Important File Requirements Beyond the Size of Twitch Emotes

Important File Requirements Beyond the Size of Twitch Emotes

Getting the pixel count right is only step one. There are other rules you must follow.

If you ignore these, the creator dashboard will give you an error.

Acceptable File Formats (PNG Vs GIF)

For standard emotes, you must use the PNG format. A PNG file is the best because it keeps the image sharp without making the file too heavy.

It also supports transparency, which is vital.

For animated emotes, you must use the GIF format. GIFs allow for movement. You cannot use JPG or JPEG files for emotes. Those formats do not allow for transparent backgrounds, so your emote would have a big white box around it. That looks bad in “dark mode” on Twitch.

File Size Limits (1MB Vs 25 KB)

We mentioned the 1MB limit for auto-resize and animated emotes.

But if you use the manual mode for tiny emotes (like the 28×28 size), the max file size used to be very small, around 25kb.

Today, Twitch is a bit more flexible, but you should still aim for a light file. A heavy file takes longer to load for your viewers.

If a viewer has slow internet, your emotes might not show up if the file size is huge. Keeping your output size efficient is a sign of a professional.

Background Transparency Rules

We cannot stress this enough.

Your emotes must have transparent backgrounds. This means the empty space around your drawing should be see-through. If you save your art with a white background, it will show up as a white square in the chat.

Imagine sticking a square piece of paper on a wall. That is what it looks like without transparency.

You want it to look like a sticker that is cut out perfectly. Most design software has a checkerboard pattern to show where the image is transparent. Make sure you see that checkerboard before you save your PNG file.

Best Practices For Creating Visible and Sharp Emotes

At Designers Choice, we want your art to pop. Since emotes are viewed at very small sizes, you need to use some tricks. A lot of information gets lost when you shrink an image. Here is how to keep it looking good.

Testing Readability At 100% Zoom

When you design, you are often zoomed in very close. You might be looking at your art at 500% zoom to draw the eyes. But viewers will never see it that big. You need to zoom out to 100% size frequently.

Ask yourself: Can I still see the expression? Is the text readable? If you can’t read it, your viewers can’t either. The recommended size for working is large, but the final check must be small. If it looks muddy, simplify the lines. Use fewer colors. High contrast helps a lot.

Utilizing the Full Canvas Space

You have a square space to work with. Use all of it. Do not leave empty space around your drawing.

Stretch your character to touch the edges of the box. This maximizes the visible area.

For example, if you have a twitch emote size of 112×112, but your drawing is only in the middle 50 pixels, it will look tiny in chat. Make it fill the whole 112 pixels. This makes your emote appear larger than others in the chat, which is a great way to get noticed.

FAQ’s:

What is the Best File Format For Twitch Emotes?

The best format for non-moving images is the png format. It supports high quality and transparent backgrounds. For moving images, you must use GIF. Do not use JPG.

Do I Still Need to Upload Three Different Sizes For My Emotes?

No, you do not have to. You can use the Auto-Resize mode. This lets you upload one big square image. However, some professionals still upload different sizes manually to ensure every pixel is perfect.

Why Does My Emote Look Blurry On Twitch?

This often happens if you upload a small image and Twitch tries to stretch it, or if you resize it poorly. It can also happen if your aspect ratio is wrong. Always start with a large canvas and scale down carefully.

What is the Maximum File Size (MB) Allowed For an Emote Upload?

The maximum file size is usually 1MB for auto-resize and animated emotes. Always check the creator dashboard for the newest updates on the size limit.

Can I Use the Same Size For Sub Badges and Emotes?

No. Twitch emote size and badge sizes are different. Emotes are 28, 56, and 112 pixels. Badges are 18, 36, and 72 pixels. They are separate image sizes and serve different purposes on your twitch profile.

How Do I Make Sure My Emotes Stay Sharp At Small Sizes?

Use thick lines and flat colors. Avoid soft shading or tiny details. Check your work at the actual 28×28 size often. If it looks good there, it will look good everywhere on the social media platform.

Can I Use Free Online Tools to Create Twitch Emotes?

Yes! There is usually a free tool available online that can resize images or remove backgrounds. You do not always need expensive software. Just make sure the tool exports a clean PNG file.

What Happens If My Twitch Emote File is Too Large?

If your file size is over the limit, Twitch will reject the upload. You will see an error message. You will need to compress the file or reduce the quality slightly to fit the maximum file size rules.

Conclusion

Creating custom Twitch emotes is a fun journey. It allows you to express your style and build a stronger connection with your viewers. At Designers Choice, we believe that understanding the technical side, like the size of twitch emotes, gives you more freedom to be creative.

Remember to keep your files within the maximum size limits. Use the PNG format for clear, sharp images. Check your work at small sizes to ensure readability. And don’t forget about your other graphics like the Twitch profile picture, Twitch offline banner, and Twitch panel images.

All of these custom graphics work together to create a professional look for your Twitch channel.

We hope this guide helps you navigate the creator dashboard with confidence.

Whether you are making animated emotes or a simple profile banner, taking the time to get the dimensions right is worth it. Your twitch community will appreciate the effort. Now, go create something amazing! We are cheering for you.

Categories
Design

Download the Ultimate YouTube Banner Safe Area Template (2026 Guide)

We know how hard it is to make your creative ideas come to life. You want your channel to look amazing, and we want to help you do that.

At Designers Choice, our goal is to give you the tools and help you need to succeed. We care about good design just like you do. When you start a YouTube channel, the first thing people see is your channel art. It is like the big sign on the front of a store.

If it looks good, people will want to come inside and watch your YouTube videos. But there is a tricky part. YouTube banners show up differently on different devices like phones, computers, and TVs. This is where a YouTube banner safe area template becomes very helpful.

Many new creators struggle with this. You make a beautiful banner design, but when you upload it, half of your text is missing on a phone screen. That is frustrating! We want to stop that from happening.

This guide will teach you everything about the YouTube banner safe area template. We will show you how to use it so your channel banner looks perfect everywhere. We will talk about banner size, file size, and the best ways to design your channel brand.

Let’s make your YouTube profile look professional together.

What is a YouTube Banner Template?

What is a YouTube Banner Template?

A youtube banner template is a guide you can put on your computer screen while you design. Think of it like a map. It shows you exactly where to put your pictures and words so they do not get cut off.

When you create channel art, you work on a big canvas.

But not everyone sees the whole picture. Someone watching on a huge TV sees the whole thing. Someone on a phone sees a much smaller strip. The template has lines or boxes drawn on it. These lines tell you, “Stop! Do not put your logo here, or mobile users won’t see it.”

Using a banner template saves you time. You do not have to guess where the center is. You do not have to upload your image, check it, fix it, and upload it again. It helps you get the ideal youtube banner right on the first try. It is a simple tool, but it is one of the most important things for good graphic design on YouTube. It ensures your brand identity is safe and visible to all your viewers.

Why You Need A YouTube Banner Safe Area Template For Your Channel?

Why You Need A YouTube Banner Safe Area Template For Your Channel?

You might ask, “Can I just guess?” You can, but it is risky.

A YouTube banner safe area template is the best way to protect your hard work. You want your channel name and social media handles to be seen by everyone. If you do not use a template, you might lose important parts of your image.

Understanding the “Text and Logo Safe” Zone (1546 x 423 px)

The most important part of the template is the safe area or safe zone.

This is a box in the middle of the image. The size of this box is 1546 pixels wide and 423 pixels tall. Why is this zone so special?

Because everything inside this box will show up on every single device. It does not matter if a person uses an old phone, a tablet, or a laptop.

If you put your text and logo in this safe spot, they will see it. This is where your channel icon, brand colors, and big messages must go.

If you put your channel name outside this box, a person on a phone might only see half of it. That does not look professional.

How Channel Art Displays Differently on TV, Desktop, and Mobile?

YouTube is on many screens. This is what makes banner design hard.

  • TV Displays: TVs show the whole big picture. They show the full YouTube banner dimensions of 2560 x 1440 pixels. It looks like a big poster.
  • Desktop: Computers show a long, thin strip. They cut off the top and bottom of the TV image.
  • Mobile Devices: Phones cut off the sides, too. They show the smallest area.

Because of these screen sizes, your image changes shape.

It is like looking through different-sized windows. The YouTube banner safe area template helps you design for the smallest window (the phone) while still making the big window (the TV) look good.

You need to think about all these different devices at the same time.

Preventing Critical Info From Getting Cropped

Cropped means cut off. Nothing is worse than seeing a banner that says “New Vid… every Fri…” because the rest was chopped off.

You want your viewers to know your upload schedule and what your channel is about. Using the template prevents this. It acts like a guard rail.

It keeps your text inside the safe limits.

This ensures your value proposition—the main reason people should watch—is always clear. Whether you share new videos about cooking or gaming, the info must be visible. This attention to detail shows you care about your channel page and your audience.

Official YouTube Channel Art Dimensions Breakdown

Official YouTube Channel Art Dimensions Breakdown

To use the template well, you need to know the numbers. YouTube has strict rules for image size and file types.

Let’s break them down into simple parts.

The Full Canvas Size: 2560 x 1440 Pixels

When you open your design tool, like Adobe Photoshop or Adobe Express, you need to set your canvas size.

The full size you must start with is 2560 pixels wide by 1440 pixels tall. This is a big image! It is this big, so it looks clear on large TV screens.

This is your total working area. Even though phone users only see a small part, you must upload the full 2560 x 1440 image. These are the recommended dimensions for a standard YouTube channel banner.

If you make it smaller, it might look pixelated or fuzzy on a TV.

Minimum Dimensions For Upload

YouTube will not let you upload a tiny picture. The minimum dimensions for an upload are 2048 x 1152 pixels.

If your image is smaller than this, YouTube Studio will give you an error message.

But, even if you upload this minimum size, the safe area rule still applies. It is always better to aim for the full 2560 x 1440 size. This gives you the best quality banner image. You want your YouTube profile to look sharp and clean, not blurry.

Maximum File Size and Supported Formats

You also need to watch out for the file weight. The maximum file size is 6MB. If your picture is 10MB, YouTube will not take it. You will have to make the file smaller. For file types, you can use JPG, PNG, or GIF (but not animated GIFs).

PNG is usually the best choice for banner art because it keeps the text sharp. JPG is good if your file size is too big and you need to shrink it.

Always check your file size before you try to upload. It saves you from getting an error and having to go back to your photo editing software.

How to Use This YouTube Banner Safe Area Template in Your Design?

How to Use This YouTube Banner Safe Area Template in Your Design?

Now that we know the rules, let’s get to work. We will show you how to use a template step-by-step. It is easy once you get the hang of it.

Step 1: Importing the Template Into Canva Or Photoshop

First, you need a YouTube banner safe area template. You can find a free YouTube banner template online. Download the image file.

Next, open your design program. Many people use Canva or Adobe Photoshop.

  • In Canva: Create a design with the size 2560 x 1440. Then, upload the template image you downloaded. Drag it onto your white canvas and stretch it until it fits perfectly from corner to corner.
  • In Photoshop: Open the template file directly, or create a new file and place the template as a layer.

Now you can see the boxes and lines. You might want to lower the “opacity” of the template layer. This makes it see-through, so you can draw over it but still see the lines.

Step 2: Placing Key Elements in the Center Safe Zone

This is the most critical step.

Look for the darkest or central box on the template. That is the safe zone (1546 x 423 px). Take your channel name, your logo, and your social media handles. Move them all inside this box. Make sure no letters are touching the edge of the box. Give them a little breathing room.

If you have a slogan or text about your new videos, put that here too. Imagine this box is the only part of the screen that matters. If it looks good here, it will look good on mobile devices. This is where your design experience helps—finding a way to make it look neat in a small space.

Step 3: Designing the Background For TV and Desktop Views

Now you have a big space around your safe zone. This space will show on TVs and computers. You cannot leave it blank white (unless that is your style). Fill this outer area with a nice background. You could use a pattern, a texture, or a photo that relates to your video content.

For example, if you do travel videos, you might have a wide shot of a beach filling the whole 2560 x 1440 screen. Remember, the middle part is covered by your text. But the top, bottom, and sides are visible on larger screens. Make sure the background looks nice but does not distract from the text in the middle. The colors should match your brand colors so everything looks like it belongs together.

Step 4: Exporting Your Final Design For High Resolution

When you are happy with your design, delete the template layer or hide it. You do not want the guide lines to show in your final banner image! Save your image. Choose the high quality option. If you are in Canva, download it as a PNG. Check the size.

Is it under 6MB? Is it 2560 x 1440? If yes, you are ready. Go to your google account or YouTube Studio.

Go to the customization tab and find the branding section. Click “Change” or “Upload” on the banner image spot. Select your new file. YouTube will show you a preview of how it looks on TV, desktop, and mobile. Since you used a template, it should look perfect!

Top Design Tips For A Professional YouTube Banner

Top Design Tips For A Professional YouTube Banner

Making a banner is not just about fitting in the box. It is about style too. Here are some tips to make your YouTube banners stand out.

Keep Your Value Proposition Clear

Your banner should tell people what you do instantly. You do not have much time to grab their attention. Use short words.

If you teach people how to paint, say “Learn to Paint.” If you review toys, say “Best Toy Reviews.” This is your value. Put this text in the safe area. Do not make people guess. Simple is strong.

Use High-Contrast Colors For Readability

Contrast means the difference between light and dark.

If your background is dark blue, do not use black text. No one will be able to read it. Use white or yellow text instead. High contrast makes your text pop out. It is easy to read on a small phone screen.

Think about your brand identity. If your logo is bright red, maybe use a white background. Good graphic design is about being clear.

Use larger images or fonts if you have space in the safe zone.

Match Your Banner Style to Your Thumbnails

Your YouTube thumbnail images and your banner should look like friends. They should use the same fonts and colors.

This helps people remember you. When they see a thumbnail, they will know it is yours because it matches your banner. This builds a strong channel brand. It makes your whole channel page look organized and professional. Consistency is key in social media marketing.

FAQ’s:

What Are the Exact Dimensions For the YouTube Banner Safe Area?

The exact safe area dimensions are 1546 pixels wide by 423 pixels tall. This is the “Text and Logo Safe” zone. Any design elements placed here will be visible on all screen sizes, including mobile phones.

Is There A Difference Between the Full Banner Size and the Safe Area?

Yes, there is a big difference. The full YouTube banner size is 2560 x 1440 pixels. This is the size of the file you upload. The safe area is just the small middle part of that image (1546 x 423 pixels) that shows on every device.

Why Does My YouTube Banner Look Blurry On Mobile Or TV?

Your banner might look blurry if the image size is too small. Always start with a canvas of 2560 x 1440 pixels. Also, save your file as a high-quality PNG or JPG. If you stretch a small picture to fit the banner dimensions, it will lose quality.

Can I Use A YouTube Banner Safe Area Template in Canva?

Yes, absolutely! Canva is a great tool for this. You can upload a banner template image into Canva, set it as your background guide, and place your elements over it. Just remember to remove the guide lines before you save your final channel art.

Does the YouTube Banner Safe Area Change For Tablets?

Tablets show a little bit more than phones but less than computers. The tablet display area is 1855 x 423 pixels. However, stick to the main safe zone of 1546 x 423 PX to be safe for everyone.

What is the Maximum File Size For A YouTube Banner Upload?

The maximum file size allowed by YouTube is 6MB. If your file is bigger, you will need to compress it or save it as a JPG with slightly lower quality.

How Do I Make Sure My Banner Displays Correctly On All Devices?

The best way is to use a YouTube banner size guidelines template. Keep all text and logos inside the center safe box. Also, always check the preview in YouTube Studio before you hit publish. It shows you how it looks on TV, desktop, and mobile.

Conclusion

Creating a great YouTube channel banner does not have to be scary.

With the right tools and a little bit of knowledge, you can make something amazing. The YouTube banner safe area template is your best friend in this process. It makes sure your channel name, logo, and schedule are always visible, no matter what device your viewers use.

At Designers Choice, we believe in helping you create the best content possible. We hope this guide helps you feel more confident in your design skills. Remember to check your YouTube banner dimensions, watch your file size, and keep your important info in the safe zone.

Take some time today to look at your channel. Does your banner need an update? Use these tips and templates to give your social media presence a fresh look. A professional banner shows the world that you are serious about your video content.

It is a small step that makes a big difference. Happy designing!

Categories
Design

Best Free Twitch Panels: Where to Find & How to Use?

Welcome to Designers Choice.

We know that building a twitch channel is hard work. You have to play games, talk to chat, and fix technical issues all at once.

But there is one thing that live streamers often forget. It is the section below the video player.

This area is the essential part of any Twitch profile page. When new people visit your stream, one of the first places viewers look is your profile description. If this area looks messy or empty, they might leave.

This is where free Twitch panels come in. These are the small images or text blocks that organize your page. They tell viewers who you are, what games you play, and where to find you on the internet.

At Designers Choice, we want to help you make your stream look amazing. We believe that good design should be for everyone. You do not need a lot of money to have a professional look. In this guide, we will show you the best free twitch panels and how to use them. We will look at twitch panel templates, tools like a twitch panel maker, and give you panel ideas.

Let’s get started on making your channel look great!

Why Every Streamer Needs Professional Panels?

Why Every Streamer Needs Professional Panels?

You might think that twitch panels are just small pictures. But they do a very big job. They act like signs in a store.

They tell people where to go and what to look at. A good panel design makes your whole channel feel complete.

Improving Channel Aesthetics

Imagine walking into a messy room. It feels chaotic. Now imagine walking into a clean, decorated room. It feels nice.

Your twitch channel page works the same way. If you just have a wall of text, it creates a disconnected look. It shows a lack of style.

Using different panels with a matching theme makes everything look neat.

It shows fresh eyes that you care about your content. It creates a better experience for everyone watching. Whether you want free cute twitch panels or something dark and cool, the design sets the mood.

It turns a boring page into a professional brand.

Organizing Information For Viewers

Streamers have a lot to say. You have chat rules, a schedule, and maybe a list of computer parts.

If you put all this in one big paragraph, no one will read it. Panels help you break this up. You can have a specific panel title for each topic.

For example, you can have a specific section for your hardware specs or a gear list page.

This makes it easy for viewers to find exactly what they want. You can use bullet points to list your computer parts. You can use bold text to make important rules stand out. Organizing your text is a good idea because it keeps your page tidy.

Driving Traffic to Social Media and Donations

Most streamers want to grow on other apps too. You might want people to see your twitter timeline or join your discord server.

Panels are the best way to do this. They act as image links. When a viewer clicks on the image, it takes them straight to your other pages.

This is also how you get tips. You can link your donation page to a panel.

A major advantage of image panels is that they are big and easy to click. If you just use a small text link, people might miss it.

Using a colorful panel helps guide people to your social media and support links. It is a dynamic way to connect your different streams of content.

Top Websites to Download High-Quality Free Twitch Panels

Top Websites to Download High-Quality Free Twitch Panels

You do not need to be an artist to get great designs. Many websites offer free resources. We have tested many sites to find the best ones for you. Here are the places where you can download free Twitch panels right now.

Nerd Or Die: Best For Animated Designs

Nerd or Die is a very famous name for streamers. They make some of the best twitch overlays and alerts.

They also have a great section for panels. While they sell packs, they also offer free ones. They are famous for animated designs.

However, keep in mind that Twitch panels are usually static images (using the JPG file format or PNG).

But Nerd or Die makes the art style match their animated video screens. This creates excellent integration between your video and your profile.

It is a great example of high-quality artwork that costs zero dollars.

WDFlat: Extensive Library of Free Assets

WDFlat is a huge website full of free things for streamers. They have hundreds of Twitch panel templates.

If you want a lot of options, this is the place to go. You can find almost any color or style here.

The best part is that you can download the files instantly. They offer a helpful channel section where you can sort by color.

Whether you want red, blue, or free cute Twitch panels, WDFlat likely has them. It is a fantastic resource for new panel designs.

Streamlabs: Integrated Themes and Panels

Streamlabs is a tool many streamers use to go live. They also have a theme store.

Many of these themes are free. When you install a theme, it often comes with matching panels. This is helpful because it ensures brand consistency. Your alerts, your camera border, and your panels will all match.

You do not have to worry about mixing different links or styles.

It does the hard work for you. It provides an excellent combination of images that look like you paid a professional designer.

Canva: How to Create Your Own For Free

If you want to make something unique, you should use a twitch panel maker free tool like Canva. Canva twitch panels are very popular because they are easy to make. You do not need hard software.

Canva has a search bar where you can type “twitch panel“.

It will show you many templates. You can change the colors, add your own text, and swap icons. This allows you to add your own brand integration.

You can make a text panel or an image panel easily. It is the most popular type of design tool for beginners.

Visuals by Impulse (Own3d): Premium Looks For Free

Visuals by Impulse (now part of Own3d) is known for very fancy designs. They have a section for free tools. Their panels look very expensive.

They use great fonts and sharp graphics. Using their assets gives your channel a premium feel. It avoids the “cheap” look that some free packs have. They often provide the source files too, so you can do some icon work if you know how to use editing software.

It is a great choice for live streamers who want to look like top pros.

How to Customize Your Free Twitch Panels?

How to Customize Your Free Twitch Panels?

Downloading a pack is just the first step. To make it truly yours, you might want to change a few things. Customizing helps you stand out.

Here is how you can edit panels to fit your style.

Choosing the Right Color Scheme

Your colors tell a story. If your logo is blue, your panels should probably use blue too. This is called brand consistency. When you pick a twitch panel maker, try to use the colors that you use on your video overlay.

If you have different panels with random colors, it looks messy. Stick to one or two main colors. This makes your page look unified.

It shows that you thought about the design. It makes the end of the line for your design process look very polished.

Editing Text and Icons Without Photoshop

You do not need expensive software. Many free Twitch panel templates come with blank versions.

You can use free online tools to add text to these blanks. You can use a tool like Canva or Photopea. Just upload the blank panel image.

Then, use the input text tool to type “About Me” or “Donate“. You can also add icons. For example, add a bird icon for Twitter.

This icon work is simple but effective. Make sure the text is big enough to read. Bold text is usually better than thin text for panels.

Ensuring Consistency Across Your Brand

Your brand is not just your panels. It is your whole channel. Make sure your Twitch panel dimensions and style match your offline screen and your profile picture. If your profile picture is a cartoon, use cartoon panels.

If your logo is modern and sleek, use sleek panels. A disconnected look happens when you mix styles that do not go together. Great brand integration means everything looks like it belongs to the same person.

Step-by-Step Guide: How to Add Panels to Your Twitch Profile?

How to Add Panels to Your Twitch Profile?

Now that you have your images, it is time to put them on your page. This might seem tricky at first, but it is actually quite simple.

Follow these steps to set up your Twitch channel page.

Navigating to the “Edit Panels” Section

First, go to your channel page on a computer. Look below your video screen. You will see a switch or button that says “Edit Panels“.

You need to click this to switch from viewing mode to editing mode. Once you click it, you will see a bunch of boxes with plus signs.

These are your empty slots. This is where you will do your work. It is the control center for your profile’s look.

Uploading Your Images and Adding Links

Click on a box with a plus sign. You will see a choice to add a text or image panel. Choose “Add a Text or Image Panel“.

  1. Add Image: Click the “Add Image” button. Select your JPG file format or PNG file from your computer.
  2. Crop: You might need to drag the box to select the whole image. Click “Done“.
  3. Image Links: There is a box that says “Image Links To“. Here, paste the web address (URL) you want the button to go to. For example, paste your Twitter timeline link here.
  4. Panel Title: You can add a title above the image, but a lot of the time, the text is already on the image, so you can leave this blank.
  5. Description: This is where you can write text below the image. You can use Markdown here.
    • Use **words** for bold text.
    • Use *words* for italic text.
    • Use a double return or double line break to make a space between paragraphs.
    • You can even use block quotes for emphasis.
    • You can create anchor links within your text if you know the code, but simple links work best.

Arranging Your Grid For Best Visibility

After you upload one, do the next one. You can drag and drop the boxes to move them around. Think about what is most important.

Usually, the “About Me” or “Subscribe” panel should be first. The donation page link should be easy to see. Put less important things, like a full gear list page, lower down. The layout is an important part of any stream setup. You want the viewer to see the best stuff immediately.

Also, be careful with the HTML page coding if you try to get fancy.

Twitch only allows simple Markdown. If you try fancy HTML styling, it will not work. Stick to the basic configuration options provided.

When you are done, click the “Edit Panels” switch again to turn it off. Now you can see your beautiful new profile!

Common Mistakes to Avoid When Setting Up Panels

Common Mistakes to Avoid When Setting Up Panels

Even with free resources, things can go wrong. Here are some mistakes we see often at Designers Choice.

  1. Wrong Size: The correct width is 320 pixels. If your image is too small, it will look blurry. Always check the twitch panel dimensions.
  2. Too Much Text: Do not write a book in your description. Use bullet points and line breaks. A huge wall of words is hard to read.
  3. Bad Links: Always click your panels to check the external links. It is embarrassing if a viewer clicks “Donate” and gets a broken page error.
  4. Inconsistent Style: Do not use different panels from different packs. It looks like a patchwork quilt. Stick to one theme.
  5. Ignoring Mobile: Remember, many people watch on phones. Great use of borders and big text helps mobile users see clearly.
  6. Empty Sections: If you have a panel for “discord server“, make sure the link actually works and the server is set up.

FAQ’s:

What is the Correct Size For Twitch Panels?

The standard twitch panel dimensions are 320 pixels wide. The height can vary, but 320 pixels wide is the rule. If you make it wider, Twitch will shrink it, and it might look weird.

Are Free Twitch Panels Copyright-Free?

Yes, usually. When you download free Twitch panels from sites like WDFlat or Nerd or Die, they give you a license to use them on your channel.

However, you cannot sell them to other people.

Can I Make My Own Free Twitch Panels Without Graphic Design Skills?

Absolutely. Using a Twitch panel maker like Canva is very easy. You just drag and drop items. You do not need to know how to draw. It is a good idea for beginners.

What Sites Offer the Best Customizable Free Twitch Panels For Beginners?

Canva is the best for customizing easily. WDFlat is great for downloading ready-made ones. Both offer important information on how to use their files.

How Do I Use A Twitch Panel Maker Free to Add My Own Branding?

Upload your logo to the maker. Use your specific brand colors. Add your own unique text. This ensures brand integration across your channel.

Can I Use Canva For Creating and Editing Free Twitch Panels Easily?

Yes. Canva has specific templates for this. Search for “Twitch Panel” inside Canva. It will give you the right size automatically. It is a very helpful channel section tool.

Do I Need Animated Panels, Or Are Static Ones Okay?

Twitch panels are technically static images (JPG or PNG). You generally cannot have moving panels like a GIF in the panel slot. So, static ones are not just okay, they are the standard. Animated designs usually refer to the overlays on your video, not the panels below.

How Do I Link My Donation Page to A Panel?

Go to “Edit Panels“. Click the panel image you want to use. Paste your donation URL into the “Image Links To” box. This turns the image into a button.

Conclusion

Setting up your Twitch channel is a journey. Your profile page is your home on the internet.

Using free Twitch panels is the smartest way to make that home look welcoming and professional. It shows you care about quality. Whether you use Canva Twitch panels to make your own or download a pack from Nerd or Die, the important thing is to take action. Do not leave your profile empty. Use image panels to guide your viewers. Share your important information clearly. Connect your social media accounts.

At Designers Choice, we hope this guide helps you build the stream of your dreams.

Remember to keep your designs clean, use bold text for key points, and check your links. A great use of borders and colors can make you stand out from the crowd. Now, it is time for the last example of advice: Go create something amazing!