
Cutting out images means removing parts of pictures you don’t want. This makes your designs look cleaner and more professional.
Maybe you want to remove the sky behind a building or cut out a person from a group photo.
Canva is a popular tool for making designs. It has several ways to cut out images. Some methods are free, while others need Canva Pro.
If you’re wondering how much is Canva Pro, it’s a subscription with several pricing tiers. There are even ways you might be able to learn how to get Canva Pro for free. Canva makes cutting out images easy, even if you’re not a tech expert. Many users ask, “Is Canva Pro worth it“? For those who frequently need advanced tools, the answer is often yes.
This article will show you all the ways to cut out images in Canva—from quick automatic tools to more detailed manual methods. You’ll learn about adding borders, creating cool effects, and fixing common problems.
Beyond just cutting images, you might also be interested in learning how to flip an image in Canva to get the perfect orientation.
In this guide, I’ll show you how to cut out images step by step. With these simple steps, your designs will look more professional and eye-catching.
By the end of this guide, you’ll be able to remove backgrounds and cut out any image like a pro!
How To Cut Out An Image In Canva?
Using Background Remover Tool in Canva
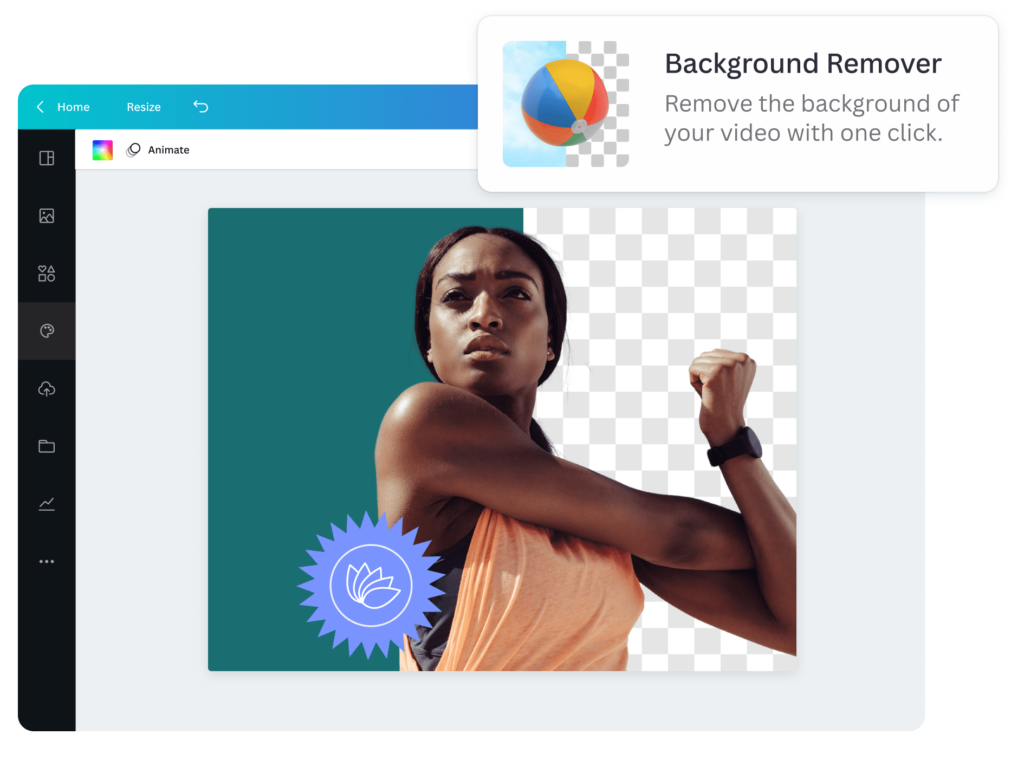
The background remover tool is the fastest way to cut out an image in Canva. It uses smart technology to find the main subject and remove everything else around it.
Here’s how to use it:
- Upload your image to Canva. If you need to switch out a picture later, you can learn how to replace an image in Canva.
- Click on your image to select it.
- Click on “Edit image” in the toolbar at the top.
- Select “BG Remover” (short for Background Remover).
- Wait a few seconds while Canva works its magic.
- The background will disappear, leaving only your subject.
- Click “Apply” to save your changes.
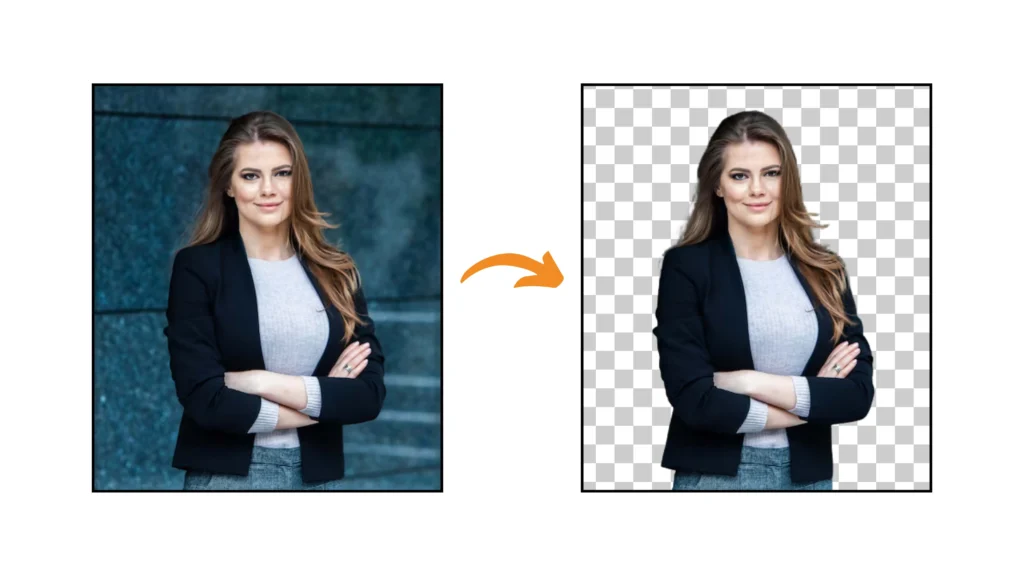
The background remover works best with images that have clear subjects and simple backgrounds. It’s great for cutting out people, products, or animals from pictures. This tool is part of Canva Pro, but you can try it once for free. When you’re done, you can download your cut-out image as a PNG file with a transparent background.
Using Magic Grab For Selective Cutouts
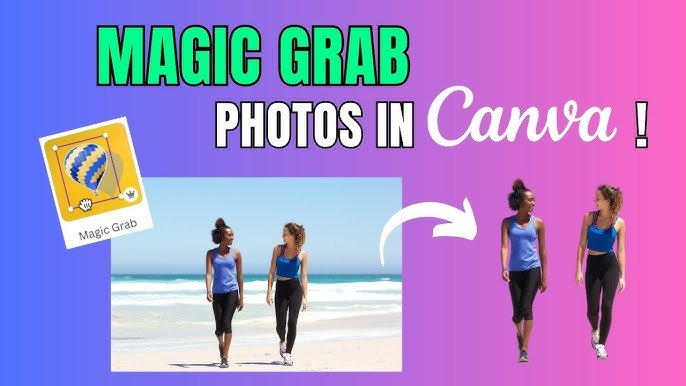
Sometimes you don’t want to remove the whole background. Maybe you just want one part of an image. That’s where Magic Grab helps.
Follow these steps to use Magic Grab:
- Select your image in Canva
- Click “Edit image” in the toolbar
- Choose “Magic Grab“
- Canva will look for objects in your picture
- Click on the part you want to cut out
- Use the “Brush” tool to add more areas if needed
- Click “Grab” when you’re happy with your selection
- The selected part will be cut out and ready to use
Magic Grab is really helpful when you have busy pictures with many things in them. For example, if you have a photo of a product display but only want one item, Magic Grab can help you get just that one product.
Like the background remover, Magic Grab is a Canva Pro feature. It saves you lots of time compared to manual cutting methods.
Free Methods For Cutting Out Images
Using Choppy Crop App
If you don’t have Canva Pro, don’t worry! There’s a free app called Choppy Crop that you can use right inside Canva.
Here’s how to find and use Choppy Crop:
- In Canva, click on “Apps” in the side menu
- Search for “Choppy Crop” and click on it
- Select the image you want to cut out
- Use the tool to click around the edges of what you want to keep
- Connect back to your starting point to complete the shape
- Click “Add to design” to place your cut-out in your project
Choppy Crop is different from the background remover because you have to manually trace around your subject. This takes more time but gives you control over exactly what gets cut out. It’s great for creating fun, scrapbook-style cutouts with interesting shapes. The app creates a cut-out with a choppy, hand-drawn look. This style works well for creative projects like collages, mood boards, and social media posts.
External Tools Compatible With Canva
There are also websites outside of Canva that can help you cut out images. These tools work well with Canva because you can download your cut-out image and then upload it to Canva.
One popular tool is remove.bg. Here’s how to use it:
- Go to remove.bg website
- Upload your image
- The tool automatically removes the background
- Download the cut-out image as a PNG file
- Upload it to your Canva project
Remove.bg lets you cut out one image for free, but you need to pay for more. Other similar tools include LunaPic and PhotoScissors, which also offer free options with some limits. When using external tools, make sure to download your images with transparency (as PNG files) and be mindful of whether you are using licensed images. It’s always good to be clear on whether Canva images are copyright-free. This way, when you put them in Canva, they won’t have a white box around them.
Manual Outlining Techniques
If you want more control over your cutouts and don’t mind spending extra time, you can try these manual methods. While you’re manually editing, you may find it useful to learn how to slice in Canva for more creative cuts.
Using Shape Masks:
- Upload your image to Canva
- Add a shape (like a circle or square) over your image
- Select both the image and shape
- Right-click and choose “Crop“
- Your image will be cropped to the shape
Using the Frame Tool:
- Add a frame from the Elements section
- Upload your image
- Drag your image into the frame
- Adjust your image inside the frame
These methods don’t completely remove backgrounds like the background remover does, but they give you creative ways to display parts of an image. They’re completely free to use with any Canva account.
Advanced Techniques and Effects

Once you cut out your image, you can make it more impressive with advanced techniques.
Adding Borders To Cut-Out Images
After cutting out an image, you might want to add a border around it. Borders make your cut-out stand out more and look finished.
Similarly, you can also learn how to outline text in Canva to make your headlines pop.
To add a border to your cut-out image:
- Select your cut-out image
- Click “Edit” in the toolbar
- Go to “Effects” then “Shadows“
- Select “Outline“
- Choose a color for your border
- Adjust the size of the border using the slider
You can make white borders for a clean look, or colorful borders that match your design. Thicker borders stand out more, while thin borders give a subtle touch.
Adding borders works especially well with photos of people, products, or any image you want to highlight in your design. The border helps separate your cut-out from the background, making it easier to see.
Creating Pop-Out Effects
A fun way to use cut-out images is to make them “pop out” of their frames or backgrounds.
This 3D effect makes your designs look more interesting. Learning how to add shadow in Canva is key to mastering this effect.
Here’s how to create a basic pop-out effect:
- Cut out your image using any of the methods above
- Add a shape or frame that will be your background
- Place your cut-out image so part of it extends beyond the frame
- Add a shadow under your cut-out to create depth
For a more advanced pop-out effect:
- Cut out your image
- Make a copy of it and place it behind the original
- Make the back copy slightly larger
- Change the color of the back copy to create a shadow effect
- Offset it slightly to create dimension
This technique works great for product photos, character illustrations, or any image where you want to create visual interest. The pop-out effect makes flat designs look more dynamic and eye-catching.
Implementing Cutouts In Various Design Projects
Cut-out images are useful in many types of projects.
Here are some ways to use them:
Social Media Posts:
- Cut out a product and place it on a colored background.
- Remove backgrounds from profile pictures for a cleaner look.
- Create collages with multiple cut-out images. You can also highlight text in Canva to draw attention to your message.
Presentations:
- Cut out team members’ photos for an “Our Team” slide.
- Remove backgrounds from product images to focus on features.
- Create clean, professional-looking slides without distracting backgrounds. You might also want to know how to put a timer in Canva for timed presentations or activities. If you’re sharing your presentation, learning how to add a clickable link in Canva PDF is incredibly useful.
Marketing Materials:
- Cut out products for catalogs and flyers. For more extensive product showcases, you can learn how to create a lookbook in Canva.
- Create clean product comparisons with transparent backgrounds. If you’re creating marketing assets, you might wonder, do Canva QR codes expire?
- Make professional-looking advertisements. If you plan to monetize your designs, it’s helpful to know how to sell Canva templates on Etsy. This also raises the question, “Can I sell Canva designs on Etsy“?
When placing cut-out images in your projects, think about where they will look best. You can overlap them with text boxes, place them on top of other images, or use them as part of a larger design.
Troubleshooting Common Issues
Fixing Imperfect Edges
Sometimes when you cut out an image, the edges don’t look perfect. This often happens with hair, fur, or objects with many small details.
To fix rough edges:
- After using the background remover, click on “Edit“
- Select “Erase” to remove unwanted parts
- Select “Restore” to bring back parts that were cut off
- Use a smaller brush size for more precise edits
- Zoom in to see the details better
If your cut-out still has problems, try taking a new photo with a simpler background. Photos with high contrast between the subject and background work best for cutting out.
Handling Complex Backgrounds
Complex backgrounds make cutting out images harder.
Examples include backgrounds with lots of colors or patterns or when the subject blends into the background.
Tips for handling tricky backgrounds:
- Use Magic Grab instead of the background remover for more control
- Try cutting out small sections at a time instead of the whole image
- If using Choppy Crop, make more points around complex areas
- For very complex images, consider using an external tool like remove.bg
Sometimes, taking a screenshot of part of your work and then cutting out that screenshot can help with very difficult areas.
Optimizing Image Quality
To make sure your cut-out images look good in your final design:
- Start with high-quality images – blurry images will make poor cut-outs
- Keep the aspect ratio of your original image when possible
- Don’t make cut-out images larger than their original size
- Save your final designs as PNG files to preserve transparency
- If your cut-out looks pixelated, try using a higher resolution image
Remember that the quality of your final cut-out depends a lot on the quality of your starting image. When possible, use clear, well-lit photos with good contrast between the subject and background.
Conclusion
Now you know how to cut out images like a pro! The background remover tool (available in Canva Pro) works fastest for simple photos, while Magic Grab lets you pick specific parts of an image.
If you’re using the free version, apps like Choppy Crop help with manual cutouts—just trace around your subject in the toolbar. Don’t forget to save your work as a PNG file to keep the transparency when you download it!
For tricky edges, use the erase tool or adjust the aspect ratio to avoid stretched images.
Adding borders or smart crop can make your designs pop, and placing cutouts over text boxes or colorful backgrounds adds flair.
If you’re stuck, try taking a screenshot of part of your image for easier editing.
Remember, practice makes perfect. Start with clear photos, experiment with the toolbar tools, and soon you’ll create pro-level designs.
Whether for school projects or social media, these tips will help you download polished, transparent images every time. Happy designing!
