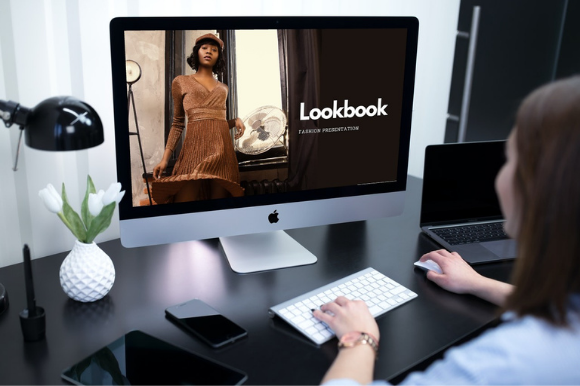
Making a lookbook has never been easier when you have the right tools at your fingertips.
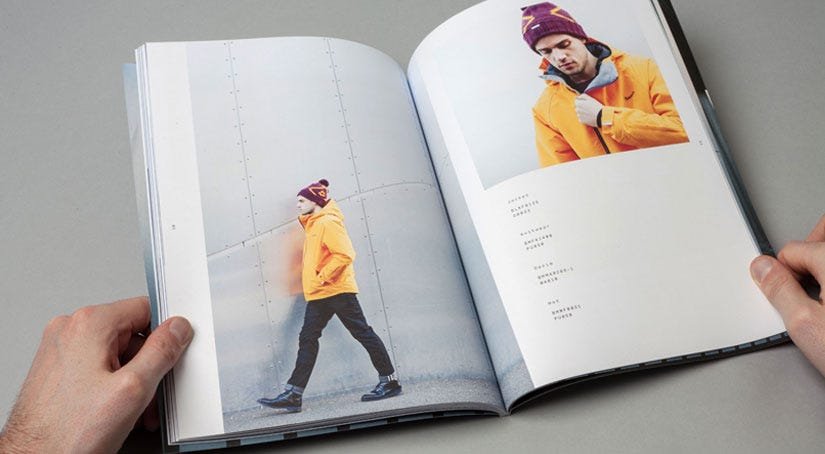
A lookbook is a special book with pictures that tells a story about your products or creative work. Think of it like a photo album, but one that helps people see your style and fall in love with what you create.
With Canva’s easy-to-use template options, you can make a beautiful lookbook that looks professional without needing years of design training. You can share your finished lookbook through email, save it as a PDF, or even post it on social media to reach more people.
Once you’ve created your designs, you might even consider learning how to sell Canva templates on Etsy to monetize your skills.
Your logo and brand colors will help make your lookbook special and unique to you.
Like a ray of sunshine breaking through clouds, a well-made lookbook can brighten someone’s day and inspire them to connect with your work.
The best part? All these amazing design tools are right at your fingertips, waiting to help you create something truly special.
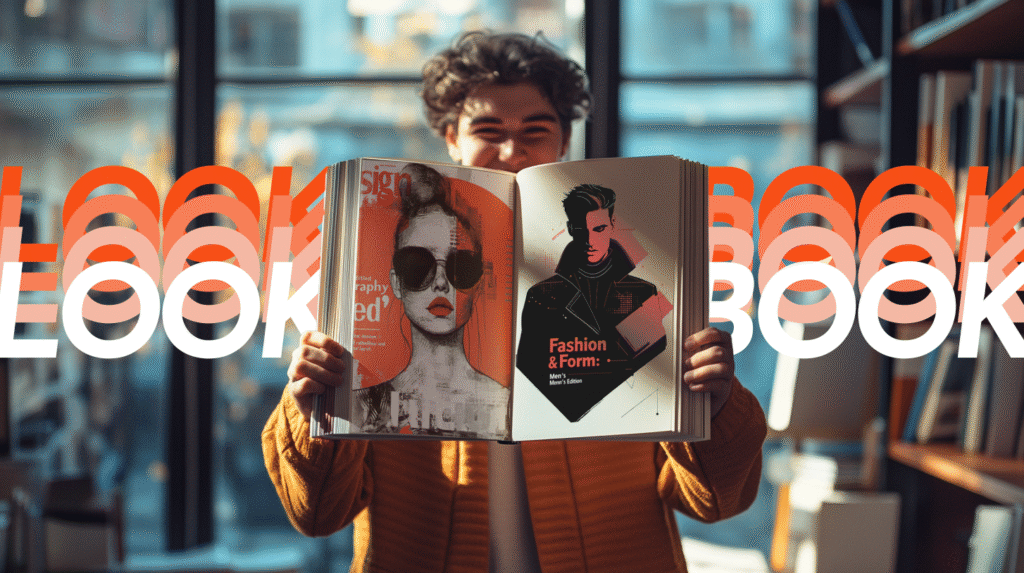
What Is A Lookbook?
Definition and Purpose
A Lookbook is a collection of photographs that showcases your products or style in a way that inspires and engages your audience.
Unlike regular catalogs, lookbooks tell a visual story and create an emotional connection with viewers.
They help people see how products work together and fit into their lives.
The main goal is to make your audience want what you’re showing them and feel excited about your brand.
Digital Vs Traditional Lookbooks
Traditional lookbooks were printed books that brands would send to buyers and customers.
Today, most lookbooks are digital, living on websites and social media.
Digital lookbooks have many advantages: they’re cheaper to make, easier to share through email, and can include interactive features like clickable links. You can also update them quickly when you have new products or ideas.
Benefits of Using Canva For Lookbooks
Canva is perfect for creating Lookbooks because it’s designed to be simple yet powerful. You don’t need to be a professional designer to create something that looks amazing.
The platform offers thousands of templates to get you started, a huge library of photos and graphics, and easy drag-and-drop tools.
For those wondering, “Is Canva Pro worth it,” the free version is often sufficient, but the Pro plan offers even more features.
Getting Started With Canva
Getting started with Canva is easy because it has a simple layout and many tools.
Setting Up Your Canva Account
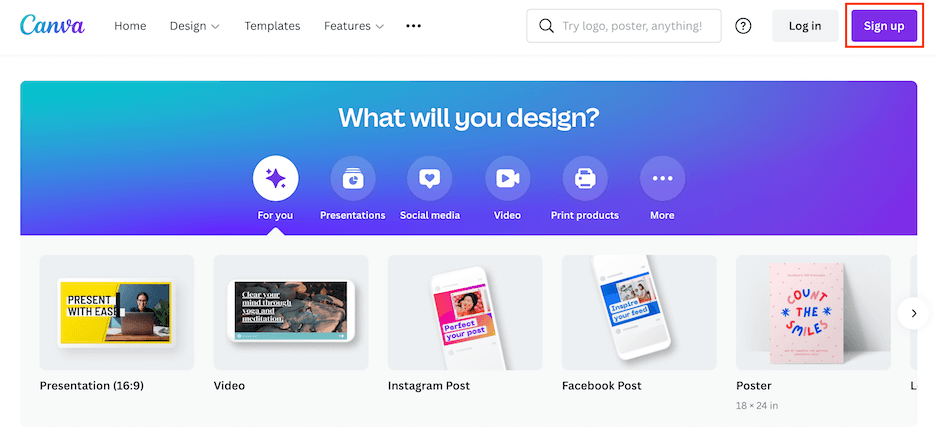
Creating your Canva account is quick and easy. Visit canva.com and sign up using your email, Google, or Facebook account. Choose the free plan to start – it has plenty of features for creating beautiful lookbooks.
If you’re curious about the premium version, you can research how much Canva Pro costs and even explore ways to get Canva Pro for free through special offers.
Choosing The Right Canvas Size
For lookbooks, the best sizes depend on how you’ll share them.
For digital lookbooks that people will view on computers, try 8.5 x 11 inches (US Letter size). If your lookbook will mainly be viewed on phones, consider 1080 x 1920 pixels for mobile-friendly viewing.
You also have the flexibility to change your orientation; learning how to landscape in Canva can be useful for different layouts.
Canva’s minimum size is 40 x 40 pixels, and maximum is 8000 x 3125 pixels, so you have lots of options.
Understanding Canva’s Interface
When you open Canva’s editor, you’ll see a clean workspace with tools on the left side.
The main workspace in the center is where you’ll create your design.
On the left, you’ll find templates, elements, photos, and text tools. Everything works with simple drag-and-drop actions – just click on what you want and move it around.
The top toolbar lets you save, share, and download your work.
Planning Your Lookbook Content

Defining Your Target Audience
Before you start designing, think about who will see your lookbook. Are they young professionals, families, or creative types? Knowing your audience helps you choose the right colors, fonts, and style.
Consider their age, interests, and what matters to them. This knowledge will guide every design choice you make.
Conceptualizing Your Vision
Your lookbook should tell a story. Think about the feeling you want to create – is it fun and playful, elegant and sophisticated, or bold and edgy? This vision will help you choose images, colors, and layouts that work together.
Write down a few words that describe your brand’s personality to keep you focused.
Planning Content Structure
Organize your lookbook into clear sections.
Start with a strong cover page, then think about how to group your products or ideas. You might organize by season, color, or product type. Plan for 10-20 pages for a good digital lookbook.
Remember to include a table of contents if your lookbook is longer than 10 pages.
Gathering Images and Assets
High-quality images are the heart of any great lookbook.
If you’re photographing products yourself, use good lighting and keep backgrounds simple.
If you need stock photos, Canva has millions to choose from, but it’s important to understand if are Canva images copyright free for your specific use case.
Also gather your logo, brand colors, and any text you want to include. Having everything ready before you start makes the design process much smoother.
Design Fundamentals For Lookbooks
Layout Principles
Good layout design starts with balance.
Don’t try to fit too much on one page – white space is your friend. Use a grid system to keep things organized and aligned.
Make sure your most important information stands out by making it bigger or using contrasting colors.
Remember that people’s eyes naturally follow a Z-pattern when reading, so place key elements along this path.
Color Palette Selection
Choose 2-3 main colors and stick to them throughout your lookbook.
Your brand colors should be the foundation, with one or two supporting colors for accents.
Canva’s color wheel tool can help you find colors that work well together.
Consistent colors make your lookbook look professional and help strengthen your brand identity.
Typography Choices
Use no more than two different fonts in your lookbook.
Choose one for headlines and another for body text. A common question is, “can you upload fonts to Canva,” and the answer is yes, with a Pro account, which allows for greater brand consistency.
Make sure they’re easy to read on both computer and phone screens. Keep your text simple and clear – the photos should do most of the talking.
White Space and Visual Hierarchy
White space (empty areas around your content) is just as important as your images and text.
It gives the eye a place to rest and makes your content easier to understand. Use different sizes and colors to show what’s most important.
Your main headline should be the biggest thing on the page, followed by images, then smaller text.
How to Create A Lookbook in Canva?
To create a lookbook in Canva, follow these:
Starting With Templates Vs Custom Design
Canva has nice lookbook templates that save you time. You can search for “lookbook” in the template library. This will show you many options. These templates provide a good starting point. You can change them with your own images and words.
If you want to design from the start, pick “Custom Size.” Then, you can make your own layout. Templates are perfect for beginners. Custom designs let you have full control over your work.
Adding and Organizing Images
Upload your pictures using the “Uploads” tab on the left side of Canva.
After you upload them, drag and drop them onto your canvas. You can make images smaller or bigger by pulling the corner handles.
If you need to make a quick change, you can learn how to replace an image in Canva with just a few clicks. Try to keep your pictures similar in style and quality. This will help your lookbook seem more professional.
Using Grids and Frames
Canva has tools called grids and frames. These tools help you place many images on one page.
You can find them in the “Elements” section. Grids help you make tidy layouts with several photos. Frames add nice borders around your images.
These tools work great for showing different views of the same item. They are also good for making photo collages.
Including Text Elements
To add text, click the “Text” tab. You can choose from headings, subheadings, or body text.
The toolbar at the top allows you to change the font, size, and color.
For more advanced text styling, you can explore how to highlight text in Canva or how to indent in Canva to structure your descriptions.
Keep your text short and simple. Lookbooks are visual tools, so let your images share most of the story.
Essential Lookbook Elements
- Cover Design: Your cover page is the first thing people see, so make it count. Include your brand name, logo, and a striking image that represents your collection. Keep it clean and simple – too many elements can be overwhelming. The cover should give viewers a taste of what’s inside and make them want to see more.
- Table of Contents (If Applicable): For longer lookbooks, a table of contents helps readers find what they’re looking for. List your main sections with page numbers. Keep the design simple and match the style of the rest of your lookbook. This is especially helpful for lookbooks with multiple product categories or seasonal collections.
- Product Information and Style Numbers: Include basic product information without cluttering your pages. You might add style numbers, fabric details, or size information. Keep this text small and place it where it won’t distract from your images. Consider using a consistent format for all product information to maintain a professional look.
- Brand Identity Integration: Your lookbook should feel like it belongs to your brand. Use your brand colors, fonts, and logo consistently throughout. Include your website, social media handles, and contact information. This helps people remember your brand and makes it easy for them to find you later. Every page should feel connected to your overall brand story.
Advanced Canva Features For Lookbooks
Using Canva’s Elements Library
Canva’s Elements library has over a million graphics, icons, and design elements.
Search for specific items like “fashion,” “minimalist,” or “vintage” to find elements that match your style. You can change colors, resize elements, and layer them with your photos to add personality to your lookbook. For unique visual effects, you might want to learn how to add shadow in Canva.
Photo Editing and Enhancement
Canva’s photo editor helps you enhance your images easily.
You can change brightness, contrast, and saturation. You can also explore creative edits like learning how to flip an image in Canva for a mirrored effect or how to fade an image on Canva for a softer look.
The background remover tool is great for isolating products, and you can even get specific with techniques like understanding how to cut out an image in Canva or how to slice in Canva.
Creating Consistent Branding
You can use Canva’s Brand Kit feature. This helps you save your colors, fonts, and logo. It makes it easy to access them later.
This way, all pages of your lookbook will be the same. They will look professional too. You can also create brand templates for future projects. Reusing these templates helps keep things consistent.
Having a steady brand makes your lookbook look better. It also helps people recognize your brand more easily.
Adding Interactive Elements
For digital lookbooks, think about adding clickable parts.
You can master how to add a clickable link in Canva PDF to direct users to your site or social media pages. For some projects, you might even find a use for dynamic elements and wonder how to put a timer in Canva.
Lookbook Structure and Organization
Opening Pages and Introduction
Start your lookbook with pages that introduce your brand and collection. This might include a welcome message, your brand story, or an overview of what’s featured inside. Keep the text engaging but brief – most people want to get to the visual content quickly.
These opening pages set the tone for everything that follows.
Product Showcase Sections
Organize your items so they are easy for your audience to understand. You can group them by color or season. You can also sort by type of product or price. Make sure each section has a clear title. Think about using pages to divide different groups.
This way, it helps viewers find what they like best. It also makes your lookbook simple to use.
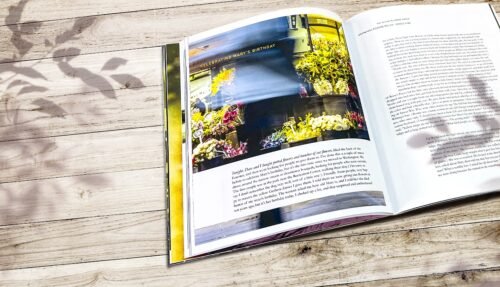
Styling and Lifestyle Content
Show your products in real life. Don’t just use single shots of items.
Instead, include pictures of people using or wearing your things. This helps customers see themselves with your products. It also builds a bond between them and the items. Lifestyle photos often do better than simple product images. They tell a story that connects with people.
Closing Pages and Contact Information
End your lookbook with clear steps for interested customers. Include your website, phone number, and email.
Don’t forget to add links to your social media accounts. You might also include a “thank you” note. A preview of future collections can be nice too. Make it easy for people to contact you or order while they are excited about what they have seen.
Best Practices and Design Tips
- Image Quality and Resolution: Always use high-quality images in your lookbook. Blurry or pixelated photos make your brand look unprofessional and can turn away potential customers. If you’re taking your photos, use good lighting and a steady camera. For print lookbooks, make sure your images are at least 300 DPI for crisp, clear results.
- Maintaining Visual Consistency: Keep your design elements consistent throughout your lookbook. This means using the same fonts, colors, and layout styles on every page. Consistency makes your lookbook look more professional and helps strengthen your brand identity. Create a style guide for yourself with your chosen fonts, colors, and spacing to refer back to as you work.
- Mobile-Friendly Design Considerations: Many people will view your lookbook on their phones, so make sure it looks good on small screens. Use larger fonts that are easy to read on mobile devices. Keep your layouts simple and avoid tiny details that might be hard to see on a phone. Test your lookbook on different devices to make sure it works well everywhere.
- Brand Storytelling Through Visuals: Let your images tell your brand’s story. Each photo should contribute to the overall feeling you want to create. Think about the emotions you want your audience to feel and choose images that evoke those feelings. Your lookbook should feel like a journey through your brand’s world, not just a random collection of photos.
Finalizing and Publishing Your Lookbook
- Reviewing and Testing Your Design: Before you share your lookbook, review every page carefully. A common question is, “Does Canva have spell check?” and while it does, it’s always good to double-check for errors yourself. Ask friends or colleagues to look at it and give feedback. Fresh eyes often catch things you might have missed. Make sure all your contact information is correct and up to date.
- Export Options and File Formats: Canva offers several export options for your lookbook. For digital sharing, PDF is usually the best choice because it maintains quality and works on all devices. For social media, you might export individual pages as PNG or JPG files. If you plan to print your lookbook, choose PDF Print for the best quality. Remember that larger files might take longer to download or load.
- Sharing and Distribution Methods: Once your lookbook is ready, think about how you’ll share it. You can email it as a PDF attachment, upload it to your website, or share it on social media. Consider creating a short link that’s easy to remember and share. You might also print copies for events or in-person meetings with customers.
- Getting Feedback and Making Revisions: Share your lookbook with a small group first to get feedback before wider distribution. Ask specific questions like “Is the text easy to read?” or “Do the colors work well together?” Use this feedback to make improvements. Remember that you can always update a digital lookbook, so don’t worry about making it perfect the first time.
Common Mistakes to Avoid
- Overcrowding Pages With Content: One of the biggest mistakes in lookbook design is trying to fit too much on each page. This makes your lookbook look cluttered and hard to read. Instead, give your images and text room to breathe. It’s better to use more pages with less content than to cram everything together. White space is your friend – use it generously.
- Inconsistent Design Elements: Switching between different fonts, colors, or layout styles makes your lookbook look unprofessional. Pick your design elements at the beginning and stick with them throughout the entire lookbook. This consistency helps create a cohesive brand experience and makes your lookbook more pleasant to look at.
- Poor Image Quality Or Resolution: Low-quality images are the fastest way to make your lookbook look amateur. Always use the highest quality images you can find or create. If an image looks blurry or pixelated on your computer screen, it will look even worse when printed or viewed on high-resolution displays. Invest time in getting good photos – they’re the foundation of your lookbook.
- Neglecting Mobile Optimization: With so many people viewing content on their phones, ignoring mobile optimization is a serious mistake. Make sure your text is large enough to read on small screens, your buttons are easy to tap, and your layout works well on vertical displays. Test your lookbook on different devices to ensure a good experience for all users.
Inspiration and Examples
Looking at different examples of lookbooks can help you get new ideas and be more creative.
Fashion Lookbook Examples
Fashion lookbooks often have clean and simple designs. This helps the clothing stand out. They usually use a lot of white space. They also use simple fonts and good-quality photos. Check out brands like Cherry Lookbook for ideas. They show elegant color choices and smart layouts. You can see how good fashion lookbooks mix product photos with lifestyle images. This mix helps to tell a full story.
Creative Layout Ideas
Try different ways to make your lookbook fun. You can use sunlight effects to shine on some products. You might also make photo collages that show several views of the same item. Grid layouts are good for showing collections of items.
Single-product pages can add drama and focus to your lookbook. Don’t be scared to play around with different page layouts in your lookbook.
Seasonal and Themed Lookbooks
You can make lookbooks based on themes or seasons.
For spring, use light and soft designs. These layouts should be airy with gentle colors. In winter, choose darker and cozier styles. Themed lookbooks help shoppers see how your items fit into their daily lives. This way, they can feel excited about new collections.
FAQ’s:
Can I Create A Professional Lookbook In Canva For Free?
Yes! Canva’s free plan includes everything you need to create a beautiful Lookbook. You get access to thousands of templates, basic photos and graphics, and all the essential design tools. While the Pro plan offers additional features like premium images and advanced editing tools, the free version is perfectly capable of producing professional-quality results.
What Are The Best Image Sizes For A Canva Lookbook?
For digital lookbooks, 8.5 x 11 inches works well for computer viewing, while 1080 x 1920 pixels is better for mobile. For individual images within your lookbook, aim for at least 1080 pixels wide to ensure crisp quality.
Remember that Canva supports sizes from 40 x 40 pixels up to 8000 x 3125 pixels, so you have plenty of flexibility.
How Do I Make My Lookbook Interactive Or Shoppable In Canva?
While Canva doesn’t have built-in shopping features, you can add clickable links to your PDF lookbooks.
Include your website URL, social media links, or specific product pages in your text. When people view your PDF lookbook, they can click these links to visit your online store. You can also use QR codes that link to your website or email address for easy access.
Can I Print My Canva Lookbook As A Physical Booklet?
Absolutely! Canva offers print services, or you can download your lookbook as a PDF and have it printed locally.
For best print quality, choose “PDF Print” when downloading and make sure all your images are high resolution. Consider the paper quality and binding options when printing – a nice paper choice can make your lookbook feel more premium and professional.
Conclusion
Creating a lookbook in Canva puts the power of professional design right at your fingertips.
From planning your content and choosing the perfect template to adding those final touches that make your brand shine, every step brings you closer to a lookbook that truly represents your vision.
Remember that the best lookbooks tell a story, connect with their audience, and make people excited about what you’re offering.
With Canva’s user-friendly tools and the techniques covered in this guide, you have everything you need to create a lookbook that not only looks amazing but also drives real results for your brand.
Whether you’re sharing it through email, posting on social media, or printing physical copies, your Canva-created lookbook will help you connect with customers and grow your business in ways you never thought possible.
