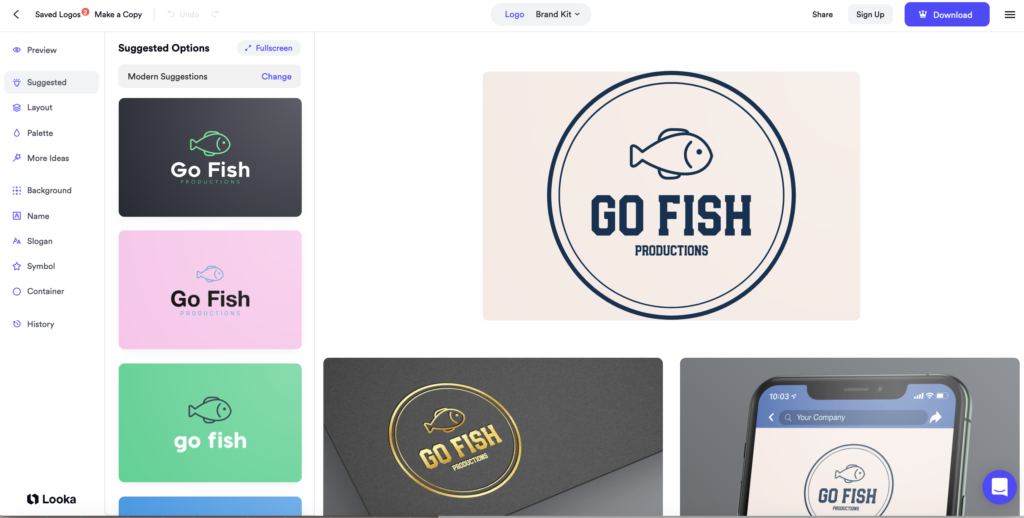
Quick Answer: To use Looka, enter your business name and industry, select your style preferences, choose colors, then review and customise the AI generated logo options. You can preview logos completely free before paying anything. Customise colors, fonts, and layout after selection. Download starts at $20 for basic logo files. The entire process takes about 10 to 15 minutes.
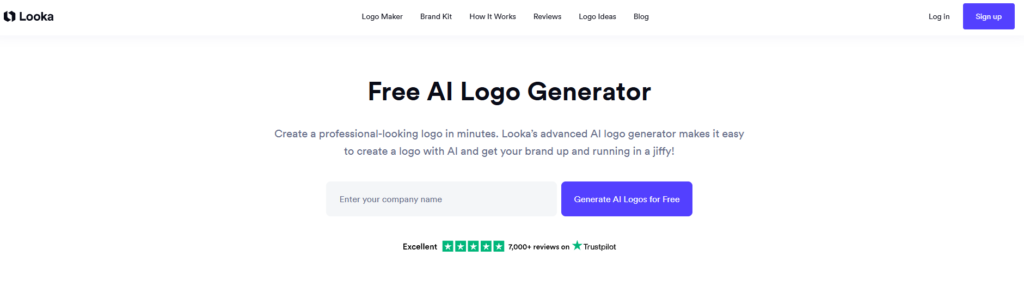
Getting a professional logo used to mean hiring a designer, waiting a week, and spending several hundred dollars. Looka changes that entirely. In about 15 minutes, you can go from a blank page to a polished, professional logo and you do not pay a single dollar until you are completely happy with what you see.
Learning how to use Looka is genuinely straightforward. The AI asks you a few questions about your business and style preferences, then generates dozens of logo options tailored to your answers. You preview everything for free, customise your favorite, and only purchase when you are ready to download.
This guide walks you through every step from start to finish with clear instructions. Before you begin, check out our full Looka review for an honest look at the pros, cons, and pricing. And if you want to compare Looka with other AI logo tools, our roundup of the best AI tools for logo design is worth a read.
Before You Start — What You Need
Looka’s process is fast, but having a few things ready before you begin makes the results better:
Your business name — exactly as you want it to appear in the logo
Your industry — Looka uses this to generate relevant icon styles and design directions
Color preferences — even a rough idea like “dark and professional” or “bright and playful” helps
10 to 15 minutes — that is genuinely all the time you need for the full process
You do not need a Looka account to start. The AI logo generation process begins immediately when you visit the site.
How to Create a Logo with Looka (Step by Step)
Step 1 — Enter Your Business Name
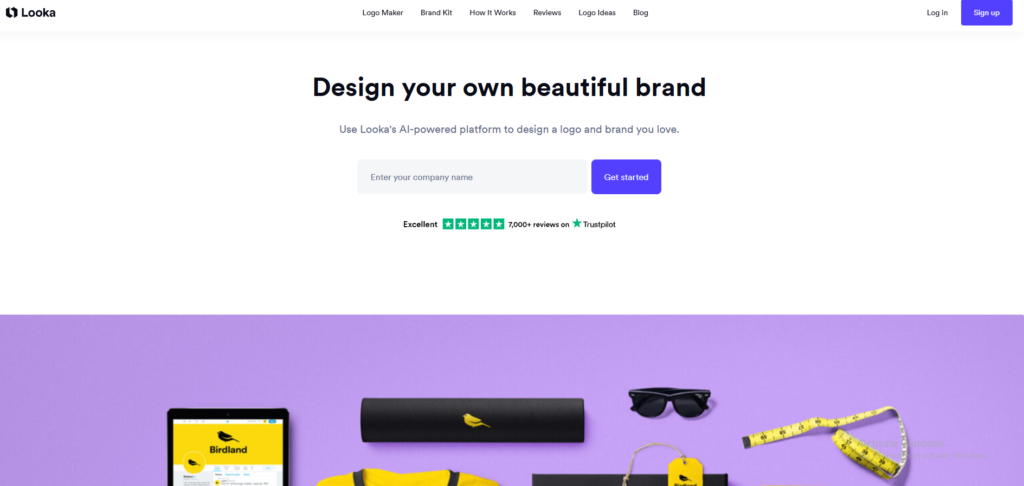
Go to looka.com and click Make your logo or Get started on the homepage. The first screen asks for your business name. Type it exactly as you want it to appear capitalisation, spacing, and punctuation all carry through to your logo options.
Click Next when you are ready.
Step 2 — Select Your Industry
The next screen asks for your industry. Type your business category in the search bar options include everything from Restaurant and Retail to Technology, Health, and Real Estate. Choose the most relevant category from the dropdown.
This step matters more than it might seem. Looka uses your industry to select icon styles, fonts, and design directions that feel appropriate for your field. A tech startup and a bakery need very different visual languages, and the AI adjusts accordingly.
Click Next to continue.
Step 3 — Choose Your Style Preferences
This is one of the most important steps. Looka shows you pairs of logo examples and asks which style you prefer similar to a design personality quiz. Click the logos that feel closest to what you want for your brand.
You are not choosing your final logo here you are teaching the AI your aesthetic preferences. Click as many or as few as feel right. The more accurately you respond, the more relevant your generated options will be.
Step 4 — Pick Your Color Palette
The next screen shows a selection of color palettes ranging from bold and vibrant to minimal and neutral to dark and professional. Click the palette that best matches the feeling you want your brand to have.
If you have existing brand colors, look for the palette closest to them. You can fine-tune the exact shades later in the editor, so do not worry about getting it perfect at this stage.
Step 5 — Review AI Generated Logo Options
After completing the preferences, Looka generates dozens of logo options based on everything you told it. This is the moment where most people are genuinely surprised the variety and quality of options is much higher than you would expect from a free preview.
Scroll through the full grid of options. Each logo shows your business name, an icon, and the color palette applied. Click any logo to see a larger preview and explore variations.
Step 6 — Customise Your Chosen Logo
When you find a logo direction you like, click Customize to open the Looka editor. Here you can adjust:
Icon — swap to a different icon from Looka’s library or try variations of the same concept
Font — choose from dozens of font options for both your business name and tagline
Colors — use the color picker to dial in your exact brand colors using hex codes
Layout — switch between stacked, horizontal, and icon-only arrangements
Tagline — add or remove a tagline beneath your business name
Take your time here. This is where a good logo becomes a great one. Try a few font combinations and color tweaks before deciding you are finished.
Step 7 — Choose a Plan and Download
When you are happy with your logo, click Continue to see the pricing options. Looka offers three tiers:
Basic Logo Package — PNG and JPG files, starts around $20
Premium Logo Package — adds SVG vector files, more formats, and higher resolution
Brand Kit Subscription — includes business cards, social media templates, email signatures, and all brand assets on a monthly plan
For most small businesses just starting out, the Basic package covers everything you need. If you plan to print your logo on merchandise, signage, or large format materials, the Premium package’s vector files are worth the extra cost.
Complete payment and your files download immediately.
How to Use the Looka Brand Kit Editor
If you purchase a Brand Kit subscription, you get access to a full suite of branded assets beyond just the logo file. Here is how to use it.
Step 1 — Access Brand Kit Dashboard
After purchasing, log in to your Looka account and go to the Brand Kit section. Your dashboard shows all available asset categories business cards, social media profiles, email signatures, letterheads, and more.
Step 2 — Generate Business Cards and Social Templates
Click any asset category to generate branded versions automatically. Looka applies your logo, colors, and fonts to each template. Business cards, Instagram profile images, Facebook banners, and email signatures are all generated in minutes without any additional design work.
Step 3 — Edit Brand Colors Across All Assets
If you want to update your brand colors after purchase, change them once in the Brand Kit settings and Looka updates every asset automatically. This is one of the most useful features for businesses that are still finalising their visual identity.
Tips for Better Looka Logo Results
Try multiple industry options if you are unsure. If your business sits between two categories say, a health-focused tech startup try both and see which generates more relevant icon styles. You can run through the process multiple times for free.
Preview many style combinations before deciding. The style preference step has a big impact on your results. If your first batch of logos does not feel right, go back and adjust your style selections before regenerating.
Save several favorites to compare side by side. Looka lets you save logo options to a favorites list. Save five or six you like before committing to one. Comparing them side by side often makes the best choice obvious.
Customise fonts after the AI generates initial concepts. The AI-chosen font is a good starting point but not always the perfect one. Spend a few minutes browsing the font options in the editor the right font pairing can make a significant difference to how professional the final logo looks.
Common Looka Problems and Solutions
Problem
Solution
All logos look too similar
Go back and try a different industry category or adjust your style preferences small changes produce very different results
Cannot find your preferred font
Use the manual font browser in the editor and search by font name or style category
Logo looks too complex for small sizes
Choose a simpler icon style in the editor abstract or lettermark icons work better at small sizes than detailed illustrations
Want a different color than what was generated
Use the color picker in the editor and enter your exact hex code for precise brand color matching
Final Thoughts
Looka is one of the most efficient tools available for getting a professional logo without hiring a designer. The AI does the heavy lifting, the preview is completely free, and the editing tools give you enough control to make the result genuinely yours.
The key to getting the best results is taking the style preference step seriously. The more accurately you respond to those logo comparisons, the more relevant your generated options will be. Do not rush through it.
When you are ready to explore the wider world of AI logo tools and see how Looka stacks up against alternatives, our guide to the best AI tools for logo design covers every major option in detail. And for a full honest breakdown of Looka’s features, pricing, and limitations, read our full Looka review. If you are also building a broader visual identity, our roundup of the best AI design tools shows what tools work best alongside Looka.
Frequently Asked Questions
Q: How long does it take to make a logo with Looka? Creating a logo with Looka takes about 10 to 15 minutes from start to finish. Entering your business details and style preferences takes a few minutes, and reviewing the AI generated options and customising your favorite takes the remaining time. The entire process is designed to be fast and beginner friendly.
Q: Can I preview my logo before paying? Yes. Looka lets you preview and customise your AI generated logo completely for free. You only need to pay when you are ready to download the final logo files. This means you can explore as many options as you want and spend as long as you like customising before deciding if Looka is right for your business.
Q: What information do I need before starting Looka? You need your business name and a general idea of your industry. Having some color preferences helps but is not required since Looka will suggest palettes based on your style preferences. The more specific information you provide during the setup steps, the more relevant your generated logo options will be.
Q: Can I change the colors after Looka generates my logo? Yes. After Looka generates your logo options, you can customise the colors using the built in editor. Select your chosen logo, click Customise, and use the color picker to adjust the palette to match your exact brand colors using hex codes before finalising your purchase.
Q: What if I do not like any of the Looka logo options? Go back and adjust your industry selection, style preferences, or color choices to generate a new set of options. Looka allows unlimited regeneration during the free preview stage so you can keep adjusting until you find a direction you are happy with. Changing even one style preference can produce a completely different set of results.
Q: How do I download my finished Looka logo? Select your final design, choose a pricing plan that matches your needs Basic, Premium, or Brand Kit complete the payment, and Looka provides your logo files for immediate download. Higher tier plans include vector SVG files alongside standard PNG and JPG images, which are essential if you plan to use your logo on printed materials or large format displays.
Quick Answer: To use Microsoft Designer, visit designer.microsoft.com, sign in with a free Microsoft account, then type a description to generate AI designs and images instantly. No download needed it works entirely in your browser. DALL-E powers the AI image generation. Templates can be customised after AI generates them. Completely free with no credit card required.
Here is something most people do not realise Microsoft has a genuinely powerful AI design tool, and it is completely free. No subscription. No credit card. No watermarks. If you have a Microsoft account (the same one you use for Outlook or Xbox), you already have everything you need to start using it today.
Learning how to use Microsoft Designer takes about 15 minutes. The tool runs entirely in your browser, is powered by DALL-E for AI image generation, and lets you create social media posts, posters, invitations, and more without any design experience. This guide walks you through every feature step by step with clear instructions.
Open any browser and go to designer.microsoft.com. You do not need to download anything. The tool runs entirely in your browser on any device Windows, Mac, Chromebook, or tablet.
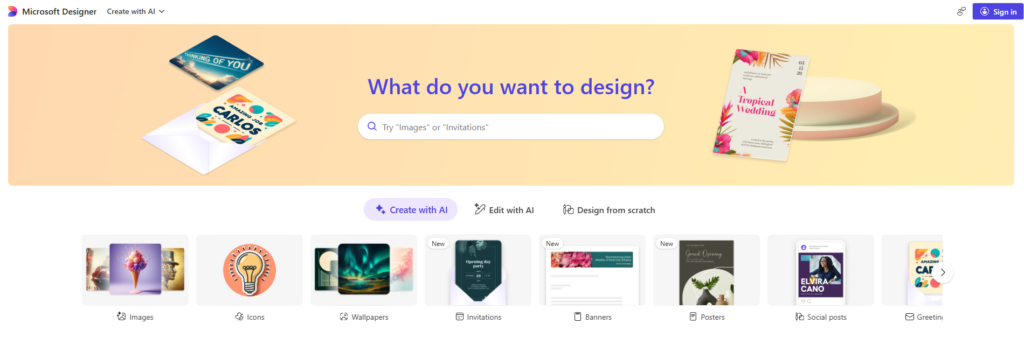
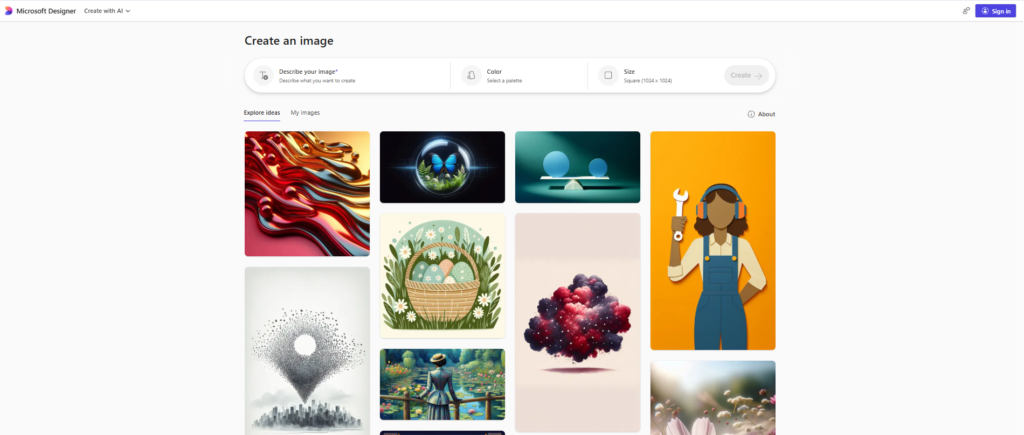
The homepage shows a prompt bar at the top and a grid of design examples below it. This is your starting point for everything.
Step 2 — Sign In With Your Free Microsoft Account
Click Sign in in the top right corner. Use your existing Microsoft account the same email you use for Outlook, Teams, or any other Microsoft product. If you do not have one, click Create one and set up a free account in about two minutes. No credit card is ever required.
Once signed in, your account saves your designs automatically so you can come back and edit them anytime.
Step 3 — Explore the Dashboard
After signing in, the dashboard shows:
A prompt bar at the top this is where you describe what you want to create
A row of design type buttons Social post, Invitation, Flyer, Presentation, and more
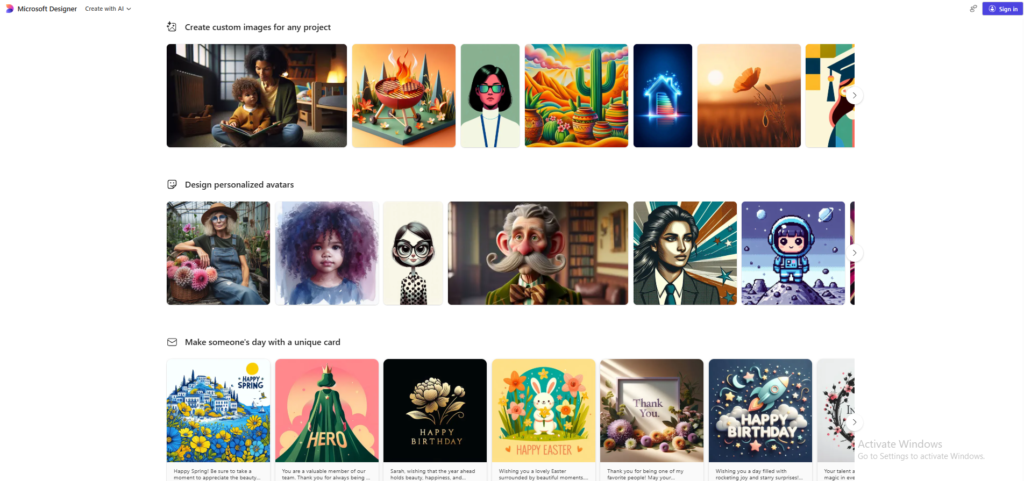
A template gallery below pre-made designs you can customise immediately
Spend a minute clicking around before starting. The interface is intentionally simple Microsoft built this for people who have never used a design tool before.
How to Create Your First AI Design
This is the core workflow in Microsoft Designer describe what you want, and the AI builds it for you.
Step 1 — Type a Description of What You Want
Click the prompt bar at the top of the dashboard and type a description of your design. Be specific about the type, purpose, and style. For example: “A birthday party invitation with colorful balloons, confetti, and a fun modern font” or “A professional LinkedIn banner for a marketing consultant with a dark blue background.”
The more detail you include colors, mood, style, purpose the better the AI results will be. Vague prompts like “make a flyer” will give you generic output.
Step 2 — Review AI Generated Options
After typing your description and pressing Enter, Microsoft Designer generates several complete design options within a few seconds. These are full layouts with colors, fonts, images, and text already placed not just templates.
Scroll through the options. You will usually see four to six variations that interpret your prompt in different ways.
Step 3 — Select and Customise Your Favorite
Click any design you like to open it in the editor. From here you can change every element text, colors, fonts, background, and images. The design is fully editable and you are never locked into what the AI generated.
How to Generate AI Images with DALL-E
Microsoft Designer uses DALL-E the same image generation model behind ChatGPT’s image features to create original images from text descriptions. This is completely free and produces genuinely impressive results.
Step 1 — Open the Image Creator Tool
From the dashboard, click Image Creator in the left sidebar or look for the image generation option within the editor. A dedicated prompt bar and style options appear.
Step 2 — Write Your Image Prompt
Type a detailed description of the image you want. Include the subject, setting, lighting, style, and mood. For example: “A flat lay photo of a coffee cup, notebook, and succulent plant on a white marble surface, soft natural light, lifestyle photography style.”
The more visual detail you include, the more useful the result. Think about what a photographer would need to know to recreate your image.
Step 3 — Choose Your Preferred Style
Below the prompt bar, Designer offers style options including Photorealistic, Digital Art, Watercolor, Sketch, and more. Select the style that fits your project before generating. This single setting changes the output dramatically.
Step 4 — Download Your Generated Image
DALL-E generates four image options. Click your favorite to select it. Use it directly inside your current design by clicking Insert, or hover and click Download to save it to your device as a PNG file. No watermarks. No credits to worry about.
How to Customise AI Generated Designs
Once you have a design whether AI generated or from a template the editor gives you full control over every element.
Step 1 — Edit Text and Fonts
Click any text block in your design to select it. A text editing toolbar appears at the top of the screen. Change the words, adjust the font family, increase or decrease the size, and change the color using the options in the toolbar. Designer includes a solid library of fonts covering modern, classic, and decorative styles.
Step 2 — Change Colors and Layout
Click the background or any colored element to select it. A color picker appears in the right panel. You can choose from the suggested palette, enter a hex code for an exact brand color, or use the color wheel for custom shades. To move elements around, click and drag them to a new position on the canvas.
Step 3 — Add Your Own Images or Logo
Click the Media option in the left sidebar to upload your own photos or logo. Drag the uploaded image onto the canvas and resize it by dragging the corner handles. Use the Remove background button that appears in the toolbar to cut out the background of any uploaded photo instantly.
How to Use Microsoft Designer Templates
If you would rather start from a template than generate from scratch, Designer has a solid library of ready-made designs organised by category.
Step 1 — Browse the Template Library
From the dashboard, click any design category Social post, Flyer, Invitation, Card, and so on. A grid of templates appears. Scroll through and click any one to preview it full size.
Step 2 — Apply AI Suggestions to a Template
Once a template is open in the editor, look for the Inspire me or AI suggestion button. Designer can automatically restyle the template based on a short description changing the color palette, font pairing, or layout to match a mood you describe. This is a faster way to personalise a template without manually changing every element.
Step 3 — Export Your Final Design
When your design is ready, click Download in the top right corner. Choose your file format PNG works for most uses, JPEG for photos, and PDF for print. Your file downloads immediately with no watermark.
Tips for Better Results in Microsoft Designer
Be descriptive in your prompts. “A social media post” gives generic results. “A bold Instagram post announcing a summer sale for a women’s clothing brand, coral and white color scheme, clean modern font” gives Designer the context to produce something actually useful.
Try multiple variations before settling. Designer generates several options from every prompt. Do not just pick the first one scroll through all of them. The fourth or fifth option is often the strongest.
Use templates as a faster starting point. If you are in a hurry, browse templates first and use the AI suggestion feature to personalise them rather than generating from a blank prompt. It is faster and the results are more polished.
Combine with Microsoft 365 for extra features. If you have a Microsoft 365 subscription, Designer integrates with Word, PowerPoint, and Teams letting you apply AI design suggestions directly inside those apps without switching tools.
Common Problems and Solutions
Problem
Solution
AI image does not match your prompt
Add more specific style details include lighting, color, and photographic style
Cannot find the export or download option
Look for the Download button in the top right corner of the editor
Design looks too simple or generic
Layer additional AI generated elements or try a more detailed prompt
Slow generation speed
Try during off-peak hours early morning or late evening typically faster
Final Thoughts
Microsoft Designer is one of the most underrated free tools available in 2026. Most people assume it is a basic Microsoft product it is not. The DALL-E image generation is genuinely impressive, the AI design workflow is fast and intuitive, and the fact that it is completely free with no watermarks puts it ahead of many paid alternatives for basic design needs.
If you are a beginner and you want to create social media content, flyers, invitations, or simple graphics without spending anything, start here. You can be producing professional-looking designs within 20 minutes of your first login.
For a full breakdown of Microsoft Designer’s features and honest pros and cons, read our full Microsoft Designer review. If you want to compare it with the most popular alternative, our guide on how to use Canva AI shows exactly how the two tools differ in practice. And for the widest view of free tools available, see our best free design tools for beginners.
Frequently Asked Questions
Q: Do I need to pay to use Microsoft Designer? No. Microsoft Designer is completely free at designer.microsoft.com. You only need a free Microsoft account to sign in. There is no credit card requirement and no hidden fees for the core AI design and image generation features.
Q: How do I generate AI images in Microsoft Designer? Open the Image Creator tool within Microsoft Designer, type a detailed description of the image you want, and the DALL-E powered AI generates several options within seconds. You can then download your favorite image or insert it directly into a design no watermarks and no credits to track.
Q: Can I edit designs after Microsoft Designer creates them? Yes. Every design Microsoft Designer generates is fully editable. You can change text, fonts, colors, layout, and images after the AI creates the initial version. The editor works like a simplified drag-and-drop design tool everything is clickable and adjustable.
Q: What can I create with Microsoft Designer? You can create social media posts, posters, flyers, invitations, presentations, banners, cards, and general graphics. It is particularly strong for social media content thanks to its DALL-E image generation and platform-specific template sizing.
Q: Does Microsoft Designer work without a Microsoft 365 subscription? Yes. Microsoft Designer works fully without a Microsoft 365 subscription. A free Microsoft account gives you access to AI design generation, the full template library, and DALL-E image creation. Microsoft 365 subscribers get some additional integration features but they are not required for the core tool.
Q: Can I use Microsoft Designer images for commercial projects? Yes, images and designs created with Microsoft Designer can generally be used for commercial purposes. As with any AI generation tool, it is worth reviewing Microsoft’s current terms of service for specific commercial usage details since policies can be updated over time.
Quick Answer: To use Adobe Firefly, open Photoshop, select an area with the selection tool, then click Generative Fill and type what you want added or removed. Generative Fill edits photos using text prompts. Generative Expand extends images beyond their borders. Text to Image works standalone at firefly.adobe.com. The free plan gives 25 credits per month to start. Follow the full step by step guide below.
Adobe Firefly has changed what is possible in Photoshop. Tasks that used to take an experienced editor an hour — removing objects, extending backgrounds, generating new elements inside a photo — now take about 30 seconds. If you already use Photoshop, or if you are just getting started with Adobe’s tools, learning how to use Adobe Firefly is one of the most valuable things you can do right now.
This guide covers every major Firefly feature step by step — from Generative Fill inside Photoshop to the standalone Firefly web app. We have tested all of it personally so you get accurate, up to date instructions rather than outdated screenshots.
For a broader look at what Adobe Firefly offers beyond tutorials, check out our full Adobe Firefly review. And if you are comparing AI tools generally, our roundup of the best AI design tools is worth a read too.
Getting Started with Adobe Firefly
Step 1 — Check Your Photoshop Version
Adobe Firefly features are built into Photoshop but require a recent version. Open Photoshop and go to Help → About Photoshop to check your version number. Generative Fill and Generative Expand require Photoshop 24.6 or later. If you are on an older version, open the Creative Cloud desktop app and update Photoshop before continuing.
Step 2 — Locate the Firefly Tools in Photoshop
Firefly tools are not in the main toolbar on the left — they appear as contextual options when you make a selection. The main ones to know:
Generative Fill — appears in the floating toolbar when you have an active selection
Generative Expand — appears when you use the Crop tool and drag beyond the image border
Text Effects — available under Filter → Neural Filters → Text Effects in some versions
You can also access Firefly independently at firefly.adobe.com without opening Photoshop at all.
Step 3 — Understand Your Credit Limit
Every Firefly action uses one generative credit. The free plan gives you 25 credits per month. A paid Creative Cloud subscription gives you significantly more. You can check your remaining credits by clicking your profile icon in the top right of any Adobe app or at adobe.com/account.
Once credits run out, you can still generate — but results will include a visible watermark until your credits reset or you upgrade.
How to Use Generative Fill (Step by Step)
Generative Fill is Adobe Firefly’s flagship feature. It lets you add, remove, or replace anything in a photo using a simple text prompt. This is the feature that makes Photoshop feel like a completely different tool.
Step 1 — Make a Selection
Open your photo in Photoshop. Choose any selection tool — the Rectangular Marquee, Lasso, or Object Selection tool all work. Draw a selection around the area you want to change. The more precise your selection, the more natural the result will look.
For removing an object: select tightly around the object itself. For adding something new: select the empty area where you want the new element to appear.
Step 2 — Click Generative Fill
With your selection active, a small floating toolbar appears below the selection. Click Generative Fill. A text prompt bar opens at the bottom of your screen.
Step 3 — Type Your Prompt or Leave Blank
Type a description of what you want to appear in the selected area. For example: “a wooden park bench with autumn leaves around it” or “clear blue sky with soft clouds.”
If you want to remove an object and fill the area naturally — like erasing a person from a background — leave the prompt blank and click Generate. Firefly will intelligently fill the area based on the surrounding image.
Step 4 — Choose From Generated Variations
Firefly generates three variations. They appear as separate layers in your Layers panel — click through them using the arrows in the Properties panel to compare. Choose the one that looks most natural, or regenerate for a new set of three if none of them work.
How to Use Generative Expand
Generative Expand extends your image beyond its original borders using AI. It is perfect for changing aspect ratios, adding breathing room around a subject, or fixing a photo that was cropped too tightly.
Step 1 — Select the Crop Tool
Press C to activate the Crop tool, or click it in the left toolbar. You will see the crop handles appear around your image.
Step 2 — Expand the Canvas Boundaries
Drag any crop handle outward — beyond the edge of your original image. You are making the canvas larger, not smaller. The area outside your original image will appear as a grey checkerboard pattern, indicating empty space.
Step 3 — Let AI Fill the New Space
Click the checkmark to confirm the expanded canvas, or press Enter. Photoshop automatically runs Generative Expand on the empty areas and fills them with AI-generated content that matches your original image. Like Generative Fill, it gives you three variations to choose from.
This works best when the edges of your original image have consistent content — sky, grass, a plain wall — rather than complex detailed subjects right at the border.
How to Generate Images with Text to Image
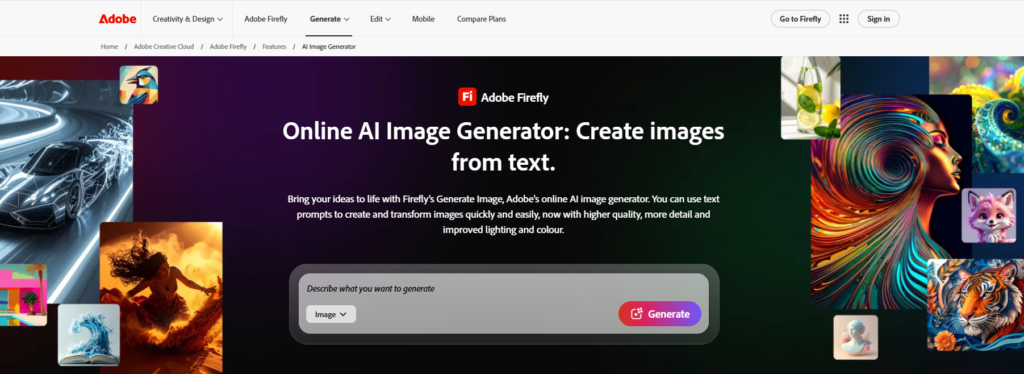
You do not need Photoshop to use Adobe Firefly. The standalone web app at firefly.adobe.com gives you access to text-to-image generation — useful for creating original images from scratch without any existing photo to edit.
Step 1 — Visit firefly.adobe.com
Go to firefly.adobe.com in any browser and sign in with your Adobe account. The home screen shows all available Firefly tools including Text to Image, Generative Fill (web version), and Text Effects.
Step 2 — Write a Detailed Prompt
Click Text to Image and type your description in the prompt bar. Be specific — include the subject, setting, lighting, style, and mood. For example: “A modern home office with floor-to-ceiling windows, soft morning light, minimal furniture, photography style, warm tones.”
Vague prompts produce average results. Specific prompts produce usable ones.
Step 3 — Select Style and Aspect Ratio
Before generating, use the options on the right side of the screen to choose:
Aspect ratio — square, landscape, portrait, or widescreen
Style — photo, art, graphic, or black and white
Content type — photo or graphic
Effects — lighting, color tone, and camera angle presets
These settings shape the output significantly. A few seconds spent here saves multiple regenerations.
Step 4 — Download Your Generated Image
Firefly generates four images. Hover over your favorite and click Download. Generated images come with Adobe’s Content Credentials tag — a transparency marker showing the image was AI-generated. For commercial use, this is actually an advantage since Adobe Firefly is specifically trained on licensed content.
How to Use AI Text Effects
Firefly’s Text Effects tool applies AI-generated visual styles to text — turning plain words into textured, illustrated, or photo-realistic type without any manual design work.
Step 1 — Select Text Effects Tool
At firefly.adobe.com, click Text Effects from the home screen. A text input and prompt field appear.
Step 2 — Type Your Text
Enter the word or short phrase you want to style. Text Effects works best on one to three words — longer text becomes harder to read once styled.
Step 3 — Apply AI Generated Style
In the prompt bar below, describe the style you want applied to your text. For example: “mossy forest bark texture” or “neon light tubes on dark background” or “fresh strawberries and cream.” Click Generate and Firefly wraps your text in that visual style. Download the result and drop it straight into Canva, Photoshop, or any other design tool.
Tips for Better Firefly Results
A few habits make a real difference in the quality of what Firefly generates:
Write specific, descriptive prompts. The difference between “add a tree” and “add a tall eucalyptus tree with silver-green leaves in soft afternoon light, matching the warm tones of the existing photo” is enormous. Always describe style, lighting, and how it should relate to the existing image.
Make precise selections before Generative Fill. Sloppy selections produce unnatural edges. Use the Object Selection tool for complex subjects — it is much more accurate than a manual lasso for most photos.
Test prompts in the standalone app first. The standalone Firefly app uses the same AI engine as Photoshop but costs credits the same way. Use it to test prompt variations before committing them inside a real project file.
Combine Firefly with manual editing. AI output is rarely perfect on the first try. Use Generative Fill to get 80% of the way there, then clean up edges and adjust colors manually. The combination is faster than doing everything from scratch.
Common Adobe Firefly Problems and Solutions
Problem
Solution
Generative Fill looks unnatural
Make a more precise selection — use Object Selection tool instead of Lasso
Running out of credits too quickly
Test prompt variations in the standalone web app before using in Photoshop
Generated image has a watermark
Credits have run out for the month — upgrade plan or wait for monthly reset
Results do not match the prompt
Add more specific descriptive details — include lighting, style, and how it fits the existing image
Final Thoughts
Adobe Firefly is one of the most practically useful AI tools available to designers and photographers in 2026. Generative Fill alone changes how photo editing works — tasks that used to require skill and time now take seconds.
If you are already a Photoshop user, start with Generative Fill today. Make a selection on any photo you have and try a prompt. The fastest way to understand what it can do is to use it on a real image rather than a tutorial exercise.
For the full breakdown of Firefly’s features, pricing, and how it compares to other AI image tools, read our full Adobe Firefly review. If you are also learning Canva, our guide on how to use Canva AI is a great companion — the two tools cover very different ground and work well together.
Frequently Asked Questions
Q: How do I access Adobe Firefly in Photoshop? Adobe Firefly features are built directly into recent versions of Photoshop. Open Photoshop, make a selection on your image using any selection tool, and look for the Generative Fill button that appears in the floating contextual toolbar. You need an active Creative Cloud subscription or available Firefly credits to generate results.
Q: How does Generative Fill work? Generative Fill analyzes your selected area and the surrounding image, then generates new content based on your text prompt. Make a selection, click Generative Fill, type what you want — or leave the prompt blank to remove an object — and Photoshop generates three variations for you to choose from. Each option is a separate non-destructive layer.
Q: Do I need Photoshop to use Adobe Firefly? No. You can use Adobe Firefly without Photoshop through the standalone web app at firefly.adobe.com. This gives you access to text-to-image generation, text effects, and a web-based version of Generative Fill. The most powerful editing features like Generative Expand are only available inside Photoshop itself.
Q: How many free credits does Adobe Firefly give? Adobe Firefly gives 25 generative credits per month on the free plan. Each generation — whether in Photoshop or the standalone app — typically uses one credit. Once credits run out you can still generate but results will include a visible watermark until your credits reset monthly or you upgrade your plan.
Q: Can I undo Generative Fill if I do not like the result? Yes. Generative Fill creates a non-destructive generative layer in your Layers panel. You can click through the three variations at any time using the Properties panel. If none look right, regenerate for new options or delete the generative layer entirely to return to your original image.
Q: What is Generative Expand used for? Generative Expand extends an image beyond its original borders using AI. It is useful for changing aspect ratios, adding more background space for text overlay, or expanding a photo that was cropped too tightly. Drag the crop boundary beyond the image edge and Firefly fills the new space to match the existing content.
Q: Is it hard to write good Adobe Firefly prompts? It gets easier with practice. The key is being specific about what you want — including style, lighting, color, and mood. Vague prompts like “add a tree” produce unpredictable results. Detailed prompts like “add a tall oak tree with autumn leaves in soft afternoon light matching the existing photo style” give Firefly what it needs to produce a natural result.
Q: Can I use Adobe Firefly generated content commercially? Yes. Adobe Firefly is specifically designed for commercial use and was trained on licensed and public domain content to ensure commercial safety. Content generated through Firefly comes with usage rights that allow you to use it in client work, products, and marketing materials — a key advantage over some competing AI image tools.
Quick Answer: To use Figma, sign up for a free account, create a new design file, then use the Frame tool to start building your layout with shapes, text, and components. Frames are your canvas — start every design here. Auto Layout arranges elements automatically. Components let you reuse design elements. Figma AI helps suggest layouts and generate content. Follow the full step by step guide below.
Let’s be upfront about something — Figma has a learning curve. It is not as instantly pick-up-and-go as Canva. But that is not a reason to avoid it. Figma is the tool that professional UI and UX designers use every single day, at companies like Google, Airbnb, and Spotify. If you want to learn how to use Figma for beginners, you are making one of the smartest long-term decisions you can as someone interested in design.
This guide makes it simple. We break down every core feature into clear, numbered steps so you can go from a blank screen to a real working design without feeling lost. No prior design experience needed — just patience and a free account.
Before you start, read our full Figma AI review if you want a broader picture of what Figma offers. And if you are still deciding between tools, our article on the best AI UI design tools covers how Figma compares.
Getting Started with Figma
Step 1 — Create Your Free Figma Account
Go to figma.com and click Get started for free. Sign up with Google or your email address. Figma’s free plan gives you access to three design files and unlimited collaborators — more than enough to learn everything in this guide.
Once your account is set up, you land on the Figma home screen where your files and projects are stored.
Step 2 — Understand the Figma Interface
When you open a design file, the Figma interface has four main areas:
Left panel — Layers and pages. This shows everything in your design as a list.
Center canvas — Your working area. This is where you build your design.
Right panel — Design properties. Colors, sizes, fonts, and effects appear here when you select something.
Top toolbar — Tools for selecting, framing, drawing shapes, adding text, and more.
Take two minutes to click around before building anything. Knowing where things live makes everything faster.
Step 3 — Create Your First File
From the Figma home screen, click the New design file button in the top right. A blank canvas opens. This is your workspace. Everything you build lives on this canvas.
How to Use Frames in Figma
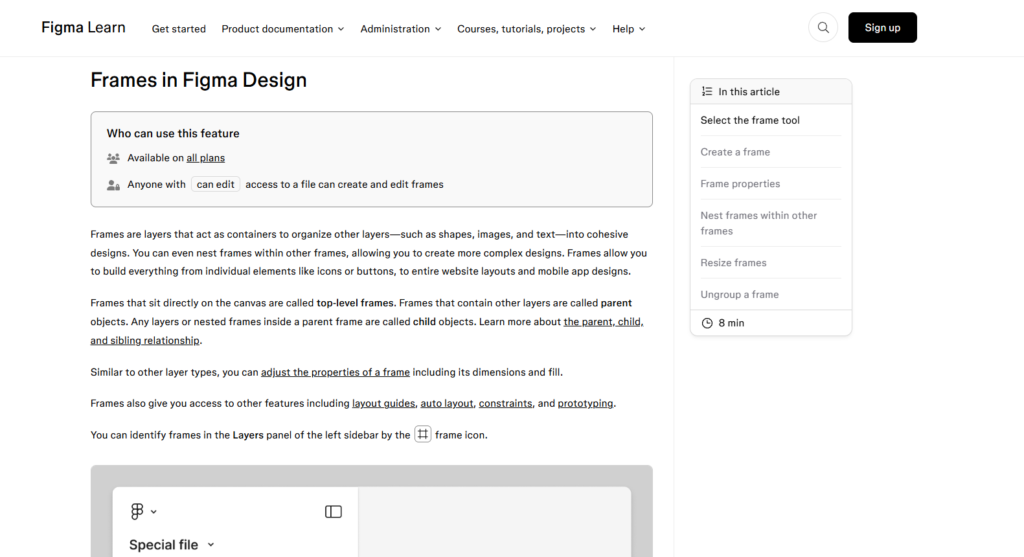
Frames are the foundation of every Figma design. Think of a frame as a container — it defines the boundaries of your screen, page, or component. You always start with a frame before adding anything else.
Step 1 — Select the Frame Tool
Press F on your keyboard or click the Frame tool in the top toolbar (it looks like a hashtag symbol). Your cursor changes to a crosshair.
Step 2 — Choose a Preset Size
Click anywhere on the canvas and drag to draw a frame, or look at the right panel after pressing F — Figma shows preset frame sizes for Phone, Tablet, Desktop, and social media formats. Click any preset and Figma draws the frame at the exact right size automatically.
For beginners, start with iPhone 14 or Desktop — both are common starting points for learning.
Step 3 — Name Your Frame
Double-click the frame name in the left panel (it will say “Frame 1” by default) and rename it something descriptive like “Home Screen” or “Landing Page.” Good naming habits make complex projects much easier to manage as you grow.
How to Add Shapes and Text
Once your frame is set up, you start filling it with content.
Step 1 — Use the Shape Tool
Press R to draw a rectangle, O for an oval, or click the shape tools in the top toolbar. Click and drag inside your frame to draw a shape. Once drawn, use the right panel to change the fill color, stroke, corner radius, and size.
Step 2 — Add Text with the Text Tool
Press T to activate the text tool. Click anywhere on your frame and start typing. Figma creates a text layer automatically. Select it and use the right panel to change the font, size, weight, color, and alignment.
Step 3 — Style Your Text and Shapes
With any element selected, the right panel shows all its properties. For shapes, you can change fill color, add a border (called a Stroke in Figma), adjust opacity, and add drop shadows. For text, you can set the font family, size, line height, and letter spacing. Spend time here — understanding the right panel is key to controlling your designs.
How to Use Auto Layout (Step by Step)
Auto Layout is one of Figma’s most powerful features — and one of the most useful for beginners once you understand it. It automatically arranges and spaces elements inside a frame so you do not have to manually position everything.
Step 1 — Select Elements to Group
Click the elements you want to group together — for example, an icon, a label, and a button. Hold Shift and click each one to select multiple elements at once.
Step 2 — Apply Auto Layout
With your elements selected, press Shift + A or right-click and choose Add Auto Layout. Figma wraps the elements in a new frame with automatic spacing applied.
Step 3 — Adjust Spacing and Direction
In the right panel, you will now see Auto Layout controls. You can set:
Direction — horizontal (elements side by side) or vertical (elements stacked)
Gap — the space between elements
Padding — the space between the elements and the frame edge
Change these values and watch everything adjust instantly. This is the feature that makes Figma so much faster than manually moving things around.
How to Create and Use Components
Components are reusable design elements. You build something once — a button, a card, a navigation bar — and reuse it everywhere. When you update the main component, every copy updates automatically.
Step 1 — Select Element to Make a Component
Design the element you want to reuse — for example, a blue button with white text. Select it on the canvas.
Step 2 — Create Component
Right-click the selected element and choose Create component, or press Ctrl + Alt + K (Windows) or Cmd + Option + K (Mac). The element turns purple in the layers panel — this means it is now a main component.
Step 3 — Reuse Component Instances
Open the Assets panel in the left sidebar (the grid icon). Find your component listed there. Drag it onto your canvas to create an instance — a linked copy. Edit the main component and all instances update. Edit an instance to override just that one copy without affecting the others.
How to Use Figma AI Features
Figma has been adding AI features that make the design process faster, especially for beginners who are still learning layout and structure.
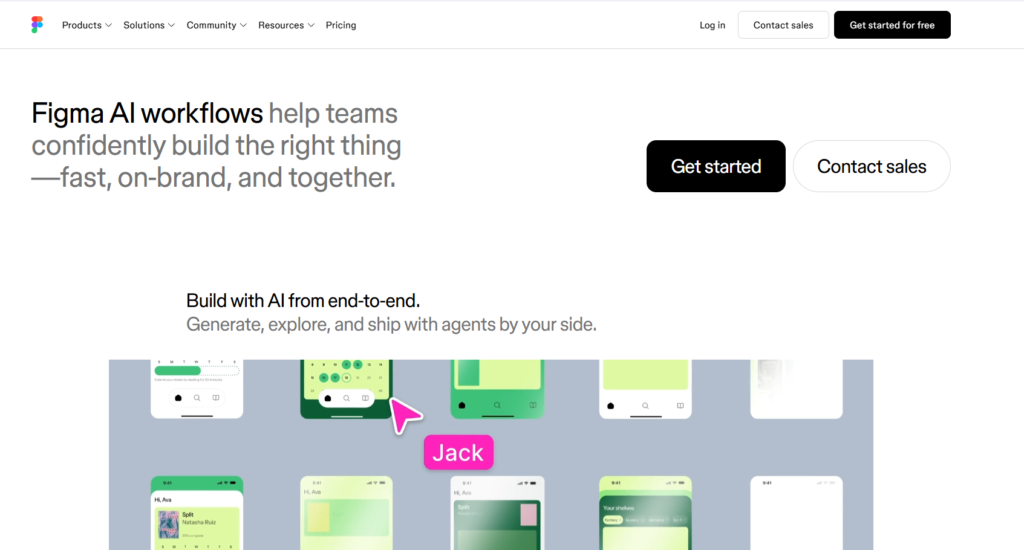
Step 1 — Access AI Design Suggestions
In the right panel, look for the AI options when you have a frame or element selected. Figma AI can suggest layout improvements, generate placeholder content, and help you rename layers automatically.
Step 2 — Use AI to Generate Content
Figma AI can fill your designs with realistic placeholder text, images, and data. Select a text layer and look for the AI fill option in the right panel. This is useful when you want to see what a design looks like with real-looking content instead of “Lorem ipsum.”
Step 3 — Apply AI Suggested Layouts
When working on a new frame, Figma AI may suggest layout options based on the content you have added. These appear as subtle prompts in the editor. Click any suggestion to apply it — you can always undo if it does not look right.
How to Prototype Your Design
Prototyping lets you connect your frames and simulate how a real app or website would work — with clickable buttons, transitions, and navigation.
Step 1 — Switch to Prototype Mode
In the top right of the editor, click Prototype (next to Design in the right panel). The interface shifts to prototype mode — you will see blue connection handles appear on your frames.
Step 2 — Connect Frames with Interactions
Hover over a button or element in your design. A blue circle appears on its right edge. Click and drag that circle to another frame to create a connection. A blue arrow appears showing the link. In the right panel, you can set the interaction type — on click, on hover, and so on — and choose a transition animation.
Step 3 — Preview Your Prototype
Click the Play button in the top right corner. Figma opens a preview window where you can click through your design as if it were a real app. Share this preview link with anyone — they can interact with it in their browser without needing a Figma account.
Tips for Beginners Learning Figma
Getting started is the hardest part. These habits will speed up your learning significantly:
Start with Figma Community templates. Go to the Figma Community tab on the home screen and search for beginner templates. Duplicate one and study how it is built — this teaches you more than any tutorial.
Learn keyboard shortcuts early. F for frame, T for text, R for rectangle, V for select. A handful of shortcuts make Figma feel much faster within your first week.
Practice with small, real projects. Do not start with a full app design. Start with one screen — a login page or a simple card layout. Finish something small and build from there.
Use the Figma YouTube channel. Figma’s official tutorials are genuinely good and free. Spend 20 minutes watching their Auto Layout video and it will click much faster than reading about it.
Common Figma Problems and Solutions
Problem
Solution
Elements not aligning properly
Select all elements and use the alignment tools in the top toolbar, or apply Auto Layout
Cannot find a tool
Press Shift + / to open the Figma command search and type what you need
File loading slowly
Reduce the number of high resolution images in your file — compress before uploading
Components not updating
Check if you edited an instance instead of the main component — main components show a purple icon
Final Thoughts
Figma has a learning curve — but it is absolutely worth it. Once you understand frames, Auto Layout, and components, you can build almost anything. And those three concepts are learnable in a week of regular practice.
The key is to keep building real things. Do not just follow tutorials — make something for yourself. A personal portfolio page, a simple app concept, a redesign of your favorite website. Real projects teach you faster than exercises.
For more on what Figma’s AI features can do, read our full Figma AI review. When you are ready to learn another tool alongside Figma, our guide on how to use Canva AI is a natural next step — the two tools complement each other well. And if you are comparing your options, check out our best graphic design tools for beginners for the full picture.
Frequently Asked Questions
Q: Is Figma hard to learn for beginners? Figma has a moderate learning curve compared to tools like Canva, but it is very learnable with consistent practice. Most beginners get comfortable with frames, shapes, and text within a few hours. Mastering Auto Layout and components typically takes one to two weeks of regular use.
Q: What is the first thing I should learn in Figma? Learn frames first. Frames are the foundation of every Figma design — they act as your canvas and define the size of your screen or page. Once you understand frames you can add shapes, text, and images inside them and start building real designs.
Q: What is Auto Layout in Figma? Auto Layout is a Figma feature that automatically arranges and spaces elements within a frame. When you apply Auto Layout to a group of elements, they adjust their spacing and position automatically when you add, remove, or resize content. It saves a huge amount of time compared to positioning things manually.
Q: Can I use Figma for free? Yes. Figma’s free plan allows up to three design files with unlimited collaborators. That is more than enough for beginners learning the tool. The free plan includes access to all core features including frames, components, Auto Layout, and basic AI features.
Q: What is the difference between a component and a frame in Figma? A frame is a container that holds your design elements and represents a screen or section of your design. A component is a reusable design element — like a button or card — that you can use multiple times throughout a project. Update the main component and all copies update automatically.
Q: How long does it take to learn Figma? Most beginners can learn the basics within one to two weeks of regular practice. Frames, shapes, and text take just a few hours. Auto Layout and components take a bit longer. Becoming comfortable enough for professional UI design work usually takes one to three months of consistent use.
Q: Does Figma have templates for beginners? Yes. Figma Community has thousands of free templates created by other designers that beginners can duplicate and learn from. Starting with a template and studying how it is built is one of the fastest ways to understand how Figma works in practice.
Q: Can I use Figma on a Chromebook or tablet? Yes. Figma is browser-based and works on Chromebooks since it runs entirely in a web browser without installation. A mobile app is available for tablets but is more limited than the desktop experience. For serious design work, a laptop or desktop gives you the best Figma experience.
Quick Answer: To use Canva AI, sign up for a free account, click “Create a design,” then use Magic Design to generate a full layout from a text prompt. Magic Design generates complete layouts instantly. Magic Write handles AI text. Background Remover and Magic Eraser fix photos in one click. All AI tools live in the left sidebar.
If you have never used Canva before or you have used it but never touched the AI features this guide is for you. Learning how to use Canva AI does not require any design experience, any technical knowledge, or any paid subscription to get started.
Canva’s AI tools are genuinely beginner-friendly. Within your first session, you can generate professional-looking designs from a simple text description, remove backgrounds from photos, create AI images, and write copy all without leaving one platform. We have tested every feature covered in this guide personally, so everything you read here is based on real hands-on use, not guesswork.
Go to canva.com and click Sign up in the top right corner. You can sign up with Google, Facebook, or your email address. The whole process takes under two minutes and does not require a credit card.
Once your account is created, you land on the Canva home dashboard. This is where everything starts.
Step 2 — Understand the Canva AI Dashboard
On your home dashboard you will see a search bar at the top, a list of design types below it (Social media, Presentation, Video, Print), and a left sidebar with your recent files and folders.
The AI tools are not hidden they are built directly into the design editor. Once you open any design, look at the left sidebar. You will see icons for Elements, Text, Apps, and more. The Apps section is where most AI features live, including Magic Media (AI image generation) and Magic Write (AI text).
Magic Design appears automatically when you start a new design you will see the option to describe your design before choosing a template.
How to Use Magic Design (Step by Step)
Magic Design is Canva’s flagship AI feature. You type what you want, and Canva generates a complete, fully designed layout in seconds.
Step 1 — Click Create a Design
From the home dashboard, click the purple Create a design button in the top right corner. A dropdown appears with options like Instagram Post, Presentation, Flyer, and more. Choose the format you need or search for a specific size.
Step 2 — Type Your Design Description
When the editor opens, you will see a search bar at the top of the template panel with the text “Describe your design.” This is Magic Design. Type a clear description of what you want for example: “A minimalist flyer for a coffee shop grand opening with warm brown tones and modern fonts.”
The more specific you are, the better the results. Include the mood, colors, and purpose.
Step 3 — Choose From AI Generated Options
Canva generates eight to ten complete design options based on your description within a few seconds. These are not just color variations they are fully laid out designs with different fonts, image placements, and structures. Scroll through and click any one that feels close to what you need.
Step 4 — Customise Your Chosen Design
Once you select a design, it opens in the full editor. Every element is clickable and editable. Click any text to change the words. Click any image to swap it out. Drag elements to reposition them. Magic Design gives you a strong starting point you take it the rest of the way.
How to Use Magic Write for AI Text
Magic Write is Canva’s built-in AI writing tool. It generates headlines, body copy, captions, and more from a simple prompt.
Step 1 — Select Magic Write Tool
Inside the editor, click the Apps icon in the left sidebar. Search for “Magic Write” or find it under the AI tools section. Click it to open the Magic Write panel on the left side of your screen.
Alternatively, click any text box in your design and look for the purple Magic Write button that appears in the toolbar above.
Step 2 — Enter Your Prompt
Type what you need. Be specific about the tone and purpose. For example: “Write a short tagline for a yoga studio that feels calm and welcoming.” Magic Write works best when you tell it both what to write and how it should feel.
Step 3 — Choose Tone and Length
Before generating, you can adjust the tone (professional, casual, friendly, persuasive) and the length (short, medium, long). These settings make a big difference in the output quality.
Step 4 — Edit and Insert Generated Text
Magic Write gives you a text output you can copy directly or insert into your design with one click. Always read it through before publishing AI text is a great starting point but usually needs a light edit to sound natural and on-brand.
How to Use AI Image Generation
Canva’s AI image generator (called Magic Media) lets you create original images from a text description. These can be used inside your designs without worrying about copyright.
Step 1 — Open Text to Image Tool
Inside the editor, click the Apps icon in the left sidebar and search for Magic Media. Click it to open the tool. You will see a text field where you enter your image description.
Step 2 — Write a Detailed Prompt
This is the most important step. Vague prompts produce generic images. Specific prompts produce useful ones. Instead of “a dog,” try: “A golden retriever sitting in a sunlit park, soft natural light, photography style, warm tones.”
Include: subject, setting, lighting, style (photography, illustration, watercolor), and mood.
Step 3 — Select Your Preferred Style
Below the prompt field, Canva offers style options including Photo, Illustration, Watercolor, Neon, and more. Choose the one that matches your design aesthetic before generating.
Step 4 — Generate and Download
Click Generate. Canva produces four image options. Click your favorite to add it directly to your design, or hover and click the download icon to save it separately. Free accounts get a limited number of Magic Media generations per month Canva Pro gives you unlimited.
How to Use Background Remover
Background Remover is one of Canva’s most useful AI tools for beginners. It removes the background from any photo in one click no manual cutting required.
Step 1 — Upload Your Photo
Click the Uploads icon in the left sidebar and drag your photo into Canva, or click Upload files to browse your device. Once uploaded, click the photo to add it to your design canvas.
Step 2 — Click Background Remover
With the photo selected on the canvas, click Edit image in the top toolbar. In the panel that opens, click BG Remover. Canva processes the image and removes the background automatically within a few seconds.
Step 3 — Download Transparent Image
Once the background is removed, click Download in the top right corner. Select PNG as the file format and make sure the Transparent background checkbox is ticked. Your image will download with a clean, transparent background ready to use anywhere.
Note: Background Remover requires a Canva Pro subscription. Free accounts can preview the result but need to upgrade to download.
How to Use Magic Eraser
Magic Eraser removes specific objects from inside a photo not the whole background, but individual elements. It is perfect for removing unwanted objects, people in the background, or distracting elements.
Step 1 — Select Magic Eraser Tool
Click your photo on the canvas, then click Edit image in the top toolbar. In the editing panel, find and click Magic Eraser.
Step 2 — Brush Over Object to Remove
A brush tool activates. Paint over the object you want to remove by clicking and dragging across it. You do not need to be precise Canva’s AI identifies the edges of the object automatically.
Step 3 — Let AI Fill the Background
After you finish brushing, Canva fills the erased area with generated background content that matches the surrounding image. The result is not always perfect on complex backgrounds, but on simple or natural backgrounds it works extremely well.
Tips for Getting Better Results from Canva AI
Getting good results from AI tools is partly about knowing how to ask. These habits make a real difference:
Be specific in your prompts. “A poster” gives you generic results. “A bold event poster for a summer music festival with neon colors and a crowd silhouette” gives you something usable. Always include mood, style, colors, and purpose.
Set your brand colors first. Before running Magic Design, add your brand colors to your Canva color palette under your account settings. Magic Design will incorporate them into generated layouts when available.
Combine multiple AI tools. Use Magic Design to build the layout, Magic Media to generate a custom image, and Magic Write to create the copy. The tools work better together than in isolation.
Always review before publishing. AI output is a starting point, not a finished product. Check for odd text, awkward crops, or off-brand colors before anything goes live.
Common Canva AI Problems and Solutions
Problem
Solution
Magic Design results look too generic
Add more specific details style, color, mood, industry
AI image has a watermark
You have used free Magic Media credits upgrade to Pro or wait for monthly reset
Magic Write text sounds robotic
Change the tone setting to “casual” and regenerate then edit lightly
Background Remover misses edges
Use the manual restore brush tool to paint back any areas removed incorrectly
Final Thoughts
Canva AI is one of the most accessible creative tools available in 2026. Whether you need a social media post, a flyer, a presentation, or a custom image, you can go from nothing to a professional-looking result in under 30 minutes on your first try.
The best way to learn is simply to use it. Open a free account, pick a design type, and run Magic Design with a description of something you actually need. You will figure out the tools faster by doing than by reading.
Q: How do I start using Canva AI? Create a free account at canva.com, click “Create a design,” and look for AI tools like Magic Design in the template search bar. Magic Design lets you type a description and Canva generates complete design options instantly no design experience needed.
Q: Is Canva AI hard to learn? No. Canva AI is one of the easiest AI tools to learn in 2026. Most beginners get comfortable with Magic Design and the core AI features within 10 to 15 minutes. The interface is built around simple buttons and clear labels, so no prior design or technical knowledge is required.
Q: How do I write good prompts for Canva AI? Good prompts are specific and detailed. Instead of “create a poster,” write “create a minimalist poster for a coffee shop with warm brown tones and modern typography.” The more detail you give about style, colors, and purpose, the better the AI results will be.
Q: Can I edit designs after Canva AI generates them? Yes every design Canva AI generates is fully editable, just like a regular template. You can change colors, fonts, images, and layout after the AI creates the initial version. Think of Magic Design as a starting point, not a finished product.
Q: How do I use Magic Eraser in Canva? Upload your photo, select it on the canvas, click Edit image, then choose Magic Eraser. Brush over the object you want removed and Canva AI fills in the background automatically. Works best on simple backgrounds complex scenes may need a light manual touch-up.
Q: Why does my Canva AI image have a watermark? Watermarks appear when your free Magic Media credits are used up for the month. Upgrading to Canva Pro removes watermarks and gives you unlimited AI image generation. You can check your remaining credits in your account settings.
Q: Can I use Canva AI on my phone? Yes. Most Canva AI features including Magic Design, background removal, and AI image generation are available on the Canva mobile app for iOS and Android. Some advanced editing is easier on desktop due to screen size, but the core AI tools work well on mobile.
Q: What is the difference between Magic Design and Magic Media? Magic Design generates complete design layouts templates, text placement, and images from a text description. Magic Media generates individual AI images from a text prompt that you then place inside your designs. Magic Design builds the whole composition; Magic Media creates individual visual elements.
Quick Answer: The best AI design tools for beginners in 2026 are Canva AI, Microsoft Designer, Adobe Express, and Uizard. Canva AI is the easiest overall. Microsoft Designer is the best free AI image tool. Adobe Express is best for social media beginners. Uizard is best for beginners learning UI design. All four have free plans and require zero design experience to get started. If you have never designed anything before, you are in the right place. A year ago, getting started with design meant learning complicated software, understanding color theory, and spending hours on layouts that still looked amateurish. That is not the case anymore.
The best design tools for beginners in 2026 do the heavy lifting for you. You describe what you want, and the AI builds it. You pick what looks good. That is genuinely all there is to it. We have personally tested every tool on this list so you do not have to guess which ones are actually beginner-friendly and which ones just claim to be. If you want the full picture on best AI design tools for graphic designers, check out our May pillar article — this list is focused specifically on tools built for people starting from scratch.
Why AI Makes Design Easier for Beginners
The biggest thing holding most beginners back is not creativity — it is the technical gap. Traditional design software like Photoshop or Illustrator takes months to get comfortable with. You had to understand layers, blending modes, kerning, and grids before you could make anything worth showing anyone.
AI removes that barrier entirely. Modern AI design tools let you type a simple description and generate a complete design in seconds. You are not learning software anymore — you are making decisions. Do you like this layout or that one? This color palette or something brighter? The AI handles the execution. You stay in control of the direction.
Combine that with the thousands of templates these tools offer, and a complete beginner can produce something that looks genuinely professional within their first session. No design degree. No YouTube tutorials. No frustration.
How We Chose These Tools for Beginners
We tested every tool on this list from a beginner’s perspective — not as experienced designers who already know what they are doing. That meant logging in fresh, skipping tutorials, and seeing how far we could get in the first 30 minutes.
Here is what we specifically checked:
Ease of first use: Could a non-designer figure it out without reading any documentation?
Free plan quality: Does the free version actually let you do useful things, or is it just a teaser?
AI feature accessibility: Are the AI tools front and center, or buried in menus?
Professional-looking results: Does the output look good enough to use on a real project?
Every tool that made this list passed all four checks.
8 Best AI Design Tools for Beginners in 2026
1. Canva AI — Best Overall for Beginners
If you only try one tool from this list, make it Canva AI. It has been the go-to beginner design platform for years, and the addition of proper AI features in recent years has made it genuinely exceptional for people with no design background.
The standout feature for beginners is Magic Design. You type a description of what you want — a birthday flyer, a LinkedIn banner, an Instagram post — and Canva generates a fully designed, ready-to-edit template in seconds. From there, everything works on drag-and-drop. You click a text box, type your words, move things around, and you are done.
Canva also has the largest template library of any tool on this list, covering everything from social media posts and presentations to menus, business cards, and video thumbnails. The free plan is legitimately generous — you get access to hundreds of thousands of templates and most of the AI features at no cost.
If you are completely new to design and want results fast, Canva AI is where you start.
Microsoft Designer is the best option on this list if you specifically want to create AI-generated images for free, with no watermarks and no strings attached. It runs entirely in your browser, it is connected to your Microsoft account if you have one, and it is powered by DALL-E — the same image model that powers ChatGPT’s image generation.
For beginners, the workflow is about as simple as it gets. You describe the image you want, and Designer generates it. You can then drop that image into a social media template, a flyer, or a presentation — all within the same tool. The interface is clean and uncluttered, which makes it far less overwhelming than most design platforms on day one.
There are no paid tiers to worry about. The whole thing is free. For a beginner who needs quality AI-generated visuals without a budget, this is hard to beat. The template selection is smaller than Canva’s, but for image-forward content it is extremely capable.
3. Adobe Express — Best for Social Media Beginners
Adobe Express sits in an interesting spot — it has the quality and polish you expect from Adobe, but it is built for people who do not know how to use Adobe’s professional tools. If your main goal as a beginner is to create content for Instagram, TikTok, Pinterest, or LinkedIn, Adobe Express is specifically built for that workflow.
Every template is sized correctly for the platform you are posting to. The AI features — including text-to-image generation and AI-powered background removal — are front and center rather than buried. Adobe’s photo editing quality is noticeably better than Canva’s at the free tier, which matters if you are working with your own photos.
The free plan is solid, though slightly more limited than Canva’s in terms of template volume. Where it wins is photo quality and the integration with Adobe’s ecosystem — if you ever graduate to Lightroom or Photoshop, your Express work moves seamlessly across.
We have not published a standalone Adobe Express review yet — for more context on how it fits into the wider AI design landscape, see our best AI design tools for graphic designers overview.
4. Uizard — Best for UI Design Beginners
Most beginner tools are built for social media graphics and marketing content. Uizard is different — it is the best option for beginners who want to design apps, websites, or digital products, and it requires absolutely no technical knowledge to use.
The feature that makes Uizard special for beginners is text-to-wireframe. You describe your app — “a fitness tracker with a dashboard, workout log, and profile page” — and Uizard generates a functional wireframe in seconds. You can then click through screens, edit components, and build something that looks like a real product, all without knowing anything about UX design principles.
Uizard also has a screenshot-to-design feature that lets you upload a photo of a hand-drawn sketch and turn it into a digital wireframe automatically. For someone with an app idea and no design experience, this is genuinely transformative. The free plan gives you access to enough features to build a real prototype.
5. Figma AI — Best for Beginners Learning Professionally
Figma is the tool that professional UX and product designers use every single day. If you want to design seriously — meaning you want a skill that is genuinely valuable in the job market — learning Figma is the right move, and the AI features added in recent years make that learning curve much more manageable for beginners.
Figma AI can auto-generate layouts, suggest design improvements, and help you build components faster than you could manually. For a beginner, this means you can produce real outputs while you are still learning. You are not just following tutorials — you are making actual things.
The free plan gives you access to everything you need to learn. The interface is more complex than Canva or Microsoft Designer, and there is a genuine learning curve. But if your goal is to become a professional designer rather than just create social media graphics, starting with Figma now is the smartest long-term move you can make.
If you are starting a business and you need a logo, Looka is the best tool built specifically for that job. You do not need to understand design — you answer a few questions about your business, choose some styles you like, and Looka’s AI generates dozens of logo options in minutes.
The process is genuinely fast. In about five minutes you can go from zero to having a professional-looking logo with multiple color variations and formats. The AI pays attention to your industry and style preferences, so the suggestions feel relevant rather than generic.
The main thing to know upfront: Looka does not have a free plan for downloading your logo. You can preview everything for free, but to actually get your files you need to purchase a package. That said, for a business logo the pricing is very reasonable, and the quality is far above what most beginners could produce on their own.
7. Khroma — Best for Beginners Who Struggle with Colors
Color is one of the hardest things to get right as a beginner, and it is one of the most common reasons amateur designs look off even when everything else is in order. Khroma solves this in a way that no other tool on this list does — by learning your personal color preferences and then generating infinite palettes that match your taste.
When you first open Khroma, you select 50 colors you like. The AI uses those choices to build a model of your aesthetic, then generates color combinations, gradients, typography pairings, and full palettes tailored to you. Every suggestion is something you are likely to actually like, because the tool learned from your own preferences.
It is completely free, browser-based, and incredibly simple to use. If you have ever spent an hour trying to pick colors for a design and ended up more confused than when you started, Khroma is worth trying before anything else.
One of the more overwhelming parts of getting started with design is figuring out which tool to use for which job. Designs.ai solves that by putting a logo maker, video maker, mockup generator, speech generator, and social media design tool all in one place under one subscription.
For a beginner who needs to produce multiple types of content — a logo, a social post, a short video — without learning four different platforms, Designs.ai is a practical choice. Everything is built for non-designers, and the AI features automate most of the technical decisions so you can focus on the creative ones.
The tradeoff is pricing. Designs.ai does not have a free plan, and the subscription cost is higher than most tools on this list. It makes the most sense for someone launching a business who needs multiple types of design assets quickly and does not want to juggle separate subscriptions.
Not sure which tool fits your situation? Here is a simple decision guide based on what you actually need:
You want to make social media posts → Start with Canva AI — free, instant results, and thousands of templates sized for every platform.
You want free AI-generated images → Start with Microsoft Designer — the best free AI image tool available in 2026, no watermarks.
You want to design a mobile app or website → Start with Uizard — no experience needed, and you will have a real prototype in under an hour.
You need a logo for your business → Start with Looka — AI generates polished options in minutes, and you only pay when you are happy.
You want to become a professional designer → Start with Figma AI — it is the industry standard, and the free plan gives you everything you need to learn.
You need multiple types of content (logo + social + video) → Start with Designs.ai — one subscription covers everything.
You are not sure what you need → Start with Canva AI — it covers almost every design type and costs nothing to try.
Final Verdict
For most beginners, Canva AI is the right starting point in 2026. It is free, it covers every design category, and the Magic Design AI feature makes it genuinely easy to produce professional-looking results from day one — no experience required.
If your goal is to design apps or websites, Uizard gives you a faster path to a real prototype than anything else on this list. And if you are serious about building a career in design, starting with Figma AI now — even while the learning curve feels steep — is the smartest long-term investment you can make.
We have tested and reviewed every tool on this list in detail. Click any tool name above to read our full review and figure out whether it is the right fit for what you specifically need to create. And if you are also looking for tools beyond AI, our guide to the best free graphic design tools for beginners is a great companion read.
Frequently Asked Questions
Q: What is the easiest AI design tool for beginners?
Canva AI is the easiest AI design tool for complete beginners in 2026. Its Magic Design feature generates complete layouts from a simple description, and the drag-and-drop interface requires no design knowledge at all. Microsoft Designer is a close second if you are specifically interested in AI image generation.
Q: Which AI design tools are free for beginners?
Several excellent AI design tools are free for beginners, including Canva AI, Microsoft Designer, Adobe Express, Figma AI, Uizard, and Khroma. All of these have fully functional free plans you can use without paying anything. Looka and Designs.ai are the only tools on this list without genuinely free plans.
Q: Can beginners use AI design tools without experience?
Yes — AI design tools are specifically built to work without prior experience. Tools like Canva AI and Microsoft Designer generate designs from simple text descriptions, so you do not need to know anything about design principles to get started. The AI handles the technical decisions, and you focus on choosing what looks right to you.
Q: How long does it take to learn AI design tools?
Most beginner-friendly tools like Canva and Microsoft Designer can be learned well enough to produce useful work within a few hours. More advanced tools like Figma take two to four weeks of regular practice to get comfortable with. For most beginners, the goal is not to master every feature — it is to learn enough to produce the specific type of content you need.
Q: What AI design tool is best for making social media posts?
Canva AI and Adobe Express are both excellent for social media as a beginner. Both have templates sized perfectly for every platform and AI features that help generate and customize content quickly. Canva has more templates overall, while Adobe Express has slightly better photo editing features on the free tier.
Q: Is there a free AI tool that makes logos for beginners?
Canva AI has a free logo maker with AI-generated templates that beginners can use at no cost. Looka lets you preview AI-generated logos for free before you pay to download them. For a completely free logo, Canva is the better option. For a more professional result with more options and brand kit files, Looka’s paid plans produce better quality output.
Q: Do I need design skills to use AI design tools?
No. Modern AI design tools are specifically built for people without design experience. Tools like Canva AI, Microsoft Designer, and Uizard generate designs based on your descriptions and preferences. You provide the direction — the AI handles the execution.
Q: What is the best free AI design tool in 2026?
Canva AI is the best free AI design tool overall for most users. Microsoft Designer is the best free option specifically for AI image generation. Figma AI is the best free tool for UI and UX design. Khroma is the best free tool specifically for AI color palette generation. The right choice depends on what type of design work you are trying to do.
Quick Answer: The best AI UI design tools in 2026 are Figma AI, Uizard, Framer AI, Galileo AI, and Khroma.
Figma AI is best for professional UI designers
Uizard is best for quick wireframe generation
Framer AI is best for building websites with AI
Galileo AI is best for generating UI from text
Khroma is best for AI color palette generation
Read on for full details on all 8 tools including pricing and who each one is designed for.
Introduction
AI UI design tools are completely changing how designers create interfaces in 2026. What used to take hours — wireframing, prototyping, color palettes, component generation — can now be done in minutes with the right AI tool.
Whether you are a professional UI designer looking to speed up your workflow, or just starting to learn UX design, this guide covers the 8 best AI UI design tools available right now. We give you honest reviews of features, pricing, and who each tool works best for — so you can find the right tool and get back to designing.
How AI is Changing UI Design in 2026
A few years ago, AI in UI design was mostly about color suggestions and auto-align features. That has changed dramatically.
In 2026, AI can generate full wireframes from a single text description. You type “a mobile banking app home screen with account balance and recent transactions” and get a working wireframe in seconds. Tools like Galileo AI and Uizard have made this a reality, not a demo feature.
AI now suggests color palettes that match your brand style, generates entire component sets, and automates the repetitive layout decisions that used to eat up half a designer’s day. Figma’s AI copilot handles layer naming, auto layout adjustments, and design suggestions — small things that add up to hours saved each week.
Prototyping is faster too. AI can generate interaction flows, link screens together, and even predict which parts of a design users are likely to look at first — which is what Attention Insight does with AI-powered heatmaps.
One thing has not changed: human designers are still essential. AI handles the mechanical parts. Strategic thinking, user research, accessibility decisions, and creative direction still require a human brain. The designers winning right now are the ones using AI tools to handle the repetitive work so they can focus on the decisions that actually matter.
How We Tested These AI UI Design Tools
We logged into each tool and tested it with real UI design tasks — not just marketing demos.
For every tool on this list, we generated wireframes, tested color palette suggestions, and evaluated how well the AI output matched the design intent we gave it. We checked how quickly a beginner could get useful output versus how powerful the tool is for professionals.
We compared free plan AI features against paid tiers honestly — not all tools give useful AI features on the free plan. We also looked at how accurate and polished the AI-generated output is, because some tools generate impressive-looking results that fall apart on closer inspection.
Every recommendation here is based on real testing with real UI design tasks.
8 Best AI UI Design Tools in 2026
1. Figma AI — Best AI UI Tool for Professionals
Figma AI is the most powerful AI tool for serious UI designers — if you design interfaces professionally, this is the one to use.
What it is: Figma is the industry standard UI design tool, used by design teams at some of the biggest companies in the world. Its AI features build on that foundation — adding auto layout intelligence, a design copilot, component generation, and AI-assisted prototyping to the tool designers already live in every day.
Key AI Features:
Auto Layout generation — AI suggests and applies layout rules automatically
Design copilot — describe a change and AI makes it
Component auto creation from existing design elements
AI-powered rename layers — saves serious time on complex files
First Draft — generate initial UI screens from text prompts
Pricing:
Plan
Price
AI Features
Starter
Free
Basic AI features
Professional
$12/month
Full AI suite
Organization
$45/month
Advanced team AI features
Best For: Professional UI/UX designers and design teams who want AI built into their existing workflow.
Our Honest Take: Figma AI is not a standalone AI tool — it is AI woven into the tool professional designers already use every day. That integration is what makes it so useful. The auto layout feature alone saves significant time on complex files. First Draft is useful for quick wireframes when a client needs to see something fast. The AI is improving with every update. If you are a professional UI designer and not using Figma already, this is the reason to switch.
Pros
Cons
Industry standard tool
AI features still maturing
Strong free plan
Steeper learning curve for beginners
Best for team collaboration
Can be slow on very large files
AI deeply integrated into workflow
Organization plan is expensive
2. Uizard — Best for Quick Wireframe Generation
Uizard is the fastest way to turn an idea — or even a rough sketch — into a working wireframe.
What it is: Uizard is an AI wireframing and prototyping tool that specializes in turning rough inputs into digital designs. Upload a hand-drawn sketch, paste in a screenshot of an app you like, or type a description of what you want — Uizard converts it into an editable digital wireframe in seconds.
Key AI Features:
Screenshot to design — upload any app screenshot and get an editable version
Sketch to wireframe — draw on paper, photograph it, and Uizard converts it digitally
Text to UI — describe your screen and AI generates it
Auto Theme — generates a full visual style from a text description
Autodesigner — generates multi-screen app prototypes from a single prompt
Pricing:
Plan
Price
AI Features
Free
$0/month
Basic AI features, limited projects
Pro
$19/month
Full AI suite, unlimited projects
Business
$39/month
Team features, advanced AI
Best For: Designers, product managers, and founders who need to wireframe ideas quickly — especially early in a project when speed matters more than polish.
Our Honest Take: The screenshot-to-design feature is genuinely one of the most impressive things you will see in a design tool. You screenshot an app you like, paste it into Uizard, and get back an editable wireframe version in under 30 seconds. It is not pixel-perfect, but it gets you 70% of the way there instantly. For early-stage ideation and client presentations where you need something visual fast, nothing beats Uizard’s speed.
Pros
Cons
Fastest wireframe generation available
Not for production-ready UI
Screenshot to design is a standout feature
Output needs cleanup and refinement
Great for non-designers and founders
Less powerful than Figma for professionals
Generous free plan
AI output can be inconsistent
3. Framer AI — Best for AI-Powered Website UI
If you want to build a real, live website with AI doing most of the design work, Framer AI is the tool for that.
What it is: Framer AI is a website builder and design tool that uses AI to generate complete website UI — not just mockups, but actual working websites with animations, interactions, and real content. You describe what you want and Framer builds it, ready to publish.
Key AI Features:
AI website generation from a text prompt
Generates layouts, animations, and interactions automatically
AI copy generation built into the design tool
Responsive design AI handles mobile and desktop layout
Publish directly from Framer without any code
Pricing:
Plan
Price
AI Features
Free
$0/month
Basic AI, limited pages
Mini
$5/month
AI site generation, custom domain
Basic
$15/month
Full AI suite, more pages
Best For: Designers who want to create live website UI with AI assistance — not just mockups, but actual published websites.
Our Honest Take: Framer AI sits in a unique space — it is not just a design tool, it is a design tool that publishes live websites. The AI can generate a complete website from a text description and have it live on a custom domain within an hour. For small business sites, portfolios, and landing pages, that is genuinely impressive. For app UI design, Figma or Uizard are better choices. But for web UI that needs to go live fast, Framer AI is hard to beat.
Pros
Cons
Generates live, publishable websites
Not ideal for app UI design
Great animations and interactions built in
Learning curve for complex customization
Affordable pricing for what it does
Free plan is quite limited
AI handles responsive design
Best used for web — not print or social
4. Galileo AI — Best for Generating Full UI from Text
Galileo AI does one thing that is still remarkable to watch — you describe a UI and it generates a complete, polished design.
What it is: Galileo AI is a text-to-UI design tool. You type a description of the interface you want — including the purpose, content, and style — and Galileo generates a complete, multi-element UI design. It is not a wireframe, it is a full visual design with real UI components.
Key AI Features:
Text to full UI — describe any interface and get a polished design
Generates multiple design variations from one prompt
Outputs designs compatible with Figma for further editing
Handles complex multi-screen apps from a single description
AI generated illustrations and icons included in output
Pricing:
Plan
Price
AI Features
Free Trial
Limited
Basic generation
Paid
Contact for pricing
Full AI generation
Best For: Designers and product teams who want to generate high-quality UI concepts quickly for client presentations or early-stage product development.
Our Honest Take: Galileo AI produces the most visually polished AI-generated UI output of any tool on this list. The designs it generates from text prompts look like something a senior designer put together. The catch is pricing — it is not cheap and the pricing model is contact-based, which can be frustrating when you just want to try it. But for generating impressive UI concepts fast, nothing else comes close right now.
Pros
Cons
Most polished AI-generated UI output
No self-serve free plan
Generates Figma-compatible designs
Pricing requires contacting sales
Handles complex multi-screen apps
Output still needs designer refinement
Impressive text-to-UI quality
Newer tool — features still developing
5. Khroma — Best for AI Color Palette Generation
Khroma solves the color problem that trips up designers at every level.
What it is: Khroma is a free AI color tool that learns your personal color preferences and then generates unlimited palettes, gradients, and color combinations tailored to your taste. It is not a full design tool — it is a dedicated color assistant that does exactly one thing very well.
Key AI Features:
Trains on your color preferences to generate personalized results
Generates palettes, gradients, typography combos, and full poster mock-ups
Searchable by hue, shade, or hex code
AI learns from your choices over time — gets better the more you use it
Pricing:
Plan
Price
Free
$0 — completely free
Best For: UI designers who spend too much time on color decisions, or anyone working on brand identity and needing palettes that feel considered rather than random.
Our Honest Take: Khroma is a niche tool that does exactly one thing really well. Once you train it on your color preferences, the palettes it generates feel genuinely personal — they match your taste rather than just being mathematically harmonious. We use it at the start of brand and UI projects to explore color directions quickly. It is free, it is fast, and it is better than any color picker we have found.
Pros
Cons
Completely free
Only does color — not a full design tool
Personalizes to your taste over time
Requires setup time to train
Great for UI and brand color exploration
No direct export to design files
Fast palette generation
Simple interface — not feature-rich
6. Visily — Best for Screenshot-to-UI Conversion
Visily makes it effortless to take an existing design idea and turn it into a professional wireframe.
What it is: Visily is an AI wireframing tool that specializes in converting screenshots of existing apps, hand-drawn sketches, or text descriptions into clean, editable UI designs. It is built for speed and accessibility — designed to be usable by people who are not professional UI designers.
Key AI Features:
Screenshot to editable UI — paste any screenshot, get an editable design
AI theme generation — generates a visual style from a description or image
Text to wireframe — describe a screen and Visily builds it
Component suggestions based on context
Team collaboration built in
Pricing:
Plan
Price
AI Features
Free
$0/month
Basic AI features, limited projects
Starter
$10/month
Full AI suite
Team
$20/user/month
Team features
Best For: Product managers, startup teams, and non-designers who need to create wireframes quickly without a design background.
Our Honest Take: Visily and Uizard are the two tools that make wireframing genuinely accessible to non-designers. Visily has a slightly cleaner interface and feels more polished right out of the box. If you are a product manager who needs to communicate UI ideas to a design team without being a designer yourself, Visily is one of the most practical tools on this list.
Pros
Cons
Very easy for non-designers
Not for production-level UI
Clean, polished interface
Less powerful than Figma for professionals
Screenshot to UI works reliably
Output still needs designer polish
Good free plan
Smaller community than Figma or Uizard
7. Attention Insight — Best for AI Heatmap Prediction
Attention Insight tells you where users will actually look before your design ever goes live.
What it is: Attention Insight is an AI-powered UX testing tool that predicts where users will focus their attention on a design. You upload a mockup or screenshot and the AI generates a heatmap showing which areas will capture the most visual attention — based on patterns from millions of eye-tracking studies.
Key AI Features:
AI attention heatmap — predicts where users will look on any design
Clarity score — rates how clearly your design communicates its key elements
Folding analysis — shows what users see above the fold without scrolling
Compare multiple design versions side by side
Works with Figma, Adobe XD, and image uploads
Pricing:
Plan
Price
AI Features
Free Trial
Limited scans
Basic heatmap
Starter
$23/month
Full heatmap suite
Professional
$59/month
Advanced analysis
Best For: UI/UX designers and researchers who want data-driven insight into how users will perceive their designs before spending time on user testing.
Our Honest Take: Attention Insight fills a real gap user testing takes time and money, but getting zero feedback before launch is risky. AI heatmaps are not a perfect substitute for real user testing, but they catch obvious attention problems before they become expensive mistakes. We use it as a quick gut-check before presenting designs to clients. The $23/month entry point is reasonable for professional designers who do this regularly.
Pros
Cons
Unique AI heatmap prediction capability
No free plan with meaningful access
Catches attention problems before launch
AI predictions are not a replacement for real user testing
Works with existing design files
Pricier than other tools on this list
Saves time vs traditional user testing
Less useful for early wireframe stages
8. Colormind — Best for AI Color Scheme Generation
Colormind generates color schemes that look like a designer made them — because it learned from real designers’ work.
What it is: Colormind is a free AI color scheme generator that uses deep learning trained on real design work — photography, films, and art — to generate color palettes that feel cohesive and intentional. You can lock colors you like and regenerate the rest, making it fast to find the right palette.
Key AI Features:
AI color scheme generation from deep learning
Lock individual colors and regenerate the rest
Upload an image to extract its color palette
Bootstrap mode for web and UI color application
One-click new scheme generation
Pricing:
Plan
Price
Free
$0 — completely free
Best For: UI designers and brand designers who need a quick, reliable color scheme and want something more grounded than a random palette generator.
Our Honest Take: Colormind is a reliable color tool we keep bookmarked. The palettes feel more intentional than what you get from random generators, and the ability to lock colors you like and regenerate the rest makes it fast to work with. It is not as personalized as Khroma, but it does not require setup time either — you can get a solid palette in 30 seconds. The fact that it is completely free makes it an easy recommendation.
Pros
Cons
Completely free
No saving or account features
Fast — good palette in under a minute
Simpler than Khroma for personalization
Image-to-palette feature is useful
Only does color — not a full design tool
Works for web and print color needs
Interface is very basic
Quick Comparison Table
Tool
Best For
Free Plan
Starting Price
AI Specialty
Ease of Use
Figma AI
Professional UI
✅ Yes
$12/month
Full design copilot
⭐⭐⭐⭐
Uizard
Wireframing
✅ Yes
$19/month
Screen generation
⭐⭐⭐⭐⭐
Framer AI
Web UI
✅ Yes
$5/month
AI site builder
⭐⭐⭐⭐
Galileo AI
UI generation
❌ No
Contact for price
Text to UI
⭐⭐⭐⭐⭐
Khroma
Color palettes
✅ Yes
Free
Color generation
⭐⭐⭐
Visily
Wireframing
✅ Yes
$10/month
Screenshot to UI
⭐⭐⭐⭐⭐
Attention Insight
UX testing
❌ No
$23/month
Heatmap AI
⭐⭐⭐
Colormind
Color schemes
✅ Yes
Free
Color AI
⭐⭐⭐
Verify all pricing at each tool’s official website before purchasing.
How to Choose the Right AI UI Design Tool
Are you a professional UI/UX designer? Figma AI is the clear choice. It is the industry standard and the AI features integrate directly into your existing workflow.
Do you need to wireframe quickly from ideas or screenshots? Uizard or Visily. Both are fast, both handle screenshot-to-wireframe well. Uizard has a slightly larger community. Visily has a cleaner interface for non-designers.
Are you building a website with AI help? Framer AI. It generates live, publishable websites from text prompts — not just mockups.
Do you need AI to generate a full UI from a text description? Galileo AI. The output quality is the most impressive on this list. The pricing model is the main friction.
Do you only need help with colors? Khroma or Colormind. Both are completely free. Khroma personalizes over time. Colormind is faster to get started with.
Do you want to predict how users will experience your design? Attention Insight. It is the only tool on this list that gives you AI-powered attention heatmaps before a design goes live.
Are AI UI Design Tools Replacing Designers?
This comes up constantly, so here is an honest answer.
No — AI is not replacing UI designers. What it is doing is changing what designers spend their time on.
AI handles the repetitive and mechanical parts of design work well. Generating wireframe options, suggesting color palettes, auto-applying layout rules, predicting user attention — these are all things AI tools do faster than any human. That is genuinely useful and genuinely time-saving.
What AI cannot do is understand your users. It cannot decide what problem you are solving, who you are solving it for, and how to design an experience that feels right for that specific context. Those decisions require human judgment, empathy, and strategic thinking. No AI tool gets there yet.
The designers who are thriving right now are the ones who have embraced AI tools to handle the mechanical work and redirected their energy toward the decisions that require a human. The ones who ignore AI tools entirely are at risk of being slower and more expensive than designers who use them.
The best outcome is not AI instead of designers — it is human designers with AI tools working together. That combination is genuinely better than either alone.
Final Verdict
After testing all 8 tools, here are our top picks:
For professional UI designers — Figma AI. It is the industry standard with the best-integrated AI features. If you design interfaces for a living, this is the tool to be in.
For quick wireframing — Uizard. Nothing else generates wireframes from screenshots and text descriptions as fast. Great for early-stage projects and non-designers who need to communicate UI ideas.
For free color work — Khroma or Colormind. Both are excellent and completely free. Khroma personalizes to your taste over time. Colormind is faster to get your first palette.
Want to see how Figma AI compares in a full review? Read our detailed Figma AI review. Or check our main guide to the best AI design tools for graphic designers.
Frequently Asked Questions
Q: What is the best AI tool for UI design?
Figma AI is the best AI tool for professional UI design in 2026. It is the industry standard design tool and its AI features include auto layout, component generation, and a design copilot. For beginners who want to wireframe quickly, Uizard is the better choice because it is easier to learn and faster for generating initial UI concepts.
Q: Can AI generate UI designs automatically?
Yes, tools like Galileo AI and Uizard can generate complete UI designs from a text description or screenshot. Galileo AI is the most advanced — you type what you want and it generates a full, polished UI layout. Uizard can convert a rough hand-drawn sketch into a digital wireframe in seconds using AI.
Q: Is Figma an AI design tool?
Yes, Figma has added significant AI features to its platform including an AI design copilot, auto layout generation, and AI component suggestions. While Figma started as a traditional UI design tool it is now one of the most capable AI-powered design tools available and is the industry standard for professional UI and UX designers.
Q: What AI tools do UX designers use?
UX designers commonly use Figma AI for interface design, Attention Insight for AI heatmap predictions, Uizard for quick wireframing, and Khroma for AI color palette generation. Many UX designers also use general AI tools like ChatGPT for user research synthesis and writing UX copy for their designs.
Q: Are there free AI UI design tools?
Yes, several excellent AI UI design tools have free plans. Figma AI, Uizard, Framer AI, Visily, Khroma, and Colormind all offer free plans. Figma and Uizard are the most useful free AI UI tools — both let you create real designs and wireframes without paying anything.
Q: Can beginners use AI UI design tools?
Yes, tools like Uizard and Visily are specifically designed for beginners with no design experience. Both use AI to generate wireframes from screenshots or simple text descriptions. Figma AI is more powerful but has a steeper learning curve and works better for people who already understand basic design principles.
Q: How does AI help in UI/UX design?
AI helps UI/UX designers in several ways. It generates wireframes from text descriptions, suggests color palettes based on brand style, auto-creates component layouts, predicts where users will look using heatmaps, and speeds up repetitive design tasks. AI does not replace the strategic thinking and user research that makes great UX — it handles the mechanical parts so designers can focus on the creative work.
Q: Is Framer AI good for UI design?
Yes, Framer AI is excellent for building website UI with AI assistance. You can describe what you want and Framer AI generates a functional website design with animations and interactions. It is best for designers who want to create web UI that is also live and publishable — not just a mockup. For app UI design, Figma AI or Uizard are better choices.
Read on for full details, pricing, and who each tool is best suited for.
Introduction
Choosing the right graphic design tool as a beginner can feel overwhelming there are so many options. But the truth is most beginners only need one good tool to get started and start producing great work.
In this guide we cover the 10 best graphic design tools for beginners in 2026 including free and affordable paid options. We explain who each tool is best for so you can pick the right one and start designing with confidence. Whether you are making your first social media post, learning UI design, or exploring design as a career path, there is a tool on this list that fits where you are right now.
What to Look for in a Beginner Design Tool
Not every design tool is built with beginners in mind. Before picking one, here is what actually matters.
Ease of learning. The best beginner tool is one you will actually use. If the interface overwhelms you in the first five minutes, you will close the tab and never come back. Look for tools with clean layouts, good templates, and tutorials that make sense.
Template quality. Good templates are a huge shortcut for beginners. They help you understand what good design looks like and give you a starting point that is already professional. A tool with a strong template library lets you produce solid work before you fully understand design principles.
Output quality. Does the tool actually produce designs that look good? Some free tools create results that feel generic or low-quality. The tools on this list produce results you would be proud to share or show a client.
Price. We cover both free and paid tools here. Free is a great starting point, but some paid tools especially one-time purchase options like Affinity Designer offer real value for beginners serious about learning design.
Community and tutorials. Can you find help when you get stuck? The tools with large communities and YouTube libraries make learning much faster.
Future-proofing. Will the tool grow with you? Starting on a tool that professionals also use like Figma or Adobe Illustrator means your skills transfer directly into a real design career.
How We Selected These Tools
We personally tested every tool on this list not just skimmed the feature pages.
We approached each tool from a beginner perspective: how fast can a first-time user go from signing up to producing something that looks good? We paid attention to the learning curve, the quality of the first-run experience, and how much help is available when things are unclear.
We compared free plan value against paid plan value honestly. We also thought about which tools are worth learning long-term tools that professional designers still use, so the skills beginners build today are still relevant years from now.
The goal was to build a list that gives beginners the best starting point, not just the most popular names.
10 Best Graphic Design Tools for Beginners in 2026
1. Canva — Best Overall for Complete Beginners
Canva is the best starting point for anyone who has never designed anything before in their life.
What it is: Canva is a browser-based design tool with a massive template library, a drag-and-drop editor, and a growing set of AI features. It covers social posts, presentations, logos, print materials, and more all in one place. It is free to start and used by over 150 million people worldwide.
Key Features:
250,000+ free templates across every design category
Magic Design AI builds a full layout from a photo or prompt
Beginner Friendliness: ⭐⭐⭐⭐⭐ Easiest tool on this list
Best For: Complete beginners who want to design anything from social posts to presentations without any prior experience.
Our Honest Take: Canva is where almost every beginner should start in 2026. The gap between opening the app and producing something that looks professional is shorter than any other tool. The free plan is genuinely useful not a gimped demo. Our one note of caution is that designs made in Canva can sometimes look similar to what everyone else is making, since so many people use the same templates. Customize as much as you can to make your work stand out.
Pros
Cons
Easiest to learn
Designs can look generic
Huge free template library
Limited professional-level features
AI features on free plan
1GB storage on free plan
Works on web and mobile
Some Pro-only templates can confuse beginners
2. Adobe Express — Best for Social Media Beginners
If your main goal is creating content for social media, Adobe Express is purpose-built for that.
What it is: Adobe Express is Adobe’s fast, beginner-friendly design tool. It is nothing like Photoshop or Illustrator it is simple, template-driven, and focused on quick content creation. Every template is pre-sized for the right platform, which saves beginners a lot of trial and error.
Key Features:
Templates pre-sized for every social platform
AI background removal
Animated content creation for Reels and Stories
Text effects and simple photo editing
Free stock photo library built in
Pricing:
Plan
Price
What You Get
Free
$0
Thousands of templates, basic AI, 2GB storage
Premium
$10/month
Full template library, unlimited stock, advanced AI
Beginner Friendliness: ⭐⭐⭐⭐⭐ As easy as Canva for social content
Best For: Beginners focused on Instagram, Facebook, LinkedIn, and TikTok content who want templates that are already the right size.
Our Honest Take: Adobe Express has a cleaner, more polished template library than Canva in many categories. If you are already in the Adobe world or planning to be it fits naturally. The free plan is solid for daily social media use. The main reason Canva edges it out for beginners is the sheer volume of templates, but for social-first creators Adobe Express is a genuine competitor.
Pros
Cons
Templates pre-sized for every platform
Smaller template library than Canva
Clean, professional designs
Advanced features behind paywall
AI tools on free plan
Less versatile for non-social design
Part of Adobe ecosystem
Some exports include Adobe watermark
3. Microsoft Designer — Best Free AI Option for Beginners
If you want AI to do most of the design work for you for free Microsoft Designer delivers.
What it is: Microsoft Designer is a free AI design tool powered by DALL-E. You describe what you want and it generates a complete design. It is the most AI-forward free tool on this list you spend less time choosing and arranging, and more time prompting and refining.
Key Features:
DALL-E powered AI image generation best quality available for free
Text-to-design describe your idea and get a full layout
No watermarks on any downloads
AI background removal
Integrates with Microsoft 365
Pricing:
Plan
Price
What You Get
Free
$0
Full access, no watermarks, unlimited designs
Beginner Friendliness: ⭐⭐⭐⭐⭐ Easiest AI-powered tool on this list
Best For: Beginners who want AI to handle the design decisions and just need to describe what they want.
Our Honest Take: Microsoft Designer is genuinely impressive for a free tool. The DALL-E image quality is the best you will get without paying, and the absence of any watermarks is a real differentiator. It is not as template-deep as Canva, but for AI-generated designs from a text prompt, nothing free comes close. Worth having in your toolkit alongside Canva.
Pros
Cons
Best free AI image generation
Fewer templates than Canva
No watermarks at all
Newer and still maturing
Zero cost — no paid tier
Less customization depth
No design experience needed
Not ideal for print work
4. Figma — Best for Beginners Learning UI Design
If you are interested in designing apps, websites, or digital products, Figma is where you should start.
What it is: Figma is the industry-standard tool for UI and UX design. It is used by design teams at major companies worldwide. It has a free plan that is genuinely capable, a huge community of designers sharing resources, and AI features that make wireframing and prototyping faster.
Key Features:
Drag-and-drop interface with precise control
Real-time collaboration share a link and work together
Component libraries and design systems
AI-powered First Draft generate UI from a text description
Thousands of free plugins and community resources
Pricing:
Plan
Price
What You Get
Starter
Free
3 projects, unlimited files, full editor
Professional
$12/month
Unlimited projects, team features
Beginner Friendliness: ⭐⭐⭐⭐ Some learning needed, but worth it
Best For: Beginners who want to learn UI and UX design with a tool that professional designers actually use.
Our Honest Take: Figma has a steeper learning curve than Canva, but if you are interested in a career in UI or UX design, starting here is the right call. You will not have to unlearn bad habits from a simpler tool later. The free plan is more than enough to learn and build a portfolio. The community is enormous and the YouTube tutorials are excellent. Give it 30 days and you will not look back.
Pros
Cons
Industry standard for UI/UX
Steeper learning curve than Canva
Strong free plan
Not ideal for print or social graphics
Huge community and resources
Can be overwhelming at first
Real-time collaboration
AI features still developing
5. Affinity Designer — Best Paid Tool for Beginners
If you are ready to invest in a design tool and want something that will grow with you, Affinity Designer is the best value available.
What it is: Affinity Designer is a professional vector and raster design tool think Adobe Illustrator but at a fraction of the cost and with a one-time payment. It handles logos, illustrations, UI design, and print work with professional-level precision.
Key Features:
Professional vector and pixel editing in one tool
One-time purchase no subscription
Handles print, UI, and illustration work
Smooth performance works well on older hardware
Regular free updates included
Pricing:
Plan
Price
What You Get
Affinity Designer 2
$70 one-time
Full software, all features, free updates
Beginner Friendliness: ⭐⭐⭐ Some learning needed
Best For: Beginners who are serious about design and want a professional-level tool without an ongoing subscription cost.
Our Honest Take: Affinity Designer is the best one-time-purchase deal in design software right now. Seventy dollars gets you a professional tool that competes directly with Adobe Illustrator and you never pay again. The learning curve is real but manageable. If you are committed to learning design seriously and want a tool that will be with you for years, this is where we would put that $70.
Pros
Cons
One-time purchase — no subscription
No free plan
Professional-level output
Learning curve steeper than Canva
Works for print, UI, and illustration
No cloud-based collaboration
Regular free updates
Not as widely used as Adobe tools
6. Adobe Illustrator — Best for Beginners Learning Vector Design
If your goal is to work in professional graphic design, Adobe Illustrator is the tool the industry runs on.
What it is: Adobe Illustrator is the industry standard for vector graphics logos, icons, illustrations, brand identity design. It is powerful, has a steeper learning curve than the other tools on this list, and requires a subscription. But if you are serious about professional design, learning Illustrator is a career investment.
Key Features:
Industry-standard vector editing tools
Integrates with Photoshop, InDesign, and the full Adobe suite
Massive library of tutorials and learning resources
AI-powered Generative Recolor and vector generation
Professional output for print and digital
Pricing:
Plan
Price
What You Get
Illustrator
$22/month
Full software, cloud storage, Adobe fonts
Creative Cloud All Apps
$60/month
All Adobe apps included
Beginner Friendliness: ⭐⭐ Steeper learning curve
Best For: Beginners who are serious about a career in graphic design and want to learn the tool professionals actually use.
Our Honest Take: We would not recommend starting here unless you are committed to design as a career or profession. The learning curve is real and the subscription adds up. That said, if you want to work as a graphic designer professionally, you will eventually need Illustrator. Start with Canva or Affinity Designer, learn design fundamentals, and then move to Illustrator when you are ready for the next level.
Pros
Cons
Industry standard for vector work
Expensive monthly subscription
Integrates with full Adobe suite
Steep learning curve for beginners
Best professional output quality
Overkill for casual design needs
Strong learning resources available
Requires ongoing commitment to learn
7. Pixlr — Best for Beginners Who Need Photo Editing
When you need to edit photos and do not want to pay for Photoshop, Pixlr gets the job done for free.
What it is: Pixlr is a free browser-based photo editor with a feature set that goes well beyond what most people expect from a free tool. It has layers, filters, AI tools, and adjustment options all accessible from any browser without downloading anything.
Key Features:
Layers and masks for non-destructive editing
AI background removal and enhancement
Hundreds of filters and effects
Cutout and object removal tools
No download or install required
Pricing:
Plan
Price
What You Get
Free
$0
Core editing tools, basic AI, cloud storage
Plus
$8/month
Premium features, more AI credits, no ads
Beginner Friendliness: ⭐⭐⭐⭐ Easy for photo tasks
Best For: Beginners who primarily need to edit photos retouching, background removal, color correction without paying for professional software.
Our Honest Take: Pixlr sits in a useful middle ground between the simplicity of Canva and the complexity of Photoshop. For photo editing tasks that beginners typically need background removal, basic retouching, adding text to images it handles them well and quickly. The free version shows ads, which is the main downside. Everything else works reliably.
Pros
Cons
Layers on free plan
Ads on free version
No download needed
AI credits limited on free tier
Good for photo editing basics
Interface can feel busy at first
AI background removal included
Less capable than Photopea for advanced work
8. Photopea — Best Free Photoshop Alternative
Photopea is the most powerful free photo editing tool on the internet, period.
What it is: Photopea is a free browser-based photo editor that functions almost identically to Adobe Photoshop. It opens PSD files, supports layers, masks, and smart objects, and uses the same keyboard shortcuts. All of this at zero cost, with no download and no signup required.
Key Features:
Opens PSD, XD, Sketch, and AI files
Full Photoshop-level editing layers, masks, curves, levels
Same keyboard shortcuts as Photoshop
No signup or download needed
All features available on the free version
Pricing:
Plan
Price
What You Get
Free
$0
Full feature access, no watermarks
Paid
$9/month
Same features — just removes the ads
Beginner Friendliness: ⭐⭐⭐ More complex, but very capable
Best For: Beginners who need Photoshop-level editing without the cost, or anyone who needs to open and edit PSD files.
Our Honest Take: Photopea is remarkable for what it offers at zero cost. If you need Photoshop and do not have it, Photopea is the answer. The interface is more complex than Canva or Adobe Express, so it is better suited to beginners who are ready to invest some time in learning. But the payoff is significant you get professional-level photo editing completely free.
Pros
Cons
Opens PSD, XD, and Sketch files
Complex for complete beginners
Full Photoshop-like feature set
Ads on free version
No signup or install needed
Saves locally — no cloud storage
All features free
Not great for non-photo design work
9. Sketch — Best for Mac Beginners Interested in UI Design
If you are on a Mac and want to learn UI design, Sketch is a solid professional option.
What it is: Sketch is a Mac-only UI design tool that has been a staple in the industry for years. It is used by professional product designers and has a strong community, extensive plugin ecosystem, and a large library of tutorials.
Key Features:
Clean, focused UI design interface
Symbols and reusable components
Strong plugin ecosystem
Excellent community resources and templates
Export tools optimized for developer handoff
Pricing:
Plan
Price
What You Get
Individual
$10/month
Full app, cloud storage, updates
Mac App (one-time)
$120
App only — no cloud, no updates after one year
Beginner Friendliness: ⭐⭐⭐ Some learning needed
Best For: Mac users who want to learn UI design with a tool that has strong industry history and community support.
Our Honest Take: Sketch used to be the industry standard for UI design before Figma took over. It is still a solid tool, especially on Mac. For beginners on Mac who want an alternative to Figma, Sketch is worth considering. The main downside compared to Figma is that it is Mac-only and not free. For most beginners we would recommend Figma first, but Sketch is a legitimate option if you prefer it.
Pros
Cons
Professional-quality UI design
Mac only — no Windows or browser version
Strong plugin ecosystem
No free plan
Good community and tutorials
Figma has largely replaced it in teams
Clean, focused interface
Pricier than Figma for similar features
10. CorelDRAW — Best for Beginners Pursuing Professional Design
CorelDRAW is a professional design suite that gives beginners access to the tools working designers use every day.
What it is: CorelDRAW is a professional vector design application that has been around for decades. It handles everything from logo design and illustration to print layout and photo editing all in one suite. It is a serious tool with a real learning investment required.
Key Features:
Professional vector editing and illustration tools
Built-in photo editing (Corel PHOTO-PAINT)
Print-ready output tools
Font management and typography tools
AI-powered design assistance
Pricing:
Plan
Price
What You Get
CorelDRAW Essentials
$22/month
Full suite, cloud storage, updates
Perpetual License
$499 one-time
Full software, no ongoing cost
Beginner Friendliness: ⭐⭐⭐ Medium learning curve
Best For: Beginners who are serious about professional design work, especially in print and illustration, and want an alternative to the Adobe ecosystem.
Our Honest Take: CorelDRAW is a professional tool with a long history. If you want to work in print design or illustration professionally and prefer not to use Adobe software, it is a legitimate choice. For most beginners, we would recommend starting with Canva or Affinity Designer both are easier to learn and more affordable. CorelDRAW is worth considering once you know design is a serious pursuit.
Pros
Cons
Professional-level output
No free plan
Handles print and illustration well
Expensive for beginners
Good alternative to Adobe tools
Steep learning curve
One-time purchase option available
Less widely used than Adobe in many markets
Quick Comparison Table
Tool
Free Plan
Starting Price
Ease of Use
Best For
Platform
Canva
✅ Yes
$15/month
⭐⭐⭐⭐⭐
All-round beginners
Web + Mobile
Adobe Express
✅ Yes
$10/month
⭐⭐⭐⭐⭐
Social media
Web + Mobile
Microsoft Designer
✅ Yes
Free
⭐⭐⭐⭐⭐
AI designs
Web
Figma
✅ Yes
$12/month
⭐⭐⭐⭐
UI/UX
Web + Desktop
Affinity Designer
❌ No
$70 one-time
⭐⭐⭐
Vectors + Print
Desktop
Adobe Illustrator
❌ No
$22/month
⭐⭐
Professional vectors
Desktop
Pixlr
✅ Yes
$8/month
⭐⭐⭐⭐
Photo editing
Web
Photopea
✅ Yes
$9/month
⭐⭐⭐
Photo editing
Web
Sketch
❌ No
$10/month
⭐⭐⭐
UI design
Mac only
CorelDRAW
❌ No
$22/month
⭐⭐⭐
Professional design
Desktop
Verify all pricing at the tool’s official website before purchasing.
Free vs Paid — Which Should Beginners Choose?
This is one of the most common questions beginners ask, and the answer is almost always the same: start free.
Free tools have improved so dramatically in recent years that most beginners will not hit their limits for months if ever. Canva, Adobe Express, Microsoft Designer, Figma, Pixlr, and Photopea all have free plans that are genuinely useful, not just stripped demos.
Start free if:
You are exploring design for the first time
You have no budget right now
You are not sure which tool fits your style
You need results quickly without a learning curve
Go paid if:
You are serious about building design skills professionally
You want features not available on free plans like watermark-free exports or unlimited storage
You are learning design for a career
You need to work on client projects where free plan limits are a problem
Our recommendation for most beginners: start with the Canva free plan for 30 days. If you enjoy design and want to go further, consider the Figma free plan for UI work or Affinity Designer as a one-time paid investment for professional-level design.
How to Choose the Right Tool for Your Goals
You want to make social media posts: Use Canva or Adobe Express. Both are free, both have templates the right size for every platform, and both are easy enough to use on day one.
You want to learn UI and UX design: Use Figma. It is the industry standard. Free to start. The skills transfer directly into a real design career.
You want to edit photos: Use Pixlr or Photopea. Both are free. Pixlr is easier for beginners. Photopea is more powerful and opens PSD files.
You want to make logos and vectors: Use Affinity Designer if you are ready to invest. Use Gravit Designer or Vectr if you want free options to start.
You want to pursue professional design: Start with Canva to learn design basics, then move to Adobe Illustrator or Affinity Designer when you are ready for professional-level work.
Final Verdict
For most beginners in 2026, the answer is simple: start with Canva.
It is free, easy, produces professional results from day one, and covers almost every design need a beginner has. If you enjoy it and want to keep going, the free plan will carry you further than you expect.
For beginners interested in UI and UX design specifically, Figma is the better starting point it is the industry standard and free to begin. Learning it early sets you up for a real career in product design.
If you are ready to invest in a paid tool that will grow with you for years, Affinity Designer at $70 one-time is the best value in design software right now. No subscription, professional output, and it handles vectors, print, and UI design.
Want to see which of these tools are completely free? Read our full guide to free graphic design tools for beginners. Or check our complete guide to the best AI design tools for graphic designers.
Frequently Asked Questions
Q: What is the best graphic design tool for beginners?
Canva is the best graphic design tool for beginners in 2026. It has the easiest learning curve, a huge free template library, and built-in AI features. For beginners interested in UI/UX design specifically, Figma is the better choice as it is the industry standard tool used by professional designers.
Q: Should beginners use free or paid design tools?
Beginners should start with free tools like Canva, Adobe Express, or Figma before investing in paid software. Free tools let you learn design fundamentals and discover your preferred style without spending money. Once you know design is something you want to pursue seriously, then consider upgrading to paid tools.
Q: How long does it take to learn graphic design tools?
Basic tools like Canva and Adobe Express can be learned in a few hours. More advanced tools like Figma and Adobe Illustrator typically take 2–4 weeks of regular practice to become comfortable with. Most beginners can produce professional-looking work within 30 days of consistent practice with any beginner-friendly tool.
Q: Is Figma good for beginners?
Yes, Figma is good for beginners who want to learn UI and UX design. It has a free plan, excellent tutorials, and a huge community of designers who share resources. The learning curve is steeper than Canva but Figma is the industry standard for UI design, so learning it early sets beginners up for a career in design.
Q: What design tool do most graphic designers use?
Professional graphic designers most commonly use Adobe Illustrator for vector design, Adobe Photoshop for photo editing, and Figma for UI and UX design. However, many designers also use Canva for quick social media content and client presentations because of its speed and ease of use.
Q: Is Adobe Illustrator too hard for beginners?
Adobe Illustrator has a steeper learning curve than tools like Canva but it is not impossible for beginners. Most designers recommend starting with Canva or Figma first to learn design fundamentals, then moving to Adobe Illustrator when you are ready for professional-level vector work. There are also many free YouTube tutorials that make learning Illustrator accessible.
Q: Can I use graphic design tools on mobile?
Yes, Canva, Adobe Express, and Microsoft Designer all have excellent mobile apps for iOS and Android. These are the best options for designing on your phone or tablet. Desktop-focused tools like Figma and Adobe Illustrator have limited mobile support and work best on a laptop or desktop computer.
Q: Which graphic design tool is best for making logos?
For beginners making logos, Canva is the easiest option with hundreds of free logo templates. For more professional logo design, Affinity Designer or Adobe Illustrator give you more control and produce truly unique results. If you want AI to generate your logo automatically, Looka is purpose-built for this and takes just minutes.
Quick Answer:The best free graphic design tools for beginners in 2026 are Canva, Microsoft Designer, Adobe Express, Pixlr, and Gravit Designer.
Canva is the easiest free tool for complete beginners
Microsoft Designer is best for AI-powered free designs
Adobe Express is best for social media graphics
Pixlr is best for free photo editing
Gravit Designer is best for free vector design
All tools in this list are 100% free to start.
Introduction
Finding the best free graphic design tools for beginners does not have to be complicated. In 2026 there are more free design tools than ever before and many of them are just as powerful as paid options. Whether you want to create social media posts, logos, presentations, or website graphics this guide covers the 10 best free tools that any beginner can start using today. No design experience needed.
We personally tested every tool on this list, checked what is actually free versus what requires a paid upgrade, and made sure each one is beginner-friendly from day one. If you are starting from scratch and do not want to spend a dollar, you are in the right place.
Why Free Design Tools Are Good Enough for Beginners
A few years ago, free design tools felt limited and clunky. That has completely changed.
In 2026, free tools like Canva and Microsoft Designer offer features that used to cost hundreds of dollars a year. AI is a big part of that shift many free tools now have AI image generation, background removal, and smart design suggestions built right in, at no cost.
For beginners, paid tools are rarely necessary. Most people starting out need templates, basic editing, and the ability to export clean files. Every tool on this list covers that. The free plan on most of these tools will carry you further than you think.
There is also a practical reason to start free you do not yet know which tool fits your workflow. Spending money before you have used a tool for a few weeks is rarely a good idea. Start free, learn what you like, and upgrade only when the free plan genuinely holds you back.
Professional-looking results are absolutely possible with free tools. Thousands of small businesses, freelancers, and content creators use them every single day.
How We Selected These Free Tools
We did not just pick the most popular names and call it a day. We actually logged into each tool on a free plan and used it.
For every tool on this list, we checked whether it is truly free no hidden credit card required, no bait-and-switch after a trial period. We tested ease of use from a complete beginner perspective, which means we paid close attention to how fast you can go from signing up to producing something that looks good.
We also checked output quality. A free tool is only useful if the designs you make with it actually look professional. We verified what the free plan limitations are storage, watermarks, template access and made sure those limits are workable for a beginner, not just frustrating.
Every recommendation here is honest. If the free plan is too limited to be useful, the tool did not make this list.
10 Best Free Graphic Design Tools for Beginners in 2026
1. Canva — Best Free Tool Overall for Beginners
If you are starting from zero, Canva is the tool you should open first it is free and takes minutes to learn.
What it is: Canva is a browser-based design tool with a drag-and-drop editor, a massive template library, and a growing set of AI features. It covers everything from social media posts and presentations to logos and print materials all in one place.
Key Features:
Over 250,000 free templates across every design category
Magic Design AI generates full layouts from a photo or prompt
Resize designs for different platforms in one click
What is Free: The free plan includes 1GB of storage, access to 250,000+ templates, basic AI features including background removal, and unlimited designs. You can export files as PNG, JPG, or PDF at no cost.
What is NOT Free: Some templates and elements are marked as Pro-only and require a Canva Pro subscription ($15/month). The watermark appears on certain downloads if you use premium assets accidentally. The brand kit feature and full AI suite require Pro.
Best For: Complete beginners who want to create anything from social posts to presentations without any design experience.
Our Honest Take:Canva is the first tool we recommend to anyone who has never designed before, and for good reason. You can sign up and have something that looks great within your first 20 minutes. The free plan is genuinely generous the 250,000+ templates alone make it worth it. The only frustration is accidentally clicking a Pro element and then finding out your download has a watermark. Just watch for the crown icon and stick to free assets and you will be fine.
Pros
Cons
Completely free to start
Some templates are Pro only
No design experience needed
Watermark if Pro assets used
Huge template library
Designs can look similar to others
AI features on free plan
Limited storage on free plan (1GB)
2. Microsoft Designer — Best for AI-Powered Free Design
If you want the most powerful AI features completely free, Microsoft Designer is the one to use.
What it is: Microsoft Designer is a free AI-powered design tool from Microsoft, powered by DALL-E. It generates complete designs from text descriptions you tell it what you want and it builds it for you. No templates to browse through, no design choices to make just describe your idea and Designer takes it from there.
Key Features:
DALL-E powered AI image generation some of the best quality available for free
Text-to-design type a description and get a full design
AI background removal
Integrates with Microsoft 365 apps
No watermarks on downloads
What is Free: Everything. Microsoft Designer is completely free with no paid tier currently. You get unlimited designs, cloud storage, and full access to all AI features at no cost.
What is NOT Free: Nothing it is all free right now.
Best For: Beginners who want AI to do most of the design work for them, and anyone who wants professional-looking results without learning design basics.
Our Honest Take: The DALL-E image quality on Microsoft Designer is genuinely impressive better than most paid tools at the same task. And the fact that there are zero watermarks and zero costs makes it hard to argue against. It is not as deep as Canva in terms of templates and customization, but for AI-generated designs it is the best free option out there. Worth having as your go-to alongside Canva.
Pros
Cons
100% free — no watermarks
Fewer templates than Canva
Best free AI image generation
Less customization depth
No design experience needed
Newer tool still maturing
Integrates with Microsoft apps
Not ideal for print work
3. Adobe Express — Best Free Tool for Social Media Graphics
If you are creating content for Instagram, Facebook, or LinkedIn, Adobe Express is built exactly for that.
What it is: Adobe Express is Adobe’s free online design tool, built for quick content creation. It is lighter and faster than Photoshop or Illustrator, and it comes with templates pre-sized for every major social media platform. It also has solid AI features on the free plan.
Key Features:
Thousands of templates sized for every social platform
AI-powered background removal
Text effects and animation for social content
Brand color and font tools
Remove backgrounds from photos instantly
What is Free: The free plan includes 2GB of storage, thousands of templates, basic AI features including background removal, and the ability to export clean files with no watermark on most content.
What is NOT Free: Premium templates, Adobe Stock photos, and advanced AI features require Adobe Express Premium ($10/month). Some exports may carry an Adobe badge on the free plan.
Best For: Beginners who are primarily creating social media content and want templates that are already the right size for every platform.
Our Honest Take: Adobe Express is the tool we reach for when speed matters for social content. The templates are clean, professionally designed, and already sized correctly you are not wasting time resizing. The free plan is solid for everyday social media use. If you are already in the Adobe ecosystem, it feels like a natural fit.
Pros
Cons
Templates sized for every social platform
Some exports carry Adobe badge
Clean, professional template designs
Fewer templates than Canva on free plan
Good AI features for free
Premium stock photos require paid plan
2GB storage on free plan
Less versatile for non-social design
4. Pixlr — Best Free Photo Editing Tool
If you need to edit photos and do not want to pay for Photoshop, Pixlr is the best free option.
What it is: Pixlr is a free browser-based photo editor with tools that feel surprisingly close to Photoshop. It has layers, filters, adjustment tools, and AI-powered features all accessible from any browser without downloading anything.
Key Features:
Layers support for non-destructive photo editing
AI background removal and photo enhancement
Hundreds of filters and effects
Cutout tool for removing objects from photos
Works in browser no download or install needed
What is Free: Core editing tools, layers, filters, and basic AI features are all free. Cloud storage is included. No download required.
What is NOT Free: Some premium filters, AI credits, and export options require Pixlr Premium ($8/month). The free version shows ads.
Best For: Beginners who need to edit photos adjusting colors, removing backgrounds, cutting out objects without paying for professional software.
Our Honest Take: Pixlr sits in a nice spot between being genuinely capable and actually free. For photo editing tasks that beginners typically need background removal, basic retouching, color adjustments it handles them well. The interface takes a few minutes to get used to but once you find your way around, it is fast and reliable. The ads on the free plan are a minor annoyance but not a dealbreaker.
Pros
Cons
Closest free alternative to Photoshop
Ads on free plan
No download required
Some features require paid plan
Good AI photo features
Interface can feel cluttered at first
Layers support on free plan
AI credits are limited on free tier
5. Gravit Designer — Best for Free Vector Design
If you need to create logos, icons, or scalable graphics without paying for Illustrator, Gravit Designer is worth your time.
What it is: Gravit Designer is a free vector design tool that runs in the browser. Vector graphics are scalable they stay sharp at any size which makes Gravit useful for logos, icons, and illustrations. It is more technical than Canva but still approachable for beginners willing to spend a bit of time learning.
Key Features:
Full vector editing tools pen tool, bezier curves, shapes
500MB free cloud storage
Export to SVG, PDF, PNG, and other formats
Symbols and reusable components
Multi-page documents
What is Free: The core vector editor, 500MB storage, and all basic design tools are free with an account. Export to common formats is free.
What is NOT Free: Offline access, unlimited cloud storage, and advanced features require Gravit Designer Pro ($49/year).
Best For: Beginners who want to learn vector design and create logos or icons without paying for Adobe Illustrator.
Our Honest Take: Gravit Designer is a solid free tool for anyone who wants to get into vector design without the Illustrator price tag. The learning curve is steeper than Canva but that is the nature of vector work it takes more time to learn. For logo design and icon creation, it does the job well. If you are serious about learning vector design, this is the best free starting point available.
Pros
Cons
Full vector editor for free
Steeper learning curve than Canva
Export to SVG and PDF free
Limited templates
Good for logos and icons
No offline access on free plan
Browser-based — no install needed
500MB storage limit
6. Photopea — Best Free Photoshop Alternative
Photopea is the closest thing to Photoshop you will find completely free, no questions asked.
What it is: Photopea is a free browser-based photo editor that looks and works almost identically to Adobe Photoshop. It opens PSD files, supports layers and masks, and handles all the photo editing tasks that Photoshop is known for entirely for free.
Key Features:
Opens and saves PSD, XD, Sketch, and AI files
Full layers and masks support
Same keyboard shortcuts as Photoshop
No download, no signup required just open the browser and go
Smart objects and adjustment layers
What is Free: Everything is free. No signup needed, no storage limits, no watermarks. You work on files locally and save them to your computer.
What is NOT Free: A paid plan ($9/month) removes ads from the interface. That is the only difference all features are available on the free version.
Best For: Anyone who needs Photoshop-level editing without paying for it, or anyone who needs to open and edit PSD files for free.Our Honest Take: Photopea is one of the most impressive free tools on the internet, full stop. The fact that it opens PSD files, handles layers properly, and uses the same shortcuts as Photoshop all for free, in a browser is remarkable. The ads are a small annoyance. Everything else about it is excellent. If you need Photoshop and do not have it, open Photopea.
Pros
Cons
Opens PSD, XD, and Sketch files
Ads on free version
Full Photoshop-level feature set
Can feel overwhelming for beginners
No signup or download needed
No cloud storage — saves locally
All features free
Interface is complex for first-timers
7. Desygner — Best Free Template-Based Design Tool
Desygner gives you access to thousands of ready-made templates that cover almost any design need.
What it is: Desygner is a free online design tool focused on templates. It has thousands of designs for social media, marketing materials, business documents, and more. It is similar to Canva in concept but with its own template library and editor.
Key Features:
Thousands of free templates across categories
1GB free storage
PDF editing you can edit existing PDFs directly
Team sharing features
Mobile app available
What is Free: The free plan includes 1GB storage, access to most templates, and basic editing tools. PDF editing is included for free.
What is NOT Free: Premium templates, some design elements, and advanced brand features require Desygner Business ($9.95/month). Some downloads may include a Desygner watermark on the free plan.
Best For: Beginners who need a quick template-based design tool and also need to edit PDF files occasionally.
Our Honest Take: Desygner is a solid alternative to Canva with one unique advantage PDF editing. If you regularly need to update or edit existing PDF documents, Desygner handles that better than most free tools. The template library is good but not as deep as Canva’s. Worth having in your toolkit, especially if PDF work is part of your workflow.
Pros
Cons
PDF editing on free plan
Watermark on some free downloads
Thousands of templates
Smaller template library than Canva
1GB free storage
Less intuitive than Canva
Mobile app available
Some features feel limited on free tier
8. Vectr — Best Free Vector Graphics Tool for Beginners
Vectr makes vector design as simple as possible a good starting point if Gravit Designer feels too advanced.
What it is: Vectr is a free, simplified vector graphics editor designed specifically for beginners. It is less powerful than Gravit Designer or Illustrator, but that simplicity is the point it is easier to learn and faster to get results if you are just starting out with vector design.
Key Features:
Simple vector editing tools shapes, paths, text
Real-time collaboration share a link and work together
Cloud-based no download needed
Free for all users with no paid tier
Basic export to SVG and PNG
What is Free: Everything Vectr is completely free with no paid plan. All features are available to all users.
What is NOT Free: Nothing. It is all free.
Best For: Beginners who want to learn the basics of vector design in a tool that is less intimidating than Gravit or Illustrator.
Our Honest Take: Vectr is not the most powerful vector tool, but it is genuinely one of the easiest to learn. If you are a complete beginner curious about vector design, Vectr is a low-pressure way to start. The real-time collaboration feature is a nice bonus for working with teammates or clients. Once you outgrow it, moving to Gravit Designer or Figma is a natural next step.
Pros
Cons
Completely free — no paid plan
Limited compared to Gravit or Figma
Easiest vector tool for beginners
Fewer export options
Real-time collaboration included
Not suitable for complex vector work
No download required
Limited template library
9. Crello (Vista Create) — Best Free Tool for Animated Designs
If you want to make animated social media content for free, Vista Create (formerly Crello) is the tool to use.
What it is: Vista Create, which most people still call Crello, is a free design tool focused on animated content. It has thousands of templates including animated versions great for Instagram Stories, TikTok content, and any social media that benefits from movement.
Key Features:
Thousands of free animated templates
Video and GIF creation tools
Brand kit features on free plan
Large library of free stock photos and videos
One-click resizing for different platforms
What is Free: The free plan includes access to thousands of templates (including animated ones), basic stock assets, and export to common formats. A watermark may appear on some free exports.
What is NOT Free: Premium templates, extended stock library, and removing watermarks require Vista Create Pro ($13/month).
Best For: Beginners creating animated content for social media who want ready-made templates that move.
Our Honest Take: Vista Create is the best free option specifically for animated social content. The animated templates are a big differentiator Canva has some, but Vista Create has more variety in this specific category. If animation matters to your content, it is worth spending time here. For static designs, Canva is still the better all-around choice.
Pros
Cons
Best free animated template library
Watermark on some free exports
Good stock photo and video library
Less known — smaller community
Brand kit on free plan
Not as deep as Canva overall
Easy to use for animated content
Premium templates require paid plan
10. Snappa — Best Free Tool for Quick Social Media Design
When you need a social media graphic done in under five minutes, Snappa makes it happen.
What it is: Snappa is a free online design tool built specifically for social media and digital marketing graphics. It is fast, simple, and focused no unnecessary features, just a clean editor with good templates and the right canvas sizes already set up.
Key Features:
Pre-set canvas sizes for every major social platform
Thousands of free templates
One-click background removal
Free stock photo library built in
Simple drag-and-drop editor
What is Free: The free plan includes 3 downloads per month, access to all templates, and the full stock photo library. No watermark on downloads.
What is NOT Free: Unlimited downloads require Snappa Pro ($10/month). The 3 downloads per month limit is the main restriction on the free plan.
Best For: Beginners who need to create a small number of social media graphics each month and want a fast, simple tool with no learning curve.
Our Honest Take: Snappa is genuinely fast and clean. The interface is simpler than Canva which is actually an advantage if you just need to get something done quickly. The 3 downloads per month limit on the free plan is restrictive if you create content regularly, but if you only need a handful of graphics per month, it works well. No watermarks is a big plus.
Pros
Cons
No watermarks on free plan
Only 3 downloads per month free
Very fast and easy to use
Not great for non-social design
Clean, simple interface
Limited customization depth
Built-in free stock photos
Fewer templates than Canva
Quick Comparison Table
Tool
Best For
Storage
Templates
AI Features
Watermark
Canva
Overall
1GB
250,000+
✅ Yes
Some files
Microsoft Designer
AI Design
Cloud
Unlimited
✅ Yes
❌ No
Adobe Express
Social Media
2GB
Thousands
✅ Yes
Some files
Pixlr
Photo Edit
Cloud
Hundreds
✅ Yes
❌ No
Gravit Designer
Vectors
500MB
Limited
❌ No
❌ No
Photopea
Photo Edit
Local
None
❌ No
❌ No
Desygner
Templates
1GB
Thousands
❌ No
Some files
Vectr
Vectors
Cloud
Limited
❌ No
❌ No
Vista Create
Animation
Cloud
Thousands
✅ Yes
Some files
Snappa
Social Media
Cloud
Thousands
❌ No
❌ No
Always verify free plan details directly on each tool’s website these change regularly.
How to Choose the Right Free Tool
Are you a complete beginner with no design experience? Start with Canva. It is the easiest to learn and covers almost every design need. You can be up and running in under 10 minutes.
Do you want AI to generate designs for you? Use Microsoft Designer. Describe what you want and it builds it. Best free AI image quality available right now.
Are you creating social media content? Adobe Express or Snappa. Both have templates pre-sized for every platform. Adobe Express has more depth, Snappa is faster for quick work.
Do you need to edit photos? Pixlr for beginner-friendly photo editing. Photopea if you need Photoshop-level tools and want to open PSD files.
Do you need to design logos or icons? Gravit Designer or Vectr. Vectr is easier to start with. Gravit Designer is more powerful once you get the hang of it.
Do you need animated social content? Vista Create. It has the best free library of animated templates.
Do you have almost no time and need quick results? Snappa. It is the fastest tool on this list for getting a social graphic done and exported.
Tips for Beginners Using Free Design Tools
Starting out with a new design tool can feel overwhelming. Here are a few things that will save you time and frustration.
Start with templates, not blank canvases. Every tool on this list has templates. Use them. There is no shame in starting from a template even professional designers do it. Pick one that is close to what you want, swap out the text and images, and you have something that looks great in minutes.
Watch one YouTube tutorial before you start. Every tool here has free tutorials on YouTube. Spending 15 minutes watching someone use the tool before you open it will save you an hour of confusion. Search the tool name plus “beginner tutorial” and pick the most recent one.
Stick to one tool for your first 30 days. It is tempting to try all of them. Resist that urge. Pick one tool probably Canva if you are unsure and use it for 30 days. You will learn it much faster by going deep on one tool than jumping between five.
Save your work regularly. Most of these tools auto-save in the browser, but do not assume. Download a copy of your work after finishing anything important. You do not want to lose two hours of work because a browser tab closed unexpectedly.
Use free design communities for inspiration. Dribbble, Behance, and Pinterest are all free to browse. When you are stuck on how something should look, spend five minutes looking at what other designers have created. Inspiration is not cheating it is how design works.
Final Verdict
After testing all 10 tools, here are our top picks for different types of beginners:
For most beginners — Canva. It is free, easy to learn, produces professional results, and covers almost every design need. If you are unsure where to start, start here.
For AI-powered designs — Microsoft Designer. The best free AI image generation available, with no watermarks and no cost. A powerful companion to Canva.
For social media content — Adobe Express. Templates pre-sized for every platform, clean designs, and solid AI features on the free plan.
For photo editing, Pixlr and Photopea both deliver. For vector work, start with Vectr and graduate to Gravit Designer. For animated content, Vista Create is the standout free option.
The most important thing is to pick one and start. You will learn more in a week of actually using a tool than in a month of reading about them.
Frequently Asked Questions
Q: What is the best free graphic design tool for beginners?
Canva is the best free graphic design tool for beginners in 2026. It has over 250,000 free templates, requires no design experience, and includes free AI features. Microsoft Designer is a strong second choice for beginners who want more AI-powered options for free.
Q: Can I do professional graphic design with free tools?
Yes, you can create professional-quality designs using free tools like Canva, Adobe Express, and Microsoft Designer. Many small businesses and freelancers use these free tools daily for social media, presentations, and marketing materials without needing paid software.
Q: Is Canva really free for beginners?
Yes, Canva has a completely free plan that includes access to over 250,000 templates, basic AI features, 1GB of storage, and unlimited designs. Some premium templates and features require Canva Pro which starts at around $15 per month, but the free plan is more than enough for most beginners.
Q: What free tool is best for social media graphics?
Adobe Express and Canva are the best free tools for social media graphics. Both have templates sized perfectly for Instagram, Facebook, Twitter, and LinkedIn. Adobe Express has slightly better photo editing features while Canva has more template variety on its free plan.
Q: Is there a free alternative to Adobe Photoshop?
Yes, Photopea and Pixlr are the best free alternatives to Adobe Photoshop. Both run directly in your browser with no download needed. Photopea is the closest match to Photoshop and even opens PSD files. Pixlr is easier for beginners with a simpler interface.
Q: Can beginners learn graphic design with free tools?
Absolutely. Free tools like Canva, Adobe Express, and Microsoft Designer are designed specifically for people with no design experience. Starting with free tools is actually recommended for beginners because you can learn design fundamentals without spending money before knowing which tool fits your workflow.
Q: What is the easiest free graphic design tool?
Canva is the easiest free graphic design tool for complete beginners. Its drag-and-drop interface, pre-made templates, and AI design suggestions mean you can create a professional-looking design in under 10 minutes even with zero design experience.
Q: Are free graphic design tools good enough for business use?
Yes, many businesses use free design tools successfully. Canva, Adobe Express, and Microsoft Designer are all used by small businesses for social media, presentations, email graphics, and basic marketing materials. For advanced branding or print work, a paid tool may eventually be needed.
Microsoft Designer is the best completely free option
Keep reading to see all 10 tools with full details, pricing, and who each one is best for.
Introduction
AI design tools are completely changing how graphic designers work in 2026. Whether you are a beginner looking for your first design tool or a professional wanting to speed up your workflow there is an AI design tool that fits your exact needs.
In this guide we tested and reviewed the 10 best AI design tools for graphic designers. We cover pricing, features, ease of use, and who each tool works best for so you can make the right choice without wasting time. If you have been wondering which tools are actually worth it and which ones are just hype, you are in the right place.
Why Graphic Designers Need AI Tools
A few years ago, AI in design felt like a gimmick. Now it is one of the most practical things you can add to your workflow.
The biggest win is time. Tasks that used to eat up a whole afternoon like removing backgrounds, generating color palettes, or resizing assets for different platforms now take seconds. That frees you up to focus on the work that actually requires your brain.
AI tools also help when you hit a creative block. Need five different logo concepts to show a client? An AI tool can generate a starting point in minutes. You still bring the creative direction, but you are not starting from a blank page.
For freelancers and small studios, the cost savings are real too. You can produce more work in less time, which means you can take on more clients without burning out. And for beginners, AI tools have made professional-looking design accessible to people who do not have years of training.
The bottom line: AI does not replace what makes you a good designer. It just handles the repetitive stuff so you can do more of the creative stuff.
How We Tested and Selected These Tools
We did not just read the marketing pages. We actually logged into each tool and put it through its paces.
For every tool on this list, we tested it for ease of use both as someone who is new to design and as someone with professional experience. We created real design assets: social media graphics, logos, color palettes, wireframes, and marketing materials.
We compared what you actually get on the free plan versus what is locked behind a paywall. We also looked at how often each tool pushes out updates and improvements, because in the AI world a tool that is not evolving is already falling behind.
Price was a big factor too. We asked ourselves honestly is this worth the money at every price point? If the answer was no, it did not make the list.
Every recommendation here is based on real testing, not sponsored rankings.
10+ Best AI Design Tools for Graphic Designers in 2026
1. Canva AI — Best for Beginners
If you have never used a design tool before, Canva AI is honestly the best place to start.
What it is: Canva started as a drag-and-drop design tool, but in the last couple of years it has added a serious set of AI features. You can generate images, write copy, remove backgrounds, and get full design suggestions all inside the same platform you probably already know.
Key Features:
Magic Design generates full layouts from a single prompt
Best For: Beginners, social media managers, and small business owners who want professional results without a design degree.
Our Honest Take: We use Canva AI regularly for quick social media graphics and client presentations. The AI suggestions genuinely save time probably an hour or more per week. The one frustration is the watermark on the free plan, which makes it awkward for client work. If you are serious about using it professionally, the Pro plan is worth it.
Pros
Cons
Incredibly easy to use
Free plan has a watermark
Huge library of templates
Designs can look similar to everyone else’s
AI features on free plan
Limited fine-tuning control
Works in browser — no install needed
Not ideal for complex print work
2. Adobe Firefly — Best for Professionals
If you are a working designer who lives inside Adobe Creative Cloud, Firefly is the AI upgrade you have been waiting for.
What it is: Adobe Firefly is Adobe’s AI image and content generation tool, built directly into Photoshop, Illustrator, and other Adobe apps. It is commercially safe — meaning you can use the outputs in client work without worrying about copyright issues.
Key Features:
Generative Fill in Photoshop add, remove, or expand elements with text prompts
Text to vector in Illustrator
Text effects that turn words into illustrated art
Generative Recolor for instant color variations
Commercially safe outputs trained on licensed content
Pricing:
Plan
Price
Best For
Free
$0/month
Testing the tool
Firefly Premium
$20/month
Professionals
Creative Cloud
Included
Existing CC subscribers
Best For: Professional graphic designers and photographers already using Adobe products.
Our Honest Take: Generative Fill alone is worth the price of entry. It handles tasks in Photoshop that used to take real skill and time extending backgrounds, removing objects, filling in gaps. The output quality is noticeably better than most competitors. The only catch is you need to already be in the Adobe ecosystem to get full value from it.
Pros
Cons
Integrates directly with Photoshop and Illustrator
Best features require Creative Cloud subscription
Commercially safe outputs
Learning curve if you are new to Adobe tools
Excellent output quality
Slower for quick social media work
Regular updates and improvements
Can be expensive for hobbyists
3. Figma AI — Best for UI/UX Designers
For anyone designing apps, websites, or digital products, Figma AI is the tool your whole team should be using.
What it is: Figma has been the standard for UI and UX design for years. Their AI features a layer on top of that foundation helping designers prototype faster, generate layouts, and collaborate in real time without constantly starting from scratch.
Key Features:
Auto Layout with AI suggestions for consistent spacing
AI-powered design suggestions based on context
Rename layers automatically saves serious time on complex files
First Draft generate UI screens from text descriptions
Real-time collaboration with AI-assisted handoff notes
Best For: UI/UX designers, product teams, and developers who collaborate on digital products.
Our Honest Take: Figma is already the industry standard for product design, and the AI additions make it even stickier. First Draft is genuinely useful for rough wireframes when a client needs to see something quickly. The auto-rename feature is one of those small things that saves more time than you would expect. If you are building digital products, nothing else comes close.
Pros
Cons
Industry standard for UI/UX
Not great for print or social design
Strong real-time collaboration
AI features still maturing
Free plan is very capable
Can be overwhelming for beginners
Integrates with developer handoff tools
Organization plan is expensive
4. Looka — Best for Logo Design
If you need a professional logo and you need it fast, Looka is built exactly for that.
What it is: Looka is an AI-powered branding tool that generates custom logos based on your business name, industry, and style preferences. It is not a general design tool — it is purpose-built for logo creation and brand identity packages.
Key Features:
AI logo generator that creates dozens of options instantly
Full brand kit including business cards, email signatures, and social profiles
Customizable fonts, colors, and icon combinations
High-resolution files for print and digital use
Brand identity package option
Pricing:
Plan
Price
Best For
Logo Package
$20 one-time
Startups and small businesses
Brand Kit
$96/year
Full brand identity needs
Best For: Entrepreneurs, startups, and small businesses that need a professional logo without hiring a designer.
Our Honest Take: For what it costs, Looka delivers real value. The logos it generates look professional and the customization options give you enough control to make it feel unique. It is not going to replace a senior brand designer for a major rebrand, but for a small business getting started, it is a smart and affordable choice.
Pros
Cons
Fast — logos in minutes
No free download
Professional looking results
Not ideal for complex brand work
One-time payment option
Limited if you need very unique designs
Full brand kit available
_
5. Orshot – Best Design agent
What it is: Orshot is a design + automation platform that puts your social media and marketing visuals on auto-pilot. Design once in a Canva-like editor, then auto-generate images, PDFs, and videos at scale via API, no-code integrations (Zapier, Make, n8n), or directly inside the studio.
Key features:
Canva-like visual editor — no design skills required
AI: generate templates from a prompt + AI image generation credits
150,000+ renders, custom-branded embed, more workspaces/seats
Enterprise
custom pricing
SLA + dedicated support
Annual billing gets 2 months free (~17% off). Unlimited templates on every plan.
Pros
Cons
Real free tier (60 renders + 50 AI credits/month) — most API-first tools in this space are trial-only
Newer and smaller than long-established players like Bannerbear, so the built-in template library and brand recognition are still growing
One platform for images, PDFs, and video, with a full timeline editor and auto-generated subtitles
Automation depth (API, bulk rendering, embed) can be more than a designer who only needs occasional one-off graphics
Canva-like visual editor (Studio) designers can use directly, not developer-only
AI image credits are limited on the free and entry tiers
Import from Figma and Canva, plus AI template generation from a prompt
Highest-volume and multi-tenancy features sit on the Scale/Enterprise plans
White-label, embeddable editor on every paid plan (competitors usually gate this behind higher tiers)
–
Built-in publishing to 15+ social platforms — no separate scheduler needed
–
Automate via API or no-code (Zapier, Make, n8n), plus an MCP server for AI agents
–
Simple credits: 1 credit = 1 image, 1 PDF page, or 1 second of video
–
Automation workflows built right inside the app, so you can setup recurring automations based on schedule, actions etc. without leaving the platform
6. Microsoft Designer — Best Free Option
If your budget is zero, Microsoft Designer gives you more than you would expect for free.
What it is: Microsoft Designer is a free AI design tool powered by DALL-E. You can create social media graphics, invitations, flyers, and more — all from text prompts or customizable templates. No design experience needed.
Key Features:
DALL-E powered AI image generation
Text-to-design — describe what you want and it builds it
Hundreds of templates for social, presentations, and print
Background remover
Integrates with Microsoft 365 apps
Pricing:
Plan
Price
Best For
Free
$0
Everyone
Microsoft 365
Included
Microsoft 365 subscribers
Best For: Anyone who wants a capable free design tool with strong AI image generation.
Our Honest Take: Microsoft Designer is genuinely impressive for a free tool. The DALL-E integration produces some of the best AI-generated images of any tool at this price point — which is zero. It does not have the depth of Canva or Adobe, but if you are not ready to pay for a design tool yet, this is where you should start.
Pros
Cons
100% free
Fewer templates than Canva
DALL-E image quality is excellent
Less mature than other tools
No watermarks
Not ideal for professional client work
Easy to learn
Fewer integrations
7. Khroma — Best for Color Palettes
Khroma solves one of the most common headaches in design — choosing the right colors.
What it is: Khroma is an AI color tool that learns your color preferences and then generates unlimited palettes, gradients, and color combinations tailored to your taste. It is free and entirely focused on color.
Key Features:
Trains on your color preferences to personalize results
Generates palettes, gradients, typography combos, and images
Best For: Designers who struggle with color choices or want to explore new combinations fast.
Our Honest Take: Khroma is one of those niche tools that does exactly one thing really well. Once you train it on your preferences, the palettes it suggests feel genuinely personal — not random. It is not a full design tool, but as a standalone color assistant it is hard to beat for free.
Pros
Cons
Completely free
Only does color — not a full design tool
Personalized to your taste
Requires setup time to train
Great for branding projects
No direct export to design files
8. Uizard — Best for Wireframing
Uizard is the fastest way to go from a rough idea to a working prototype.
What it is: Uizard is an AI wireframing and prototyping tool that lets you upload a hand-drawn sketch or a screenshot and turn it into a digital design. It is designed for non-designers and early-stage product teams who need to visualize ideas quickly.
Key Features:
Screenshot to design upload any app screenshot and get an editable version
Sketch to wireframe draw something on paper, upload it, and Uizard converts it
Auto Theme generates color schemes and design styles from text
Best For: Product managers, startup founders, and designers who need fast wireframes and prototypes.
Our Honest Take: The screenshot-to-design feature is genuinely magical the first time you use it. It is not perfect you will still need to clean things up but it gets you 70% of the way there in seconds. For early-stage product work when speed matters more than polish, Uizard is a real time-saver.
Pros
Cons
Screenshot to design is a standout feature
Not for production-ready UI
Great for non-designers
Less powerful than Figma for professionals
Fast prototyping
Output needs cleanup
9. Designs.ai — Best All-in-One AI Design Suite
If you want one tool that handles everything from logos to videos to social posts, Designs.ai tries to be that.
What it is: Designs.ai is a full AI design platform that covers logos, videos, mockups, social media content, and more all under one subscription. It is built for marketing teams and content creators who need variety without switching between five different tools.
Key Features:
AI logo maker, video maker, and social content creator
Best For: Marketing teams, content creators, and small agencies who need a wide range of design output in one place.
Our Honest Take: Designs.ai is impressive in scope but the individual tools do not always match the depth of dedicated tools like Canva or Adobe. If you need a little of everything and do not want to manage multiple subscriptions, it makes sense. If you only need one type of design work, you will probably get better results from a focused tool.
Pros
Cons
Covers a wide range of design needs
No free plan
One subscription for many tools
Individual tools not as deep as dedicated apps
Good for marketing content
Can feel overwhelming
10. Autodraw — Best for Quick Illustrations
Autodraw is a free Google tool that turns rough sketches into clean illustrations instantly.
What it is: Autodraw is a free AI drawing tool from Google that recognizes what you are trying to draw and suggests polished versions of it. It is simple, fast, and surprisingly fun to use.
Key Features:
AI sketch recognition draw something rough and it guesses what you meant
One-click clean illustration suggestions from professional artists
Best For: Anyone who needs a quick, clean illustration and does not have the skills or time to draw it from scratch.
Our Honest Take: Autodraw is not a professional tool, but it fills a real gap. Sometimes you just need a simple icon or illustration and you do not want to spend 30 minutes on it. Autodraw gets you there in under a minute. It is a fun tool that more designers should have bookmarked.
Pros
Cons
Completely free
Very limited in scope
Instant results
Not for professional illustration work
No login required
Output can look basic
Great for quick diagrams and icons
–
11. Colormind — Best for Branding Color Schemes
Colormind uses deep learning to generate color schemes that actually look good together.
What it is: Colormind is a free AI color scheme generator that pulls color inspiration from photos, movies, and art. It generates complete color palettes that you can lock, shuffle, and adjust — useful for branding projects, web design, and any work where you need a cohesive color story.
Key Features:
AI-generated color palettes based on real-world sources
Best For: Brand designers, web designers, and anyone who needs a solid color palette fast.
Our Honest Take: Colormind is a reliable tool we keep coming back to at the start of branding projects. The palettes feel more grounded and intentional than what you get from random generators. It is free, it is fast, and it does its job well. No complaints.
Pros
Cons
Free to use
No account or saving features
Smart, cohesive palettes
Simpler than Khroma for personalization
Image-to-palette feature is great
Only does color
Works for web and print
–
Quick Comparison Table
Tool
Best For
Free Plan
Starting Price
Ease of Use
Key AI Feature
Canva AI
Beginners
✅ Yes
$15/mo
⭐⭐⭐⭐⭐
Magic Design, AI Image Gen
Adobe Firefly
Professionals
✅ Yes
$20/mo
⭐⭐⭐⭐
Generative Fill, Text Effects
Figma AI
UI/UX
✅ Yes
$20/mo
⭐⭐⭐⭐
Auto Layout, AI Suggestions
Looka
Logo Design
❌ No
$20 one-time
⭐⭐⭐⭐⭐
AI Logo Genera- tor
Microsoft Designer
Free Users
✅ Yes
Free
⭐⭐⭐⭐⭐
DALL-E Image Gen
Khroma
Color
✅ Yes
Free
⭐⭐⭐
AI Color Palette Gen
Uizard
Wireframes
✅ Yes
$12/mo
⭐⭐⭐⭐
Screenshot to Design
Designs.ai
All in One
❌ No
$19/mo
⭐⭐⭐⭐
Full AI Suite
Autodraw
Illustration
✅ Yes
Free
⭐⭐⭐⭐⭐
AI Sketch Recognition
Colormind
Branding
✅ Yes
Free
⭐⭐⭐
AI Color Schemes
How to Choose the Right AI Design Tool
Not sure which one is right for you? Here is a simple way to think about it.
Are you a complete beginner? Start with Canva AI or Microsoft Designer. Both are free, easy to pick up, and do not require any prior design knowledge. You will be making things that look professional within an hour of signing up.
Are you a professional designer? Adobe Firefly or Figma AI will fit your workflow best. Adobe Firefly integrates directly into the Creative Cloud apps you are already using. Figma AI is the standard for digital product and UI work.
Do you only need logo design? Looka is purpose-built for that exact job. The results are clean, professional, and you can get a full brand kit without hiring a designer.
Are you on a zero budget? Use Microsoft Designer, Autodraw, Khroma, or Colormind. All four are completely free with no hidden costs or watermarks. You can build a solid design workflow without spending a dollar.
Do you work in a team? Figma AI and Canva Teams are both built for collaboration. Multiple people can work on the same designs at the same time, which cuts down on the back-and-forth that slows most teams down.
Do you need a little of everything? Designs.ai covers logos, videos, social content, and more under one subscription. It is worth looking at if you hate juggling multiple tools.
Final Verdict
After testing all 10 tools, here are our top picks:
Best overall — Canva AI. It is the easiest tool for most people, has strong AI features on the free plan, and works for a huge range of design tasks. If you only try one tool from this list, make it this one.
Best for professionals — Adobe Firefly. The integration with Photoshop and Illustrator alone makes it worth the price for any serious designer. Generative Fill is one of the most useful AI design features built right now.
Best free option — Microsoft Designer. The DALL-E image quality is genuinely impressive for a free tool. No watermarks, no limits on everyday use, and no reason not to try it.
If you are just starting out, go with Canva AI — it will get you moving fast. If you are serious about professional design work, Adobe Firefly is worth the investment.
AI design tools research and UX insights — nngroup.com
Frequently Asked Questions
Q: What is the best AI tool for graphic design?
Canva AI is the best AI tool for most graphic designers because it is easy to use, free to start, and works for social media, presentations, and print design. If you are a professional, Adobe Firefly gives you more advanced features and better quality output.
Q: Are AI design tools free to use?
Yes, several great AI design tools are completely free. Microsoft Designer, Canva AI free plan, Autodraw, Khroma, and Colormind are all free with no hidden costs. Paid plans on tools like Canva Pro and Adobe Firefly unlock more advanced AI features and remove usage limits.
Q: Can AI replace graphic designers?
No, AI cannot replace graphic designers. AI tools help designers work faster and handle repetitive tasks, but human creativity, strategic thinking, and problem solving are still essential. AI is a tool that makes designers more productive — not a replacement for design skills and creative judgment.
Q: What AI tool do professional designers use?
Professional designers most commonly use Adobe Firefly, Figma AI, and Midjourney in their workflows. Adobe Firefly integrates directly with Photoshop and Illustrator. Figma AI is the standard for UI and UX design teams. Midjourney is popular for creative concept generation and client presentations.
Q: Is Canva an AI design tool?
Yes, Canva has added powerful AI features including Magic Design, Magic Write, AI image generation, and background removal. These features are available on both free and paid plans, making Canva one of the most accessible AI design tools for beginners and professionals alike.
Q: What is the best free AI design tool for beginners?
Microsoft Designer and Canva AI are the best free AI design tools for complete beginners. Both are easy to use, require no prior design experience, and use AI to generate professional-looking results. Microsoft Designer is powered by DALL-E, which produces particularly impressive AI images at no cost.
Q: Which AI design tool is best for logo design?
Looka is the best AI tool specifically built for logo design. It generates professional logos based on your industry and style preferences in minutes. If you want a free option, Canva AI has a logo maker with AI-generated templates you can customize without any design experience.
Q: Do AI design tools work on mobile?
Yes, most popular AI design tools have mobile apps. Canva AI, Microsoft Designer, and Adobe Firefly all have iOS and Android apps. This lets you create and edit designs on your phone without needing a laptop or desktop useful for quick social media content on the go.
Related reading:
Best Free Graphic Design Tools for Beginners in 2026 — link
Canva Vs Illustrator: Which One Is Better In 2026— link
Best Graphic Design Tools for Beginners in 2026— link