Categories
Canva

How to Use Canva AI : Complete Beginner Guide (2026)

Quick Answer: To use Canva AI, sign up for a free account, click “Create a design,” then use Magic Design to generate a full layout from a text prompt. Magic Design generates complete layouts instantly. Magic Write handles AI text. Background Remover and Magic Eraser fix photos in one click. All AI tools live in the left sidebar.


If you have never used Canva before or you have used it but never touched the AI features this guide is for you. Learning how to use Canva AI does not require any design experience, any technical knowledge, or any paid subscription to get started.

Canva’s AI tools are genuinely beginner-friendly. Within your first session, you can generate professional-looking designs from a simple text description, remove backgrounds from photos, create AI images, and write copy all without leaving one platform. We have tested every feature covered in this guide personally, so everything you read here is based on real hands-on use, not guesswork.

Before diving in, if you want a broader look at how Canva compares to other tools, check out our full Canva AI review and our roundup of the best AI design tools.

Getting Started with Canva AI

Step 1 — Create Your Free Canva Account

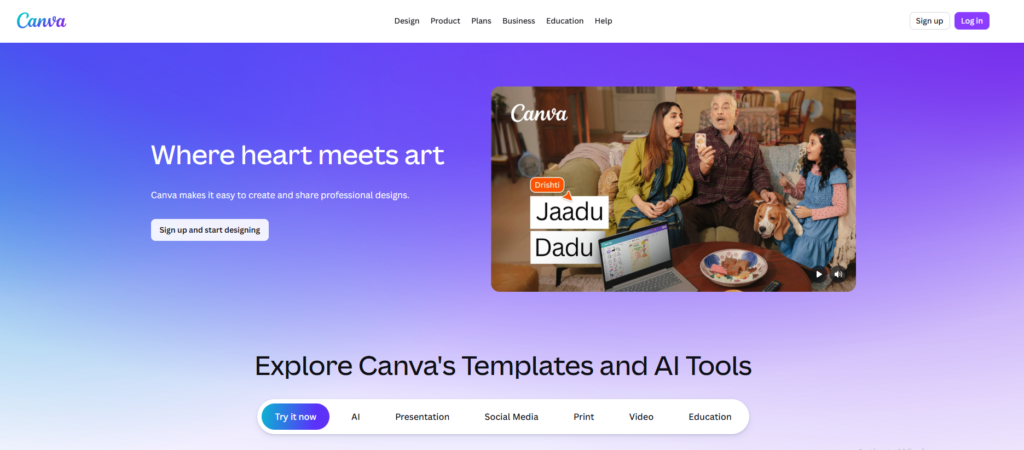
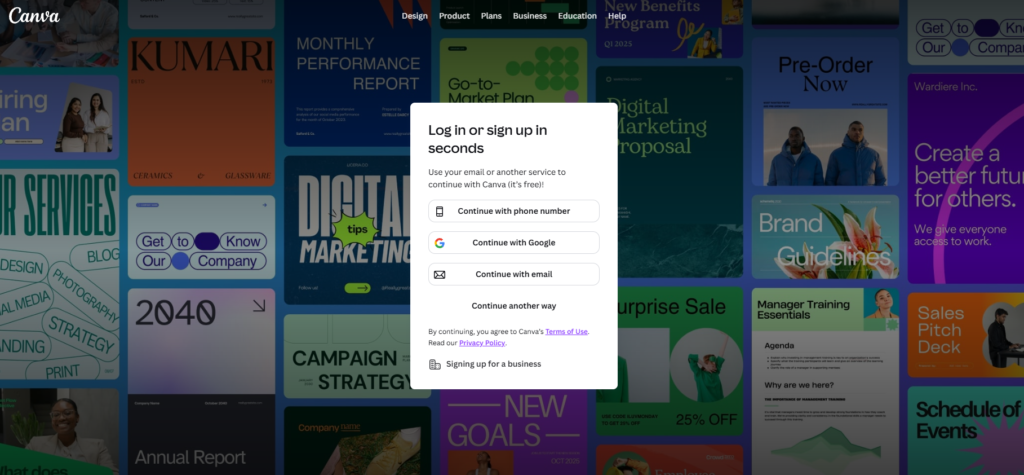
Go to canva.com and click Sign up in the top right corner. You can sign up with Google, Facebook, or your email address. The whole process takes under two minutes and does not require a credit card.

Once your account is created, you land on the Canva home dashboard. This is where everything starts.
Step 2 — Understand the Canva AI Dashboard

On your home dashboard you will see a search bar at the top, a list of design types below it (Social media, Presentation, Video, Print), and a left sidebar with your recent files and folders.

The AI tools are not hidden they are built directly into the design editor. Once you open any design, look at the left sidebar. You will see icons for Elements, Text, Apps, and more. The Apps section is where most AI features live, including Magic Media (AI image generation) and Magic Write (AI text).

Magic Design appears automatically when you start a new design you will see the option to describe your design before choosing a template.

How to Use Magic Design (Step by Step)

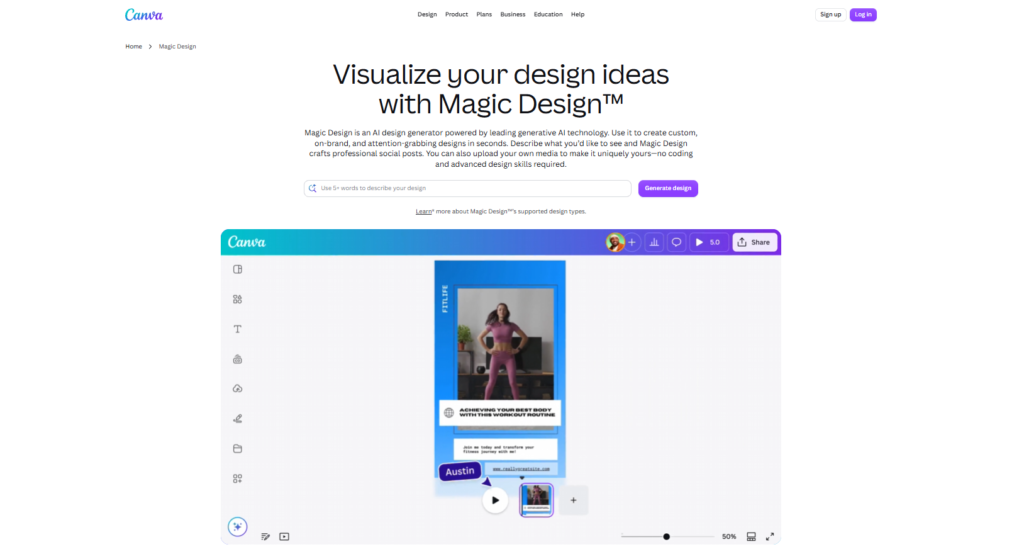
Magic Design is Canva’s flagship AI feature. You type what you want, and Canva generates a complete, fully designed layout in seconds.
Step 1 — Click Create a Design

From the home dashboard, click the purple Create a design button in the top right corner. A dropdown appears with options like Instagram Post, Presentation, Flyer, and more. Choose the format you need or search for a specific size.

Step 2 — Type Your Design Description

When the editor opens, you will see a search bar at the top of the template panel with the text “Describe your design.” This is Magic Design. Type a clear description of what you want for example: “A minimalist flyer for a coffee shop grand opening with warm brown tones and modern fonts.”

The more specific you are, the better the results. Include the mood, colors, and purpose.

Step 3 — Choose From AI Generated Options

Canva generates eight to ten complete design options based on your description within a few seconds. These are not just color variations they are fully laid out designs with different fonts, image placements, and structures. Scroll through and click any one that feels close to what you need.

Step 4 — Customise Your Chosen Design

Once you select a design, it opens in the full editor. Every element is clickable and editable. Click any text to change the words. Click any image to swap it out. Drag elements to reposition them. Magic Design gives you a strong starting point you take it the rest of the way.

How to Use Magic Write for AI Text
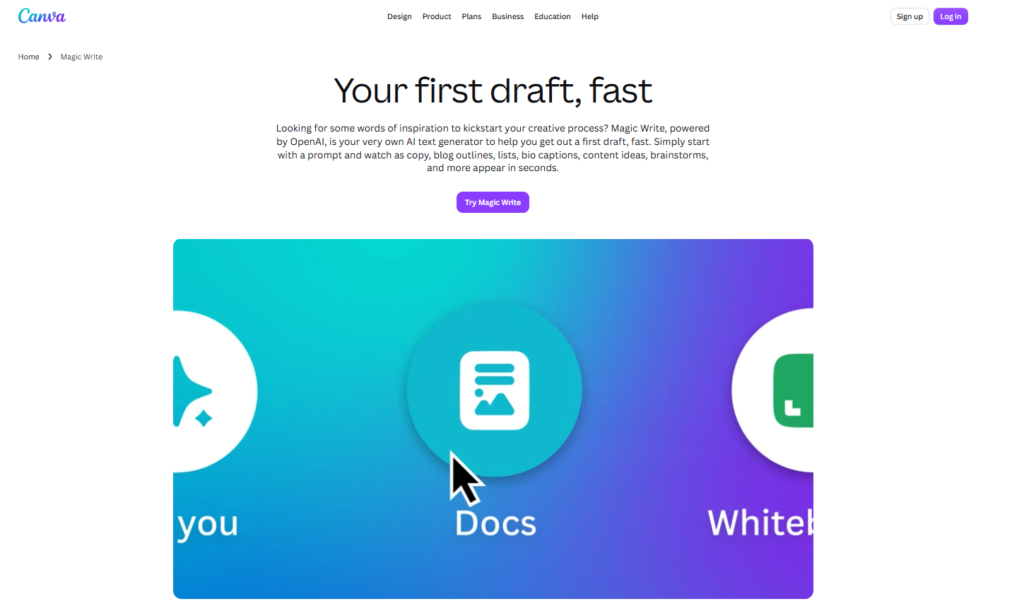
Magic Write is Canva’s built-in AI writing tool. It generates headlines, body copy, captions, and more from a simple prompt.

Step 1 — Select Magic Write Tool

Inside the editor, click the Apps icon in the left sidebar. Search for “Magic Write” or find it under the AI tools section. Click it to open the Magic Write panel on the left side of your screen.

Alternatively, click any text box in your design and look for the purple Magic Write button that appears in the toolbar above.

Step 2 — Enter Your Prompt

Type what you need. Be specific about the tone and purpose. For example: “Write a short tagline for a yoga studio that feels calm and welcoming.” Magic Write works best when you tell it both what to write and how it should feel.

Step 3 — Choose Tone and Length

Before generating, you can adjust the tone (professional, casual, friendly, persuasive) and the length (short, medium, long). These settings make a big difference in the output quality.

Step 4 — Edit and Insert Generated Text

Magic Write gives you a text output you can copy directly or insert into your design with one click. Always read it through before publishing AI text is a great starting point but usually needs a light edit to sound natural and on-brand.

How to Use AI Image Generation

Canva’s AI image generator (called Magic Media) lets you create original images from a text description. These can be used inside your designs without worrying about copyright.
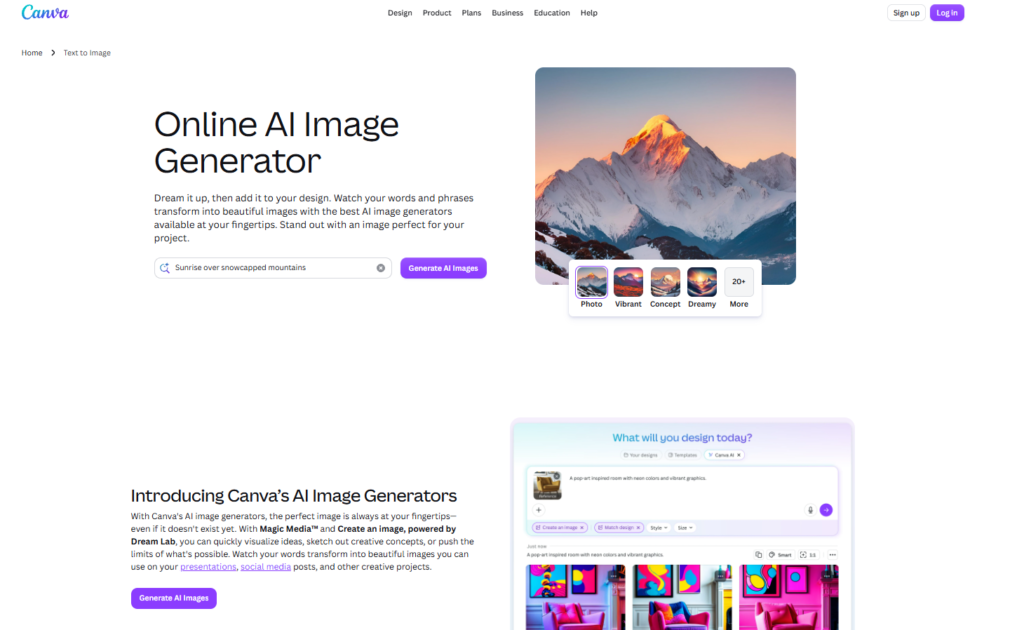
Step 1 — Open Text to Image Tool

Inside the editor, click the Apps icon in the left sidebar and search for Magic Media. Click it to open the tool. You will see a text field where you enter your image description.

Step 2 — Write a Detailed Prompt

This is the most important step. Vague prompts produce generic images. Specific prompts produce useful ones. Instead of “a dog,” try: “A golden retriever sitting in a sunlit park, soft natural light, photography style, warm tones.”

Include: subject, setting, lighting, style (photography, illustration, watercolor), and mood.

Step 3 — Select Your Preferred Style

Below the prompt field, Canva offers style options including Photo, Illustration, Watercolor, Neon, and more. Choose the one that matches your design aesthetic before generating.

Step 4 — Generate and Download

Click Generate. Canva produces four image options. Click your favorite to add it directly to your design, or hover and click the download icon to save it separately. Free accounts get a limited number of Magic Media generations per month Canva Pro gives you unlimited.

How to Use Background Remover

Background Remover is one of Canva’s most useful AI tools for beginners. It removes the background from any photo in one click no manual cutting required.
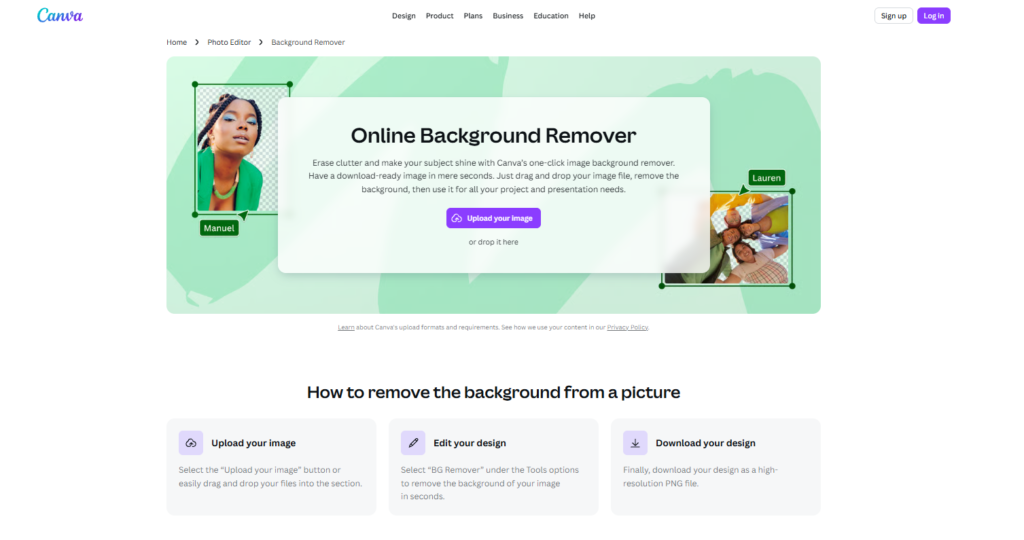
Step 1 — Upload Your Photo

Click the Uploads icon in the left sidebar and drag your photo into Canva, or click Upload files to browse your device. Once uploaded, click the photo to add it to your design canvas.

Step 2 — Click Background Remover

With the photo selected on the canvas, click Edit image in the top toolbar. In the panel that opens, click BG Remover. Canva processes the image and removes the background automatically within a few seconds.

Step 3 — Download Transparent Image

Once the background is removed, click Download in the top right corner. Select PNG as the file format and make sure the Transparent background checkbox is ticked. Your image will download with a clean, transparent background ready to use anywhere.

Note: Background Remover requires a Canva Pro subscription. Free accounts can preview the result but need to upgrade to download.

How to Use Magic Eraser

Magic Eraser removes specific objects from inside a photo not the whole background, but individual elements. It is perfect for removing unwanted objects, people in the background, or distracting elements.
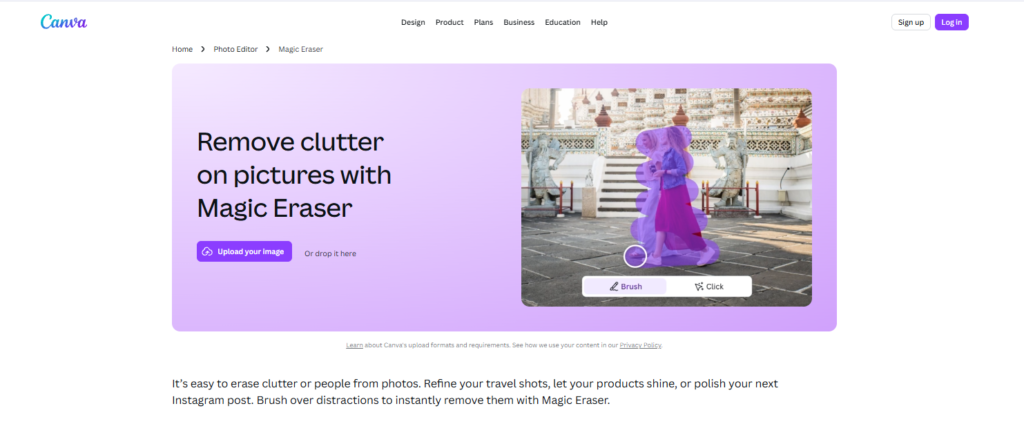
Step 1 — Select Magic Eraser Tool

Click your photo on the canvas, then click Edit image in the top toolbar. In the editing panel, find and click Magic Eraser.

Step 2 — Brush Over Object to Remove

A brush tool activates. Paint over the object you want to remove by clicking and dragging across it. You do not need to be precise Canva’s AI identifies the edges of the object automatically.

Step 3 — Let AI Fill the Background

After you finish brushing, Canva fills the erased area with generated background content that matches the surrounding image. The result is not always perfect on complex backgrounds, but on simple or natural backgrounds it works extremely well.

Tips for Getting Better Results from Canva AI

Getting good results from AI tools is partly about knowing how to ask. These habits make a real difference:

Be specific in your prompts. “A poster” gives you generic results. “A bold event poster for a summer music festival with neon colors and a crowd silhouette” gives you something usable. Always include mood, style, colors, and purpose.

Set your brand colors first. Before running Magic Design, add your brand colors to your Canva color palette under your account settings. Magic Design will incorporate them into generated layouts when available.

Combine multiple AI tools. Use Magic Design to build the layout, Magic Media to generate a custom image, and Magic Write to create the copy. The tools work better together than in isolation.

Always review before publishing. AI output is a starting point, not a finished product. Check for odd text, awkward crops, or off-brand colors before anything goes live.

Common Canva AI Problems and Solutions

ProblemSolution
Magic Design results look too genericAdd more specific details style, color, mood, industry
AI image has a watermarkYou have used free Magic Media credits upgrade to Pro or wait for monthly reset
Magic Write text sounds roboticChange the tone setting to “casual” and regenerate then edit lightly
Background Remover misses edgesUse the manual restore brush tool to paint back any areas removed incorrectly

Final Thoughts

Canva AI is one of the most accessible creative tools available in 2026. Whether you need a social media post, a flyer, a presentation, or a custom image, you can go from nothing to a professional-looking result in under 30 minutes on your first try.

The best way to learn is simply to use it. Open a free account, pick a design type, and run Magic Design with a description of something you actually need. You will figure out the tools faster by doing than by reading.

For more on what Canva AI can do and how it stacks up against competitors, read our full Canva AI review. And if you are still exploring your options, our guide to the best free graphic design tools for beginners and the best AI design tools for beginners are great next reads.

Frequently Asked Questions

Q: How do I start using Canva AI? Create a free account at canva.com, click “Create a design,” and look for AI tools like Magic Design in the template search bar. Magic Design lets you type a description and Canva generates complete design options instantly no design experience needed.

Q: Is Canva AI hard to learn? No. Canva AI is one of the easiest AI tools to learn in 2026. Most beginners get comfortable with Magic Design and the core AI features within 10 to 15 minutes. The interface is built around simple buttons and clear labels, so no prior design or technical knowledge is required.

Q: How do I write good prompts for Canva AI? Good prompts are specific and detailed. Instead of “create a poster,” write “create a minimalist poster for a coffee shop with warm brown tones and modern typography.” The more detail you give about style, colors, and purpose, the better the AI results will be.

Q: Can I edit designs after Canva AI generates them? Yes every design Canva AI generates is fully editable, just like a regular template. You can change colors, fonts, images, and layout after the AI creates the initial version. Think of Magic Design as a starting point, not a finished product.

Q: How do I use Magic Eraser in Canva? Upload your photo, select it on the canvas, click Edit image, then choose Magic Eraser. Brush over the object you want removed and Canva AI fills in the background automatically. Works best on simple backgrounds complex scenes may need a light manual touch-up.

Q: Why does my Canva AI image have a watermark? Watermarks appear when your free Magic Media credits are used up for the month. Upgrading to Canva Pro removes watermarks and gives you unlimited AI image generation. You can check your remaining credits in your account settings.

Q: Can I use Canva AI on my phone? Yes. Most Canva AI features including Magic Design, background removal, and AI image generation are available on the Canva mobile app for iOS and Android. Some advanced editing is easier on desktop due to screen size, but the core AI tools work well on mobile.

Q: What is the difference between Magic Design and Magic Media? Magic Design generates complete design layouts templates, text placement, and images from a text description. Magic Media generates individual AI images from a text prompt that you then place inside your designs. Magic Design builds the whole composition; Magic Media creates individual visual elements.
Categories
Design tools

Best AI Design Tools for Beginners in 2026 (Tested and Reviewed)

Quick Answer: The best AI design tools for beginners in 2026 are Canva AI, Microsoft Designer, Adobe Express, and Uizard. Canva AI is the easiest overall. Microsoft Designer is the best free AI image tool. Adobe Express is best for social media beginners. Uizard is best for beginners learning UI design. All four have free plans and require zero design experience to get started.
If you have never designed anything before, you are in the right place. A year ago, getting started with design meant learning complicated software, understanding color theory, and spending hours on layouts that still looked amateurish. That is not the case anymore.

The best design tools for beginners in 2026 do the heavy lifting for you. You describe what you want, and the AI builds it. You pick what looks good. That is genuinely all there is to it. We have personally tested every tool on this list so you do not have to guess which ones are actually beginner-friendly and which ones just claim to be. If you want the full picture on best AI design tools for graphic designers, check out our May pillar article — this list is focused specifically on tools built for people starting from scratch.


Why AI Makes Design Easier for Beginners

The biggest thing holding most beginners back is not creativity — it is the technical gap. Traditional design software like Photoshop or Illustrator takes months to get comfortable with. You had to understand layers, blending modes, kerning, and grids before you could make anything worth showing anyone.

AI removes that barrier entirely. Modern AI design tools let you type a simple description and generate a complete design in seconds. You are not learning software anymore — you are making decisions. Do you like this layout or that one? This color palette or something brighter? The AI handles the execution. You stay in control of the direction.

Combine that with the thousands of templates these tools offer, and a complete beginner can produce something that looks genuinely professional within their first session. No design degree. No YouTube tutorials. No frustration.


How We Chose These Tools for Beginners

We tested every tool on this list from a beginner’s perspective — not as experienced designers who already know what they are doing. That meant logging in fresh, skipping tutorials, and seeing how far we could get in the first 30 minutes.

Here is what we specifically checked:

  • Ease of first use: Could a non-designer figure it out without reading any documentation?
  • Free plan quality: Does the free version actually let you do useful things, or is it just a teaser?
  • AI feature accessibility: Are the AI tools front and center, or buried in menus?
  • Professional-looking results: Does the output look good enough to use on a real project?

Every tool that made this list passed all four checks.


8 Best AI Design Tools for Beginners in 2026

1. Canva AI — Best Overall for Beginners

If you only try one tool from this list, make it Canva AI. It has been the go-to beginner design platform for years, and the addition of proper AI features in recent years has made it genuinely exceptional for people with no design background.

The standout feature for beginners is Magic Design. You type a description of what you want — a birthday flyer, a LinkedIn banner, an Instagram post — and Canva generates a fully designed, ready-to-edit template in seconds. From there, everything works on drag-and-drop. You click a text box, type your words, move things around, and you are done.

Canva also has the largest template library of any tool on this list, covering everything from social media posts and presentations to menus, business cards, and video thumbnails. The free plan is legitimately generous — you get access to hundreds of thousands of templates and most of the AI features at no cost.

If you are completely new to design and want results fast, Canva AI is where you start.

Read our full Canva AI review


2. Microsoft Designer — Best Free AI Image Tool

Microsoft Designer is the best option on this list if you specifically want to create AI-generated images for free, with no watermarks and no strings attached. It runs entirely in your browser, it is connected to your Microsoft account if you have one, and it is powered by DALL-E — the same image model that powers ChatGPT’s image generation.

For beginners, the workflow is about as simple as it gets. You describe the image you want, and Designer generates it. You can then drop that image into a social media template, a flyer, or a presentation — all within the same tool. The interface is clean and uncluttered, which makes it far less overwhelming than most design platforms on day one.

There are no paid tiers to worry about. The whole thing is free. For a beginner who needs quality AI-generated visuals without a budget, this is hard to beat. The template selection is smaller than Canva’s, but for image-forward content it is extremely capable.

Read our full Microsoft Designer review


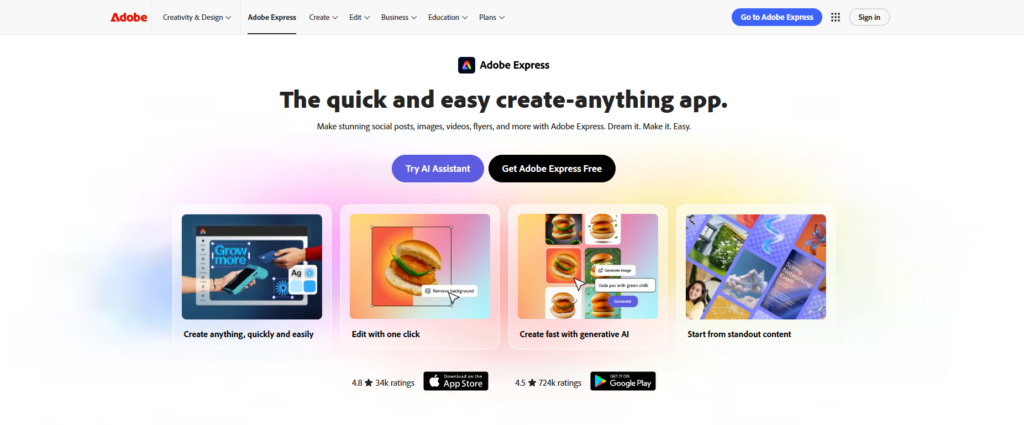
3. Adobe Express — Best for Social Media Beginners

Adobe Express sits in an interesting spot — it has the quality and polish you expect from Adobe, but it is built for people who do not know how to use Adobe’s professional tools. If your main goal as a beginner is to create content for Instagram, TikTok, Pinterest, or LinkedIn, Adobe Express is specifically built for that workflow.

Every template is sized correctly for the platform you are posting to. The AI features — including text-to-image generation and AI-powered background removal — are front and center rather than buried. Adobe’s photo editing quality is noticeably better than Canva’s at the free tier, which matters if you are working with your own photos.

The free plan is solid, though slightly more limited than Canva’s in terms of template volume. Where it wins is photo quality and the integration with Adobe’s ecosystem — if you ever graduate to Lightroom or Photoshop, your Express work moves seamlessly across.

We have not published a standalone Adobe Express review yet — for more context on how it fits into the wider AI design landscape, see our best AI design tools for graphic designers overview.


4. Uizard — Best for UI Design Beginners

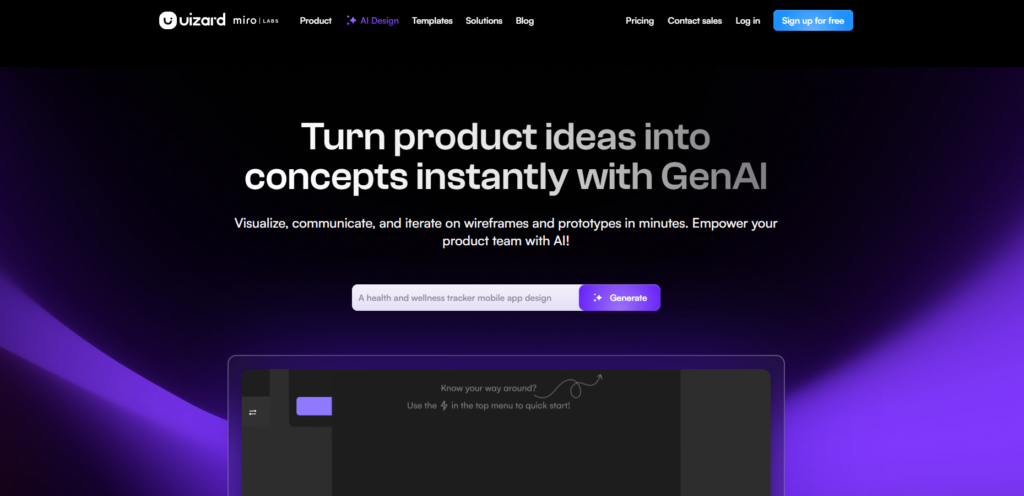
Most beginner tools are built for social media graphics and marketing content. Uizard is different — it is the best option for beginners who want to design apps, websites, or digital products, and it requires absolutely no technical knowledge to use.

The feature that makes Uizard special for beginners is text-to-wireframe. You describe your app — “a fitness tracker with a dashboard, workout log, and profile page” — and Uizard generates a functional wireframe in seconds. You can then click through screens, edit components, and build something that looks like a real product, all without knowing anything about UX design principles.

Uizard also has a screenshot-to-design feature that lets you upload a photo of a hand-drawn sketch and turn it into a digital wireframe automatically. For someone with an app idea and no design experience, this is genuinely transformative. The free plan gives you access to enough features to build a real prototype.

Read our full Uizard review


5. Figma AI — Best for Beginners Learning Professionally

Figma is the tool that professional UX and product designers use every single day. If you want to design seriously — meaning you want a skill that is genuinely valuable in the job market — learning Figma is the right move, and the AI features added in recent years make that learning curve much more manageable for beginners.

Figma AI can auto-generate layouts, suggest design improvements, and help you build components faster than you could manually. For a beginner, this means you can produce real outputs while you are still learning. You are not just following tutorials — you are making actual things.

The free plan gives you access to everything you need to learn. The interface is more complex than Canva or Microsoft Designer, and there is a genuine learning curve. But if your goal is to become a professional designer rather than just create social media graphics, starting with Figma now is the smartest long-term move you can make.

Read our full Figma AI review


6. Looka — Best for Beginners Who Need a Logo

If you are starting a business and you need a logo, Looka is the best tool built specifically for that job. You do not need to understand design — you answer a few questions about your business, choose some styles you like, and Looka’s AI generates dozens of logo options in minutes.

The process is genuinely fast. In about five minutes you can go from zero to having a professional-looking logo with multiple color variations and formats. The AI pays attention to your industry and style preferences, so the suggestions feel relevant rather than generic.

The main thing to know upfront: Looka does not have a free plan for downloading your logo. You can preview everything for free, but to actually get your files you need to purchase a package. That said, for a business logo the pricing is very reasonable, and the quality is far above what most beginners could produce on their own.

Read our full Looka review


7. Khroma — Best for Beginners Who Struggle with Colors

Color is one of the hardest things to get right as a beginner, and it is one of the most common reasons amateur designs look off even when everything else is in order. Khroma solves this in a way that no other tool on this list does — by learning your personal color preferences and then generating infinite palettes that match your taste.

When you first open Khroma, you select 50 colors you like. The AI uses those choices to build a model of your aesthetic, then generates color combinations, gradients, typography pairings, and full palettes tailored to you. Every suggestion is something you are likely to actually like, because the tool learned from your own preferences.

It is completely free, browser-based, and incredibly simple to use. If you have ever spent an hour trying to pick colors for a design and ended up more confused than when you started, Khroma is worth trying before anything else.

Read our full Khroma review


8. Designs.ai — Best All-in-One for Beginners

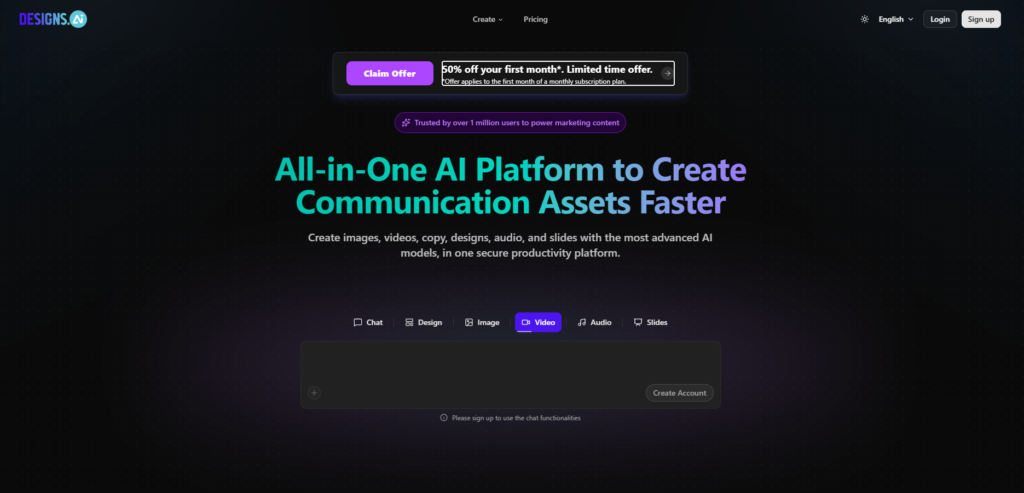
One of the more overwhelming parts of getting started with design is figuring out which tool to use for which job. Designs.ai solves that by putting a logo maker, video maker, mockup generator, speech generator, and social media design tool all in one place under one subscription.

For a beginner who needs to produce multiple types of content — a logo, a social post, a short video — without learning four different platforms, Designs.ai is a practical choice. Everything is built for non-designers, and the AI features automate most of the technical decisions so you can focus on the creative ones.

The tradeoff is pricing. Designs.ai does not have a free plan, and the subscription cost is higher than most tools on this list. It makes the most sense for someone launching a business who needs multiple types of design assets quickly and does not want to juggle separate subscriptions.

Read our full Designs.ai review


Quick Comparison Table

ToolBest ForFree PlanEasiest Feature
Canva AIOverall design✅ YesMagic Design
Microsoft DesignerFree AI images✅ YesDALL-E generation
Adobe ExpressSocial media✅ YesSocial templates
UizardUI wireframing✅ YesText to wireframe
Figma AIProfessional learning✅ YesAuto layout
LookaLogo creation❌ Preview onlyAI logo generator
KhromaColor selection✅ YesPalette learning
Designs.aiAll-in-one❌ NoMultiple tools

Which AI Design Tool Should You Start With?

Not sure which tool fits your situation? Here is a simple decision guide based on what you actually need:

You want to make social media posts → Start with Canva AI — free, instant results, and thousands of templates sized for every platform.

You want free AI-generated images → Start with Microsoft Designer — the best free AI image tool available in 2026, no watermarks.

You want to design a mobile app or website → Start with Uizard — no experience needed, and you will have a real prototype in under an hour.

You need a logo for your business → Start with Looka — AI generates polished options in minutes, and you only pay when you are happy.

You want to become a professional designer → Start with Figma AI — it is the industry standard, and the free plan gives you everything you need to learn.

You need multiple types of content (logo + social + video) → Start with Designs.ai — one subscription covers everything.

You are not sure what you need → Start with Canva AI — it covers almost every design type and costs nothing to try.

Final Verdict

For most beginners, Canva AI is the right starting point in 2026. It is free, it covers every design category, and the Magic Design AI feature makes it genuinely easy to produce professional-looking results from day one — no experience required.

If your goal is to design apps or websites, Uizard gives you a faster path to a real prototype than anything else on this list. And if you are serious about building a career in design, starting with Figma AI now — even while the learning curve feels steep — is the smartest long-term investment you can make.

We have tested and reviewed every tool on this list in detail. Click any tool name above to read our full review and figure out whether it is the right fit for what you specifically need to create. And if you are also looking for tools beyond AI, our guide to the best free graphic design tools for beginners is a great companion read.

Frequently Asked Questions

Q: What is the easiest AI design tool for beginners?

Canva AI is the easiest AI design tool for complete beginners in 2026. Its Magic Design feature generates complete layouts from a simple description, and the drag-and-drop interface requires no design knowledge at all. Microsoft Designer is a close second if you are specifically interested in AI image generation.

Q: Which AI design tools are free for beginners?

Several excellent AI design tools are free for beginners, including Canva AI, Microsoft Designer, Adobe Express, Figma AI, Uizard, and Khroma. All of these have fully functional free plans you can use without paying anything. Looka and Designs.ai are the only tools on this list without genuinely free plans.

Q: Can beginners use AI design tools without experience?

Yes — AI design tools are specifically built to work without prior experience. Tools like Canva AI and Microsoft Designer generate designs from simple text descriptions, so you do not need to know anything about design principles to get started. The AI handles the technical decisions, and you focus on choosing what looks right to you.

Q: How long does it take to learn AI design tools?

Most beginner-friendly tools like Canva and Microsoft Designer can be learned well enough to produce useful work within a few hours. More advanced tools like Figma take two to four weeks of regular practice to get comfortable with. For most beginners, the goal is not to master every feature — it is to learn enough to produce the specific type of content you need.

Q: What AI design tool is best for making social media posts?

Canva AI and Adobe Express are both excellent for social media as a beginner. Both have templates sized perfectly for every platform and AI features that help generate and customize content quickly. Canva has more templates overall, while Adobe Express has slightly better photo editing features on the free tier.

Q: Is there a free AI tool that makes logos for beginners?

Canva AI has a free logo maker with AI-generated templates that beginners can use at no cost. Looka lets you preview AI-generated logos for free before you pay to download them. For a completely free logo, Canva is the better option. For a more professional result with more options and brand kit files, Looka’s paid plans produce better quality output.

Q: Do I need design skills to use AI design tools?

No. Modern AI design tools are specifically built for people without design experience. Tools like Canva AI, Microsoft Designer, and Uizard generate designs based on your descriptions and preferences. You provide the direction — the AI handles the execution.

Q: What is the best free AI design tool in 2026?

Canva AI is the best free AI design tool overall for most users. Microsoft Designer is the best free option specifically for AI image generation. Figma AI is the best free tool for UI and UX design. Khroma is the best free tool specifically for AI color palette generation. The right choice depends on what type of design work you are trying to do.

Categories
Design tools

Best AI UI Design Tools in 2026

Quick Answer: The best AI UI design tools in 2026 are Figma AI, Uizard, Framer AI, Galileo AI, and Khroma.

  • Figma AI is best for professional UI designers
  • Uizard is best for quick wireframe generation
  • Framer AI is best for building websites with AI
  • Galileo AI is best for generating UI from text
  • Khroma is best for AI color palette generation

Read on for full details on all 8 tools including pricing and who each one is designed for.

Introduction

AI UI design tools are completely changing how designers create interfaces in 2026. What used to take hours — wireframing, prototyping, color palettes, component generation — can now be done in minutes with the right AI tool.

Whether you are a professional UI designer looking to speed up your workflow, or just starting to learn UX design, this guide covers the 8 best AI UI design tools available right now. We give you honest reviews of features, pricing, and who each tool works best for — so you can find the right tool and get back to designing.

How AI is Changing UI Design in 2026

A few years ago, AI in UI design was mostly about color suggestions and auto-align features. That has changed dramatically.

In 2026, AI can generate full wireframes from a single text description. You type “a mobile banking app home screen with account balance and recent transactions” and get a working wireframe in seconds. Tools like Galileo AI and Uizard have made this a reality, not a demo feature.

AI now suggests color palettes that match your brand style, generates entire component sets, and automates the repetitive layout decisions that used to eat up half a designer’s day. Figma’s AI copilot handles layer naming, auto layout adjustments, and design suggestions — small things that add up to hours saved each week.

Prototyping is faster too. AI can generate interaction flows, link screens together, and even predict which parts of a design users are likely to look at first — which is what Attention Insight does with AI-powered heatmaps.

One thing has not changed: human designers are still essential. AI handles the mechanical parts. Strategic thinking, user research, accessibility decisions, and creative direction still require a human brain. The designers winning right now are the ones using AI tools to handle the repetitive work so they can focus on the decisions that actually matter.

How We Tested These AI UI Design Tools

We logged into each tool and tested it with real UI design tasks — not just marketing demos.

For every tool on this list, we generated wireframes, tested color palette suggestions, and evaluated how well the AI output matched the design intent we gave it. We checked how quickly a beginner could get useful output versus how powerful the tool is for professionals.

We compared free plan AI features against paid tiers honestly — not all tools give useful AI features on the free plan. We also looked at how accurate and polished the AI-generated output is, because some tools generate impressive-looking results that fall apart on closer inspection.

Every recommendation here is based on real testing with real UI design tasks.

8 Best AI UI Design Tools in 2026

1. Figma AI — Best AI UI Tool for Professionals

Figma AI is the most powerful AI tool for serious UI designers — if you design interfaces professionally, this is the one to use.

What it is: Figma is the industry standard UI design tool, used by design teams at some of the biggest companies in the world. Its AI features build on that foundation — adding auto layout intelligence, a design copilot, component generation, and AI-assisted prototyping to the tool designers already live in every day.

Key AI Features:

  • Auto Layout generation — AI suggests and applies layout rules automatically
  • Design copilot — describe a change and AI makes it
  • Component auto creation from existing design elements
  • AI-powered rename layers — saves serious time on complex files
  • First Draft — generate initial UI screens from text prompts

Pricing:

PlanPriceAI Features
StarterFreeBasic AI features
Professional$12/monthFull AI suite
Organization$45/monthAdvanced team AI features

Best For: Professional UI/UX designers and design teams who want AI built into their existing workflow.

Our Honest Take: Figma AI is not a standalone AI tool — it is AI woven into the tool professional designers already use every day. That integration is what makes it so useful. The auto layout feature alone saves significant time on complex files. First Draft is useful for quick wireframes when a client needs to see something fast. The AI is improving with every update. If you are a professional UI designer and not using Figma already, this is the reason to switch.

ProsCons
Industry standard toolAI features still maturing
Strong free planSteeper learning curve for beginners
Best for team collaborationCan be slow on very large files
AI deeply integrated into workflowOrganization plan is expensive

2. Uizard — Best for Quick Wireframe Generation

Uizard is the fastest way to turn an idea — or even a rough sketch — into a working wireframe.

What it is: Uizard is an AI wireframing and prototyping tool that specializes in turning rough inputs into digital designs. Upload a hand-drawn sketch, paste in a screenshot of an app you like, or type a description of what you want — Uizard converts it into an editable digital wireframe in seconds.

Key AI Features:

  • Screenshot to design — upload any app screenshot and get an editable version
  • Sketch to wireframe — draw on paper, photograph it, and Uizard converts it digitally
  • Text to UI — describe your screen and AI generates it
  • Auto Theme — generates a full visual style from a text description
  • Autodesigner — generates multi-screen app prototypes from a single prompt

Pricing:

PlanPriceAI Features
Free$0/monthBasic AI features, limited projects
Pro$19/monthFull AI suite, unlimited projects
Business$39/monthTeam features, advanced AI

Best For: Designers, product managers, and founders who need to wireframe ideas quickly — especially early in a project when speed matters more than polish.

Our Honest Take: The screenshot-to-design feature is genuinely one of the most impressive things you will see in a design tool. You screenshot an app you like, paste it into Uizard, and get back an editable wireframe version in under 30 seconds. It is not pixel-perfect, but it gets you 70% of the way there instantly. For early-stage ideation and client presentations where you need something visual fast, nothing beats Uizard’s speed.

ProsCons
Fastest wireframe generation availableNot for production-ready UI
Screenshot to design is a standout featureOutput needs cleanup and refinement
Great for non-designers and foundersLess powerful than Figma for professionals
Generous free planAI output can be inconsistent

3. Framer AI — Best for AI-Powered Website UI

If you want to build a real, live website with AI doing most of the design work, Framer AI is the tool for that.

What it is: Framer AI is a website builder and design tool that uses AI to generate complete website UI — not just mockups, but actual working websites with animations, interactions, and real content. You describe what you want and Framer builds it, ready to publish.

Key AI Features:

  • AI website generation from a text prompt
  • Generates layouts, animations, and interactions automatically
  • AI copy generation built into the design tool
  • Responsive design AI handles mobile and desktop layout
  • Publish directly from Framer without any code

Pricing:

PlanPriceAI Features
Free$0/monthBasic AI, limited pages
Mini$5/monthAI site generation, custom domain
Basic$15/monthFull AI suite, more pages

Best For: Designers who want to create live website UI with AI assistance — not just mockups, but actual published websites.

Our Honest Take: Framer AI sits in a unique space — it is not just a design tool, it is a design tool that publishes live websites. The AI can generate a complete website from a text description and have it live on a custom domain within an hour. For small business sites, portfolios, and landing pages, that is genuinely impressive. For app UI design, Figma or Uizard are better choices. But for web UI that needs to go live fast, Framer AI is hard to beat.

ProsCons
Generates live, publishable websitesNot ideal for app UI design
Great animations and interactions built inLearning curve for complex customization
Affordable pricing for what it doesFree plan is quite limited
AI handles responsive designBest used for web — not print or social

4. Galileo AI — Best for Generating Full UI from Text

Galileo AI does one thing that is still remarkable to watch — you describe a UI and it generates a complete, polished design.

What it is: Galileo AI is a text-to-UI design tool. You type a description of the interface you want — including the purpose, content, and style — and Galileo generates a complete, multi-element UI design. It is not a wireframe, it is a full visual design with real UI components.

Key AI Features:

  • Text to full UI — describe any interface and get a polished design
  • Generates multiple design variations from one prompt
  • Outputs designs compatible with Figma for further editing
  • Handles complex multi-screen apps from a single description
  • AI generated illustrations and icons included in output

Pricing:

PlanPriceAI Features
Free TrialLimitedBasic generation
PaidContact for pricingFull AI generation

Best For: Designers and product teams who want to generate high-quality UI concepts quickly for client presentations or early-stage product development.

Our Honest Take: Galileo AI produces the most visually polished AI-generated UI output of any tool on this list. The designs it generates from text prompts look like something a senior designer put together. The catch is pricing — it is not cheap and the pricing model is contact-based, which can be frustrating when you just want to try it. But for generating impressive UI concepts fast, nothing else comes close right now.

ProsCons
Most polished AI-generated UI outputNo self-serve free plan
Generates Figma-compatible designsPricing requires contacting sales
Handles complex multi-screen appsOutput still needs designer refinement
Impressive text-to-UI qualityNewer tool — features still developing

5. Khroma — Best for AI Color Palette Generation

Khroma solves the color problem that trips up designers at every level.

What it is: Khroma is a free AI color tool that learns your personal color preferences and then generates unlimited palettes, gradients, and color combinations tailored to your taste. It is not a full design tool — it is a dedicated color assistant that does exactly one thing very well.

Key AI Features:

  • Trains on your color preferences to generate personalized results
  • Generates palettes, gradients, typography combos, and full poster mock-ups
  • Searchable by hue, shade, or hex code
  • AI learns from your choices over time — gets better the more you use it

Pricing:

PlanPrice
Free$0 — completely free

Best For: UI designers who spend too much time on color decisions, or anyone working on brand identity and needing palettes that feel considered rather than random.

Our Honest Take: Khroma is a niche tool that does exactly one thing really well. Once you train it on your color preferences, the palettes it generates feel genuinely personal — they match your taste rather than just being mathematically harmonious. We use it at the start of brand and UI projects to explore color directions quickly. It is free, it is fast, and it is better than any color picker we have found.

ProsCons
Completely freeOnly does color — not a full design tool
Personalizes to your taste over timeRequires setup time to train
Great for UI and brand color explorationNo direct export to design files
Fast palette generationSimple interface — not feature-rich

6. Visily — Best for Screenshot-to-UI Conversion

Visily makes it effortless to take an existing design idea and turn it into a professional wireframe.

What it is: Visily is an AI wireframing tool that specializes in converting screenshots of existing apps, hand-drawn sketches, or text descriptions into clean, editable UI designs. It is built for speed and accessibility — designed to be usable by people who are not professional UI designers.

Key AI Features:

  • Screenshot to editable UI — paste any screenshot, get an editable design
  • AI theme generation — generates a visual style from a description or image
  • Text to wireframe — describe a screen and Visily builds it
  • Component suggestions based on context
  • Team collaboration built in

Pricing:

PlanPriceAI Features
Free$0/monthBasic AI features, limited projects
Starter$10/monthFull AI suite
Team$20/user/monthTeam features

Best For: Product managers, startup teams, and non-designers who need to create wireframes quickly without a design background.

Our Honest Take: Visily and Uizard are the two tools that make wireframing genuinely accessible to non-designers. Visily has a slightly cleaner interface and feels more polished right out of the box. If you are a product manager who needs to communicate UI ideas to a design team without being a designer yourself, Visily is one of the most practical tools on this list.

ProsCons
Very easy for non-designersNot for production-level UI
Clean, polished interfaceLess powerful than Figma for professionals
Screenshot to UI works reliablyOutput still needs designer polish
Good free planSmaller community than Figma or Uizard

7. Attention Insight — Best for AI Heatmap Prediction

Attention Insight tells you where users will actually look before your design ever goes live.

What it is: Attention Insight is an AI-powered UX testing tool that predicts where users will focus their attention on a design. You upload a mockup or screenshot and the AI generates a heatmap showing which areas will capture the most visual attention — based on patterns from millions of eye-tracking studies.

Key AI Features:

  • AI attention heatmap — predicts where users will look on any design
  • Clarity score — rates how clearly your design communicates its key elements
  • Folding analysis — shows what users see above the fold without scrolling
  • Compare multiple design versions side by side
  • Works with Figma, Adobe XD, and image uploads

Pricing:

PlanPriceAI Features
Free TrialLimited scansBasic heatmap
Starter$23/monthFull heatmap suite
Professional$59/monthAdvanced analysis

Best For: UI/UX designers and researchers who want data-driven insight into how users will perceive their designs before spending time on user testing.

Our Honest Take: Attention Insight fills a real gap user testing takes time and money, but getting zero feedback before launch is risky. AI heatmaps are not a perfect substitute for real user testing, but they catch obvious attention problems before they become expensive mistakes. We use it as a quick gut-check before presenting designs to clients. The $23/month entry point is reasonable for professional designers who do this regularly.

ProsCons
Unique AI heatmap prediction capabilityNo free plan with meaningful access
Catches attention problems before launchAI predictions are not a replacement for real user testing
Works with existing design filesPricier than other tools on this list
Saves time vs traditional user testingLess useful for early wireframe stages

8. Colormind — Best for AI Color Scheme Generation

Colormind generates color schemes that look like a designer made them — because it learned from real designers’ work.

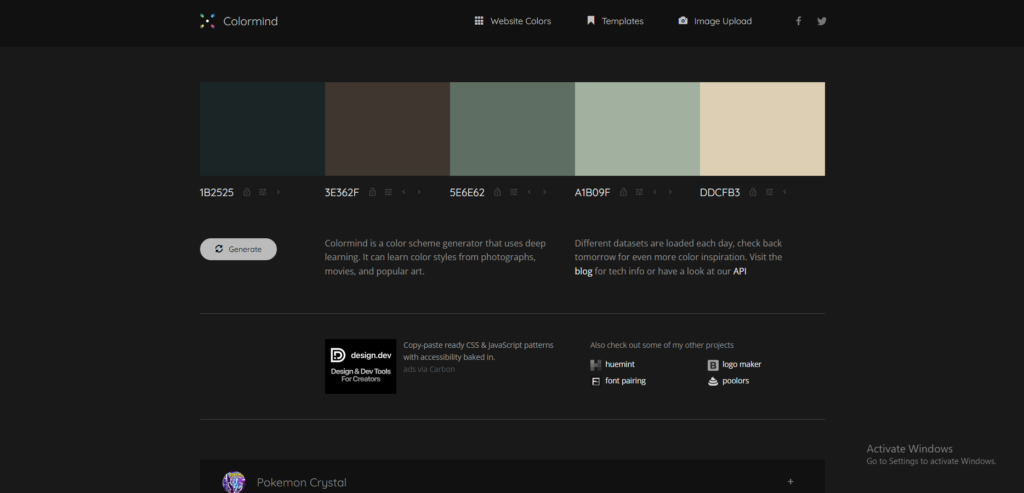
What it is: Colormind is a free AI color scheme generator that uses deep learning trained on real design work — photography, films, and art — to generate color palettes that feel cohesive and intentional. You can lock colors you like and regenerate the rest, making it fast to find the right palette.

Key AI Features:

  • AI color scheme generation from deep learning
  • Lock individual colors and regenerate the rest
  • Upload an image to extract its color palette
  • Bootstrap mode for web and UI color application
  • One-click new scheme generation

Pricing:

PlanPrice
Free$0 — completely free

Best For: UI designers and brand designers who need a quick, reliable color scheme and want something more grounded than a random palette generator.

Our Honest Take: Colormind is a reliable color tool we keep bookmarked. The palettes feel more intentional than what you get from random generators, and the ability to lock colors you like and regenerate the rest makes it fast to work with. It is not as personalized as Khroma, but it does not require setup time either — you can get a solid palette in 30 seconds. The fact that it is completely free makes it an easy recommendation.

ProsCons
Completely freeNo saving or account features
Fast — good palette in under a minuteSimpler than Khroma for personalization
Image-to-palette feature is usefulOnly does color — not a full design tool
Works for web and print color needsInterface is very basic

Quick Comparison Table

ToolBest ForFree PlanStarting PriceAI SpecialtyEase of Use
Figma AIProfessional UI✅ Yes$12/monthFull design copilot⭐⭐⭐⭐
UizardWireframing✅ Yes$19/monthScreen generation⭐⭐⭐⭐⭐
Framer AIWeb UI✅ Yes$5/monthAI site builder⭐⭐⭐⭐
Galileo AIUI generation❌ NoContact for priceText to UI⭐⭐⭐⭐⭐
KhromaColor palettes✅ YesFreeColor generation⭐⭐⭐
VisilyWireframing✅ Yes$10/monthScreenshot to UI⭐⭐⭐⭐⭐
Attention InsightUX testing❌ No$23/monthHeatmap AI⭐⭐⭐
ColormindColor schemes✅ YesFreeColor AI⭐⭐⭐

Verify all pricing at each tool’s official website before purchasing.

How to Choose the Right AI UI Design Tool

Are you a professional UI/UX designer? Figma AI is the clear choice. It is the industry standard and the AI features integrate directly into your existing workflow.

Do you need to wireframe quickly from ideas or screenshots? Uizard or Visily. Both are fast, both handle screenshot-to-wireframe well. Uizard has a slightly larger community. Visily has a cleaner interface for non-designers.

Are you building a website with AI help? Framer AI. It generates live, publishable websites from text prompts — not just mockups.

Do you need AI to generate a full UI from a text description? Galileo AI. The output quality is the most impressive on this list. The pricing model is the main friction.

Do you only need help with colors? Khroma or Colormind. Both are completely free. Khroma personalizes over time. Colormind is faster to get started with.

Do you want to predict how users will experience your design? Attention Insight. It is the only tool on this list that gives you AI-powered attention heatmaps before a design goes live.

Are AI UI Design Tools Replacing Designers?

This comes up constantly, so here is an honest answer.

No — AI is not replacing UI designers. What it is doing is changing what designers spend their time on.

AI handles the repetitive and mechanical parts of design work well. Generating wireframe options, suggesting color palettes, auto-applying layout rules, predicting user attention — these are all things AI tools do faster than any human. That is genuinely useful and genuinely time-saving.

What AI cannot do is understand your users. It cannot decide what problem you are solving, who you are solving it for, and how to design an experience that feels right for that specific context. Those decisions require human judgment, empathy, and strategic thinking. No AI tool gets there yet.

The designers who are thriving right now are the ones who have embraced AI tools to handle the mechanical work and redirected their energy toward the decisions that require a human. The ones who ignore AI tools entirely are at risk of being slower and more expensive than designers who use them.

The best outcome is not AI instead of designers — it is human designers with AI tools working together. That combination is genuinely better than either alone.

Final Verdict

After testing all 8 tools, here are our top picks:

For professional UI designers — Figma AI. It is the industry standard with the best-integrated AI features. If you design interfaces for a living, this is the tool to be in.

For quick wireframing — Uizard. Nothing else generates wireframes from screenshots and text descriptions as fast. Great for early-stage projects and non-designers who need to communicate UI ideas.

For free color work — Khroma or Colormind. Both are excellent and completely free. Khroma personalizes to your taste over time. Colormind is faster to get your first palette.

Want to see how Figma AI compares in a full review? Read our detailed Figma AI review. Or check our main guide to the best AI design tools for graphic designers.

Frequently Asked Questions

Q: What is the best AI tool for UI design?

Figma AI is the best AI tool for professional UI design in 2026. It is the industry standard design tool and its AI features include auto layout, component generation, and a design copilot. For beginners who want to wireframe quickly, Uizard is the better choice because it is easier to learn and faster for generating initial UI concepts.

Q: Can AI generate UI designs automatically?

Yes, tools like Galileo AI and Uizard can generate complete UI designs from a text description or screenshot. Galileo AI is the most advanced — you type what you want and it generates a full, polished UI layout. Uizard can convert a rough hand-drawn sketch into a digital wireframe in seconds using AI.

Q: Is Figma an AI design tool?

Yes, Figma has added significant AI features to its platform including an AI design copilot, auto layout generation, and AI component suggestions. While Figma started as a traditional UI design tool it is now one of the most capable AI-powered design tools available and is the industry standard for professional UI and UX designers.

Q: What AI tools do UX designers use?

UX designers commonly use Figma AI for interface design, Attention Insight for AI heatmap predictions, Uizard for quick wireframing, and Khroma for AI color palette generation. Many UX designers also use general AI tools like ChatGPT for user research synthesis and writing UX copy for their designs.

Q: Are there free AI UI design tools?

Yes, several excellent AI UI design tools have free plans. Figma AI, Uizard, Framer AI, Visily, Khroma, and Colormind all offer free plans. Figma and Uizard are the most useful free AI UI tools — both let you create real designs and wireframes without paying anything.

Q: Can beginners use AI UI design tools?

Yes, tools like Uizard and Visily are specifically designed for beginners with no design experience. Both use AI to generate wireframes from screenshots or simple text descriptions. Figma AI is more powerful but has a steeper learning curve and works better for people who already understand basic design principles.

Q: How does AI help in UI/UX design?

AI helps UI/UX designers in several ways. It generates wireframes from text descriptions, suggests color palettes based on brand style, auto-creates component layouts, predicts where users will look using heatmaps, and speeds up repetitive design tasks. AI does not replace the strategic thinking and user research that makes great UX — it handles the mechanical parts so designers can focus on the creative work.

Q: Is Framer AI good for UI design?

Yes, Framer AI is excellent for building website UI with AI assistance. You can describe what you want and Framer AI generates a functional website design with animations and interactions. It is best for designers who want to create web UI that is also live and publishable — not just a mockup. For app UI design, Figma AI or Uizard are better choices.

Related reading:

  • Best AI design tools for graphic designers — Link
  • Graphic design tools for beginners — Link
  • Free graphic design tools for beginners — Link

Categories
Design tools

Best Graphic Design Tools for Beginners in 2026

Quick Answer: The best graphic design tools for beginners in 2026 are Canva, Adobe Express, Figma, Microsoft Designer, and Affinity Designer.

  • Canva is easiest for complete beginners free
  • Adobe Express is best for social media beginners
  • Figma is best for beginners learning UI design
  • Microsoft Designer is best free AI option
  • Affinity Designer is best paid tool for beginners

Read on for full details, pricing, and who each tool is best suited for.

Introduction

Choosing the right graphic design tool as a beginner can feel overwhelming there are so many options. But the truth is most beginners only need one good tool to get started and start producing great work.

In this guide we cover the 10 best graphic design tools for beginners in 2026 including free and affordable paid options. We explain who each tool is best for so you can pick the right one and start designing with confidence. Whether you are making your first social media post, learning UI design, or exploring design as a career path, there is a tool on this list that fits where you are right now.

What to Look for in a Beginner Design Tool

Not every design tool is built with beginners in mind. Before picking one, here is what actually matters.

Ease of learning. The best beginner tool is one you will actually use. If the interface overwhelms you in the first five minutes, you will close the tab and never come back. Look for tools with clean layouts, good templates, and tutorials that make sense.

Template quality. Good templates are a huge shortcut for beginners. They help you understand what good design looks like and give you a starting point that is already professional. A tool with a strong template library lets you produce solid work before you fully understand design principles.

Output quality. Does the tool actually produce designs that look good? Some free tools create results that feel generic or low-quality. The tools on this list produce results you would be proud to share or show a client.

Price. We cover both free and paid tools here. Free is a great starting point, but some paid tools especially one-time purchase options like Affinity Designer offer real value for beginners serious about learning design.

Community and tutorials. Can you find help when you get stuck? The tools with large communities and YouTube libraries make learning much faster.

Future-proofing. Will the tool grow with you? Starting on a tool that professionals also use like Figma or Adobe Illustrator means your skills transfer directly into a real design career.

How We Selected These Tools

We personally tested every tool on this list not just skimmed the feature pages.

We approached each tool from a beginner perspective: how fast can a first-time user go from signing up to producing something that looks good? We paid attention to the learning curve, the quality of the first-run experience, and how much help is available when things are unclear.

We compared free plan value against paid plan value honestly. We also thought about which tools are worth learning long-term tools that professional designers still use, so the skills beginners build today are still relevant years from now.

The goal was to build a list that gives beginners the best starting point, not just the most popular names.

10 Best Graphic Design Tools for Beginners in 2026

1. Canva — Best Overall for Complete Beginners

Canva is the best starting point for anyone who has never designed anything before in their life.

What it is: Canva is a browser-based design tool with a massive template library, a drag-and-drop editor, and a growing set of AI features. It covers social posts, presentations, logos, print materials, and more all in one place. It is free to start and used by over 150 million people worldwide.

Key Features:

  • 250,000+ free templates across every design category
  • Magic Design AI builds a full layout from a photo or prompt
  • Background remover available on free plan
  • Magic Write for AI-generated copy and captions
  • One-click resize for any platform

Pricing:

PlanPriceWhat You Get
Free$0250,000+ templates, basic AI, 1GB storage
Pro$15/monthAll templates, brand kit, premium AI features

Beginner Friendliness: ⭐⭐⭐⭐⭐ Easiest tool on this list

Best For: Complete beginners who want to design anything from social posts to presentations without any prior experience.

Our Honest Take: Canva is where almost every beginner should start in 2026. The gap between opening the app and producing something that looks professional is shorter than any other tool. The free plan is genuinely useful not a gimped demo. Our one note of caution is that designs made in Canva can sometimes look similar to what everyone else is making, since so many people use the same templates. Customize as much as you can to make your work stand out.

ProsCons
Easiest to learnDesigns can look generic
Huge free template libraryLimited professional-level features
AI features on free plan1GB storage on free plan
Works on web and mobileSome Pro-only templates can confuse beginners

2. Adobe Express — Best for Social Media Beginners

If your main goal is creating content for social media, Adobe Express is purpose-built for that.

What it is: Adobe Express is Adobe’s fast, beginner-friendly design tool. It is nothing like Photoshop or Illustrator it is simple, template-driven, and focused on quick content creation. Every template is pre-sized for the right platform, which saves beginners a lot of trial and error.

Key Features:

  • Templates pre-sized for every social platform
  • AI background removal
  • Animated content creation for Reels and Stories
  • Text effects and simple photo editing
  • Free stock photo library built in

Pricing:

PlanPriceWhat You Get
Free$0Thousands of templates, basic AI, 2GB storage
Premium$10/monthFull template library, unlimited stock, advanced AI

Beginner Friendliness: ⭐⭐⭐⭐⭐ As easy as Canva for social content

Best For: Beginners focused on Instagram, Facebook, LinkedIn, and TikTok content who want templates that are already the right size.

Our Honest Take: Adobe Express has a cleaner, more polished template library than Canva in many categories. If you are already in the Adobe world or planning to be it fits naturally. The free plan is solid for daily social media use. The main reason Canva edges it out for beginners is the sheer volume of templates, but for social-first creators Adobe Express is a genuine competitor.

ProsCons
Templates pre-sized for every platformSmaller template library than Canva
Clean, professional designsAdvanced features behind paywall
AI tools on free planLess versatile for non-social design
Part of Adobe ecosystemSome exports include Adobe watermark

3. Microsoft Designer — Best Free AI Option for Beginners

If you want AI to do most of the design work for you for free Microsoft Designer delivers.

What it is: Microsoft Designer is a free AI design tool powered by DALL-E. You describe what you want and it generates a complete design. It is the most AI-forward free tool on this list you spend less time choosing and arranging, and more time prompting and refining.

Key Features:

  • DALL-E powered AI image generation best quality available for free
  • Text-to-design describe your idea and get a full layout
  • No watermarks on any downloads
  • AI background removal
  • Integrates with Microsoft 365

Pricing:

PlanPriceWhat You Get
Free$0Full access, no watermarks, unlimited designs

Beginner Friendliness: ⭐⭐⭐⭐⭐ Easiest AI-powered tool on this list

Best For: Beginners who want AI to handle the design decisions and just need to describe what they want.

Our Honest Take: Microsoft Designer is genuinely impressive for a free tool. The DALL-E image quality is the best you will get without paying, and the absence of any watermarks is a real differentiator. It is not as template-deep as Canva, but for AI-generated designs from a text prompt, nothing free comes close. Worth having in your toolkit alongside Canva.

ProsCons
Best free AI image generationFewer templates than Canva
No watermarks at allNewer and still maturing
Zero cost — no paid tierLess customization depth
No design experience neededNot ideal for print work

4. Figma — Best for Beginners Learning UI Design

If you are interested in designing apps, websites, or digital products, Figma is where you should start.

What it is: Figma is the industry-standard tool for UI and UX design. It is used by design teams at major companies worldwide. It has a free plan that is genuinely capable, a huge community of designers sharing resources, and AI features that make wireframing and prototyping faster.

Key Features:

  • Drag-and-drop interface with precise control
  • Real-time collaboration share a link and work together
  • Component libraries and design systems
  • AI-powered First Draft generate UI from a text description
  • Thousands of free plugins and community resources

Pricing:

PlanPriceWhat You Get
StarterFree3 projects, unlimited files, full editor
Professional$12/monthUnlimited projects, team features

Beginner Friendliness: ⭐⭐⭐⭐ Some learning needed, but worth it

Best For: Beginners who want to learn UI and UX design with a tool that professional designers actually use.

Our Honest Take: Figma has a steeper learning curve than Canva, but if you are interested in a career in UI or UX design, starting here is the right call. You will not have to unlearn bad habits from a simpler tool later. The free plan is more than enough to learn and build a portfolio. The community is enormous and the YouTube tutorials are excellent. Give it 30 days and you will not look back.

ProsCons
Industry standard for UI/UXSteeper learning curve than Canva
Strong free planNot ideal for print or social graphics
Huge community and resourcesCan be overwhelming at first
Real-time collaborationAI features still developing

5. Affinity Designer — Best Paid Tool for Beginners

If you are ready to invest in a design tool and want something that will grow with you, Affinity Designer is the best value available.

What it is: Affinity Designer is a professional vector and raster design tool think Adobe Illustrator but at a fraction of the cost and with a one-time payment. It handles logos, illustrations, UI design, and print work with professional-level precision.

Key Features:

  • Professional vector and pixel editing in one tool
  • One-time purchase no subscription
  • Handles print, UI, and illustration work
  • Smooth performance works well on older hardware
  • Regular free updates included

Pricing:

PlanPriceWhat You Get
Affinity Designer 2$70 one-timeFull software, all features, free updates

Beginner Friendliness: ⭐⭐⭐ Some learning needed

Best For: Beginners who are serious about design and want a professional-level tool without an ongoing subscription cost.

Our Honest Take: Affinity Designer is the best one-time-purchase deal in design software right now. Seventy dollars gets you a professional tool that competes directly with Adobe Illustrator and you never pay again. The learning curve is real but manageable. If you are committed to learning design seriously and want a tool that will be with you for years, this is where we would put that $70.

ProsCons
One-time purchase — no subscriptionNo free plan
Professional-level outputLearning curve steeper than Canva
Works for print, UI, and illustrationNo cloud-based collaboration
Regular free updatesNot as widely used as Adobe tools

6. Adobe Illustrator — Best for Beginners Learning Vector Design

If your goal is to work in professional graphic design, Adobe Illustrator is the tool the industry runs on.

What it is: Adobe Illustrator is the industry standard for vector graphics logos, icons, illustrations, brand identity design. It is powerful, has a steeper learning curve than the other tools on this list, and requires a subscription. But if you are serious about professional design, learning Illustrator is a career investment.

Key Features:

  • Industry-standard vector editing tools
  • Integrates with Photoshop, InDesign, and the full Adobe suite
  • Massive library of tutorials and learning resources
  • AI-powered Generative Recolor and vector generation
  • Professional output for print and digital

Pricing:

PlanPriceWhat You Get
Illustrator$22/monthFull software, cloud storage, Adobe fonts
Creative Cloud All Apps$60/monthAll Adobe apps included

Beginner Friendliness: ⭐⭐ Steeper learning curve

Best For: Beginners who are serious about a career in graphic design and want to learn the tool professionals actually use.

Our Honest Take: We would not recommend starting here unless you are committed to design as a career or profession. The learning curve is real and the subscription adds up. That said, if you want to work as a graphic designer professionally, you will eventually need Illustrator. Start with Canva or Affinity Designer, learn design fundamentals, and then move to Illustrator when you are ready for the next level.

ProsCons
Industry standard for vector workExpensive monthly subscription
Integrates with full Adobe suiteSteep learning curve for beginners
Best professional output qualityOverkill for casual design needs
Strong learning resources availableRequires ongoing commitment to learn

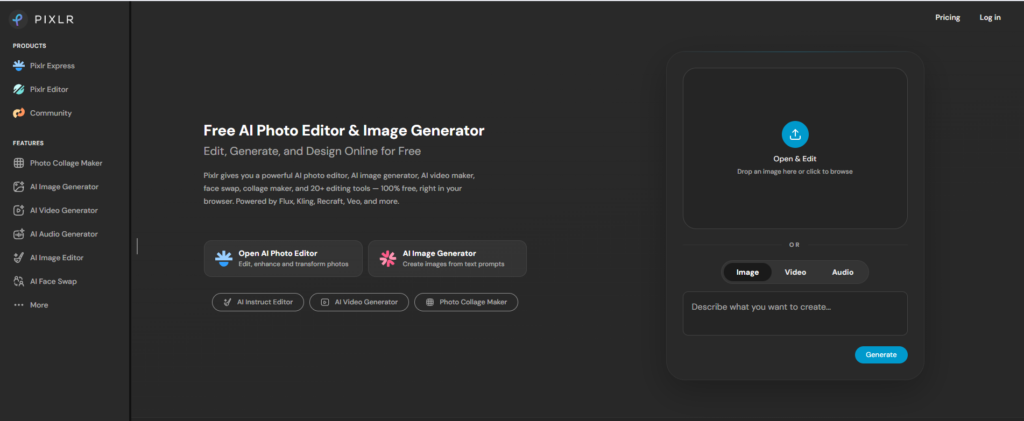
7. Pixlr — Best for Beginners Who Need Photo Editing

When you need to edit photos and do not want to pay for Photoshop, Pixlr gets the job done for free.

What it is: Pixlr is a free browser-based photo editor with a feature set that goes well beyond what most people expect from a free tool. It has layers, filters, AI tools, and adjustment options all accessible from any browser without downloading anything.

Key Features:

  • Layers and masks for non-destructive editing
  • AI background removal and enhancement
  • Hundreds of filters and effects
  • Cutout and object removal tools
  • No download or install required

Pricing:

PlanPriceWhat You Get
Free$0Core editing tools, basic AI, cloud storage
Plus$8/monthPremium features, more AI credits, no ads

Beginner Friendliness: ⭐⭐⭐⭐ Easy for photo tasks

Best For: Beginners who primarily need to edit photos retouching, background removal, color correction without paying for professional software.

Our Honest Take: Pixlr sits in a useful middle ground between the simplicity of Canva and the complexity of Photoshop. For photo editing tasks that beginners typically need background removal, basic retouching, adding text to images it handles them well and quickly. The free version shows ads, which is the main downside. Everything else works reliably.

ProsCons
Layers on free planAds on free version
No download neededAI credits limited on free tier
Good for photo editing basicsInterface can feel busy at first
AI background removal includedLess capable than Photopea for advanced work

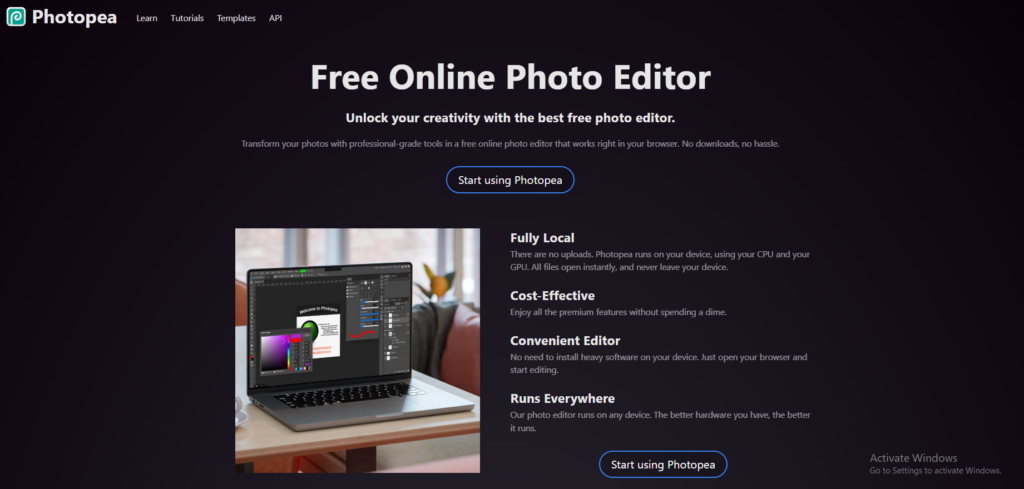
8. Photopea — Best Free Photoshop Alternative

Photopea is the most powerful free photo editing tool on the internet, period.

What it is: Photopea is a free browser-based photo editor that functions almost identically to Adobe Photoshop. It opens PSD files, supports layers, masks, and smart objects, and uses the same keyboard shortcuts. All of this at zero cost, with no download and no signup required.

Key Features:

  • Opens PSD, XD, Sketch, and AI files
  • Full Photoshop-level editing layers, masks, curves, levels
  • Same keyboard shortcuts as Photoshop
  • No signup or download needed
  • All features available on the free version

Pricing:

PlanPriceWhat You Get
Free$0Full feature access, no watermarks
Paid$9/monthSame features — just removes the ads

Beginner Friendliness: ⭐⭐⭐ More complex, but very capable

Best For: Beginners who need Photoshop-level editing without the cost, or anyone who needs to open and edit PSD files.

Our Honest Take: Photopea is remarkable for what it offers at zero cost. If you need Photoshop and do not have it, Photopea is the answer. The interface is more complex than Canva or Adobe Express, so it is better suited to beginners who are ready to invest some time in learning. But the payoff is significant you get professional-level photo editing completely free.

ProsCons
Opens PSD, XD, and Sketch filesComplex for complete beginners
Full Photoshop-like feature setAds on free version
No signup or install neededSaves locally — no cloud storage
All features freeNot great for non-photo design work

9. Sketch — Best for Mac Beginners Interested in UI Design

If you are on a Mac and want to learn UI design, Sketch is a solid professional option.

What it is: Sketch is a Mac-only UI design tool that has been a staple in the industry for years. It is used by professional product designers and has a strong community, extensive plugin ecosystem, and a large library of tutorials.

Key Features:

  • Clean, focused UI design interface
  • Symbols and reusable components
  • Strong plugin ecosystem
  • Excellent community resources and templates
  • Export tools optimized for developer handoff

Pricing:

PlanPriceWhat You Get
Individual$10/monthFull app, cloud storage, updates
Mac App (one-time)$120App only — no cloud, no updates after one year

Beginner Friendliness: ⭐⭐⭐ Some learning needed

Best For: Mac users who want to learn UI design with a tool that has strong industry history and community support.

Our Honest Take: Sketch used to be the industry standard for UI design before Figma took over. It is still a solid tool, especially on Mac. For beginners on Mac who want an alternative to Figma, Sketch is worth considering. The main downside compared to Figma is that it is Mac-only and not free. For most beginners we would recommend Figma first, but Sketch is a legitimate option if you prefer it.

ProsCons
Professional-quality UI designMac only — no Windows or browser version
Strong plugin ecosystemNo free plan
Good community and tutorialsFigma has largely replaced it in teams
Clean, focused interfacePricier than Figma for similar features

10. CorelDRAW — Best for Beginners Pursuing Professional Design

CorelDRAW is a professional design suite that gives beginners access to the tools working designers use every day.

What it is: CorelDRAW is a professional vector design application that has been around for decades. It handles everything from logo design and illustration to print layout and photo editing all in one suite. It is a serious tool with a real learning investment required.

Key Features:

  • Professional vector editing and illustration tools
  • Built-in photo editing (Corel PHOTO-PAINT)
  • Print-ready output tools
  • Font management and typography tools
  • AI-powered design assistance

Pricing:

PlanPriceWhat You Get
CorelDRAW Essentials$22/monthFull suite, cloud storage, updates
Perpetual License$499 one-timeFull software, no ongoing cost

Beginner Friendliness: ⭐⭐⭐ Medium learning curve

Best For: Beginners who are serious about professional design work, especially in print and illustration, and want an alternative to the Adobe ecosystem.

Our Honest Take: CorelDRAW is a professional tool with a long history. If you want to work in print design or illustration professionally and prefer not to use Adobe software, it is a legitimate choice. For most beginners, we would recommend starting with Canva or Affinity Designer both are easier to learn and more affordable. CorelDRAW is worth considering once you know design is a serious pursuit.

ProsCons
Professional-level outputNo free plan
Handles print and illustration wellExpensive for beginners
Good alternative to Adobe toolsSteep learning curve
One-time purchase option availableLess widely used than Adobe in many markets

Quick Comparison Table

ToolFree PlanStarting PriceEase of UseBest ForPlatform
Canva✅ Yes$15/month⭐⭐⭐⭐⭐All-round beginnersWeb + Mobile
Adobe Express✅ Yes$10/month⭐⭐⭐⭐⭐Social mediaWeb + Mobile
Microsoft Designer✅ YesFree⭐⭐⭐⭐⭐AI designsWeb
Figma✅ Yes$12/month⭐⭐⭐⭐UI/UXWeb + Desktop
Affinity Designer❌ No$70 one-time⭐⭐⭐Vectors + PrintDesktop
Adobe Illustrator❌ No$22/month⭐⭐Professional vectorsDesktop
Pixlr✅ Yes$8/month⭐⭐⭐⭐Photo editingWeb
Photopea✅ Yes$9/month⭐⭐⭐Photo editingWeb
Sketch❌ No$10/month⭐⭐⭐UI designMac only
CorelDRAW❌ No$22/month⭐⭐⭐Professional designDesktop

Verify all pricing at the tool’s official website before purchasing.

Free vs Paid — Which Should Beginners Choose?

This is one of the most common questions beginners ask, and the answer is almost always the same: start free.

Free tools have improved so dramatically in recent years that most beginners will not hit their limits for months if ever. Canva, Adobe Express, Microsoft Designer, Figma, Pixlr, and Photopea all have free plans that are genuinely useful, not just stripped demos.

Start free if:

  • You are exploring design for the first time
  • You have no budget right now
  • You are not sure which tool fits your style
  • You need results quickly without a learning curve

Go paid if:

  • You are serious about building design skills professionally
  • You want features not available on free plans like watermark-free exports or unlimited storage
  • You are learning design for a career
  • You need to work on client projects where free plan limits are a problem

Our recommendation for most beginners: start with the Canva free plan for 30 days. If you enjoy design and want to go further, consider the Figma free plan for UI work or Affinity Designer as a one-time paid investment for professional-level design.

How to Choose the Right Tool for Your Goals

You want to make social media posts: Use Canva or Adobe Express. Both are free, both have templates the right size for every platform, and both are easy enough to use on day one.

You want to learn UI and UX design: Use Figma. It is the industry standard. Free to start. The skills transfer directly into a real design career.

You want to edit photos: Use Pixlr or Photopea. Both are free. Pixlr is easier for beginners. Photopea is more powerful and opens PSD files.

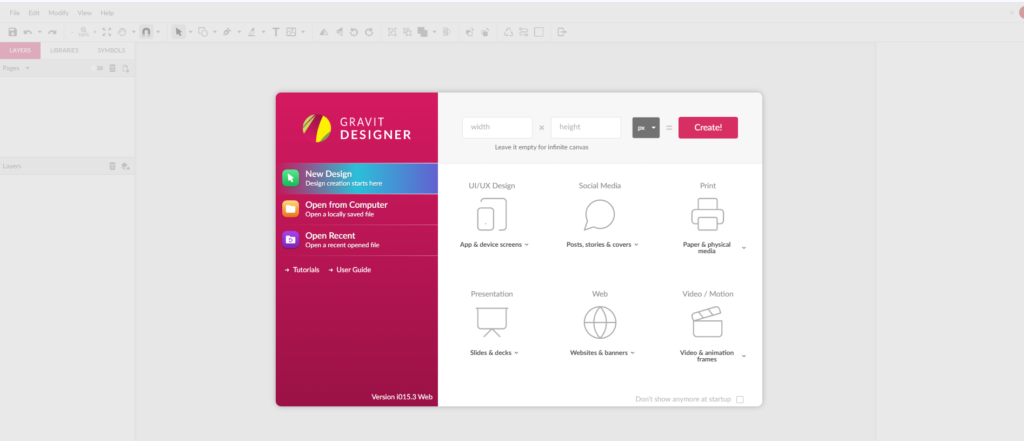
You want to make logos and vectors: Use Affinity Designer if you are ready to invest. Use Gravit Designer or Vectr if you want free options to start.

You want to pursue professional design: Start with Canva to learn design basics, then move to Adobe Illustrator or Affinity Designer when you are ready for professional-level work.

Final Verdict

For most beginners in 2026, the answer is simple: start with Canva.

It is free, easy, produces professional results from day one, and covers almost every design need a beginner has. If you enjoy it and want to keep going, the free plan will carry you further than you expect.

For beginners interested in UI and UX design specifically, Figma is the better starting point it is the industry standard and free to begin. Learning it early sets you up for a real career in product design.

If you are ready to invest in a paid tool that will grow with you for years, Affinity Designer at $70 one-time is the best value in design software right now. No subscription, professional output, and it handles vectors, print, and UI design.

Want to see which of these tools are completely free? Read our full guide to free graphic design tools for beginners. Or check our complete guide to the best AI design tools for graphic designers.

Frequently Asked Questions

Q: What is the best graphic design tool for beginners?

Canva is the best graphic design tool for beginners in 2026. It has the easiest learning curve, a huge free template library, and built-in AI features. For beginners interested in UI/UX design specifically, Figma is the better choice as it is the industry standard tool used by professional designers.

Q: Should beginners use free or paid design tools?

Beginners should start with free tools like Canva, Adobe Express, or Figma before investing in paid software. Free tools let you learn design fundamentals and discover your preferred style without spending money. Once you know design is something you want to pursue seriously, then consider upgrading to paid tools.

Q: How long does it take to learn graphic design tools?

Basic tools like Canva and Adobe Express can be learned in a few hours. More advanced tools like Figma and Adobe Illustrator typically take 2–4 weeks of regular practice to become comfortable with. Most beginners can produce professional-looking work within 30 days of consistent practice with any beginner-friendly tool.

Q: Is Figma good for beginners?

Yes, Figma is good for beginners who want to learn UI and UX design. It has a free plan, excellent tutorials, and a huge community of designers who share resources. The learning curve is steeper than Canva but Figma is the industry standard for UI design, so learning it early sets beginners up for a career in design.

Q: What design tool do most graphic designers use?

Professional graphic designers most commonly use Adobe Illustrator for vector design, Adobe Photoshop for photo editing, and Figma for UI and UX design. However, many designers also use Canva for quick social media content and client presentations because of its speed and ease of use.

Q: Is Adobe Illustrator too hard for beginners?

Adobe Illustrator has a steeper learning curve than tools like Canva but it is not impossible for beginners. Most designers recommend starting with Canva or Figma first to learn design fundamentals, then moving to Adobe Illustrator when you are ready for professional-level vector work. There are also many free YouTube tutorials that make learning Illustrator accessible.

Q: Can I use graphic design tools on mobile?

Yes, Canva, Adobe Express, and Microsoft Designer all have excellent mobile apps for iOS and Android. These are the best options for designing on your phone or tablet. Desktop-focused tools like Figma and Adobe Illustrator have limited mobile support and work best on a laptop or desktop computer.

Q: Which graphic design tool is best for making logos?

For beginners making logos, Canva is the easiest option with hundreds of free logo templates. For more professional logo design, Affinity Designer or Adobe Illustrator give you more control and produce truly unique results. If you want AI to generate your logo automatically, Looka is purpose-built for this and takes just minutes.

Related reading:

  • Best AI design tools for graphic designers — link
  • Free graphic design tools for beginners —link
  • Best Canva Alternatives For Designers in 2026 — link

Categories
Design tools

Best Free Graphic Design Tools for Beginners in 2026

Quick Answer: The best free graphic design tools for beginners in 2026 are Canva, Microsoft Designer, Adobe Express, Pixlr, and Gravit Designer.

  • Canva is the easiest free tool for complete beginners
  • Microsoft Designer is best for AI-powered free designs
  • Adobe Express is best for social media graphics
  • Pixlr is best for free photo editing
  • Gravit Designer is best for free vector design

All tools in this list are 100% free to start.

Introduction

Finding the best free graphic design tools for beginners does not have to be complicated. In 2026 there are more free design tools than ever before and many of them are just as powerful as paid options. Whether you want to create social media posts, logos, presentations, or website graphics this guide covers the 10 best free tools that any beginner can start using today. No design experience needed.

We personally tested every tool on this list, checked what is actually free versus what requires a paid upgrade, and made sure each one is beginner-friendly from day one. If you are starting from scratch and do not want to spend a dollar, you are in the right place.

Why Free Design Tools Are Good Enough for Beginners

A few years ago, free design tools felt limited and clunky. That has completely changed.

In 2026, free tools like Canva and Microsoft Designer offer features that used to cost hundreds of dollars a year. AI is a big part of that shift many free tools now have AI image generation, background removal, and smart design suggestions built right in, at no cost.

For beginners, paid tools are rarely necessary. Most people starting out need templates, basic editing, and the ability to export clean files. Every tool on this list covers that. The free plan on most of these tools will carry you further than you think.

There is also a practical reason to start free you do not yet know which tool fits your workflow. Spending money before you have used a tool for a few weeks is rarely a good idea. Start free, learn what you like, and upgrade only when the free plan genuinely holds you back.

Professional-looking results are absolutely possible with free tools. Thousands of small businesses, freelancers, and content creators use them every single day.

How We Selected These Free Tools

We did not just pick the most popular names and call it a day. We actually logged into each tool on a free plan and used it.

For every tool on this list, we checked whether it is truly free no hidden credit card required, no bait-and-switch after a trial period. We tested ease of use from a complete beginner perspective, which means we paid close attention to how fast you can go from signing up to producing something that looks good.

We also checked output quality. A free tool is only useful if the designs you make with it actually look professional. We verified what the free plan limitations are storage, watermarks, template access and made sure those limits are workable for a beginner, not just frustrating.

Every recommendation here is honest. If the free plan is too limited to be useful, the tool did not make this list.

10 Best Free Graphic Design Tools for Beginners in 2026

1. Canva — Best Free Tool Overall for Beginners

If you are starting from zero, Canva is the tool you should open first it is free and takes minutes to learn.

What it is: Canva is a browser-based design tool with a drag-and-drop editor, a massive template library, and a growing set of AI features. It covers everything from social media posts and presentations to logos and print materials all in one place.

Key Features:

  • Over 250,000 free templates across every design category
  • Magic Design AI generates full layouts from a photo or prompt
  • Background remover on free plan
  • Magic Write for AI-generated text and captions
  • Resize designs for different platforms in one click

What is Free: The free plan includes 1GB of storage, access to 250,000+ templates, basic AI features including background removal, and unlimited designs. You can export files as PNG, JPG, or PDF at no cost.

What is NOT Free: Some templates and elements are marked as Pro-only and require a Canva Pro subscription ($15/month). The watermark appears on certain downloads if you use premium assets accidentally. The brand kit feature and full AI suite require Pro.

Best For: Complete beginners who want to create anything from social posts to presentations without any design experience.

Our Honest Take: Canva is the first tool we recommend to anyone who has never designed before, and for good reason. You can sign up and have something that looks great within your first 20 minutes. The free plan is genuinely generous the 250,000+ templates alone make it worth it. The only frustration is accidentally clicking a Pro element and then finding out your download has a watermark. Just watch for the crown icon and stick to free assets and you will be fine.

ProsCons
Completely free to startSome templates are Pro only
No design experience neededWatermark if Pro assets used
Huge template libraryDesigns can look similar to others
AI features on free planLimited storage on free plan (1GB)

2. Microsoft Designer — Best for AI-Powered Free Design

If you want the most powerful AI features completely free, Microsoft Designer is the one to use.

What it is: Microsoft Designer is a free AI-powered design tool from Microsoft, powered by DALL-E. It generates complete designs from text descriptions you tell it what you want and it builds it for you. No templates to browse through, no design choices to make just describe your idea and Designer takes it from there.

Key Features:

  • DALL-E powered AI image generation some of the best quality available for free
  • Text-to-design type a description and get a full design
  • AI background removal
  • Integrates with Microsoft 365 apps
  • No watermarks on downloads

What is Free: Everything. Microsoft Designer is completely free with no paid tier currently. You get unlimited designs, cloud storage, and full access to all AI features at no cost.

What is NOT Free: Nothing it is all free right now.

Best For: Beginners who want AI to do most of the design work for them, and anyone who wants professional-looking results without learning design basics.

Our Honest Take: The DALL-E image quality on Microsoft Designer is genuinely impressive better than most paid tools at the same task. And the fact that there are zero watermarks and zero costs makes it hard to argue against. It is not as deep as Canva in terms of templates and customization, but for AI-generated designs it is the best free option out there. Worth having as your go-to alongside Canva.

ProsCons
100% free — no watermarksFewer templates than Canva
Best free AI image generationLess customization depth
No design experience neededNewer tool still maturing
Integrates with Microsoft appsNot ideal for print work

3. Adobe Express — Best Free Tool for Social Media Graphics

If you are creating content for Instagram, Facebook, or LinkedIn, Adobe Express is built exactly for that.

What it is: Adobe Express is Adobe’s free online design tool, built for quick content creation. It is lighter and faster than Photoshop or Illustrator, and it comes with templates pre-sized for every major social media platform. It also has solid AI features on the free plan.

Key Features:

  • Thousands of templates sized for every social platform
  • AI-powered background removal
  • Text effects and animation for social content
  • Brand color and font tools
  • Remove backgrounds from photos instantly

What is Free: The free plan includes 2GB of storage, thousands of templates, basic AI features including background removal, and the ability to export clean files with no watermark on most content.

What is NOT Free: Premium templates, Adobe Stock photos, and advanced AI features require Adobe Express Premium ($10/month). Some exports may carry an Adobe badge on the free plan.

Best For: Beginners who are primarily creating social media content and want templates that are already the right size for every platform.

Our Honest Take: Adobe Express is the tool we reach for when speed matters for social content. The templates are clean, professionally designed, and already sized correctly you are not wasting time resizing. The free plan is solid for everyday social media use. If you are already in the Adobe ecosystem, it feels like a natural fit.

ProsCons
Templates sized for every social platformSome exports carry Adobe badge
Clean, professional template designsFewer templates than Canva on free plan
Good AI features for freePremium stock photos require paid plan
2GB storage on free planLess versatile for non-social design

4. Pixlr — Best Free Photo Editing Tool

If you need to edit photos and do not want to pay for Photoshop, Pixlr is the best free option.

What it is: Pixlr is a free browser-based photo editor with tools that feel surprisingly close to Photoshop. It has layers, filters, adjustment tools, and AI-powered features all accessible from any browser without downloading anything.

Key Features:

  • Layers support for non-destructive photo editing
  • AI background removal and photo enhancement
  • Hundreds of filters and effects
  • Cutout tool for removing objects from photos
  • Works in browser no download or install needed

What is Free: Core editing tools, layers, filters, and basic AI features are all free. Cloud storage is included. No download required.

What is NOT Free: Some premium filters, AI credits, and export options require Pixlr Premium ($8/month). The free version shows ads.

Best For: Beginners who need to edit photos adjusting colors, removing backgrounds, cutting out objects without paying for professional software.

Our Honest Take: Pixlr sits in a nice spot between being genuinely capable and actually free. For photo editing tasks that beginners typically need background removal, basic retouching, color adjustments it handles them well. The interface takes a few minutes to get used to but once you find your way around, it is fast and reliable. The ads on the free plan are a minor annoyance but not a dealbreaker.

ProsCons
Closest free alternative to PhotoshopAds on free plan
No download requiredSome features require paid plan
Good AI photo featuresInterface can feel cluttered at first
Layers support on free planAI credits are limited on free tier

5. Gravit Designer — Best for Free Vector Design

If you need to create logos, icons, or scalable graphics without paying for Illustrator, Gravit Designer is worth your time.

What it is: Gravit Designer is a free vector design tool that runs in the browser. Vector graphics are scalable they stay sharp at any size which makes Gravit useful for logos, icons, and illustrations. It is more technical than Canva but still approachable for beginners willing to spend a bit of time learning.

Key Features:

  • Full vector editing tools pen tool, bezier curves, shapes
  • 500MB free cloud storage
  • Export to SVG, PDF, PNG, and other formats
  • Symbols and reusable components
  • Multi-page documents

What is Free: The core vector editor, 500MB storage, and all basic design tools are free with an account. Export to common formats is free.

What is NOT Free: Offline access, unlimited cloud storage, and advanced features require Gravit Designer Pro ($49/year).

Best For: Beginners who want to learn vector design and create logos or icons without paying for Adobe Illustrator.

Our Honest Take: Gravit Designer is a solid free tool for anyone who wants to get into vector design without the Illustrator price tag. The learning curve is steeper than Canva but that is the nature of vector work it takes more time to learn. For logo design and icon creation, it does the job well. If you are serious about learning vector design, this is the best free starting point available.

ProsCons
Full vector editor for freeSteeper learning curve than Canva
Export to SVG and PDF freeLimited templates
Good for logos and iconsNo offline access on free plan
Browser-based — no install needed500MB storage limit

6. Photopea — Best Free Photoshop Alternative

Photopea is the closest thing to Photoshop you will find completely free, no questions asked.

What it is: Photopea is a free browser-based photo editor that looks and works almost identically to Adobe Photoshop. It opens PSD files, supports layers and masks, and handles all the photo editing tasks that Photoshop is known for entirely for free.

Key Features:

  • Opens and saves PSD, XD, Sketch, and AI files
  • Full layers and masks support
  • Same keyboard shortcuts as Photoshop
  • No download, no signup required just open the browser and go
  • Smart objects and adjustment layers

What is Free: Everything is free. No signup needed, no storage limits, no watermarks. You work on files locally and save them to your computer.

What is NOT Free: A paid plan ($9/month) removes ads from the interface. That is the only difference all features are available on the free version.

Best For: Anyone who needs Photoshop-level editing without paying for it, or anyone who needs to open and edit PSD files for free.Our Honest Take: Photopea is one of the most impressive free tools on the internet, full stop. The fact that it opens PSD files, handles layers properly, and uses the same shortcuts as Photoshop all for free, in a browser is remarkable. The ads are a small annoyance. Everything else about it is excellent. If you need Photoshop and do not have it, open Photopea.

ProsCons
Opens PSD, XD, and Sketch filesAds on free version
Full Photoshop-level feature setCan feel overwhelming for beginners
No signup or download neededNo cloud storage — saves locally
All features freeInterface is complex for first-timers

7. Desygner — Best Free Template-Based Design Tool

Desygner gives you access to thousands of ready-made templates that cover almost any design need.

What it is: Desygner is a free online design tool focused on templates. It has thousands of designs for social media, marketing materials, business documents, and more. It is similar to Canva in concept but with its own template library and editor.

Key Features:

  • Thousands of free templates across categories
  • 1GB free storage
  • PDF editing you can edit existing PDFs directly
  • Team sharing features
  • Mobile app available

What is Free: The free plan includes 1GB storage, access to most templates, and basic editing tools. PDF editing is included for free.

What is NOT Free: Premium templates, some design elements, and advanced brand features require Desygner Business ($9.95/month). Some downloads may include a Desygner watermark on the free plan.

Best For: Beginners who need a quick template-based design tool and also need to edit PDF files occasionally.

Our Honest Take: Desygner is a solid alternative to Canva with one unique advantage PDF editing. If you regularly need to update or edit existing PDF documents, Desygner handles that better than most free tools. The template library is good but not as deep as Canva’s. Worth having in your toolkit, especially if PDF work is part of your workflow.

ProsCons
PDF editing on free planWatermark on some free downloads
Thousands of templatesSmaller template library than Canva
1GB free storageLess intuitive than Canva
Mobile app availableSome features feel limited on free tier

8. Vectr — Best Free Vector Graphics Tool for Beginners

Vectr makes vector design as simple as possible a good starting point if Gravit Designer feels too advanced.

What it is: Vectr is a free, simplified vector graphics editor designed specifically for beginners. It is less powerful than Gravit Designer or Illustrator, but that simplicity is the point it is easier to learn and faster to get results if you are just starting out with vector design.

Key Features:

  • Simple vector editing tools shapes, paths, text
  • Real-time collaboration share a link and work together
  • Cloud-based no download needed
  • Free for all users with no paid tier
  • Basic export to SVG and PNG

What is Free: Everything Vectr is completely free with no paid plan. All features are available to all users.

What is NOT Free: Nothing. It is all free.

Best For: Beginners who want to learn the basics of vector design in a tool that is less intimidating than Gravit or Illustrator.

Our Honest Take: Vectr is not the most powerful vector tool, but it is genuinely one of the easiest to learn. If you are a complete beginner curious about vector design, Vectr is a low-pressure way to start. The real-time collaboration feature is a nice bonus for working with teammates or clients. Once you outgrow it, moving to Gravit Designer or Figma is a natural next step.

ProsCons
Completely free — no paid planLimited compared to Gravit or Figma
Easiest vector tool for beginnersFewer export options
Real-time collaboration includedNot suitable for complex vector work
No download requiredLimited template library

9. Crello (Vista Create) — Best Free Tool for Animated Designs

If you want to make animated social media content for free, Vista Create (formerly Crello) is the tool to use.

What it is: Vista Create, which most people still call Crello, is a free design tool focused on animated content. It has thousands of templates including animated versions great for Instagram Stories, TikTok content, and any social media that benefits from movement.

Key Features:

  • Thousands of free animated templates
  • Video and GIF creation tools
  • Brand kit features on free plan
  • Large library of free stock photos and videos
  • One-click resizing for different platforms

What is Free: The free plan includes access to thousands of templates (including animated ones), basic stock assets, and export to common formats. A watermark may appear on some free exports.

What is NOT Free: Premium templates, extended stock library, and removing watermarks require Vista Create Pro ($13/month).

Best For: Beginners creating animated content for social media who want ready-made templates that move.

Our Honest Take: Vista Create is the best free option specifically for animated social content. The animated templates are a big differentiator Canva has some, but Vista Create has more variety in this specific category. If animation matters to your content, it is worth spending time here. For static designs, Canva is still the better all-around choice.

ProsCons

Best free animated template library
Watermark on some free exports
Good stock photo and video libraryLess known — smaller community
Brand kit on free planNot as deep as Canva overall
Easy to use for animated contentPremium templates require paid plan

10. Snappa — Best Free Tool for Quick Social Media Design

When you need a social media graphic done in under five minutes, Snappa makes it happen.

What it is: Snappa is a free online design tool built specifically for social media and digital marketing graphics. It is fast, simple, and focused no unnecessary features, just a clean editor with good templates and the right canvas sizes already set up.

Key Features:

  • Pre-set canvas sizes for every major social platform
  • Thousands of free templates
  • One-click background removal
  • Free stock photo library built in
  • Simple drag-and-drop editor

What is Free: The free plan includes 3 downloads per month, access to all templates, and the full stock photo library. No watermark on downloads.

What is NOT Free: Unlimited downloads require Snappa Pro ($10/month). The 3 downloads per month limit is the main restriction on the free plan.

Best For: Beginners who need to create a small number of social media graphics each month and want a fast, simple tool with no learning curve.

Our Honest Take: Snappa is genuinely fast and clean. The interface is simpler than Canva which is actually an advantage if you just need to get something done quickly. The 3 downloads per month limit on the free plan is restrictive if you create content regularly, but if you only need a handful of graphics per month, it works well. No watermarks is a big plus.

ProsCons
No watermarks on free planOnly 3 downloads per month free
Very fast and easy to useNot great for non-social design
Clean, simple interfaceLimited customization depth
Built-in free stock photosFewer templates than Canva

Quick Comparison Table

Tool
Best For
Storage
Templates

AI Features

Watermark
CanvaOverall1GB250,000+✅ YesSome files
Microsoft DesignerAI DesignCloudUnlimited✅ Yes❌ No
Adobe ExpressSocial Media2GBThousands✅ YesSome files
PixlrPhoto EditCloudHundreds✅ Yes❌ No
Gravit DesignerVectors500MBLimited❌ No❌ No
PhotopeaPhoto EditLocalNone❌ No❌ No
DesygnerTemplates1GBThousands❌ NoSome files
VectrVectorsCloudLimited❌ No❌ No
Vista CreateAnimationCloudThousands✅ YesSome files
SnappaSocial MediaCloudThousands❌ No❌ No

Always verify free plan details directly on each tool’s website these change regularly.

How to Choose the Right Free Tool

Are you a complete beginner with no design experience? Start with Canva. It is the easiest to learn and covers almost every design need. You can be up and running in under 10 minutes.

Do you want AI to generate designs for you? Use Microsoft Designer. Describe what you want and it builds it. Best free AI image quality available right now.

Are you creating social media content? Adobe Express or Snappa. Both have templates pre-sized for every platform. Adobe Express has more depth, Snappa is faster for quick work.

Do you need to edit photos? Pixlr for beginner-friendly photo editing. Photopea if you need Photoshop-level tools and want to open PSD files.

Do you need to design logos or icons? Gravit Designer or Vectr. Vectr is easier to start with. Gravit Designer is more powerful once you get the hang of it.

Do you need animated social content? Vista Create. It has the best free library of animated templates.

Do you have almost no time and need quick results? Snappa. It is the fastest tool on this list for getting a social graphic done and exported.

Tips for Beginners Using Free Design Tools

Starting out with a new design tool can feel overwhelming. Here are a few things that will save you time and frustration.

Start with templates, not blank canvases. Every tool on this list has templates. Use them. There is no shame in starting from a template even professional designers do it. Pick one that is close to what you want, swap out the text and images, and you have something that looks great in minutes.

Watch one YouTube tutorial before you start. Every tool here has free tutorials on YouTube. Spending 15 minutes watching someone use the tool before you open it will save you an hour of confusion. Search the tool name plus “beginner tutorial” and pick the most recent one.

Stick to one tool for your first 30 days. It is tempting to try all of them. Resist that urge. Pick one tool probably Canva if you are unsure and use it for 30 days. You will learn it much faster by going deep on one tool than jumping between five.

Save your work regularly. Most of these tools auto-save in the browser, but do not assume. Download a copy of your work after finishing anything important. You do not want to lose two hours of work because a browser tab closed unexpectedly.

Use free design communities for inspiration. Dribbble, Behance, and Pinterest are all free to browse. When you are stuck on how something should look, spend five minutes looking at what other designers have created. Inspiration is not cheating it is how design works.

Final Verdict

After testing all 10 tools, here are our top picks for different types of beginners:

For most beginners — Canva. It is free, easy to learn, produces professional results, and covers almost every design need. If you are unsure where to start, start here.

For AI-powered designs — Microsoft Designer. The best free AI image generation available, with no watermarks and no cost. A powerful companion to Canva.

For social media content — Adobe Express. Templates pre-sized for every platform, clean designs, and solid AI features on the free plan.

For photo editing, Pixlr and Photopea both deliver. For vector work, start with Vectr and graduate to Gravit Designer. For animated content, Vista Create is the standout free option.

The most important thing is to pick one and start. You will learn more in a week of actually using a tool than in a month of reading about them.

Frequently Asked Questions

Q: What is the best free graphic design tool for beginners?

Canva is the best free graphic design tool for beginners in 2026. It has over 250,000 free templates, requires no design experience, and includes free AI features. Microsoft Designer is a strong second choice for beginners who want more AI-powered options for free.

Q: Can I do professional graphic design with free tools?

Yes, you can create professional-quality designs using free tools like Canva, Adobe Express, and Microsoft Designer. Many small businesses and freelancers use these free tools daily for social media, presentations, and marketing materials without needing paid software.

Q: Is Canva really free for beginners?

Yes, Canva has a completely free plan that includes access to over 250,000 templates, basic AI features, 1GB of storage, and unlimited designs. Some premium templates and features require Canva Pro which starts at around $15 per month, but the free plan is more than enough for most beginners.

Q: What free tool is best for social media graphics?

Adobe Express and Canva are the best free tools for social media graphics. Both have templates sized perfectly for Instagram, Facebook, Twitter, and LinkedIn. Adobe Express has slightly better photo editing features while Canva has more template variety on its free plan.

Q: Is there a free alternative to Adobe Photoshop?

Yes, Photopea and Pixlr are the best free alternatives to Adobe Photoshop. Both run directly in your browser with no download needed. Photopea is the closest match to Photoshop and even opens PSD files. Pixlr is easier for beginners with a simpler interface.

Q: Can beginners learn graphic design with free tools?

Absolutely. Free tools like Canva, Adobe Express, and Microsoft Designer are designed specifically for people with no design experience. Starting with free tools is actually recommended for beginners because you can learn design fundamentals without spending money before knowing which tool fits your workflow.

Q: What is the easiest free graphic design tool?

Canva is the easiest free graphic design tool for complete beginners. Its drag-and-drop interface, pre-made templates, and AI design suggestions mean you can create a professional-looking design in under 10 minutes even with zero design experience.

Q: Are free graphic design tools good enough for business use?

Yes, many businesses use free design tools successfully. Canva, Adobe Express, and Microsoft Designer are all used by small businesses for social media, presentations, email graphics, and basic marketing materials. For advanced branding or print work, a paid tool may eventually be needed.

Related reading:

  • Best AI design tools for graphic designers — link
  • Canva Alternatives For Designers in 2026 — link
  • Canva Pro Vs Free — link
Categories
Design tools

Best AI Design Tools for Graphic Designers in 2026

Quick Answer: The best AI design tools for graphic designers in 2026 are Canva AI, Adobe Firefly, and Figma AI.

  • Canva AI is best if you are a beginner
  • Adobe Firefly is best for professional designers
  • Figma AI is best for UI and UX design work
  • Microsoft Designer is the best completely free option

Keep reading to see all 10 tools with full details, pricing, and who each one is best for.

Introduction

AI design tools are completely changing how graphic designers work in 2026. Whether you are a beginner looking for your first design tool or a professional wanting to speed up your workflow there is an AI design tool that fits your exact needs.

In this guide we tested and reviewed the 10 best AI design tools for graphic designers. We cover pricing, features, ease of use, and who each tool works best for so you can make the right choice without wasting time. If you have been wondering which tools are actually worth it and which ones are just hype, you are in the right place.

Why Graphic Designers Need AI Tools

A few years ago, AI in design felt like a gimmick. Now it is one of the most practical things you can add to your workflow.

The biggest win is time. Tasks that used to eat up a whole afternoon like removing backgrounds, generating color palettes, or resizing assets for different platforms now take seconds. That frees you up to focus on the work that actually requires your brain.

AI tools also help when you hit a creative block. Need five different logo concepts to show a client? An AI tool can generate a starting point in minutes. You still bring the creative direction, but you are not starting from a blank page.

For freelancers and small studios, the cost savings are real too. You can produce more work in less time, which means you can take on more clients without burning out. And for beginners, AI tools have made professional-looking design accessible to people who do not have years of training.

The bottom line: AI does not replace what makes you a good designer. It just handles the repetitive stuff so you can do more of the creative stuff.

How We Tested and Selected These Tools

We did not just read the marketing pages. We actually logged into each tool and put it through its paces.

For every tool on this list, we tested it for ease of use both as someone who is new to design and as someone with professional experience. We created real design assets: social media graphics, logos, color palettes, wireframes, and marketing materials.

We compared what you actually get on the free plan versus what is locked behind a paywall. We also looked at how often each tool pushes out updates and improvements, because in the AI world a tool that is not evolving is already falling behind.

Price was a big factor too. We asked ourselves honestly is this worth the money at every price point? If the answer was no, it did not make the list.

Every recommendation here is based on real testing, not sponsored rankings.

10+ Best AI Design Tools for Graphic Designers in 2026

1. Canva AI — Best for Beginners

If you have never used a design tool before, Canva AI is honestly the best place to start.

What it is: Canva started as a drag-and-drop design tool, but in the last couple of years it has added a serious set of AI features. You can generate images, write copy, remove backgrounds, and get full design suggestions all inside the same platform you probably already know.

Key Features:

  • Magic Design generates full layouts from a single prompt
  • AI image generation built right into the editor
  • Background remover that works in one click
  • Magic Write for AI-generated copy and captions
  • Resize designs for any platform automatically

Pricing:

PlanPriceBest For
Free$0/monthBeginners
Pro$18/monthFreelancers
Business$25/monthTeam

Best For: Beginners, social media managers, and small business owners who want professional results without a design degree.

Our Honest Take: We use Canva AI regularly for quick social media graphics and client presentations. The AI suggestions genuinely save time probably an hour or more per week. The one frustration is the watermark on the free plan, which makes it awkward for client work. If you are serious about using it professionally, the Pro plan is worth it.

ProsCons
Incredibly easy to useFree plan has a watermark
Huge library of templatesDesigns can look similar to everyone else’s
AI features on free planLimited fine-tuning control
Works in browser — no install neededNot ideal for complex print work

2. Adobe Firefly — Best for Professionals

If you are a working designer who lives inside Adobe Creative Cloud, Firefly is the AI upgrade you have been waiting for.

What it is: Adobe Firefly is Adobe’s AI image and content generation tool, built directly into Photoshop, Illustrator, and other Adobe apps. It is commercially safe — meaning you can use the outputs in client work without worrying about copyright issues.

Key Features:

  • Generative Fill in Photoshop add, remove, or expand elements with text prompts
  • Text to vector in Illustrator
  • Text effects that turn words into illustrated art
  • Generative Recolor for instant color variations
  • Commercially safe outputs trained on licensed content

Pricing:

PlanPriceBest For
Free$0/monthTesting the tool
Firefly Premium$20/monthProfessionals
Creative CloudIncludedExisting CC subscribers

Best For: Professional graphic designers and photographers already using Adobe products.

Our Honest Take: Generative Fill alone is worth the price of entry. It handles tasks in Photoshop that used to take real skill and time extending backgrounds, removing objects, filling in gaps. The output quality is noticeably better than most competitors. The only catch is you need to already be in the Adobe ecosystem to get full value from it.

ProsCons
Integrates directly with Photoshop and IllustratorBest features require Creative Cloud subscription
Commercially safe outputsLearning curve if you are new to Adobe tools
Excellent output qualitySlower for quick social media work
Regular updates and improvementsCan be expensive for hobbyists

3. Figma AI — Best for UI/UX Designers

For anyone designing apps, websites, or digital products, Figma AI is the tool your whole team should be using.

What it is: Figma has been the standard for UI and UX design for years. Their AI features a layer on top of that foundation helping designers prototype faster, generate layouts, and collaborate in real time without constantly starting from scratch.

Key Features:

  • Auto Layout with AI suggestions for consistent spacing
  • AI-powered design suggestions based on context
  • Rename layers automatically saves serious time on complex files
  • First Draft generate UI screens from text descriptions
  • Real-time collaboration with AI-assisted handoff notes

Pricing:

PlanPriceBest For
StarterFreeSolo designers
Professional$20/monthFreelancers
Organization$55/monthDesign teams
Enterprise$90/monthExpert

Best For: UI/UX designers, product teams, and developers who collaborate on digital products.

Our Honest Take: Figma is already the industry standard for product design, and the AI additions make it even stickier. First Draft is genuinely useful for rough wireframes when a client needs to see something quickly. The auto-rename feature is one of those small things that saves more time than you would expect. If you are building digital products, nothing else comes close.

ProsCons
Industry standard for UI/UXNot great for print or social design
Strong real-time collaborationAI features still maturing
Free plan is very capableCan be overwhelming for beginners
Integrates with developer handoff toolsOrganization plan is expensive

4. Looka — Best for Logo Design

If you need a professional logo and you need it fast, Looka is built exactly for that.

What it is: Looka is an AI-powered branding tool that generates custom logos based on your business name, industry, and style preferences. It is not a general design tool — it is purpose-built for logo creation and brand identity packages.

Key Features:

  • AI logo generator that creates dozens of options instantly
  • Full brand kit including business cards, email signatures, and social profiles
  • Customizable fonts, colors, and icon combinations
  • High-resolution files for print and digital use
  • Brand identity package option

Pricing:

PlanPriceBest For
Logo Package$20 one-timeStartups and small businesses
Brand Kit$96/yearFull brand identity needs

Best For: Entrepreneurs, startups, and small businesses that need a professional logo without hiring a designer.

Our Honest Take: For what it costs, Looka delivers real value. The logos it generates look professional and the customization options give you enough control to make it feel unique. It is not going to replace a senior brand designer for a major rebrand, but for a small business getting started, it is a smart and affordable choice.

ProsCons
Fast — logos in minutes
No free download
Professional looking resultsNot ideal for complex brand work
One-time payment optionLimited if you need very unique designs
Full brand kit available_

5. Orshot – Best Design agent

What it is: Orshot is a design + automation platform that puts your social media and marketing visuals on auto-pilot. Design once in a Canva-like editor, then auto-generate images, PDFs, and videos at scale via API, no-code integrations (Zapier, Make, n8n), or directly inside the studio.

Key features:

  • Canva-like visual editor — no design skills required
  • AI: generate templates from a prompt + AI image generation credits
  • Import existing designs from Figma and Canva
  • Render to multiple formats: PNG, JPEG, WEBP, PDF, MP4, WEBM, GIF
  • Smart Resize — design once, output any size/format automatically
  • Bulk/batch rendering for hundreds of variations
  • Video generation with a timeline editor + auto subtitles
  • Automate via API or no-code (Zapier, Make, n8n) and publish directly to 15+ social platforms
  • Brand kit (colors, fonts, images, videos), team workspaces, and embeddable/white-label studio

Pricing:

PlanPriceBest for
Free$0/month60 renders + 50 AI credits, 1 workspace
Launchfrom $39/month3,000 renders, video rendering, basic embed
Growfrom $160/month40,000 renders, advanced embed (webhooks, downloads, multi-tenancy)
Scalefrom $349/month150,000+ renders, custom-branded embed, more workspaces/seats
Enterprisecustom pricingSLA + dedicated support

Annual billing gets 2 months free (~17% off). Unlimited templates on every plan.

ProsCons
Real free tier (60 renders + 50 AI credits/month) — most API-first tools in this space are trial-onlyNewer and smaller than long-established players like Bannerbear, so the built-in template library and brand recognition are still growing
One platform for images, PDFs, and video, with a full timeline editor and auto-generated subtitlesAutomation depth (API, bulk rendering, embed) can be more than a designer who only needs occasional one-off graphics
Canva-like visual editor (Studio) designers can use directly, not developer-onlyAI image credits are limited on the free and entry tiers
Import from Figma and Canva, plus AI template generation from a promptHighest-volume and multi-tenancy features sit on the Scale/Enterprise plans
White-label, embeddable editor on every paid plan (competitors usually gate this behind higher tiers)–
Built-in publishing to 15+ social platforms — no separate scheduler needed–
Automate via API or no-code (Zapier, Make, n8n), plus an MCP server for AI agents–
Simple credits: 1 credit = 1 image, 1 PDF page, or 1 second of video–
Automation workflows built right inside the app, so you can setup recurring automations based on schedule, actions etc. without leaving the platform

6. Microsoft Designer — Best Free Option

If your budget is zero, Microsoft Designer gives you more than you would expect for free.

What it is: Microsoft Designer is a free AI design tool powered by DALL-E. You can create social media graphics, invitations, flyers, and more — all from text prompts or customizable templates. No design experience needed.

Key Features:

  • DALL-E powered AI image generation
  • Text-to-design — describe what you want and it builds it
  • Hundreds of templates for social, presentations, and print
  • Background remover
  • Integrates with Microsoft 365 apps

Pricing:

PlanPriceBest For
Free$0Everyone
Microsoft 365IncludedMicrosoft 365 subscribers

Best For: Anyone who wants a capable free design tool with strong AI image generation.

Our Honest Take: Microsoft Designer is genuinely impressive for a free tool. The DALL-E integration produces some of the best AI-generated images of any tool at this price point — which is zero. It does not have the depth of Canva or Adobe, but if you are not ready to pay for a design tool yet, this is where you should start.

ProsCons
100% freeFewer templates than Canva
DALL-E image quality is excellentLess mature than other tools
No watermarksNot ideal for professional client work
Easy to learnFewer integrations

7. Khroma — Best for Color Palettes

Khroma solves one of the most common headaches in design — choosing the right colors.

What it is: Khroma is an AI color tool that learns your color preferences and then generates unlimited palettes, gradients, and color combinations tailored to your taste. It is free and entirely focused on color.

Key Features:

  • Trains on your color preferences to personalize results
  • Generates palettes, gradients, typography combos, and images
  • Searchable by hue, shade, or hex code
  • Exports color values for use in any design tool

Pricing:

PlanPrice
Free$0

Best For: Designers who struggle with color choices or want to explore new combinations fast.

Our Honest Take: Khroma is one of those niche tools that does exactly one thing really well. Once you train it on your preferences, the palettes it suggests feel genuinely personal — not random. It is not a full design tool, but as a standalone color assistant it is hard to beat for free.

ProsCons
Completely freeOnly does color — not a full design tool
Personalized to your tasteRequires setup time to train
Great for branding projectsNo direct export to design files

8. Uizard — Best for Wireframing

Uizard is the fastest way to go from a rough idea to a working prototype.

What it is: Uizard is an AI wireframing and prototyping tool that lets you upload a hand-drawn sketch or a screenshot and turn it into a digital design. It is designed for non-designers and early-stage product teams who need to visualize ideas quickly.

Key Features:

  • Screenshot to design upload any app screenshot and get an editable version
  • Sketch to wireframe draw something on paper, upload it, and Uizard converts it
  • Auto Theme generates color schemes and design styles from text
  • Pre-built UI component library
  • Team collaboration features

Pricing:

PlanPriceBest For
Free$0/monthIndividuals
Pro$19/monthFreelancers
Business$39/monthTeams

Best For: Product managers, startup founders, and designers who need fast wireframes and prototypes.

Our Honest Take: The screenshot-to-design feature is genuinely magical the first time you use it. It is not perfect you will still need to clean things up but it gets you 70% of the way there in seconds. For early-stage product work when speed matters more than polish, Uizard is a real time-saver.

ProsCons
Screenshot to design is a standout featureNot for production-ready UI
Great for non-designersLess powerful than Figma for professionals
Fast prototypingOutput needs cleanup

9. Designs.ai — Best All-in-One AI Design Suite

If you want one tool that handles everything from logos to videos to social posts, Designs.ai tries to be that.

What it is: Designs.ai is a full AI design platform that covers logos, videos, mockups, social media content, and more all under one subscription. It is built for marketing teams and content creators who need variety without switching between five different tools.

Key Features:

  • AI logo maker, video maker, and social content creator
  • Speechmaker for AI voiceover videos
  • Design maker with thousands of templates
  • Color matcher and font pairer
  • Brand identity tools

Pricing:

PlanPriceBest For
Plus$19.50/month
Individuals
Pro$39.50/monthProfessionals
Enterprise$94/monthLarge teams

Best For: Marketing teams, content creators, and small agencies who need a wide range of design output in one place.

Our Honest Take: Designs.ai is impressive in scope but the individual tools do not always match the depth of dedicated tools like Canva or Adobe. If you need a little of everything and do not want to manage multiple subscriptions, it makes sense. If you only need one type of design work, you will probably get better results from a focused tool.

ProsCons
Covers a wide range of design needsNo free plan
One subscription for many toolsIndividual tools not as deep as dedicated apps
Good for marketing contentCan feel overwhelming

10. Autodraw — Best for Quick Illustrations

Autodraw is a free Google tool that turns rough sketches into clean illustrations instantly.

What it is: Autodraw is a free AI drawing tool from Google that recognizes what you are trying to draw and suggests polished versions of it. It is simple, fast, and surprisingly fun to use.

Key Features:

  • AI sketch recognition draw something rough and it guesses what you meant
  • One-click clean illustration suggestions from professional artists
  • Completely free to use
  • Works in any browser no install required
  • Download finished drawings as PNG files

Pricing:

PlanPrice
Free$0

Best For: Anyone who needs a quick, clean illustration and does not have the skills or time to draw it from scratch.

Our Honest Take: Autodraw is not a professional tool, but it fills a real gap. Sometimes you just need a simple icon or illustration and you do not want to spend 30 minutes on it. Autodraw gets you there in under a minute. It is a fun tool that more designers should have bookmarked.

ProsCons
Completely freeVery limited in scope
Instant resultsNot for professional illustration work
No login requiredOutput can look basic
Great for quick diagrams and icons–

11. Colormind — Best for Branding Color Schemes

Colormind uses deep learning to generate color schemes that actually look good together.

What it is: Colormind is a free AI color scheme generator that pulls color inspiration from photos, movies, and art. It generates complete color palettes that you can lock, shuffle, and adjust — useful for branding projects, web design, and any work where you need a cohesive color story.

Key Features:

  • AI-generated color palettes based on real-world sources
  • Lock individual colors and regenerate the rest
  • Bootstrap UI color mode for web developers
  • Upload an image to extract its color palette
  • One-click new palette generation

Pricing:

PlanPrice
Free$0

Best For: Brand designers, web designers, and anyone who needs a solid color palette fast.

Our Honest Take: Colormind is a reliable tool we keep coming back to at the start of branding projects. The palettes feel more grounded and intentional than what you get from random generators. It is free, it is fast, and it does its job well. No complaints.

ProsCons
Free to useNo account or saving features
Smart, cohesive palettesSimpler than Khroma for personalization
Image-to-palette feature is greatOnly does color
Works for web and print–

Quick Comparison Table

ToolBest ForFree PlanStarting PriceEase of UseKey AI Feature

Canva AI
Beginners✅ Yes
$15/mo
⭐⭐⭐⭐⭐
Magic Design, AI Image Gen
Adobe FireflyProfessionals✅ Yes
$20/mo
⭐⭐⭐⭐Generative Fill, Text Effects
Figma AIUI/UX✅ Yes$20/mo⭐⭐⭐⭐
Auto Layout, AI Suggestions
LookaLogo Design❌ No$20 one-time⭐⭐⭐⭐⭐
AI Logo Genera-
tor
Microsoft DesignerFree Users✅ YesFree⭐⭐⭐⭐⭐
DALL-E Image Gen
KhromaColor✅ YesFree⭐⭐⭐
AI Color Palette Gen
UizardWireframes✅ Yes$12/mo⭐⭐⭐⭐Screenshot to Design
Designs.aiAll in One❌ No$19/mo⭐⭐⭐⭐
Full AI Suite
AutodrawIllustration✅ YesFree⭐⭐⭐⭐⭐
AI Sketch Recognition
ColormindBranding✅ YesFree⭐⭐⭐
AI Color Schemes

How to Choose the Right AI Design Tool

Not sure which one is right for you? Here is a simple way to think about it.

Are you a complete beginner? Start with Canva AI or Microsoft Designer. Both are free, easy to pick up, and do not require any prior design knowledge. You will be making things that look professional within an hour of signing up.

Are you a professional designer? Adobe Firefly or Figma AI will fit your workflow best. Adobe Firefly integrates directly into the Creative Cloud apps you are already using. Figma AI is the standard for digital product and UI work.

Do you only need logo design? Looka is purpose-built for that exact job. The results are clean, professional, and you can get a full brand kit without hiring a designer.

Are you on a zero budget? Use Microsoft Designer, Autodraw, Khroma, or Colormind. All four are completely free with no hidden costs or watermarks. You can build a solid design workflow without spending a dollar.

Do you work in a team? Figma AI and Canva Teams are both built for collaboration. Multiple people can work on the same designs at the same time, which cuts down on the back-and-forth that slows most teams down.

Do you need a little of everything? Designs.ai covers logos, videos, social content, and more under one subscription. It is worth looking at if you hate juggling multiple tools.

Final Verdict

After testing all 10 tools, here are our top picks:

Best overall — Canva AI. It is the easiest tool for most people, has strong AI features on the free plan, and works for a huge range of design tasks. If you only try one tool from this list, make it this one.

Best for professionals — Adobe Firefly. The integration with Photoshop and Illustrator alone makes it worth the price for any serious designer. Generative Fill is one of the most useful AI design features built right now.

Best free option — Microsoft Designer. The DALL-E image quality is genuinely impressive for a free tool. No watermarks, no limits on everyday use, and no reason not to try it.

If you are just starting out, go with Canva AI — it will get you moving fast. If you are serious about professional design work, Adobe Firefly is worth the investment.

Sources and Further Reading

Frequently Asked Questions

Q: What is the best AI tool for graphic design?

Canva AI is the best AI tool for most graphic designers because it is easy to use, free to start, and works for social media, presentations, and print design. If you are a professional, Adobe Firefly gives you more advanced features and better quality output.

Q: Are AI design tools free to use?

Yes, several great AI design tools are completely free. Microsoft Designer, Canva AI free plan, Autodraw, Khroma, and Colormind are all free with no hidden costs. Paid plans on tools like Canva Pro and Adobe Firefly unlock more advanced AI features and remove usage limits.

Q: Can AI replace graphic designers?

No, AI cannot replace graphic designers. AI tools help designers work faster and handle repetitive tasks, but human creativity, strategic thinking, and problem solving are still essential. AI is a tool that makes designers more productive — not a replacement for design skills and creative judgment.

Q: What AI tool do professional designers use?

Professional designers most commonly use Adobe Firefly, Figma AI, and Midjourney in their workflows. Adobe Firefly integrates directly with Photoshop and Illustrator. Figma AI is the standard for UI and UX design teams. Midjourney is popular for creative concept generation and client presentations.

Q: Is Canva an AI design tool?

Yes, Canva has added powerful AI features including Magic Design, Magic Write, AI image generation, and background removal. These features are available on both free and paid plans, making Canva one of the most accessible AI design tools for beginners and professionals alike.

Q: What is the best free AI design tool for beginners?

Microsoft Designer and Canva AI are the best free AI design tools for complete beginners. Both are easy to use, require no prior design experience, and use AI to generate professional-looking results. Microsoft Designer is powered by DALL-E, which produces particularly impressive AI images at no cost.

Q: Which AI design tool is best for logo design?

Looka is the best AI tool specifically built for logo design. It generates professional logos based on your industry and style preferences in minutes. If you want a free option, Canva AI has a logo maker with AI-generated templates you can customize without any design experience.

Q: Do AI design tools work on mobile?

Yes, most popular AI design tools have mobile apps. Canva AI, Microsoft Designer, and Adobe Firefly all have iOS and Android apps. This lets you create and edit designs on your phone without needing a laptop or desktop useful for quick social media content on the go.

Related reading:

  • Best Free Graphic Design Tools for Beginners in 2026 — link
  • Canva Vs Illustrator: Which One Is Better In 2026— link
  • Best Graphic Design Tools for Beginners in 2026— link

Categories
Canva

How To Outline Text In Canva: 3 Easy Methods For Perfect Designs

Outlined text is one of the most effective ways to make your words stand out in any Canva design. It stops text from blending into busy backgrounds, makes headlines pop on photos and gives logos and YouTube thumbnails a clean, professional look – all without needing a solid background box behind your text.

In 2026, Canva gives you three easy ways to outline text – the one-click Hollow effect, the more customizable Splice effect and the manual duplicate text method for full creative control. All three work on both the free plan and Canva Pro and none of them require any design experience.

In this guide, we walk you through each method step by step, with tips on font choice, outline thickness, colour combinations and when to use each technique for the best results.

How to Outline Text in Canva?

How To Outline Text In Canva?

Method 1: Using the Hollow Effect

The Hollow effect is one of the quickest ways to create outlined text in Canva. It removes the fill from your text, leaving just the outline.

  • Open Canva and start a new design or open an existing one. For instance, you might be working on a design where you need to know how to landscape in Canva.
  • Click on the text box tool in the side panel to add text.
  • Type your text and select it.
  • Click on “Effects” in the top toolbar.
  • Select “Hollow” from the effects panel.
  • Your text now has an outline instead of being filled.

Adjusting Thickness and Appearance

Once you’ve applied the Hollow effect:

  • Use the thickness slider that appears to adjust how thick or thin your outline is
  • Move it to the right for a thicker outline
  • Move it to the left for a thinner outline
  • The changes will show up right away on your text

Customizing Color Options

To change the color of your outlined text:

  • With your text still selected, click on the text color option
  • Use the color picker to choose any color for your outline
  • You can select from the color palette or enter a specific color code
  • The outline of your text will update with your chosen color

The Hollow effect works best for larger text and headings rather than body text, where you might be more focused on learning how to indent in Canva for readability. Thin outlines can be hard to see at small sizes.

Method 2: Using the Splice Effect

The Splice effect is another built-in Canva tool that creates outlined text with more customization options.

It’s almost as intuitive as learning how to slice in Canva.

How to Apply the Splice Effect?

  1. Add a text box to your design and type your text
  2. Select your text
  3. Click on “Effects” in the top toolbar
  4. Choose “Splice” from the effects panel
  5. Your text will now have an outline applied to it

Adjusting Offset and Direction

The Splice effect gives you more control:

  • Use the thickness slider to adjust the width of your outline
  • Change the offset slider to control how far the outline sits from your text
  • Select a direction (horizontal, vertical, or diagonal) to change how the outline appears
  • Each adjustment gives your text a different look

Creating 3D Text Effects

The Splice effect can create a 3D text effect, which pairs nicely with other depth-creating techniques. For example, you can learn how to add shadow in Canva to enhance this effect even further.

  • Apply the Splice effect to your text
  • Set the offset slightly to the right and bottom
  • Choose a lighter color for your text and a darker color for the outline
  • This creates a shadow effect that makes your text look three-dimensional

Method 3: Duplicate Text Method

For more control over your outlines, especially if you want multiple outlines, you can use the duplicate text method.

This technique gives you the ultimate freedom, similar to how you can learn how to cut out an image in Canva for precise layering.

Creating Layered Text

  1. Add a text box and type your text
  2. Format it with your desired font and size
  3. Select the text and use the keyboard shortcut Ctrl+D (or Cmd+D on Mac) to duplicate it
  4. Make sure the duplicate text is in exactly the same position as the original
  5. Use the three dots menu, go to “Layer” and select “Send to back“
  6. The text that’s now in the back will become your outline layer.

Positioning Tips

Getting perfect alignment is key:

  1. Select both text layers by holding Shift and clicking on each one
  2. Use the “Position” tab to align them in the center, both horizontally and vertically
  3. Make the back layer slightly larger than the front layer if you want the outline to be visible all around
  4. Use the white circle handles to resize text if needed

Color Combinations

Playing with colors can create striking effects:

  • Make the front text layer a different color from the outline layer
  • For a double outline, create a third text layer behind the others
  • Give each layer a different color and thickness
  • Try contrasting colors like white text with a black outline, or bright colors against darker outlines
  • Use your brand colors for a consistent look

What Must You Consider Before Adding An Outline To Text?

Before adding an outline to your text, think about:

  1. Font Choice: Sans-serif fonts like Arial or Verdana often work better for outlines than complicated fonts
  2. Size Matters: Outlined text works best at larger sizes, as small outlined text can be hard to read
  3. Letter Spacing: Adjust the letter spacing if your outlined letters are too close together
  4. Background Complexity: The busier your background, the more your text needs to stand out
  5. Purpose: Make sure the outline helps your message, not distracts from it

Benefits of Outlined Text

Benefits of Outlined Text

Outlined text offers several advantages:

  1. Better Readability: Text outlines help words stand out against busy backgrounds or images
  2. Visual Appeal: Outlines add style and dimension to otherwise flat text
  3. Attention-Grabbing: Outlined text draws the eye to important information
  4. No Background Needed: Outlined text can float over images without needing a solid background box
  5. Matches Design Styles: Outlines work well for gaming, sports, or bold marketing materials

When To Use Outlined Text In Your Designs?

When To Use Outlined Text In Your Designs?

Outlined text works especially well in these situations:

  1. Over Photographs: When text needs to be placed directly on images
  2. For Headings: To make titles and headers stand out
  3. Logo Design: To create memorable and legible logos
  4. YouTube Thumbnails: To ensure text is readable at small sizes
  5. Social Media Graphics: To catch attention while scrolling
  6. When Space is Limited: Instead of adding a text background box

Best Practices For Outlined Text

Best Practices For Outlined Text

Font Selection Tips

Choose sans-serif fonts like Verdana or Arial because their simple shapes make outlines clearer.

Avoid decorative fonts with swirls or uneven thickness- they can look messy when outlined. Bold fonts work better than thin ones since their thicker letters hold outlines well.

Always test your font at different sizes using the size slider to ensure it stays readable, especially for social media graphics or YouTube thumbnails.

Design Principles

Use contrasting colors between your text and outline (like white text with a black outline) to make words pop.

Stick to your brand palette for consistency. Your logo uses blue, so use blue outlines in designs. Don’t add more than two outline layers; too many can make text look cluttered.

Match the border weight to your design style: thick outlines for bold posters, thin ones for subtle logo designs.

Legibility Considerations

Always check if your text is easy to read after adding outlines. Avoid outlining body text or small fonts- they become blurry.

Test your design on phones and tablets using the preview feature to ensure it looks good everywhere.

Ensure high contrast between the outline and background (like dark outlines on light photos) so words don’t disappear. Larger text (like headings) can handle thicker outlines without losing clarity.

Following these tips, your outlined text will look clean, professional, and easy to read in any design!

Practical Applications

Social Media Graphics

Social Media Graphics

Outlined text makes your social media posts stand out:

  • Create eye-catching Pinterest pins with outlined headings
  • Make Instagram quotes more readable with text outlines
  • Design Facebook headers with outlined text that pops against cover images
  • Add outlined text to profile pictures for temporary announcements
  • Use outlined text for hashtags or calls to action on promotional graphics

YouTube Thumbnails

YouTube Thumbnails

YouTube creators can benefit from outlined text:

  1. Make your video titles readable at thumbnail size
  2. Use contrasting colors for maximum visibility
  3. Apply the Splice effect for a 3D look that stands out in search results
  4. Keep text large and the message simple
  5. Use outlined text to build your channel’s recognizable style

Logo Design

Logo Design

For logo design, outlined text can:

  1. Create a distinctive brand mark
  2. Make text readable across different backgrounds
  3. Add a professional touch to simple text-based logos
  4. Work well for export as a PNG with transparent background
  5. Be easily scaled without losing clarity

Marketing Materials

Marketing materials benefit from outlined text in many ways:

  1. Create attention-grabbing headlines for flyers
  2. Design readable text for banners and posters
  3. Make coupon codes stand out in promotional materials
  4. Highlight important dates or deadlines
  5. Create watermarks that don’t obscure images

FAQ’s:

Can I Outline Text in the Free Version of Canva?

Yes! The Hollow and Splice effects are available in the free version.

However, a Pro account offers more features. If you’re wondering how much Canva Pro costs, the pricing is competitive.

Many users ask Is Canva Pro worth it, and for frequent designers, the extra tools are often a game-changer. There are even ways to learn how to get Canva Pro for free through special programs.

How Do I Make the Outline Thicker Or Thinner?

After applying the Hollow or Splice effect, use the thickness slider that appears in the effects panel. Move it to the right for a thicker outline or to the left for a thinner one. With the duplicate text method, you can adjust the size of the background text to change the outline thickness.

Can I Outline Any Font in Canva?

Yes, you can apply outline effects to any font in Canva. However, some fonts work better than others.

Sans-serif fonts with consistent thickness usually look best with outlines. Very decorative or thin fonts might not show outlines as clearly.

How Do I Remove An Outline Effect?

To remove an outline effect, select your text and click on “Effects” in the top toolbar. Then click on the currently applied effect (like Hollow or Splice) to deselect it.

This will return your text to its normal appearance without an outline.

Can I Save My Outlined Text As A Template?

Yes! After creating the perfect outlined text, you can save your entire design as a template for future use.

Simply click the “Share” button in the top right corner of your screen and select “Save as template.” You can also save it as an element by grouping your text layers and using the “Save as element” option.

Conclusion

Adding outlines to your text in Canva is one of the simplest ways to make your designs look more polished and professional. Whether you use the Hollow effect for a quick one-click outline, the Splice effect for a 3D look, or the duplicate text method for full control – all three approaches are easy to learn and work great across social media graphics, YouTube thumbnails, logos and more.

A few things to keep in mind: use sans-serif fonts for the cleanest outlines, keep contrast high between your text and outline colours and avoid outlining small body text where readability matters most.

In 2026, both the free plan and Canva Pro give you solid options for outlined text. Try all three methods in your next project and see which one fits your style best.

For more Canva text tips and design guides, check out our other posts right here on Designers Choice.

Categories
Canva

How to Curve Text in Canva? A Easy 1 Minute Guide

Ever wanted to make your social media posts or logo designs pop with a creative touch?

Curved text is one of those small design details that makes a big visual impact. Whether it is wrapping around a badge, arching over a logo, or bending around a circular image – it instantly makes your design look more polished and professional.

In 2026, Canva makes it very easy to curve text with just a few clicks – no design experience needed. Whether you are on the desktop version or using the Canva mobile app, the process is quick and simple.

In this guide, we will walk you through exactly how to curve text in Canva step by step. You will also learn how to adjust the curve direction, create circular text for logos and fix the most common issues people run into along the way.

By the end, you’ll be curving text like a pro, whether you’re on a keyboard or tapping your phone screen! 🎨

How to Curve Text in Canva?

How to Curve Text in Canva?

To curve text in Canva follow these steps:

Adding Text to Your Canvas

First, you need to add the text you want to curve:

  • Click the “Text” button in the toolbar
  • Choose “Add a heading,” “Add a subheading,” or “Add a little bit of body text.“
  • Click on the canvas and type your text
  • Use the toolbar to pick a font and size for your text

Accessing the Effects Panel

Now it’s time to curve your text:

  • Click on your text box to select it
  • Look at the toolbar at the top of the screen
  • Click on “Effects” – this button opens the text effects panel

Selecting the Curve Effect

In the Effects panel, you’ll find the curve option:

  • Scroll down in the Effects panel
  • Look for the “Shape” section
  • Click on “Curve” – your text will instantly start to curve!

Adjusting the Curve Direction

You can control how your text curves:

  • After clicking “Curve,” you’ll see a slider.
  • Move the slider to the right (positive numbers) to curve your text downward.
  • Move the slider to the left (negative numbers) to curve your text upward.
  • The higher the number, the more curved your text will be. You can even experiment with how to flip text in Canva to create unique mirrored effects.

Fine-Tuning Your Curved Text

To make your curved text look just right:

  • Use the slider to adjust how much your text curves.
  • Try different fonts to see which looks best when curved.
  • Change the size of your text box by dragging the corners.
  • Adjust letter spacing by clicking “Spacing” in the toolbar and moving the slider. You can also refine your text layout by learning how to indent in Canva for cleaner paragraphs.

How to Curve Text in the Canva Mobile App?

How to Curve Text in the Canva Mobile App?

To curve text in the Canva mobile app, follow these steps:

Adding Text in the Mobile App

The Canva mobile app lets you curve text too:

  • Open the Canva app on your phone
  • Start a new design or open an existing one
  • Tap the “+” button at the bottom
  • Choose “Text” from the menu
  • Pick a text style or tap “Add text.”
  • Type your text

Applying the Curve Effect On Mobile

To curve your text in the mobile app:

  • Tap on your text to select it
  • Look for the menu at the bottom of the screen
  • Swipe left on this menu until you see “Effects“
  • Tap on “Effects“
  • Scroll down and tap on “Shape“
  • Tap on “Curve“

Adjusting Curved Text On Mobile Devices

To change how your text curves on your phone:

  • After tapping “Curve,” you’ll see a slider appear
  • Slide your finger left or right to change the curve amount
  • Tap the checkmark when you’re happy with the curve
  • Use the corner handles of the text box to resize if needed

How To Curve Text in Canva Using Templates?

How to Curve Text in Canva Using Templates?

Templates make curving text even faster.

If you’re creating a marketing asset, you might want to know how to create a lookbook in Canva to showcase your products in style.

Tap the Social Media Option

Templates make curving text even faster:

  • When starting a new design, look for social media templates
  • Tap on “Social Media” to see template options
  • Browse through templates that already have curved text

Select the Template

Pick a template with text you want to customize:

  • Tap on a template that has curved text you like
  • The template will open in the editor
  • Tap on the curved text in the template to edit it
  • Type your own words to replace the sample text

Tap the “Effects” and Change It to Curve

Even with templates, you can adjust the curve:

  • With your text selected, tap “Effects“
  • The curve effect will already be applied
  • Adjust the curve slider to change how much it bends
  • Try different curve amounts until it looks right

Why Use Curved Text in Your Designs?

Why Use Curved Text in Your Designs?

Curved text makes designs look special because:

  • It adds movement and flow to your graphics
  • It helps text follow the shape of other design elements
  • It makes logos and badges look professional
  • It catches people’s eye when scrolling through social media
  • It can fit more text in a small space when made into a circle
  • It adds a creative touch that flat text doesn’t have

Curved text works great for:

  • Company logos
  • Social media posts
  • Product labels
  • Stickers
  • Badges
  • Business cards
  • T-shirt designs

Customizing Your Curved Text

Customizing Your Curved Text

Changing Font Styles For Curved Text

Different fonts look different when curved:

  • With your curved text selected, click on the font dropdown in the toolbar
  • Try various fonts to see which ones curve nicely
  • Bold fonts often look good when curved
  • Script and handwriting fonts can create flowing, curved text
  • Remember that some fonts might look squished when curved

Adjusting the Angle of Curved Text

You can change exactly how your text bends:

  • Select your curved text
  • Go back to Effects > Curve
  • Use the slider to make small changes to the curve angle
  • Try both positive and negative numbers
  • For a complete circle of text, you’ll need to adjust both the curve amount and the letter spacing

Positioning Curved Text in Your Design

Place your curved text just right:

  • Click and drag to move your curved text around the canvas.
  • Use the resize handles to make it bigger or smaller.
  • Try placing curved text around circular images. To perfect this, you might need to know how to replace an image in Canva or even how to flip an image in Canva.
  • Make sure curved text doesn’t get too close to the edge of your design.
  • If you want text to curve around an object, position it to follow that shape. For more advanced edits, learning how to cut out an image in Canva can help isolate objects perfectly.

Creative Uses For Curved Text

Creative Uses For Curved Text

Designing Logos With Curved Text

Curved text makes logos look professional:

  • Start with a simple shape like a circle or shield.
  • Add your main text and curve it to follow the shape.
  • Use the letter spacing tool to spread letters evenly.
  • Add straight text in the middle for a contrast.
  • Try placing curved text above and below a central image. Exploring techniques like how to fade an image on Canva can add a subtle, professional background to your logo.

Creating Circular Text Designs

Make text go all the way around in a cir cle:

  • Type your text in a text box
  • Apply the curve effect with a high value
  • Click on “Spacing” in the toolbar
  • Increase letter spacing until your text forms a complete circle
  • Add an image or design element in the center of your circle

Using Curved Text in Social Media Graphics

Make your social posts stand out:

  • Create a post for Instagram, Facebook, or other platforms. For interactive posts, consider learning how to put a timer in Canva.
  • Use curved text for headings or important messages.
  • Try curving text around product photos.
  • Make quote graphics with the quote in curved text.
  • Use curved text to highlight special offers or announcements.
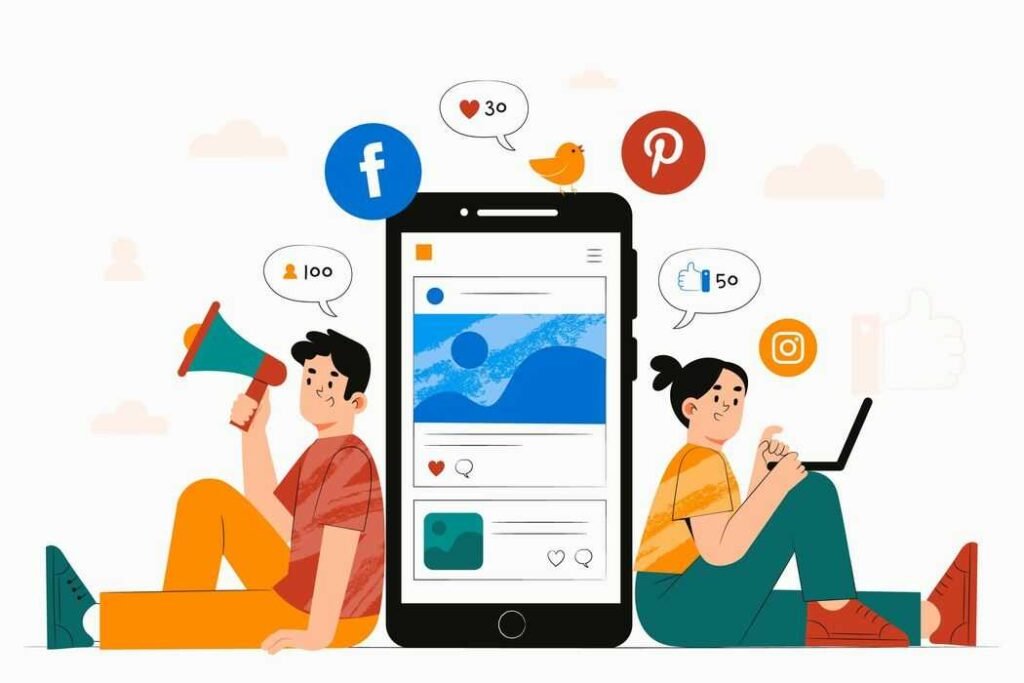
If you plan to sell your creations, it’s a great idea to learn how to sell Canva templates on Etsy to turn your design skills into a business.

Troubleshooting Curved Text Issues

Troubleshooting Curved Text Issues

Common Problems With Curved Text

Sometimes curved text doesn’t look right. Here’s why:

  • Text Looks Squished: Your text box might be too small.
  • Letters Are Too Far Apart: Your letter spacing is too high.
  • Can’t See All The Text: Your curve amount might be too extreme.
  • Text Looks Pixelated: Try using a different font.
  • Can’t Curve The Text: Make sure you’re selecting a text box, not an image. For other text formatting challenges, you may wonder how to wrap text in Canva.

Tips For Better Curved Text Results

Try these tricks for better curved text:

  • Use shorter words or phrases for the best curve effect.
  • Make sure your text is big enough to read when curved.
  • High contrast colors help curved text stand out.
  • Add a text background or shadow for better readability. You can also learn how to highlight text in Canva to make certain words pop.
  • Use the letter spacing tool to fix uneven spaces between letters.
  • Try the TypeCraft app in Canva for more advanced text-bending options.

FAQ’s:

Can I Change the Curve Direction on Canva?

Yes! When you select your text and go to Effects > Curve, move the slider to the left (negative numbers) to curve text upward, or to the right (positive numbers) to curve text downward.

Can I Use Curved Text With Different Fonts?

Absolutely! All fonts in Canva can be curved. Some fonts look better curved than others, so try a few different options to find what works best for your design.

Can I Change the Curve After Adding Other Effects?

Yes, you can edit the curve at any time. Select your text, go to Effects, and adjust the curve slider. You can combine curved text with shadows, color effects, and other text styles.

Is Curved Text Available in Free Canva?

Yes! The curve text feature is available in both free and Canva Pro accounts. However, many users wonder how much Canva Pro costs and whether Canva Pro is worth it. If you’re on a budget, you might even be curious about how to get Canva Pro for free.

How Do I Create A Complete Circle With Text?

To make text go all the way around in a circle:

  • Add your text and apply the curve effect
  • Adjust the curve amount using the slider
  • Click on “Spacing” in the toolbar
  • Increase the letter spacing until your text forms a complete circle
  • You might need to adjust both the curve amount and letter spacing to get a perfect circle

Conclusion

Now you know how to curve text in Canva. With just a few clicks, you can bend, arch and wrap your text to create designs that look polished and professional.

The curve effect works on both desktop and mobile and it works with any font in Canva’s library. The key is to keep the curve subtle enough that your text stays easy to read – the more text you have, the less curve you need.

Curved text works especially well for logos, badges, stickers and social media graphics. Once you try it in one project, you will find yourself using it regularly.

In 2026, Canva keeps adding more text effects and tools – so it is worth exploring the full Effects panel to see what else is available. And if you want to keep improving your designs, check out our other Canva guides right here on Designers Choice – like how to landscape in Canva for different layout options.

Categories
Canva

10 Top Audio To Text Converters Online – FREE AI Transcriptions

Typing out everything from a voice note, meeting, or podcast recording takes a lot of time. Audio to text converters solve this problem in minutes. These tools use AI to turn your spoken words into clean, ready-to-use text – with no manual effort.

In 2026, AI transcription tools have become faster and more accurate than ever. Whether you need to transcribe a Zoom meeting, a client interview, or a full podcast episode, there is a tool out there that fits your needs and budget. Many of them even offer free plans to get you started.

In this guide, we have listed the 10 best audio to text converters available right now. We cover what each tool does best, what formats it supports, and who it is best suited for – so you can pick the right one without wasting time.

What Is An Audio To Text Converter?

What Is An Audio To Text Converter?

An audio to text converter is a special tool. It can be software or a web app.

This tool changes spoken words in audio files into written text. It does this through automated transcription. These tools use smart speech recognition to analyze audio recordings. They then make text transcripts that can be easily edited, searched, and shared.

Modern audio transcription tools use artificial intelligence. This helps improve accuracy and recognize different speakers. They can also deal with background noise well. There are many options available. Some are free and have basic features.

Others are premium and offer high accuracy plus more features like translation. The best free audio to text converters usually have limits on minutes for transcription before they need payment.

However, they can still work well for occasional use. Professional tools provide stronger features for content creators, researchers, and businesses that need regular transcription services.

How Audio To Text Conversion Works?

How Audio To Text Conversion Works?

Audio-to-text conversion uses voice tech and AI to change spoken words into text.

The process starts when you upload an audio file. The system then breaks the file into smaller parts to study the sound patterns. AI transcription checks these patterns against many speech samples. It identifies phonemes, which are tiny sound units.

Then, it uses math models to guess the spoken words. Some advanced systems can tell different speakers apart. They can also remove background noise for better clarity. This tech is quickly improving and can reach up to 98% accuracy with clear audio.

However, accuracy may drop with low quality audio or strong accents, as well as hard words.

Top 10 Best Audio to Text Converters

Best Audio to Text Converters

Audio-to-text converters help users by making transcription easier and faster. They provide high accuracy for recordings and use advanced AI features.

Here are some of the best options available:

Sonix

Sonix

Sonix stands out as a powerful audio transcription tool that specializes in delivering high accuracy across multiple languages. This web app processes audio files quickly and supports automated translation features, making it ideal for international projects.

Sonix offers robust editing capabilities within its interface, allowing you to refine transcripts without switching platforms. The platform supports numerous file formats, including MP3, WAV, and various video files.

Sonix integrates well with other tools like Google Drive and offers team collaboration features that make it suitable for professional environments where multiple people need access to the same transcripts.

Notta

Notta

Notta is an AI-powered transcription tool that delivers impressive accuracy, even with technically dense terms.

The platform supports 58 transcription languages and offers bilingual transcription in 11 languages, making it versatile for global users. Notta integrates with popular calendar and video conferencing software, simplifying the workflow for business users.

This transcription service automatically identifies different speakers and adds timestamps, creating well-organized transcripts.

Notta’s AI features automatically highlight key points and generate summaries of meetings, saving users significant time when reviewing content. The platform supports multiple audio and video file formats such as WAV, MP3, AVI, MP4, and MOV.

Descript

Descript

Descript takes a unique approach by combining audio transcription with audio/video editing capabilities.

This all-in-one platform allows you to edit your audio by editing the text transcript, making it particularly valuable for podcast creators and video editors. The text transcription tool offers impressive accuracy and an intuitive interface.

With Descript, you can remove filler words automatically, collaborate with team members, and export in various formats.

The platform uses AI transcription to convert audio to text quickly while maintaining high accuracy levels, even with challenging audio recordings containing multiple speakers.

Maestra

Maestra

Maestra.ai delivers fast AI transcription with support for over 80 languages including German, English, Spanish, Italian, and Portuguese.

The platform features a built-in text editor for making quick corrections and supports various audio formats such as MP3, AAC, FLAC, M4A, and WAV. Users appreciate Maestra for its simple interface and custom dictionary feature, which allows you to add technical terms for improved accuracy.

The platform enables export in multiple formats, including Word (DOCX), PDF, TXT, SRT, and VTT, making it versatile for different use cases. Maestra offers a free trial with premium subscriptions starting at $5 per month.

Canva’s Transcribe Audio

Canva

Canva has expanded beyond design to offer audio transcription capabilities within its platform.

This integration makes it particularly useful for designers who already use Canva in their workflow. The transcribe audio feature allows you to convert spoken content directly within your design projects, streamlining the process of creating visual content with accompanying text.

The tool supports multiple languages and provides reasonable accuracy for clear recordings. While not as feature-rich as dedicated transcription services, Canva’s solution offers convenience for those already working within the Canva ecosystem.

Otter.ai

Otter

Otter.ai specializes in real-time transcription, making it excellent for meetings, interviews, and lectures. The platform offers live transcription during Zoom meetings and can identify different speakers automatically.

Otter’s mobile app allows you to record and transcribe on the go, syncing across devices for a seamless workflow.

The service provides AI-generated summaries, highlights, and automated action item extraction, saving users significant time after meetings. Otter also offers strong search capabilities, allowing you to find specific moments in long recordings quickly.

The platform’s voice recognition technology continues to improve, delivering increasingly accurate results.

Happy Scribe

Happy Scribe

Happy Scribe offers both automated AI transcription and human transcription services, giving users flexibility based on their accuracy needs.

The platform supports 45+ formats and converts audio recordings to text with impressive speed. Users can import files from Google Drive, YouTube, Dropbox, and other sources. This transcription tool provides approximately 85% accuracy compared to other apps and allows users to get transcripts of podcasts and class lectures.

Happy Scribe enables export in various formats including plain text, Microsoft Word, PDF, and subtitle formats like SRT. The basic plan starts at $18 per month and is designed for individual users.

Amberscript

Amberscript

Amberscript combines automated transcription with human editing options for maximum accuracy.

The platform is particularly popular in Europe and offers strong support for European languages. Amberscript provides specialized services for subtitling and captioning, making it valuable for video content creators.

The platform features an intuitive text editor for refining transcripts and supports multiple export formats including subtitles. Amberscript integrates well with video platforms and offers enterprise solutions for organizations with high-volume transcription needs.

Rev

Rev

Rev offers both automated transcription and human transcription services, with the latter providing exceptional accuracy for critical content.

The platform is known for its quick turnaround times and straightforward pricing model. Rev’s automated service provides good accuracy for clear recordings, while the human service delivers near-perfect results.

The platform includes an editor for making corrections and supports various audio and video files. Rev also offers additional services like captioning, subtitling, and translation, making it a comprehensive solution for content creators and businesses.

Scribie

Scribie

Scribie differentiates itself by offering tiered transcription services based on accuracy needs and budget constraints.

The platform provides both automated AI transcription and various levels of human transcription services. Scribie’s automated option delivers quick results at a lower cost, while its human services offer exceptional accuracy with longer turnaround times.

The service includes a built-in editor for corrections and supports multiple file formats. Scribie is particularly useful for researchers and academics who need verbatim transcripts with high precision.

Key Features To Look For In Audio To Text Converters

Key Features To Look For In Audio To Text Converters

Accuracy and Language Support

Accuracy is very important when picking an audio-to-text converter.

The best tools can reach 95-99% accuracy with clear audio. It is good to test each option with your own recordings to see how well they work. You should also look for services that can understand specific terms, accents, and different ways of speaking.

Language support can be different; top converters like Notta can handle up to 58 languages.

This includes English, German, Spanish, French, and Hindi. If you use many languages, make sure your tool keeps good accuracy in all the languages you need.

File Format Compatibility

Good audio to text tools work with many file types. They can change recordings from formats like MP3, WAV, and M4A. They also support FLAC and video files such as MP4, MOV, and AVI.

This means you do not have to change the files first. It is useful to see if the tool can take files directly from places like YouTube or Google Drive. This helps make your work faster. Some tools also let you record live in their apps for quick text changes.

Editing Capabilities

Strong editing tools help make transcripts better. Important features include editing text, knowing who speaks, adjusting time stamps, and fixing repeated words. Good interfaces show possible mistakes for fast checking.

Advanced editors have search and replace tools. They also have custom lists for special words and work with spelling and grammar checkers. These features can save a lot of time when improving a transcript, especially for long recordings.

Translation Features

Translation features improve your transcripts for audiences around the world. Top services give built-in translation between many languages. This lets you write in one language and get results in another. This is very helpful for creators and researchers who work globally.

The quality of automated translation can be different. It is smart to test this feature with sample text before using it for important tasks. Some services also provide human translation for better accuracy when needed.

Export Options

Versatile export choices make it easy to use transcripts in your work. You should pick converters that support formats like plain text, RTF, DOCX, PDF, and subtitles like SRT and VTT. The option to export with or without timestamps is important.

It also allows for speaker tags and paragraph breaks. This feature offers much-needed flexibility.

Some advanced services allow direct use with content management systems. They also work with video editors and teamwork tools. This saves time by removing the need for manual copying and formatting steps.

Benefits Of Using Audio To Text Converters

Benefits Of Using Audio To Text Converters

Time and Effort Savings

Transcribing one hour of clear audio by hand takes a skilled worker 4 to 5 hours. AI tools can do this in just minutes. This saves more than 95% of the time. With this ease, you can focus on understanding the content instead of typing it out.

The best tools also lessen mental effort by taking care of the hard parts of transcription. This helps you get more done with other tasks. For workers who deal with audio often, these time savings lead to big cost cuts.

Improved Content Accessibility

Text transcripts help make audio content easier to access. They are useful for people who cannot hear well. This feature helps you reach a larger audience. It also ensures you follow rules about accessibility.

Transcripts allow people to enjoy content in quiet places. Users can read in libraries, on public transport, or in quiet offices. They do not need to wear headphones. This flexibility improves how people engage with the content.

SEO Enhancement

Search engines cannot read audio content directly. However, they can read text transcripts.

Converting audio to text helps your content get found. This may increase organic traffic to your site. Transcripts filled with keywords can improve search rankings. They also allow for better internal links and anchor text use, which boosts SEO value.

Plus, longer user engagement with both audio and text shows quality to search engines. This helps improve your overall site ranking.

Content Repurposing Opportunities

Transcripts are very important for making different types of content. You can use one transcript to make blog posts. It can help create social media posts, email newsletters, ebooks, and course materials.

This way, you get the most from your original recording. Transcripts also allow for quick changes and updates. Editing text is faster than re-recording audio. This makes it easy to adjust your message or include new ideas.

Search and Organization Benefits

Text transcripts help you find audio content easily. They let you locate specific facts without listening to every recording. This is very helpful for reference works, interviews, and research where exact details matter. Transcripts also make it easier to organize content. You can use tags and categories to improve how you manage large audio files. This makes your audio collection more valuable over time.

How To Convert Audio To Text: Step-By-Step Guide

How To Convert Audio To Text?

Converting audio to text is easy if you follow some simple steps.

Uploading Your Audio File

Start by picking a transcription service. You may need to create an account. Services like Notta make it easy. You can upload your audio file by clicking ‘Select File.’ You can also drag and drop the file. Make sure your file is in a supported format.

These formats include MP3, WAV, M4A, or video files like MP4. Your audio should have clear sound with little background noise. Look for any size limits before uploading. Many tools let you import files directly from cloud storage like Google Drive or from sites like YouTube.

Selecting Language and Settings

Choose the main language for your recording from the options given. Some services, like Notta, support many languages. Pick the one that fits best. If your audio has more than one language, check if it can handle bilingual notes.

Set up features like speaker identification to tell voices apart. Some services allow you to add special industry terms or upload a custom word list. This can improve accuracy for specific words. Change quality settings based on your needs and budget.

Processing and Transcription

After you upload your audio file and set the options, you can start the transcription. The system will use AI and speech tools to change speech into text. The time it takes to process depends on how long the recording is and which service you use.

However, most tools work faster than real-time speaking. Some services give updates as it works.

When done, tools like Notta will send the results to your email. They may also show them in your account dashboard. Check the first version of the text for quality before making changes.

Editing and Correcting The Transcript

Check the transcript for mistakes. Most transcription tools have built-in editors. These editors show issues for easy fixing. Pay close attention to tricky words, names, and numbers. They often have more mistakes. Use the search tool in the editor to find and fix repeated errors.

Take advantage of features like changing playback speed and synchronized audio/text highlighting. You can also use keyboard shortcuts to make editing easier. For long transcripts, split the work into smaller parts. This helps with accuracy and focus.

Exporting In Your Preferred Format

After you finish your transcript, export it in the format you want. Most services let you choose from plain text, Word files, PDFs, and subtitle types like SRT for videos. Pick the format that works best for you.

You can change export settings to add timestamps, speaker names, or breaks between paragraphs if needed. Some services also let you export directly to Google Docs or video editing apps. Save a copy in your account or download it for safety.

Common Use Cases For Audio to Text Converters

Common Use Cases For Audio to Text Converters

Podcasts and Interviews

Podcast makers use audio transcription to help those who can’t hear well. It also helps with SEO. Transcripts let listeners find specific details easily. They provide good reference material too. Turning transcripts into new content adds value to the original recording.

For news writers and researchers, transcribing interviews saves a lot of time. It gives clear records for quotes and study. The search feature of transcripts makes it easy to analyze themes. It also helps find key statements fast, acting as a backup for important interviews.

Meetings and Lectures

Meeting transcription helps to record talks, choices, and tasks. This is done without the need for manual notes. It lets people take part fully while keeping a record. The transcripts can be searched easily. This makes it simpler to follow up on certain points.

Lecture transcription gives students study materials. These help with audio or video recordings. They also make learning easier for those who have hearing issues or are not fluent in the language. Searchable transcripts allow for focused review of ideas or sections.

Content Creation

Content creators use transcription to change spoken thoughts into written words. This process is often quicker than writing from scratch.

This is especially true for those who speak more easily than they write. Transcripts act as a base for articles, blogs, and books. Video creators also use transcription for subtitles and captions. This makes their content easier to access and helps keep viewers engaged.

Furthermore, transcripts help in making video descriptions, show notes, and extra articles. These additions improve SEO. They allow viewers to look at content before watching the full videos.

Research and Education

Researchers use transcription to write down interviews, focus groups, and field notes. These written records are key for studying ideas. They also act as main sources for research.

Digital transcripts make it easier to sort themes and analyze data. Teachers depend on transcription to make learning materials easy for all students. This allows lessons to be changed into different languages. It also helps students go over material at their own speed.
Accessibility Compliance

Organizations use typing services to follow rules for access. These rules help people with hearing issues. This makes sure they can get information easily. Following these rules lowers the chances of legal problems. It also helps to reach more people.

Media firms create closed captions for their videos. This meets both legal needs and viewer likes.

Many people choose to watch with captions, no matter their hearing ability. Transcripts give another choice for those with slow internet. Some prefer reading text instead of streaming video.

FAQ’s:

What is Audio Transcription?

Audio transcription is the process of converting spoken words from an audio recording into written text. This applies to various audio sources like interviews, lectures, podcasts, and meetings, and can be performed manually by transcriptionists or automatically using speech recognition technology.

How Do I Convert Audio To Text Online?

To convert audio to text online, open a web browser and access an audio to text converter like Notta or Media.io. Upload your audio file, select the transcription language, and initiate the transcription process. Some services may require an email address to receive your transcript. Within minutes, you’ll receive your text transcription that can be downloaded or edited online.

Can I Convert Audio To text For Free?

Yes, you can convert audio to text for free using services like Media.io, Restream, or the free tier of Notta.

However, free services typically have limitations such as restricted transcription minutes, limited features, or watermarks. Notta’s free tier, for example, only transcribes the first three minutes of a conversation, while other services might offer 5-10 minutes of free transcription monthly.

How Do I Transcribe Audio To Text Automatically For Free?

To transcribe audio to text automatically for free, visit an online transcriber like Media.io or Restream. Upload your audio file from your local storage, select the language and settings, and start the automatic transcription process. Once complete, you can preview the text and export it in formats like TXT or SRT. Free services typically limit the duration or number of transcriptions you can perform.

What File Formats Are Supported For Audio To Text Conversion?

Audio to text converters support numerous file formats. Common audio formats include MP3, WAV, M4A, FLAC, AAC, AIFF, and OGG. Many services also accept video files like MP4, MOV, AVI, WMV, and RMVB.

Top converters like Notta support a wide range of formats, including WAV, MP3, M4A, AVI, RMVB, FLV, MP4, and MOV.

How Long Does It Take To Transcribe An Hour-Long Audio Manually?

Manually transcribing an hour-long audio recording typically takes 4-5 hours for an experienced transcriptionist.

This ratio varies based on audio quality, number of speakers, speech clarity, and technical terminology. In contrast, AI transcription tools can complete the same task in minutes, representing a significant time savings.

What’s The Difference Between Automatic and Manual Transcription?

Automatic transcription uses AI and speech tools. It changes audio to text without needing people. This method is quick and cheaper. However, it can have accuracy problems. These issues arise with bad audio quality or strong accents.

Manual transcription is done by people. Human workers listen to the audio and write down what they hear. This method gives better accuracy. It also handles many speakers and tricky words well. But, it costs much more and takes longer to finish.

How Accurate Are Audio To Text Converters?

The accuracy of audio to text converters typically ranges from 80% to 99%, depending on audio quality, speech clarity, and the sophistication of the AI system. Premium services like Notta can deliver up to 98.86% accuracy for high-quality audio recordings.

Factors affecting accuracy include background noise, accents, technical terminology, and speaker overlap.

What Languages Are Supported By Audio To Text Converters?

Modern audio to text converters support numerous languages. Notta supports 58 transcription languages including English, German, Spanish, French, Hindi, and many more. Restream supports 15 languages including Dutch, English, French, German, Hindi, Indonesian, Italian, Japanese, Korean, Mandarin, Portuguese, Spanish, Swedish, Turkish and Ukrainian. Maestra.ai offers transcription in over 80 languages.

Can ChatGPT Transcribe Audio?

Currently, ChatGPT itself cannot directly transcribe audio files. ChatGPT is a text-based AI that processes and generates text content but lacks native audio processing capabilities.

For audio transcription, you need to use dedicated audio to text converters like the ones covered in this article. However, ChatGPT can help analyze, summarize, or refine transcripts after they’ve been created using a transcription tool.

Can I Edit My Transcript After Conversion?

Yes, most audio to text converters provide editing capabilities within their platforms. After transcription, you can correct any inaccuracies, add speaker labels, adjust timestamps, and format the text as needed.

Advanced editors include features like search and replace, custom dictionaries, and collaborative editing. Once edited, you can export the final transcript in your preferred format for further use.

Conclusion

Audio to text converters have made transcription simple, fast and affordable for everyone. Whether you are a content creator, a student, a researcher, or a business owner, there is a tool on this list that will work for you.

If you are just starting out, try a free plan first – tools like Notta and Otter.ai let you test things out without spending a penny. If you need more accuracy or advanced features, paid plans from tools like Sonix, Descript, or Rev are well worth it.

The key is to pick the tool that fits how you actually work. Think about the languages you use, the file formats you record in and how often you need transcriptions done.

At Designers Choice, we keep testing and updating our recommendations as new tools come out. Bookmark this page and check back for the latest updates.

Categories
Canva

Does Canva Have Spell Check? [Easy Ways To Find Out]

Creating professional designs isn’t just about choosing the right fonts or layouts-it’s also about making sure your text is clear and error-free.

Spelling errors and grammar mistakes can make even the best Canva design look unprofessional and hurt your brand’s credibility.

That’s why having a reliable spell check and grammar checker is so important for every designer.

While Canva offers a user-friendly platform with plenty of templates, many users still wonder: does Canva have spell check built in?

The answer isn’t straightforward, but there are several ways to catch spelling and punctuation errors in your Canva projects.
You can use your web browser’s spell checker, like the one in Google Chrome, or add the Grammarly extension for a more powerful grammar and punctuation checker.

Some designers prefer copying their text into Google Docs or Microsoft Word to use their spell check features before pasting it back into Canva.

No matter which method you choose, using a spell checker helps keep your blog post, social media graphic, or business presentation polished and professional. With these tools, you can focus on creativity while letting technology handle spelling, commas, and other common mistakes.
Does Canva Have Spell Check?

Does Canva Have Spell Check?

The answer to “Does Canva have spell check” has evolved.
Historically, Canva lacked a built-in spell checker, requiring users to rely on workarounds. However, Canva now offers Magic Write, an AI-powered feature that includes grammar checker and spell checker functionality.

This powerful grammar checker instantly identifies and fixes spelling, grammar, or punctuation errors while working in Canva Docs.

The spell check capability helps users create error-free content for various applications, including school essays, research articles, business reports, and blog posts.

That said,

The full spell checker functionality is primarily integrated into Canva Docs rather than the main design interface. For standard design projects, users may still need additional methods to ensure text accuracy.

For instance, knowing how to highlight text in Canva is a useful skill for manual proofreading within a design.

Let’s explore all available options for spell checking in Canva.

How to Spell Check in Canva?

How to Spell Check in Canva?

Canva does not have a built-in spell-check tool. However, there are easy ways to check your spelling.

Method 1: Using Canva’s Magic Write Feature

Canva’s Magic Write feature provides AI-powered spell check and grammar checking capabilities within Canva Docs.

This powerful grammar checker automatically detects spelling errors, grammar issues, and punctuation errors as you type.

While you’re working with text, you might also find it helpful to learn how to indent in Canva for better formatting.

To access this spell checker:

  • Open Canva Docs
  • Type or paste your text
  • Highlight the text requiring spell check
  • Select “Magic Write“
  • Choose “Fix spelling” to scan and correct errors

This spell check option saves time by instantly identifying problems while maintaining your writing flow. The grammar checker component also helps improve overall sentence structure and clarity.

Method 2: Using Browser’s Built-in Spell Checker

Most web browsers include basic spell check functionality that works within Canva’s text fields. This browser-based spell checker can identify common spelling errors while working directly in the Canva design interface.

For Google Chrome users:

  • Open Chrome settings via the three-dot menu
  • Search for “spell“
  • Enable spell check functionality

Once activated, the browser spell checker will highlight spelling errors with a red underline while typing text in Canva. Right-clicking the underlined word provides correction suggestions. This method provides real-time feedback without switching between applications.

Method 3: Using Grammarly Extension

The Grammarly extension offers robust spell check and grammar checking capabilities that work directly within the Canva interface. This popular browser extension functions as both a spelling checker and a punctuation checker.

To use Grammarly with Canva:

  • Install the Grammarly extension for Chrome, Firefox, or Safari
  • The extension will automatically check text as you type in Canva
  • Spelling errors and grammar issues appear with underlines
  • Hover over underlined text to see correction suggestions

The Grammarly extension provides more comprehensive checking than basic browser tools, identifying complex grammar issues, punctuation errors, and stylistic improvements in addition to spelling.

Method 4: Copy and Paste to External Tools

For thorough spell checking, copying text from Canva to dedicated writing tools offers comprehensive error detection.

This method works well for text-heavy designs or critical projects.

While you’re perfecting your text, you might also explore creative text effects, like learning how to curve text in Canva.

Process:

  • Select and copy text from your Canva design (Ctrl+C on Windows, Cmd+C on Mac)
  • Paste into Google Docs, Microsoft Word, or the Grammarly web app
  • Use these platforms’ spell check and grammar tools
  • Make necessary corrections
  • Copy the corrected text and paste it back into Canva (Ctrl+V on Windows, Cmd+V on Mac)

This approach uses specialized writing tools’ advanced capabilities. Similarly, for advanced text styling, you might want to know how to wrap text in Canva or even how to flip text in Canva for unique design effects.

Method 5: Manual Proofreading Techniques

Manual proofreading remains valuable even with technological assistance. Beyond text, the visual elements are just as important.

For example, knowing how to replace an image in Canva or how to flip an image in Canva can be important for design consistency.

Effective techniques include:

  • Reading text backward to focus on individual words rather than the content
  • Printing designs for physical proofreading
  • Having another person review your work
  • Reading text aloud to catch awkward phrasing and errors
  • Taking a break before the final review to approach with fresh eyes

Manual proofreading catches context-specific errors that automated tools might miss. This is also a good time to check your image edits, such as whether you know how to cut out an image in Canva correctly or how to slice in Canva for creative effects.

Step-By-Step Guide To Spell Checking With Magic Write

Step-By-Step Guide To Spell Checking With Magic Write

Opening Your Design

To begin spell checking with Canva’s Magic Write:

  • Log into your Canva account.
  • Open Canva Docs by selecting it from the homepage menu.
  • Create a new document or open an existing one. You may want to set your orientation first, so learning how to landscape in Canva can be a useful first step.
  • For text from a design project, copy it first and paste into Docs for checking.

The Magic Write spell checker functions primarily within Canva Docs rather than directly in design projects, making this intermediary step necessary for accessing the full spell check capabilities.

Selecting Text

Once your text appears in Canva Docs:

  • Click and drag to highlight the text requiring spell check
  • Ensure all relevant content is selected
  • For long documents, consider checking in manageable sections

Text selection activates the Magic Write menu, providing access to the spell checker and other text enhancement functions.

Using Magic Write To Fix Spelling

With text selected:

  • Click the “Magic Write” option that appears
  • Choose “Fix spelling” from the menu options
  • Wait briefly while the powerful grammar checker scans your text
  • The spell checker automatically identifies and suggests corrections for spelling errors, punctuation errors, and grammar issues

The Magic Write spell checker leverages AI technology to detect a wide range of text issues beyond simple spelling, including grammar problems and punctuation inconsistencies.

Reviewing Corrections

After Magic Write processes your text:

  • Review each suggested correction carefully
  • Accept appropriate changes
  • Consider context for specialized terms or brand names that might be falsely flagged
  • Check that formatting remains consistent after corrections

This review step remains essential, as even advanced spell checkers occasionally suggest inappropriate corrections for specialized terminology or creative language choices.

Using Third-Party Tools For Spell Checking

For additional verification:

  • Copy your corrected text (Ctrl+C/Cmd+C)
  • Paste into another checking tool like Grammarly or Word
  • Address any issues missed by Magic Write
  • Return the finalized text to your Canva design

This multi-tool approach provides comprehensive error detection for critical projects.

Using Third-Party Tools For Spell Checking

Using Third-Party Tools For Spell Checking

Setting Up Grammarly For Canva

Setting Up Grammarly For Canva

Grammarly offers powerful spell check capabilities directly within your browser:

  • Visit the Grammarly website or browser extension store
  • Download and install the extension for your web browser
  • Create a Grammarly account or log in
  • The extension automatically activates when working in Canva
  • Spelling errors appear with red underlines
  • Grammar issues show with other colored underlines
  • Click the underlined text to view correction suggestions

The Grammarly extension works seamlessly across Canva’s interface, providing real-time feedback on spelling errors, punctuation errors, and grammar issues.

Using Google Docs For Spell Checking

Using Google Docs For Spell Checking

Google Docs offers robust spell check functionality:

  • Open Google Docs in a separate browser tab
  • Create a new document
  • Copy text from your Canva design
  • Paste into Google Docs
  • Spelling errors automatically appear with red underlines
  • Right-click underlined words for correction options
  • Use Tools > Spelling and grammar for comprehensive checking
  • Copy corrected text back to Canva

Google Docs’ spell checker catches many common errors and works well for checking longer text passages before finalizing them in Canva.

Using Microsoft Word For Spell Checking

Using Microsoft Word For Spell Checking

Microsoft Word provides industry-standard spell checking:

  • Open Microsoft Word
  • Create a new document
  • Copy text from Canva
  • Paste into Word
  • Use the Review tab > Spelling & Grammar
  • Address flagged issues
  • Copy corrected text back to Canva

Spell Checking On Mobile Devices

Spell Checking On Mobile Devices

Options For The Canva Mobile App

The Canva mobile app presents challenges for spell checking:

  • The Magic Write feature may be accessible in the mobile Docs interface
  • Mobile keyboard spell checkers provide basic functionality
  • Red underlines typically indicate spelling errors detected by your device
  • Tap underlined words to view correction options

Mobile spell checking tends to be more limited than desktop options, but it provides basic error detection for on-the-go design work.

Workarounds For Mobile Spell Checking

For more thorough mobile spell checking:

  • Copy text from your Canva mobile design
  • Paste into a mobile word processor or email app
  • Use that app’s spell check functionality
  • Copy corrected text back to Canva
  • Alternatively, send yourself the text to check on a desktop device

These workarounds help overcome the limitations of mobile spell checking for important projects.

Tips For Error-Free Canva Designs

Tips For Error-Free Canva Designs

Pre-Writing Best Practices

Prevent spelling errors before they occur:

  • Draft important text in a dedicated word processor with spell check before adding to Canva
  • Create a style guide with commonly used terms and brand-specific spellings
  • Maintain a list of frequently misspelled words relevant to your industry
  • Use simple, clear language when possible
  • Be consistent with spelling conventions (American vs. British English)

Preparation minimizes errors and streamlines the design process, reducing time spent on corrections later.

Final Proofreading Checklist

Before finalizing any Canva design:

  • Check all headlines and prominent text first – these errors are most noticeable
  • Verify proper names, brand terms, and technical terminology
  • Review punctuation, especially commas and apostrophes
  • Confirm consistent capitalization in headings
  • Check for proper spacing after punctuation
  • Verify numbers and dates
  • Review fonts for consistency and legibility
  • Print complex designs for final review when possible

This systematic approach catches errors that might slip through automated spell checkers.

FAQ’s:

Does Canva Have A Built-In Spell Checker?

Yes, Canva now offers spell check functionality through its Magic Write feature in Canva Docs. This powerful grammar checker can fix spelling, grammar, and punctuation errors. However, the spell checker isn’t directly integrated into the main design interface.

Is Magic Write Available On The Free Version Of Canva?

Magic Write has limited functionality in Canva’s free version. Full access to the spell checker and grammar features may require a Canva Pro subscription.

Magic Write has limited functionality in Canva’s free version. Full access may require a Canva Pro subscription.

If you’re wondering how much Canva Pro costs, it’s best to check their site for current pricing. You can also research how to get Canva Pro for free through special offers.

Ultimately, deciding if Canva Pro is worth it depends on your needs.

Does Canva Support Spell Check In Multiple Languages?

Canva’s Magic Write feature supports spell checking in multiple languages, though English has the most comprehensive support. Browser-based spell checkers and tools like Grammarly also offer multi-language functionality depending on your settings.

Which Browser Extensions Work Best For spell checking in Canva?

Grammarly consistently ranks as the most effective browser extension for spell checking in Canva, providing comprehensive error detection. LanguageTool offers a free alternative with solid functionality.

Can I Spell Check Canva Designs On Mobile?

The Canva mobile app has limited native spell check capabilities. Users can use device keyboard spell checkers or copy text to other mobile apps for checking, then paste corrected text back into Canva.

Is Canva’s Spell Check Reliable For Long Documents?

For extensive text, it’s advisable to use dedicated word processing software like Google Docs or Microsoft Word in conjunction with Canva’s Magic Write. This combined approach ensures thorough error detection.

Is Canva’s Grammar Checker Free To Use?

Basic grammar checking via Magic Write is available in Canva Docs, but may have usage limits on free accounts. Premium features of the spelling and grammar checker may require a Canva Pro subscription.

Conclusion

The question “Does Canva have spell check?” has a nuanced answer. While Canva now offers spell checking through Magic Write in Canva Docs, designers still benefit from supplementing this with additional methods for comprehensive error detection. Whether you’re creating a presentation where you need to know how to put a timer in Canva or designing templates for sale, error-free text is important.

Whether using Canva’s built-in capabilities, browser-based spell checkers, specialized extensions like Grammarly, or external tools like Google Docs and Microsoft Word, maintaining error-free text remains essential for professional designs.

The methods outlined in this guide provide multiple layers of protection against spelling errors, punctuation mistakes, and grammar issues.

Keep in mind that no matter how advanced a grammar checker may be, a final human review is essential; the synergy of technological help and meticulous proofreading yields well-refined outcomes that boost your brand’s credibility and influence.