Ever wanted to make your social media posts or logo designs pop with a creative touch?
Curved text-like words bending in a circle or arching like a smile-is an easy way to add flair to any project. Whether you’re designing business cards, stickers, or eye-catching social media graphics, Canva’s curve text feature lets you bend words in seconds, no fancy skills needed!
At Designers Choice, we know how small details like curved text can transform your work. Maybe you’ve seen curved text on a badge or a social media post and wondered, “How do they do that?”
Good news: You don’t need the desktop version or Canva Pro guide works on the mobile app too! We’ll walk you through bending text, adjusting the curve direction, and even creating circular text for logos or graphics.
Let’s turn ordinary words into dynamic design elements with Canva’s text tool and Effects panel.
By the end, you’ll be curving text like a pro, whether you’re on a keyboard or tapping your phone screen! 🎨
How to Curve Text in Canva?
To curve text in Canva follow these steps:
Adding Text to Your Canvas
First, you need to add the text you want to curve:
- Click the “Text” button in the toolbar
- Choose “Add a heading,” “Add a subheading,” or “Add a little bit of body text.“
- Click on the canvas and type your text
- Use the toolbar to pick a font and size for your text
Accessing the Effects Panel
Now it’s time to curve your text:
- Click on your text box to select it
- Look at the toolbar at the top of the screen
- Click on “Effects” – this button opens the text effects panel
Selecting the Curve Effect
In the Effects panel, you’ll find the curve option:
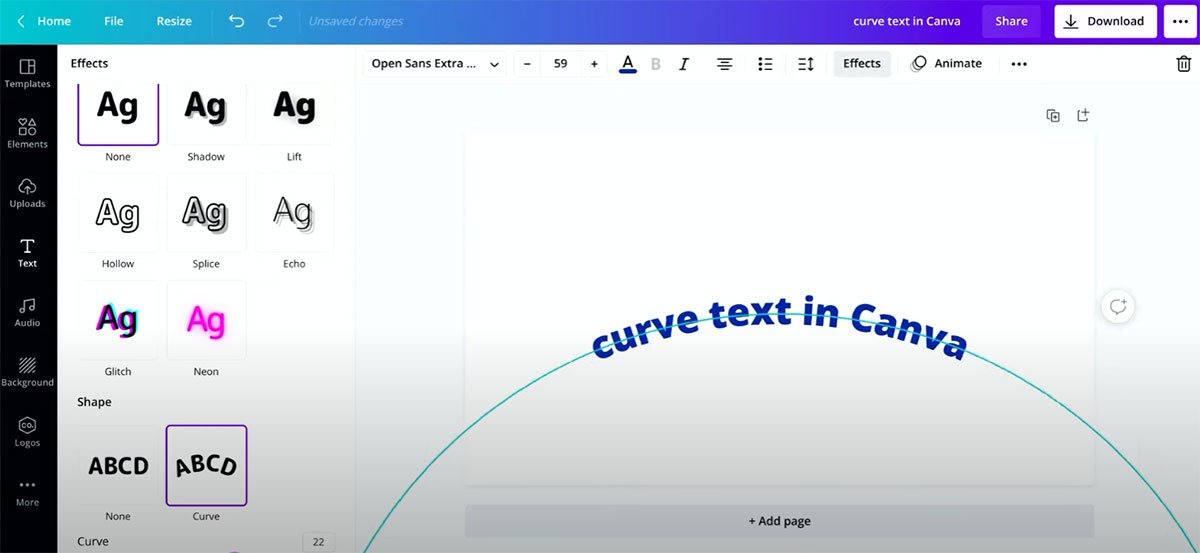
- Scroll down in the Effects panel
- Look for the “Shape” section
- Click on “Curve” – your text will instantly start to curve!
Adjusting the Curve Direction
You can control how your text curves:
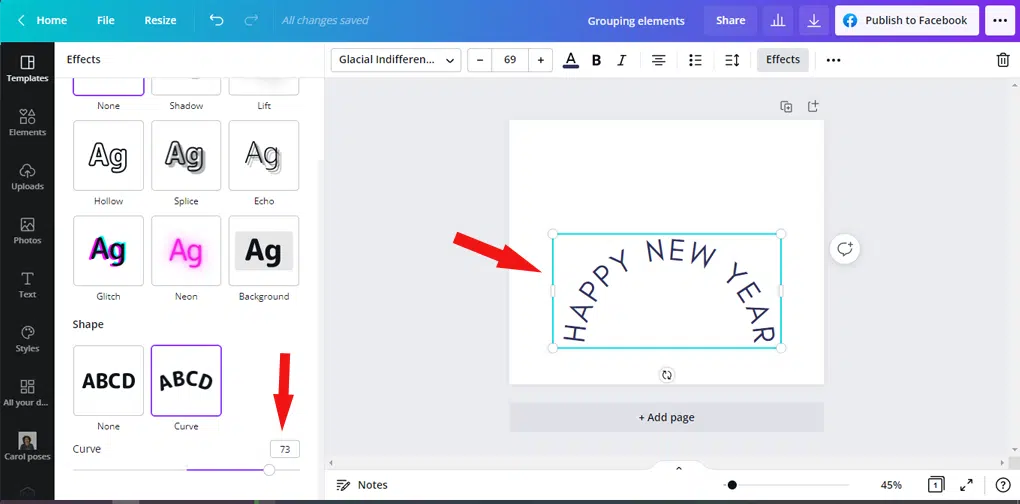
- After clicking “Curve,” you’ll see a slider.
- Move the slider to the right (positive numbers) to curve your text downward.
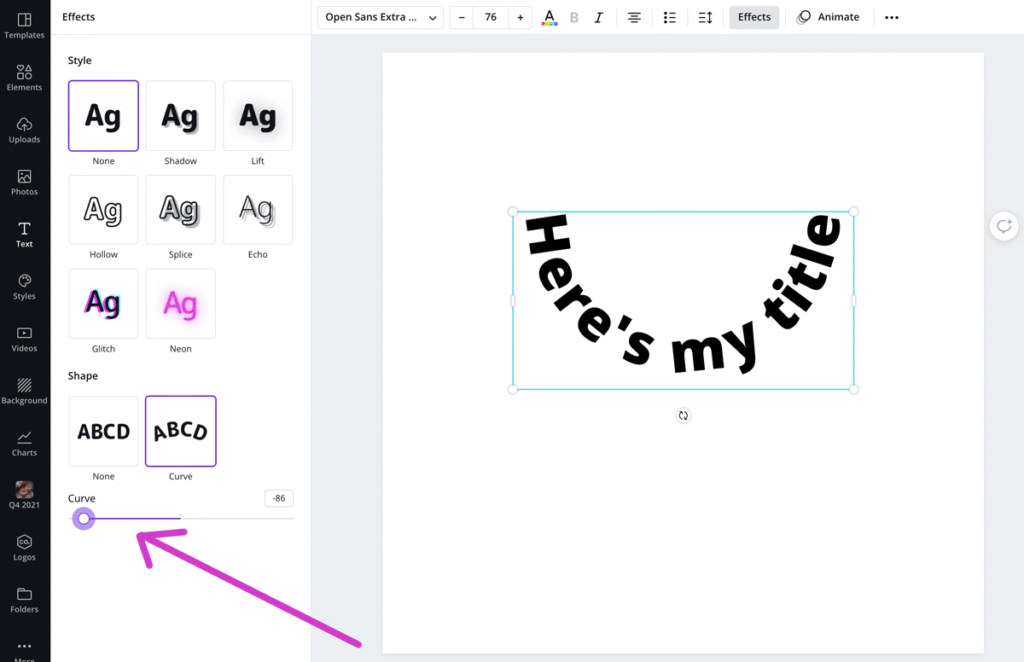
- Move the slider to the left (negative numbers) to curve your text upward.
- The higher the number, the more curved your text will be. You can even experiment with how to flip text in Canva to create unique mirrored effects.
Fine-Tuning Your Curved Text
To make your curved text look just right:
- Use the slider to adjust how much your text curves.
- Try different fonts to see which looks best when curved.
- Change the size of your text box by dragging the corners.
- Adjust letter spacing by clicking “Spacing” in the toolbar and moving the slider. You can also refine your text layout by learning how to indent in Canva for cleaner paragraphs.
How to Curve Text in the Canva Mobile App?
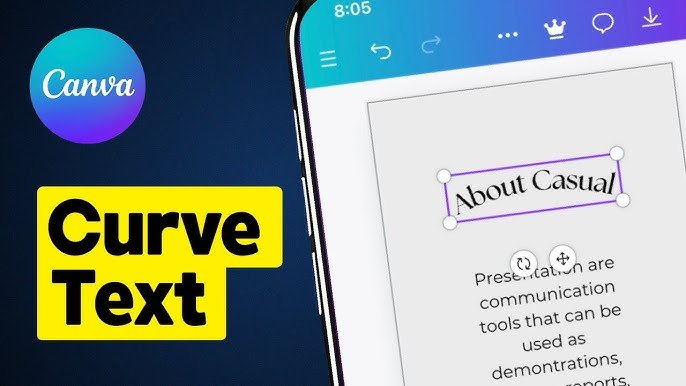
To curve text in the Canva mobile app, follow these steps:
Adding Text in the Mobile App
The Canva mobile app lets you curve text too:
- Open the Canva app on your phone
- Start a new design or open an existing one
- Tap the “+” button at the bottom
- Choose “Text” from the menu
- Pick a text style or tap “Add text.”
- Type your text
Applying the Curve Effect On Mobile
To curve your text in the mobile app:
- Tap on your text to select it
- Look for the menu at the bottom of the screen
- Swipe left on this menu until you see “Effects“
- Tap on “Effects“
- Scroll down and tap on “Shape“
- Tap on “Curve“
Adjusting Curved Text On Mobile Devices
To change how your text curves on your phone:
- After tapping “Curve,” you’ll see a slider appear
- Slide your finger left or right to change the curve amount
- Tap the checkmark when you’re happy with the curve
- Use the corner handles of the text box to resize if needed
How To Curve Text in Canva Using Templates?
Templates make curving text even faster.
If you’re creating a marketing asset, you might want to know how to create a lookbook in Canva to showcase your products in style.
Tap the Social Media Option
Templates make curving text even faster:
- When starting a new design, look for social media templates
- Tap on “Social Media” to see template options
- Browse through templates that already have curved text
Select the Template
Pick a template with text you want to customize:
- Tap on a template that has curved text you like
- The template will open in the editor
- Tap on the curved text in the template to edit it
- Type your own words to replace the sample text
Tap the “Effects” and Change It to Curve
Even with templates, you can adjust the curve:
- With your text selected, tap “Effects“
- The curve effect will already be applied
- Adjust the curve slider to change how much it bends
- Try different curve amounts until it looks right
Why Use Curved Text in Your Designs?
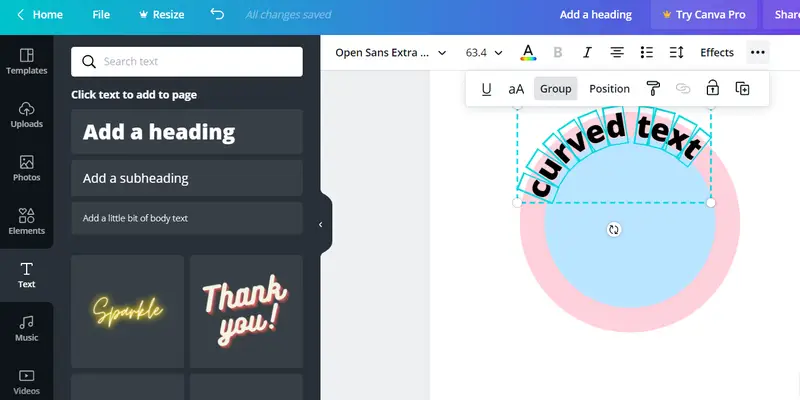
Curved text makes designs look special because:
- It adds movement and flow to your graphics
- It helps text follow the shape of other design elements
- It makes logos and badges look professional
- It catches people’s eye when scrolling through social media
- It can fit more text in a small space when made into a circle
- It adds a creative touch that flat text doesn’t have
Curved text works great for:
- Company logos
- Social media posts
- Product labels
- Stickers
- Badges
- Business cards
- T-shirt designs
Customizing Your Curved Text
Changing Font Styles For Curved Text
Different fonts look different when curved:
- With your curved text selected, click on the font dropdown in the toolbar
- Try various fonts to see which ones curve nicely
- Bold fonts often look good when curved
- Script and handwriting fonts can create flowing, curved text
- Remember that some fonts might look squished when curved
Adjusting the Angle of Curved Text
You can change exactly how your text bends:
- Select your curved text
- Go back to Effects > Curve
- Use the slider to make small changes to the curve angle
- Try both positive and negative numbers
- For a complete circle of text, you’ll need to adjust both the curve amount and the letter spacing
Positioning Curved Text in Your Design
Place your curved text just right:
- Click and drag to move your curved text around the canvas.
- Use the resize handles to make it bigger or smaller.
- Try placing curved text around circular images. To perfect this, you might need to know how to replace an image in Canva or even how to flip an image in Canva.
- Make sure curved text doesn’t get too close to the edge of your design.
- If you want text to curve around an object, position it to follow that shape. For more advanced edits, learning how to cut out an image in Canva can help isolate objects perfectly.
Creative Uses For Curved Text
Designing Logos With Curved Text
Curved text makes logos look professional:
- Start with a simple shape like a circle or shield.
- Add your main text and curve it to follow the shape.
- Use the letter spacing tool to spread letters evenly.
- Add straight text in the middle for a contrast.
- Try placing curved text above and below a central image. Exploring techniques like how to fade an image on Canva can add a subtle, professional background to your logo.
Creating Circular Text Designs
Make text go all the way around in a cir cle:
- Type your text in a text box
- Apply the curve effect with a high value
- Click on “Spacing” in the toolbar
- Increase letter spacing until your text forms a complete circle
- Add an image or design element in the center of your circle
Using Curved Text in Social Media Graphics
Make your social posts stand out:
- Create a post for Instagram, Facebook, or other platforms. For interactive posts, consider learning how to put a timer in Canva.
- Use curved text for headings or important messages.
- Try curving text around product photos.
- Make quote graphics with the quote in curved text.
- Use curved text to highlight special offers or announcements.
If you plan to sell your creations, it’s a great idea to learn how to sell Canva templates on Etsy to turn your design skills into a business.
Troubleshooting Curved Text Issues
Common Problems With Curved Text
Sometimes curved text doesn’t look right. Here’s why:
- Text Looks Squished: Your text box might be too small.
- Letters Are Too Far Apart: Your letter spacing is too high.
- Can’t See All The Text: Your curve amount might be too extreme.
- Text Looks Pixelated: Try using a different font.
- Can’t Curve The Text: Make sure you’re selecting a text box, not an image. For other text formatting challenges, you may wonder how to wrap text in Canva.
Tips For Better Curved Text Results
Try these tricks for better curved text:
- Use shorter words or phrases for the best curve effect.
- Make sure your text is big enough to read when curved.
- High contrast colors help curved text stand out.
- Add a text background or shadow for better readability. You can also learn how to highlight text in Canva to make certain words pop.
- Use the letter spacing tool to fix uneven spaces between letters.
- Try the TypeCraft app in Canva for more advanced text-bending options.
FAQ’s:
Can I Change the Curve Direction on Canva?
Yes! When you select your text and go to Effects > Curve, move the slider to the left (negative numbers) to curve text upward, or to the right (positive numbers) to curve text downward.
Can I Use Curved Text With Different Fonts?
Absolutely! All fonts in Canva can be curved. Some fonts look better curved than others, so try a few different options to find what works best for your design.
Can I Change the Curve After Adding Other Effects?
Yes, you can edit the curve at any time. Select your text, go to Effects, and adjust the curve slider. You can combine curved text with shadows, color effects, and other text styles.
Is Curved Text Available in Free Canva?
Yes! The curve text feature is available in both free and Canva Pro accounts. However, many users wonder how much Canva Pro costs and whether Canva Pro is worth it. If you’re on a budget, you might even be curious about how to get Canva Pro for free.
How Do I Create A Complete Circle With Text?
To make text go all the way around in a circle:
- Add your text and apply the curve effect
- Adjust the curve amount using the slider
- Click on “Spacing” in the toolbar
- Increase the letter spacing until your text forms a complete circle
- You might need to adjust both the curve amount and letter spacing to get a perfect circle
Conclusion
Now you know how to curve text in Canva! With just a few clicks, you can bend, arch, and circle your text to make eye-catching designs.
The curve effect works on both computers and phones, and you can use it with any font. Try using curved text in your next design project.
It works great for logos, social media posts, and lots of other graphics.
Just remember to keep your text readable and not too curved if you want people to easily understand your message.
And don’t forget to explore other features like changing your page orientation to how to landscape in Canva for different layouts.
At Designers Choice, I believe small changes like adding curved text can make a big difference in how professional your designs look. So give it a try – select your text, click Effects, choose Curve, and start creating!
