Categories
Design

How to Crop an Image in InDesign: A Step-by-Step Guide

At Designers Choice, we know that working with images is a big part of any design projects.

Whether you are making brochures, printing materials, or creating a PDF, knowing how to crop an image in InDesign is an essential skill.

Many beginners get confused when they first start using Adobe InDesign because cropping works differently here than in Photoshop.

This guide will show you the easy steps to get consistent results every time.

Understanding the Basics: How to Crop an Image in InDesign

Understanding the basics of how to crop an image in Adobe InDesign using frames, selection tools, and clipping paths

The Relationship Between the Image and the Frame

In InDesign, every image file sits inside an image frame.

Think of the frame as a window. The image content is behind that window. When you crop, you are changing the size of the window, not the photo itself. This is why InDesign cropping is different from other programs. The frame size controls what part of the image you see.

Step-by-Step: Using the Selection Tool (Black Arrow)

The selection tool (also called the black arrow) is in the tools panel on the left side of your screen. Here is how to use it:

  • Click the black arrow in the toolbar
  • Click on your selected image frame
  • Look at the corners of the frame. You will see small squares called anchor points
  • Drag any corner handle to resize the frame
  • Hold the shift keys on the side of the keyboard to keep the aspect ratio

This is the normal sequence for basic cropping. The control panel at the top of your screen also shows the frame size numbers.

Utilizing the Content Grabber to Position Your Crop

The content grabber is a small circle that appears when you hover over a placed image. It helps you move the image content inside the frame. Click and drag it to show a different part of the image. This gives you precise cropping without changing the frame size.

Advanced Techniques For Cropping an Image in InDesign

Advanced techniques for cropping an image in Adobe InDesign using direct selection tool, frame fitting options and custom shape cropping

Resizing and Cropping with the Direct Selection Tool (White Arrow)

The direct selection tool (the white arrow) lets you work with the image content directly. When you select this tool from the tools panel, you can:

  • Click on the image content to select it
  • Drag the image content to move it inside the frame
  • Use the control handle points to resize the image itself

This tool is great when you need to fit a frame to specific dimensions while keeping the photo in the right spot.

Using Frame Fitting Options For Automatic Cropping

Adobe InDesign has built-in options to make cropping faster. With your selected image frame selected, go to the file menu and choose Object > Fitting. You will see options like:

  • Fit Content Proportionally
  • Fill Frame Proportionally
  • Center Content

These options help with InDesign cropping instead of resizing mistakes that beginners often make. The autofit feature can also be turned on in the control panel.

Cropping Images Into Custom Shapes (Circles, Polygons, and Text)

You can crop images into shapes other than rectangles. Use the pen tool to draw a custom shape, or use the shape tools for circles and polygons. Then:

  • Place your image file on the page
  • Draw your shape on top of it
  • Select both the shape and image
  • Go to Object > Clipping Path > Make

This creates a clipping path that crops the image to your shape. You can even use text as a custom shape for creative effects.

Best Practices For Non-Destructive Cropping in Adobe InDesign

Non-destructive cropping in Adobe InDesign showing image frame resizing with hidden image area and best practices checklist

Why InDesign Cropping is Always Non-Destructive?

One great thing about Adobe InDesign is that cropping never deletes your original image. The image file stays complete. You can always:

  • Double-click with the direct selection tool to see the full image
  • Drag the frame bigger to show more of the image
  • Use the content grabber to reposition

This is why InDesign cropping instead of resizing confusion happens, because the image content and frame size are separate things.

Managing File Sizes: When to Pre-Crop in Photoshop

While InDesign cropping is safe, large image file sizes can slow down your indesign document.

For printing projects with many photos, consider:

  • Cropping in Photoshop first for huge images
  • Saving copies at the right pixels size
  • Then placing them in InDesign

This keeps your layout running smoothly, especially for brochures with many pages.

FAQ’s:

What is the Difference Between the Selection Tool and the Direct Selection Tool When Cropping?

The selection tool (black arrow) moves and resizes the image frame. The direct selection tool (white arrow) moves and resizes the image content inside the frame. Use the black arrow for the frame, white arrow for the picture.

How Do I Crop an Image Into A Perfect Circle in InDesign?

Use the ellipse tool to make a circle. Place it over your image. Select both, then go to Object > Clipping Path > Make. Or use Object > Pathfinder options. This creates a circular crop using a clipping path.

Why Does My Image Look Blurry Or Pixelated After I Crop It?

This usually happens when you stretch the image content bigger than the original image resolution. Check your pixels in the control panel. For printing, images should be 300 DPI at the final size.

Why Won’t My Image Crop in InDesign, and How Can I Fix It?

Make sure you are clicking on the corner of the frame with the selection tool. If the frame moves but the image does not crop, check that you are not using the direct selection tool by mistake. Also, locked layers prevent editing. Check the Layers panel.

How Can I Quickly Fit My Image to the Cropped Frame Without Distorting It?

Select the selected image frame, then go to Object > Fitting > Fill Frame Proportionally. This keeps the aspect ratio while filling the frame. You can also use keyboard shortcuts: cmd (on Mac) or ctrl (on PC) + Alt + C.

Is Cropping A Vector Shape in InDesign Possible, Like Cropping A Photo?

Yes! You can place vector graphics inside frames just like photos. Use the same range of tools, the selection tool, direct selection tool, and frame fitting options work the same way.

Is Cropping in InDesign Permanent? Can I Get the Rest of my Image Back?

No, cropping is not permanent. Your original image is always there. Just drag the edges of the frame outward to reveal more. Or double-click with the direct selection tool to access the full image content.

Conclusion

Learning how to crop an image in InDesign opens up many different methods for your design projects. From basic selection tool moves to advanced clipping path techniques, you now have the skills to handle any cropping task.

Remember that InDesign keeps your original image safe, so do not be afraid to experiment with different cropping techniques.

At Designers Choice, we believe that mastering these tools helps you create better layouts for brochures, printing jobs, and digital PDF files. Keep practicing with these steps, and soon cropping will feel like second nature. Happy designing!

Categories
Uncategorized

How to Change Artboard Color in Illustrator: A Complete Guide

Have you ever stared at a bright, plain screen while working on your computer? Sometimes, that bright white screen makes it very hard to see what you are doing. At Designers Choice, we know that making art should be fun and easy. It should not be hard on your eyes.

When you do graphic design, you might need a different workspace to see things clearly. Knowing exactly how to change the artboard color in Illustrator is a very handy trick to learn. It is an essential skill that helps you see your design elements much better.

In this easy guide, we will show you the simple steps to change the color of the artboard. We will look at two simple methods that anyone can do. Whether you are making fun art for social media or getting ready to print a big image file, these neat tricks will make your illustrator workflow much better. Let us look at how you can pick a new background color today!

We will make sure you learn this quickly so you can get back to drawing.

Why Learn How to Change Artboard Color in Illustrator?

Why Learn How to Change Artboard Color in Illustrator?

You might wonder why you even need to learn how to change the artboard color in Illustrator in the first place. Most new projects start with a giant, plain white canvas. It looks just like a fresh piece of copy paper. But leaving it plain white is not always the best choice for your art.

Here are a few great reasons why you might want to change the background color of an artboard.

Enhancing Visibility For White Or Light-Colored Artwork

If you are drawing a fluffy white cloud or a light yellow star, it will blend right into a white background.

You will not be able to see the edges of your art at all. It can make you feel lost. If you change background color to something dark, like blue or black, your light-colored art will pop right out. This makes it so much easier to work on your graphic design.

You can pick different backgrounds to see your work clearly and easily. You will not have to guess where your lines are anymore.

Simulating Final Print Materials (Like Colored Paper)

Sometimes you want to print your art on real blue paper or pink paper at your house or at a print shop. If you only look at a white screen while you draw, it is hard to guess what the final print will actually look like.

You can use the simulate colored paper option inside the program to see exactly how your ink will look on that colored paper. This helps you plan your art much better before you spend money on printing.

Reducing Eye Strain During Long Design Sessions

Staring at a super bright screen for hours and hours can make your eyes feel very tired and sore. It can even give you a headache.

If you change the artboard background color to a soft gray or a warm, gentle tone, it is much kinder to your eyes. This is a very helpful trick for anyone who spends a lot of time sitting at a desk and working on design elements.

You can even adjust your user interface brightness to help your eyes even more while you work.

Document Setup Method: How to Change Artboard Color in Illustrator

Document Setup Method: How to Change Artboard Color in Illustrator

The first way to do this is called the document setup method. This way only changes how the workspace looks on your computer screen. It is great when you just want a better view while you are drawing. Let us break it down into very simple steps.

Step 1: Open the Document Setup Menu

First, you need to turn on your computer and open adobe illustrator.

Start your new document or open a file you already made earlier. Now, look at the very top of your screen. You will see a list of words. Click on the word “File” in the menu bar. A drop-down list will appear on your screen. Scroll down that list and click on the words “Document Setup.”

This will open the document setup window right in the middle of your screen. You can also access document setup by clicking a special button inside the properties panel. You can usually find this panel on the right side of your screen.

Step 2: Locate the Transparency Grid and Colors Section

Inside the document setup window, you need to look for a specific section. It is called the “Transparency and Overprint Options” section.

Here, you will see a little box that looks like a checkerboard. This little box is related to the transparency grid. You will also see two small color boxes right next to it. These two boxes are very important. They control the color of the grid and the color of your artboard.

Step 3: Select Your New Artboard Color

Now, click on the top color box. This action opens up the color selector tool. Now, you have the power to pick any color you want for your canvas color. You can click on a nice dark gray, a soft gentle blue, or any other color that helps you see your drawing better.

Once you pick the exact color you want, click the button that says “OK.”

Step 4: Enable the “Simulate Colored Paper” Option

There is one more very important thing to do. You must check the little box right next to the simulate colored paper option. If you forget to check this box, nothing will happen at all. Once you check it, click “OK” to close the menu completely.

If you still see a white screen after doing this, do not worry. You just need to turn on the grid. Go back to the menu bar at the top, click on the word “View,” and select show transparency grid. Now, you will finally see your brand new background color!

The Background Shape Method: An Alternative Way to Change Artboard Color

The Background Shape Method: An Alternative Way to Change Artboard Color

The first method is cool, but it only changes what you see on your monitor. It does not actually print that color on your printer. If you want the color to print out, or if you want to save it as a raster image with the color showing, you need to use a different method.

This way is called the rectangle method. Here is exactly how to make a background rectangle for your art.

Step 1: Select the Rectangle Tool (M)

Go to your tool panel on the left side of your screen. Look for the rectangle tool and click on it with your mouse. It looks like a simple square. You can also just press the letter “M” on your computer keyboard to pick it super quickly.

Step 2: Draw A Shape Over Your Artboard

Now, click and drag your mouse across the entire artboard. You want to make a big shape that is the exact size of your artboard. If your artboard is a perfect square, draw a perfect square. Make sure it covers every single edge perfectly so no white parts are left showing.

Step 3: Apply Your Desired Fill Color

With your big shape still selected, look at your color tools. Pick a new fill color for your shape. This color will be your new image background. You can change it to bright blue, deep red, or anything you like. Now, your shape acts as the solid color of the background.

Step 4: Lock the Layer to Prevent Accidental Edits

You do not want to accidentally move this background shape while you are busy drawing other fun things.

So, you need to open your layers panel. It is usually sitting on the right side of your screen. Look for your new shape in the list. Click the empty little box next to the eye icon to lock it. A small picture of a padlock will appear. Now, the shape is safely locked in place.

For better organizing, make a new layer right above it to draw your other design elements. Always make sure to keep your background shape sitting at the bottom of the layer list.

Document Setup Vs. Background Shape: Which Should You Use?

Document Setup vs Background Shape

Now you know two great ways to change the color of your artboard. But which one should you pick for your project? It really depends on what you want to do with your file later on.

When to Use Document Setup (Viewing Purposes Only)

The document setup method is strictly for your eyes while you work on your computer. It only changes the user interface view.

If you use this method, the color will not show up when you print your artwork on a printer. It will also not show up if you save your file as a picture with a transparent background.

You should only use this method if you just want to reduce eye strain or if you just need to see white shapes better while you work.

When to Use A Background Shape (Exporting and Printing)

The rectangle method is exactly what you need if you want the color to be part of your final art.

If you are making a fun post for social media and want a pink background, you must draw a solid pink shape. This method makes sure the background colors are saved when you export your final image file. It makes the color real and permanent, unlike the other way.

FAQ’s:

Will the Color I Set in Document Setup Show Up When I Export Or Print My File?

No, it will not. The color you pick in the document setup menu is only there to help you see better on your computer screen. When you print the file or save it to show your friends, it will act like it has a transparent background or a plain white background.

If you want the color to actually print out on paper, you must use the rectangle tool to make a solid shape behind your art.

How Do I Change the Artboard Color Back to White?

If you used the document setup method, just go right back to the document setup window. Click the color selector and pick the white color again. Make sure the simulate colored paper option is still checked, and click “OK.” If you drew a big shape instead, just unlock the shape in the layers panel. Then, you can change its fill color to white. Or, you can just press delete on your keyboard to remove the shape completely.

Can I Have Multiple Artboards With Different Colors in the Same Illustrator Document?

If you use the document setup method, the color you pick will change the look of the entire artboard workspace all at once. It will make all your boards look the same color. If you want different colors on different boards, you must use the rectangle tool.

Draw a shape on the first board and give it one color. Then, draw a shape on the next board and give it a different color. You can use the artboard tool and the artboard options to easily fix the size of your artboard for each different one you make.

Why Isn’t the Color Changing Even After I Picked A New One in Document Setup?

This is a very common problem for beginners. Usually, it happens because you forgot to check the tiny box for the simulated colored paper option. Go back into the menu and make sure that box has a check mark in it. Also, you must make sure your transparency grid is turned on.

Go to “View” in the menu bar and click the words Show Transparency Grid. Then you will see your new background color.

Does Changing the Illustrator UI Interface Color Affect My Artboard?

No, it does not do that. You can change your user interface brightness to make the menus dark gray or light gray.

This only changes the toolbars and menus sitting around your workspace. It just changes the user interface. It does not change the actual canvas color where you draw your art. The color of your artboard stays the same, no matter how dark or light your menus are.

Conclusion

Knowing how to change artboard color in Illustrator is a great trick that makes your work so much easier.

We hope these simple steps help you enjoy your graphic design work even more today. Whether you use the document setup method for a better view or the background rectangle for printing, you now have the tools you need to succeed.

At Designers Choice, we love sharing tips that help you create better art without getting a headache. You can easily save your eyes from staring at a super bright white screen all day long. You can easily test how your art looks on different colored paper before you print it.

There is no need for a fancy automated background remover tool when you know how to control your layers and backgrounds right from the very start. Try out these simple methods today on your brand new projects, and see how much better your workspace feels!

Categories
Fonts

How to Add Fonts to GIMP? A Complete Guide

As passionate designers with years of hands-on experience, we created Designers Choice to be the resource we always wished we had—where expertise meets inspiration. We know the challenges of turning creative ideas into reality, from sourcing the perfect materials to staying ahead of design trends. That’s why we bring you a collection of top-quality products, innovative solutions, and trusted insights, all tailored for fellow professionals who demand the best. Our mission is to empower you to bring your boldest visions to life, backed by a community that values creativity, craftsmanship, and excellence as much as you do.

Today, we are going to talk about a very fun topic: how to add fonts to gimp. If you use this free software to draw or edit pictures, you already know it is a great tool. However, the basic letters that come with it might feel a little boring after a while.

To make your pictures look amazing, you need a new font. We will show you exactly how to get a new font and place it in your fonts folder so you can use it every day. This guide is written so that anyone can read it and learn how to add fonts to gimp.

Why You Should Learn How to Add Fonts to GIMP?

Why You Should Learn How to Add Fonts to GIMP?

When you type words on a picture, the shape of the letters is called a font. Learning how to add fonts to gimp is a great skill to have. It gives you many new choices for your art. You do not have to stick to the same old typefaces anymore.

Elevating Your Graphic Design Projects

If you only use the default options, your art might look like everyone else’s art. A fresh, fun font makes your work stand out.

Whether you are making a birthday card or a poster for school, using the text tool with fresh styles makes everything look much better. When you add a great new font, your pictures tell a better story. Beautiful typefaces catch the eye of anyone who looks at your work.

Matching Brand Guidelines and Aesthetics

Sometimes, a company has rules about how their words should look. They might want a special serif style with little lines on the letters.

If you do not have their exact font files, you cannot match their rules. By keeping your gimp fonts updated, you can always pick the right style to match any brand or project. Having many font files ready to use makes you look like a real professional.

Preparation: Finding and Downloading Custom Fonts

The first step is to go on the internet and look for the files you need. You have to save them to your computer before you can use them.

Best Free Font Resources (Google Fonts, DaFont, etc.)

There are many amazing font websites where you can get free fonts. Some of the most popular places are Google Fonts and DaFont.

Just go to Google, type what you are looking for, and hit search. When you find a style you like, just click the download button. Always check if the downloaded fonts are marked for personal use only.

If they are for personal use, it means you cannot use them to make money or sell things.

Extracting ZIP Files Before Installation

When you click the download button, the computer usually gives you a zip file. A zip file is like a tight suitcase that holds your files inside so they take up less space. You cannot put a zip file straight into your fonts folder. You have to open it first.

To do this, right-click on the file and click “extract“. Once you extract it, a normal folder will appear. Open that folder, and you will see your actual font files. Most of the time, they will be a TTF file (TrueType) or an OTF (OpenType) file.

Step-by-Step: How to Add Fonts to GIMP on Windows

Step-by-Step: How to Add Fonts to GIMP on Windows

If you are using a PC running Microsoft Windows, your operating system makes it very easy to add these files. You have two ways to do this.

Method 1: Installing Fonts System-Wide (Recommended)

This is the best way because it lets all the programs on your PC use the letters. It will work for Adobe Photoshop, Inkscape, and Microsoft Word, too. First, open your file manager and find the TTF or OTF file you saved. Right click right on the name of the font. A menu will pop up. Click the word “Install“. The computer will copy it for you. The next time you open gimp, the style will be sitting in your font list, ready to go.

Method 2: Adding Fonts Directly to the GIMP Directory

If you only want this style for one program, you can drop it right into the personal gimp directory.

First, open your file manager and look for your gimp fonts folder. The file location is usually hidden in your user files. Once you find this special fonts directory, just drag the TTF file or OTF file and drop it inside.

When you open your software, it will check the fonts directory and load the letters.

Step-by-Step: How to Add Fonts to GIMP on Mac

How to Add Fonts to GIMP on Mac

If you use an Apple computer, your operating system is a little different, but it is still very simple.

Using the macOS Font Book

On a Mac, find the TTF or OTF file you saved. Double-click on it. A small window will open up.

This window gives you a nice preview of what the letters look like. It will also show you the number of characters in the file. At the bottom, click the install button. This puts the file straight into your font book. Because it is in your font book, your software will find it easily.

Moving Files to the Mac GIMP Library

You can also use your Mac file searcher, called Finder, to place files yourself.

Open Finder and look for your Application Support directory. Look for the specific font folders for your drawing software. When you find the right folder, drag the downloaded fonts inside. Now your custom gimp fonts are ready.

Step-by-Step: How to Add Fonts to GIMP on Linux

How to Add Fonts to GIMP on Linux

For people who like free and open software like Linux, the steps are very fast.

Installing Via the ~/.fonts or ~/.local/share/fonts Directory

On Linux, you do not need to click install. You just open your local file directory.

Look for a folder named ~/.fonts or ~/.local/share/fonts. If it is not there, you can just make a new folder with that name. Drag your free fonts and drop them in. Your system uses a tool called fontconfig. The computer knows fontconfig’s font path, which means it knows exactly where to look for letters. Your font engine, which is usually called freetype, will read the files. You do not even need a full reboot of your computer!

How to Add Fonts to GIMP and Refresh the Font Cache?

How to Add Fonts to GIMP and Refresh the Font Cache

Sometimes, you might be working on a picture and decide you want a new style right then. You can get one even if you are already running gimp. You do not have to save your work and close the program.

Finding the “Rescan Font List” Button in GIMP

Look at your screen and find the dockable dialog menu on the side. Inside this menu, you will see a specific font dialog. Click the small folder tab at the top of this box. At the bottom, look for a tiny refresh button. This is your rescan font list button. Click it once! The software will stop for a second, read all your font folders, and update the font list. When it finishes, grab your text tool, and your new style will be there.

Troubleshooting: What to Do If Your Fonts Aren’t Showing Up

Troubleshooting: What to Do If Your Fonts Aren't Showing Up

Sometimes things go wrong. Please do not worry. If you followed the steps but your letters are missing, here are some ways to fix the problem.

Verifying Font File Formats (.TTF and .OTF)

The very first step is to make sure you used the correct file type. Did you remember to extract the zip file? Your software cannot read a zipped package. Look at the file location. You must see a true TTF (TrueType) or OTF (OpenType) file. If it is a picture file or a web link, it will not work.

Checking GIMP’s Custom Folder Preferences

If the TTF file is correct, check your program settings. Go to the top menu and click Edit, then click Preferences. A big list will open. Click on Folders to open it more, then click on Fonts. Look at the screen.

Is your custom fonts folder listed there? If your gimp fonts folder is missing, click the small icon that looks like a paper to add your fonts directory. Click OK. The next time you try to type, the issue should be fixed.

FAQ’s:

Do I Need to Restart GIMP After Installing A New Font?

No, you do not always have to restart gimp. If you are already running gimp, you can just open the fonts dialog and click the rescan font list option. Pressing this refresh button makes the software look in your fonts folder again right away.

Why Isn’t My New Font Showing Up In GIMP?

There are a few reasons.

First, check your file manager to make sure you remembered to extract the zip file. Second, check your font book or computer settings to see if it installed correctly. Sometimes the font engine needs a second to read new files. Make sure the file is actually in the correct gimp fonts folder.

What Font File Formats Does GIMP Support?

This software likes two main types of files. It loves TTF files, which stand for TrueType. It also loves OTF files, which stand for OpenType. The program reads these easily because it uses a smart open source tool called freetype.

Can I Add Fonts to GIMP Without Restarting the Application?

Yes! You can skip the reboot of the program. Just go to your dockable dialog area. Find the fonts dialog screen. Click the small folder tab and press the rescan font list button. The software will look at your fontconfig’s font path and find your new files instantly.

Where is the Specific GIMP Fonts Folder Located on my Computer?

On a PC, the personal gimp directory is usually hidden inside your AppData user files.

On a Mac, you use Finder to look in Library and Application Support. On Linux, look for your ~/.config/ directory. If you cannot find the exact file location, open the program Preferences, click the folder tab for Folders, and it will tell you the exact path.

Can I Use Downloaded Fonts For Commercial Projects In GIMP?

You must be careful!

If you use font websites to find free fonts, read the rules. Many files from places like DaFont will clearly say “Free for personal use“. This means you cannot put them on things you sell. Look for styles from Google Fonts that are completely free to use for any business.

Why Is My New Font Showing Up As Weird Symbols Or Default Text?

Sometimes, a downloaded font does not have all the letters.

A fancy serif style might have the ABCs, but it might be missing numbers or question marks. Check the number of characters in your preview window on your computer. If the character is missing, your fontconfig or font engine will just show a weird box or a boring default letter instead.

Conclusion

Learning how to add fonts to gimp is a wonderful trick to learn. We hope this easy guide makes the whole process very simple for you. Now you know how to go on the internet, find great font websites like Google Fonts, and click download. You know how to use your file manager to extract a zip file and find the ttf file inside. You also learned how to install it on your operating system, whether you use a PC, a Mac, or Linux.

Do not forget to check if your files are for personal use only. And remember, you do not always have to restart gimp. You can just click the refresh button to rescan font list whenever you want. Once you fill your fonts folder with amazing typefaces, your art will look better than ever.

Grab your text tool, pick an exciting name of the font from your font list, and start making beautiful graphic designs today!

Categories
AI

A Complete Guide to Perplexity AI Image Generation Capabilities

We at Designers Choice are a team of passionate designers with years of hands-on experience. We built our site to be the resource we always wished we had. We know the challenges of turning creative ideas into reality.

Finding perfect materials and staying ahead of design trends takes hard work. That is why we have gathered a collection of top-quality products, new solutions, and trusted insights. All of this is made for fellow professionals who demand the best. Our mission is to empower you to bring your boldest visions to life. We are backed by a community that values creativity, craftsmanship, and excellence.

Today, we want to talk about perplexity ai image generation capabilities.

As a very smart answer engine, it changes how we work with visual content. It uses powerful artificial intelligence to turn text into beautiful art. Let us dive in and see how this amazing tool works!

What Is Perplexity AI Image Generation?

What Is Perplexity AI Image Generation?

When you think of Perplexity AI, you might think of reading facts.

But it can do much more now. Image generation is a huge part of what it does. This means it takes the words you type and turns them into brand-new pictures. It uses natural language processing to read your sentences. Then, it uses generative AI to draw the art from scratch.

If you make posts for social media, you always need good pictures. This tool helps you get them fast.

You just give it clear text prompts, and it gives you what you asked for. It is like having a digital artist right on your computer.

How Perplexity AI Image Generation Works?

How Perplexity AI Image Generation Works?

How does this smart tool make a picture from just words? The process happens in a few fast steps behind the scenes.

  1. Prompt Interpretation: First, the system looks at your query. It reads every single word you typed. It uses smart algorithms to figure out what kind of picture you want to see.
  2. Model Selection: Next comes the model selection phase. The system picks the exact right ai model to draw your art. Some models are good at fast sketches, while others are great at detailed photos.
  3. Image Rendering: Then, the true AI technology starts to work. This is the main image creation step. The system builds your picture pixel by pixel until it is completely drawn.
  4. Output Display: Finally, you see the finished picture on your screen. Now you can save it and use it for your work and fun projects.

Key Features of Perplexity AI Image Generation

Key Features of Perplexity AI Image Generation

This tool has many great parts that make it stand out from the rest.

  1. Text-to-Image Prompt System: You just type what you want, and it makes it. This system is the core of its amazing image generation features. It turns simple words into bright, clear art.
  2. AI Image Editing Capabilities: Sometimes, the first picture needs a small fix. With basic image editing, you can change small details. This helps you get exactly what you need without starting over.
  3. Multi-Model Generation: You do not have to stick to just one style. The system uses different image models to give you fun choices. You can get a painting, a photo, or a cartoon.
  4. Integrated Research + Image Creation: You can look up facts and make pictures at the same time. This means you do deep research and get pictures fast. It saves a lot of time.

How to Generate Images Using Perplexity AI (Step-by-Step Guide)

How to Generate Images Using Perplexity AI (Step-by-Step Guide)

Making your own pictures is very easy. Just use these basic steps.

  • Step 1: Open Perplexity – First, go to the official website on your computer or open the app on your phone. Make sure you are logged into your main account so your work saves.
  • Step 2: Enter A Prompt – Type your fun idea into the search bar. Tell the system exactly what you want it to draw for you. A clear prompt always gets better results.
  • Step 3: Generate the Image – Press the big button to start the job. The system will process your deep research queries and your art ideas all at once in a few seconds.
  • Step 4: Review the Result – Look closely at the final picture it made. Check the image quality to see if it looks right. Does it match your bright vision perfectly?
  • Step 5: Refine the Prompt – If the picture is not perfect yet, change a few words in your text prompt. Try again and again until the final result matches what you had in your mind.

The AI Models Powering Perplexity’s Visuals

The AI Models Powering Perplexity's Visuals

The magic behind this tool comes from very strong advanced models that work day and night.

Using DALL-E 3 For High-Detail Images

DALL-E 3 is one of the top tools right now in the world. It is famous for making very detailed and pretty pictures.

It is a huge part of modern AI’s image generation. When you need high-quality art for work, this model is a great choice.

Stable Diffusion and Playground AI Options

The smart system also gives you other good options like Stable Diffusion. These choices bring completely different styles to the table.

They make the total perplexity ai image generation capabilities very strong and flexible for all kinds of fun work.

Perplexity AI Image Generation Pricing and Limits

Perplexity AI Image Generation Pricing and Limits

Is this tool free to use? Yes, there is a free plan. But you need to know about the perplexity image generation limit.

On the free version, you can only make a few pictures each day. This is a big question we hear: can perplexity pro generate images?

Yes, absolutely! When you upgrade to perplexity pro, you unlock much more power. Pro users have a much higher limit. If you need to make lots of pictures for your projects, the Pro plan is the best way to go.

Editing, Refining and Regenerating Images in Perplexity

Editing, Refining and Regenerating Images in Perplexity

Sometimes the first picture the tool makes is not exactly right. You might want to fix a color or add a new detail.

You can refine your prompt by typing new, clearer words. Good text updates help you reach the best results. You can ask the tool to try again and again until you love the art. This basic image editing process is very helpful for everyone. It lets creators make small changes without starting completely over. If the tool draws a red car but you wanted a blue car, just tell it to change the color to blue.

Can You Use Perplexity-Generated Images Commercially?

If you work in digital marketing, you might want to use these pictures to sell things or promote your business.

Marketers love using AI art for ads, blog posts, and websites. Good pictures help boost your SEO and increase your brand visibility online.

Most of the time, you are allowed to use these pictures for your business work. However, you should always check the exact rules and terms on the website to be completely sure. The rules can sometimes change, so it is very smart to stay updated.

Using AI art can save your company a lot of money and time compared to hiring a photographer every single time.

Troubleshooting: Why Can’t Perplexity Generate My Image?

Troubleshooting: Why Can’t Perplexity Generate My Image?

Sometimes the tool will not make your picture. Why does this happen? First, you need to check your words carefully. The ai technology has very strict safety rules. If you ask for something bad, violent, or unsafe, the system will instantly block your prompt.

Unlike older traditional search engines, this modern system works hard to keep everything safe and clean for everyone.

Another reason might be a bad internet connection on your end. Or, you might have hit your daily limit for making art. If the system stops working, just check your prompt, check your internet speed, and try again a bit later.

Perplexity Vs ChatGPT : Which Is Better For AI Image Generation?

Perplexity vs ChatGPT vs Gemini

People always want to know how this tool compares to others. ChatGPT is a very famous tool. The upgraded version, ChatGPT plus, also makes amazing pictures. Some people also love to use Gemini from google.

So, which one is better? Perplexity is amazing because it links true facts with its pictures. It is great for fast learning. ChatGPT Plus is very creative and acts like a smart talking partner. Gemini is also very fast.

All of these tools are wonderful for content creation. The best choice depends on what kind of work you need to do today.

What Makes Perplexity Different From Other Image Tools?

This tool has a few special things that others do not have.

First, it gives you citations. This means it tells you exactly where it found its facts. If you ask a question and get a picture, you also get links to real websites. Most other tools do not do this at all. Right now, this tool does not do video generation or make audio. It focuses totally on strong facts, clear text, and great pictures. Because it provides exact sources, many content creators trust it more than other platforms.

Best Practices For Getting the Best Results

Best Practices For Getting the Best Results

If you want great art, you need to follow some simple rules.

  1. Keeping Prompts Clear and Simple: Do not use big, confusing words. Keep your text short and simple. If you are clear, the tool will know exactly what to draw.
  2. Matching the Image Style to Your Topic: Always match your art style to what you are writing about. If you are writing a fun kids’ story, ask for colorful illustrations. If you are writing a serious business report, ask for clean, real-looking photos. Matching the style makes your work look much better.

Future of AI Image Generation in Perplexity

Future of AI Image Generation in Perplexity

The future looks very bright and exciting for this amazing tool. We will soon see even faster and smarter systems coming out.

The total artificial intelligence inside it will keep learning and growing every single day.

In the future, we might even see new tools that let us put our pictures straight into our spreadsheets or business presentations with just one click.

As AI’s image generation gets better, it will become an even bigger part of our daily work and our personal lives.

We cannot wait to see what comes next!

FAQ’s:

Is Perplexity AI Image Generation Free to Use?

Yes, there is a free version you can try. But remember, the free version limits how many pictures you can make each day.

Can Perplexity Generate Photorealistic Images That Match Real-World Facts?

Yes, it is very good at taking real facts and making pictures that look like real, high-quality photos.

Can I Upload and Edit Existing Photos With Perplexity?

Right now, the tool focuses mostly on making brand-new pictures from the words you type. It is not built to be a full photo editor.

How Does Perplexity Keep an Image Tied to Its Sources?

It places neat, clickable links right next to the picture. This shows you exactly where the facts came from.

Are the Images Generated by Perplexity AI Copyright-Free?

Usually, you can use the pictures freely. However, laws are always changing. Always read the newest rules on their official site.

Is Perplexity Better Than Midjourney For Creative Art?

Midjourney is often chosen for pure, wild art. But Perplexity is better if you need fast facts paired with nice pictures.

How Many Images Can Pro Users Generate Per Day?

The exact limit can change, but Pro users can generate hundreds of pictures daily. It is great for heavy users.

Can I Export Generated Images and Their Source List Into A Report Or Spreadsheet?

You can easily save the pictures to your computer. But right now, you cannot send them directly into spreadsheets. You have to copy and paste them yourself.

Can I Use the Image Generation Feature on the Perplexity Mobile App?

Yes, the mobile app is very handy. It lets you type words and get pictures right on your phone while you are out.

Conclusion

At Designers Choice, we love finding powerful new tools. We know that working on big design projects can be hard.

But tools like this make it much easier. Our main goal is to empower you to bring your boldest visions to life. We want to support a strong community that values true creativity and excellence.

We hope this simple guide helped you learn about perplexity ai image generation capabilities. Go ahead and try making your own pictures today. Keep testing new words and have fun with it. Your next great project is just a few words away!

Categories
Design

Flip on Long Edge Vs Short Edge: Easy Double-Sided Print Guide

At Designers Choice, our team knows that bringing great ideas to life means paying close attention to every little detail.

Sometimes, small printer settings can cause the biggest problems.

Have you ever tried duplex printing, only to find the text on the back of your printed pages is completely upside down?

This happens when the flipping options are not correct. We are here to help you get the right choice for your specific needs.

When you print on both sides of the paper, you have to choose between flip on long edge vs short edge.

Getting this setting right is very important for good readability and a great user experience. In this simple guide, we will explain everything.

We want to help you make your brochures, manuals, and marketing materials look perfect every single time.

Let us look closely at how the printing process works, so you never have to waste a test page again. We want to help you create amazing things with ease, without the stress of bad prints.

What is the Difference: Flip on Long Edge Vs Short Edge?

What is the Difference: Flip on Long Edge Vs Short Edge?

When you look at your computer screen, you will see options for double-sided printing. This is also known as duplex printing.

The main difference comes down to how you turn the pages when you are reading them. Think about a regular reading book and a top-bound notepad. They turn differently because they use different sides of the paper to hold the pages together. This holding area is called the binding.

Let us look at the flip on long edge vs short edge portrait settings to see exactly how they work. It is very important to get this right.

If you get it wrong, you waste paper and ink.

Understanding “Flip on Long Edge” (Standard Book Format)

The long edge option means the printer binds the pages along the longer side of the paper.

Think about a normal reading book or a magazine. You hold the book and turn the pages from the right side to the left side. The pages are connected on the longer side. This is the normal, standard setting for a vertical orientation, which we call portrait orientation.

Most of the time, when you print a pdf document or a simple word file, this is the best print settings to pick.

It makes the printed pages look and read just like a normal book. If you choose this setting, the text on both sides of the paper will face the same way when you turn the page from right to left. This is an excellent choice for reading long school reports, reading a booklet, or reading long pages of a book. It keeps the text in the correct direction for easy reading.

Understanding “Flip on Short Edge” (Notepad Format)

Now, let us look at the short edge flipping setting. When you select the short edge option, the printer connects the pages along the shorter side of the page. Think about a legal notepad, a clipboard, or a calendar that hangs on the wall. To read the next page on a clipboard, you have to lift the bottom edge of the paper and flip it all the way over the top edge. The binding is on the shorter side.

This short edge option is great if you want to make a notepad for writing lists.

However, there are some clear disadvantages to using it as a regular reading book. If you use this setting for a normal book, the text on the back will look upside down when you turn it from right to left. We often use this short edge binding when printing in landscape mode.

When to Use Flip on Long Edge Vs Short Edge For Your Documents

When to Use Flip on Long Edge Vs Short Edge For Your Documents

Picking the right choice between short edge vs long edge will save you a lot of time, ink, and paper. Your choice depends entirely on your specific needs and the exact layout of your computer file. Let us break down when to use each one so you never get confused again.

Best Settings For Portrait Orientation

Portrait orientation means the paper is tall. The longer side of the paper goes up and down, and the shorter side goes left to right. This is how most pdf files, letters, and school papers look.

For tall pages, you almost always want to use the long edge setting. This binds the left side of the paper.

It is the best setting for manuals, reading books, and standard office letters. If you pick the short side binding setting for tall paper, you will have to flip the pages over the top edge, just like a notepad.

If you want a standard book layout, the flip on long edge vs short edge portrait question has a very easy answer: pick the long edge. This ensures high readability and makes the paper very easy to hold in your hands.

Best Settings For Landscape Orientation

Landscape orientation means the paper is wide. The longer side goes left to right, and the shorter side goes up and down. We often use this wide layout for large charts, diagrams, illustrations, or special wide brochures. When your paper is wide, the rules change completely.

For landscape mode, you usually want to pick the short edge option. Binding on the short side (which are the left and right sides when the paper is wide) lets you turn the pages like a normal book. If you choose the long-edge option for a wide paper, the binding goes on the top.

This means you will have to flip the pages over the top. This can hurt the readability and the handling of the wide paper, making it hard to read at a desk. Sometimes you have to let the short edge dictate how the paper binds.

How to Change Double-Sided Printing Settings on Your Computer?

How to Change Double-Sided Printing Settings on Your Computer?

Now that you know the difference, you need to know exactly how to change these print settings on your computer. It is very easy to find the printing options on your pc or your Mac. Before you ever hit the print button, always check the preview screen to make sure it looks correct.

If you want to download a file and print it, follow these steps.

Adjusting Flip Settings in Windows (Word, PDF, Chrome)

If you use a PC running Microsoft Windows, changing the printing settings is a very simple process.

  1. First, open your file in Microsoft Word, Adobe Reader, or your favorite PDF editor program.
  2. Click on the word “File” at the top left, and then click the print button.
  3. Look for the “Print on Both Sides” or “Duplex Printing” option on the screen.
  4. A small menu will drop down. Here, you will clearly see the flip on long-edge vs. short-edge options.
  5. Pick the one you need for your file layout.
  6. If you are printing directly from Google Chrome on the internet, click “Print,” then go down to “More settings.” You will see a small box for “Two-sided.” Check the box, and it will let you pick the long edge or the short edge to dictate the binding. Always look at the preview to make sure everything looks right before you start printing.

Adjusting Flip Settings in macOS

If you have an Apple Mac computer, the steps are a little bit different but still very easy to do. Apple macOS makes printing very simple.

  1. Open your PDF document or Word file in your macOS viewer.
  2. Press the Command key and the P key at the same time to open the print screen.
  3. Look for a check box that says “Two-Sided.” Click to check this box.
  4. After you check the box, a new menu called “Layout” might appear on the screen.
  5. In the layout menu, you will see an option called “Two-Sided.” Click on it.
  6. You can now choose between “Long-Edge binding” and “Short-Edge binding.”
  7. Make your choice based on your specific needs, look at the preview, and start your printing process.

Troubleshooting Common Duplex Printing Errors

Troubleshooting Common Duplex Printing Errors

Sometimes, things go wrong during printing. Even when you think you picked the correct printing settings, your printed pages might not look right when they come out of the printer.

Here is how to fix the most common problems to improve your user experience, save paper, and stop feeling frustrated.

Why Are My Back Pages Printing Upside Down?

This is the most common problem people face with duplex printing. If the text on the back of your page is upside down, it means you picked the wrong flipping setting for your specific layout. For example, if you printed a tall, vertical orientation page and you picked short edge flipping, the back page will be completely upside down when you turn it like a book.

To fix this upside-down issue, just open your printer settings on your screen again. If the setting is on short edge, change it to long edge.

If it was on the long edge, change it to the short edge. We always recommend printing a small test page first before printing a big booklet or large marketing materials. This small test step helps check the functionality and prevents wasting lots of printer ink.

Fixing Binding Margin Issues

Another common issue is the binding margin.

When you bind pages of a book together, you need a little bit of extra blank space on the side of the paper where the glue, spiral, or staples go. This blank space is called a margin. If you do not leave enough blank space, the printed words might get hidden in the middle of the book.

You need to know if you are binding the longer side of the paper or the shorter side of the page. If you choose the long edge setting, make sure the left side margin is a little bit wider. If you choose the short edge binding setting, make sure the top edge margin is a bit wider.

Most simple PDF editor programs let you add a “gutter” or a binding margin to make sure your readability stays very high.

FAQ’s:

Which Flip Setting Is Best For A Standard Word Document?

For a normal, tall Word document, the flip on long edge setting is the absolute best. It lets you turn the printed pages from right to left, just like a standard book. This makes reading very natural and easy for everyone.

Why Do My Double-Sided Prints Come Out Upside Down?

They come out upside down because the printer flipped the paper the wrong way. If your paper is tall (portrait orientation), and you picked the short side option, the back side will be upside down. Just switch to the long edge option in your print settings to fix this problem quickly.

Why Is the Text on the Back of my Page Upside Down?

As we mentioned above, this happens because there is a mismatch between your file layout and your flip setting. Tall pages need long-edge flipping. Wide pages need short edge flipping. Picking the wrong one flips the back text upside down on the sides of the paper.

What is the Standard Default Setting For Double-Sided Printing?

Most modern printers have the flip on long edge setting as the standard default choice. This is simply because most people print standard, tall letters and PDF files that read like normal books.

Are There Common Issues If I Select the Wrong Edge Flip Setting?

Yes, the main issue is that the text on the sides of the paper will not match up correctly. You will have to constantly flip the whole paper upside down to read the back side. This hurts the usability of the paper and can make professional manuals look very messy and hard to read.

How Should I Print A Landscape (Horizontal) Document?

For a landscape orientation document, you should almost always select the short edge option. Because the paper is wide, binding the shorter side lets you turn the pages like a normal book, making it very easy to read wide diagrams and charts.

Are These Settings the Same For Both Windows and Mac?

The exact words might look a tiny bit different on the screen, but the basic functionality is the same. Both a Microsoft Windows PC and an Apple macOS computer offer a long-edge and short-edge option when you turn on the duplex printer settings.

Is There A Simple Way to Remember When to Use Long Edge Or Short Edge Flipping?

Yes, there is! Just think about a normal reading book and a top-bound notepad.

If you want your paper to read like a normal book, pick the side you want to bind. For tall paper, bind the long edge. For wide paper, bind the short edge. If you want it to flip over the top like a notepad, bind the top edge.

Also, if you are printing a short-edge PDF, you need to match the settings to the file. It is that simple!

Conclusion

Getting your printer to do exactly what you want does not have to be hard or confusing. At Designers Choice, we want to make every step of your creative work as smooth and easy as possible. Now you know the real differences between flip on long edge vs short edge.

You know that tall pages usually need the long edge option, while wide pages need the short edge option. Remember to check your print settings and always print a quick test page if you are not sure. This saves a lot of time and keeps your printed pages looking great.

Whether you are printing a file to download from adobe reader, google chrome, an android phone, or a pc, you can control the printing options very easily. Paying attention to these small details and nuances helps you create amazing booklets, brochures, and marketing materials that show true excellence. The next time you hit the print button for a pdf document, you will know exactly which duplex setting is the right choice for you and your amazing projects!

Categories
Design

Thumbtack Vs. TaskRabbit: Which Service Platform Is Best?

At Designers Choice, our team has years of hands-on experience in the design field. We created this platform to be the resource we always wished we had. This is a place where expert knowledge meets great ideas.

We know the hard work it takes to turn great ideas into real things.

Getting the right materials and keeping up with new trends takes a lot of effort. That is why we have gathered a collection of top-quality products, smart solutions, and trusted tips. All of this is made for fellow professionals who want the best. Our mission is to help you bring your boldest visions to life. We are backed by a community that values hard work and excellence as much as you do.

When you plan a home improvement project, you might need extra hands. When you have too many everyday tasks, you might need a good service provider. This is where a mobile app steps in to save the day.

Today, we will look closely at the main keyword: Thumbtack vs TaskRabbit. We want to help you make an informed decision on which online platform is a better choice for your needs. We want you to feel sure about your choice. Finding the right help should be easy and stress-free.

Because there is a high market demand for fast help, these platforms have grown very large. Let us look at both of these options in detail.

Understanding Thumbtack Vs TaskRabbit: A Quick Overview

Understanding Thumbtack Vs TaskRabbit: A Quick Overview

What is Thumbtack?

Thumbtack is a very large online platform that works all across the United States. It connects regular people with local professionals for many different jobs. If you need skilled professionals for big jobs like home repair, real estate help, or even event planning, Thumbtack is a great place to look. The Thumbtack business model works like a giant lead generation platform. This means it helps business owners find potential customers in their specific zip code. Whether you need a small fix or a major change to your house, Thumbtack offers a wide range of services. You can type what you need into the search bar, and the site will show you people who can do that job.

It is like a big digital phone book that also lets you text the workers. Many small businesses use it to grow and find new potential clients.

What is TaskRabbit?

TaskRabbit is another popular mobile app and service marketplace.

TaskRabbit’s model focuses much more on everyday tasks and quick chores. If you need immediate help with Ikea furniture assembly, moving heavy boxes, or basic house cleaning, the TaskRabbit app is a top pick. It is a huge part of the gig economy.

The platform matches you with people ready to work right away. The major difference is that TaskRabbit is often the best option for fast, small jobs, while Thumbtack focuses on bigger, long-term professional services. TaskRabbit started in San Francisco and has grown to many cities since then. It is designed to be a fast, readymade solution when you just do not have the time to do a chore yourself.

Thumbtack Vs. TaskRabbit: Key Features Compared

Thumbtack Vs. TaskRabbit: Key Features Compared

Types of Services Offered

When we look at the types of services, we see some key differences.

Thumbtack gives you a very wide range of services. You can find experts for complex electrical work, personal training, digital marketing, and even app development. They cover almost any type of service you can think of. You can hire wedding photographers, house painters, and dog trainers.

On the other hand, TaskRabbit is known for simpler things.

People use it heavily for furniture assembly, running errands, waiting in lines, or small fixes around the house. Both online marketplaces serve the home service industry, but their target market is quite different.

Thumbtack wants to help with big life events and major home upgrades. TaskRabbit wants to help you finish your weekend chore list.

Booking Process and User Experience

The customer experience is very important when using any app.

On the TaskRabbit app, the booking process is extremely fast.

You pick a task, see a list of available workers, check their hourly rate, and book one right away. You know exactly who is coming and what they charge. It is a fast, ready-made solution.

When looking at the mobile app, you will notice some essential features that make booking easy. Thumbtack has a different user experience.

You have to answer a few questions about your project first.

Then, local professionals review your needs and send you price quotes. You can compare the quotes, read reviews, and then decide.

This smart automation helps you find a really good fit for larger projects. It takes a little more time, but it helps you find the right match.

Availability and Coverage Areas

Both of these platforms cover many cities in the United States. TaskRabbit started in San Francisco and grew from there to most big cities.

If you live in a big city, you will find many workers ready to help with everyday tasks. Thumbtack is also in many places.

Because it works with many independent small businesses, it often reaches further into smaller towns and rural areas. You just type in your zip code to see who is working near you. If you live far away from a big city, Thumbtack might have more options for you than TaskRabbit.

Both platforms are always trying to reach more potential customers in new areas.

Pricing and Fees: Thumbtack Vs. TaskRabbit

Pricing and Fees: Thumbtack Vs. TaskRabbit

How Thumbtack Charges Customers and Pros

The thumbtack business model is very interesting. Customers do not pay any direct fee to the app to search for help.

Instead, the service professionals pay a fee.

Thumbtack charges these pros for lead generation. When a customer reaches out to ask a question or get a quote, the professional pays a fee for that lead. The pro then sets their own price for the actual job.

They manage their own revenue streams and their own business vision. They act as independent business owners.

Because the pros pay to talk to you, they are usually very serious about wanting the job. They want to turn you into a paying client to make back the money they spent on the lead generation platform.

How TaskRabbit Charges Clients and Taskers

TaskRabbit has a completely different revenue model. The worker sets an hourly rate for their time.

TaskRabbit then adds a service fee on top of that hourly rate. The customer pays this total combined amount.

The worker takes home their full hourly rate, and the company keeps the service fee to run the mobile app and provide customer support.

This setup makes the pricing very clear for everyday tasks. You look at the app, see a person charges thirty dollars an hour, and you know exactly what to expect. There are no hidden surprises when you look at the hourly rate.

Which Platform Offers Better Value?

To find a better choice for your wallet, you must think about what you actually need. For a fast job like Ikea furniture assembly, TaskRabbit is very often cheaper and much faster. You pay the hourly rate and the service fee, and the job gets done in a few hours. For big home improvement jobs, Thumbtack might give you better value in the long run.

You can get quotes from many skilled professionals and pick the best price for your budget. You can compare different business models and find a team that offers the right price for the right quality.

Pros and Cons: Thumbtack Vs TaskRabbit

Pros and Cons: Thumbtack Vs Taskrabbit

The Advantages and Disadvantages of Thumbtack

A big advantage of Thumbtack is the wide range of options it provides. You can hire people for complex event planning, long-term project management, or even creative content creation. It is a fantastic tool for larger projects. You can see past work and read deep reviews.

However, there are some cons of Thumbtack to think about.

Because the pros have to pay for leads, some might charge you a little more to cover their own costs. Also, when you ask for a quote, you might get too many messages from different local professionals.

This can take a lot of time to read through and manage. If you are in a rush, this process might feel a little slow.

The Advantages and Disadvantages of TaskRabbit

TaskRabbit is very easy to use for everyone. The mobile app is simple and clean.

It is absolutely the best option for quick help around the house. A disadvantage is that the workers might not be highly licensed experts.

They are great people looking for a side hustle, but maybe not the best choice for dangerous electrical work or massive home repair jobs.

Another con is that the service fee added to the final bill can make a long job cost a lot of money. If a task takes ten hours, that hourly fee adds up very fast. You must think about the time a job will take before you hire someone on an hourly rate.

Thumbtack Vs TaskRabbit For Service Providers

Thumbtack Vs TaskRabbit For Service Providers

Earning Potential and Lead Generation

If you are a service provider, you really want to know about your earning potential.

Thumbtack is a very strong lead generation platform. It helps small businesses find potential clients every single day. However, you have to pay money for leads, even if you do not get the final job. You need good operational efficiency to make money and not waste your budget.

You have to be good at talking to potential customers. TaskRabbit does not charge pros any money to find work.

It is a great side hustle for people who want to start making money right away. You just accept jobs on your phone and get paid your hourly rate.

Building Your Business Profile

On Thumbtack, building your online profile is a major key to success.

You need to show your competitive edge to win jobs. You can list all your professional services and show bright pictures of your past work.

It acts almost like handyman business software for some users, helping them track their jobs and talk to people.

On TaskRabbit, you also make a profile, but it is much more about showing you are reliable, friendly, and fast for everyday tasks.

You want to show that you have good customer experience skills and can show up on time for a job like furniture assembly.

Thumbtack Vs. TaskRabbit For Customers: Which Should You Choose?

Thumbtack Vs. TaskRabbit For Customers: Which Should You Choose?

Best For Quick, Everyday Chores (TaskRabbit)

If you need someone to help with moving a few boxes, deep cleaning your kitchen, or completing furniture assembly, pick TaskRabbit.

The TaskRabbit app gives you a fast readymade solution. It is built for speed and ease of use. The customer support team is ready to help if something goes wrong with a simple job. You do not have to wait days for quotes. You just open the app, find a person, and get the job scheduled for that same afternoon or the next day. It is perfect for busy people who need immediate help with simple things.

Best For Specialized Or Larger Projects (Thumbtack)

If you are planning a big change to your property, Thumbtack is the better choice. When you need skilled professionals for a home improvement task, real estate photography, or complex home services, this home services platform is best. It lets you check thorough reviews and talk to real business owners before you hire them. This helps you make a truly informed decision. You can take your time, ask questions, and ensure you are hiring the best possible team for your big investment. It is the best option for larger projects.

FAQ’s:

Is Thumbtack Vs TaskRabbit Better For Moving Services?

For a small move, like moving a couch or carrying a few heavy items up the stairs, TaskRabbit is fast and easy.

You can hire two people for an hour to help you. For a whole-house move, Thumbtack is much better because you can hire fully professional moving companies with big trucks and insurance. The type of service matters a lot here.

Do Workers Set Their Own Rates on Both Platforms?

Yes, they do. On TaskRabbit, workers set a clear hourly rate for their time. On Thumbtack, service professionals give you a full price quote for the whole job, or they might offer their own hourly rate based on their specific business models and what the job requires.

Which Platform Is Safer For Customers?

Both platforms care a lot about the customer experience and safety.

They both check the background of the workers who sign up. TaskRabbit has a pledge to help fix things if a job goes wrong. Thumbtack has a guarantee program to help protect you and your property during the job. They both want to offer a safe service marketplace.

As A Freelancer, Should I Join Thumbtack Or TaskRabbit?

If you want a simple side hustle for easy jobs on the weekends, TaskRabbit is a very good fit. You do not have to pay to get jobs.

If you have a true business vision and want to find long-term potential customers to grow your company, Thumbtack is a better choice for you. You can build real revenue streams there.

How Do Fees Differ Between the Two Platforms?

TaskRabbit charges the buying customer a service fee on top of the worker’s set rate.

The customer pays everything at the end. Thumbtack charges the professional worker a fee for lead generation up front, and the customer just pays the professional directly for the work done. The major difference is who pays the platform.

Conclusion

In the end, picking between Thumbtack vs. TaskRabbit comes down to what you actually need right now.

At Designers Choice, we know that getting the right help is very important for any successful project. Your time is valuable. You should spend it enjoying your home and your life, not stressing over chores and repairs. Using an online platform to find help is a smart move. If you have a long list of everyday tasks or need fast furniture assembly, the TaskRabbit app is a great tool. It is a simple and fast service marketplace.

But if you have larger projects, need highly skilled professionals, or want a wide range of services, Thumbtack is definitely the way to go.

Both are great online marketplaces in the modern gig economy. By knowing the major difference between their business models and the types of services they offer, you can find the perfect help for your home or business.

Remember to always read reviews from other customers before you hire anyone on any app. Look at pictures of their past work. Ask them clear questions about their experience. Both Thumbtack and TaskRabbit have systems to keep you safe and ensure you are happy with the work.

Choose TaskRabbit for the fast, easy chores. Choose Thumbtack for the big, important projects that need a true expert. Whichever home services platform you choose, you are taking a great step toward getting your project done right.

Categories
Design

How to Get the Best Webcam Border: Free PNG Overlays & Guide

At Designers Choice, we know that looking good on camera matters a lot.

When you are doing a live stream or talking to friends online, a simple camera feed can look a bit plain and boring. That is where a good webcam border comes in to save the day. A webcam border frames your camera feed, making your entire setup look neat and very professional.

We are here to help you find the best options for your channel.

Whether you want a webcam border free download or a brand new custom design, we have the tips you need. If you need a webcam overlay, animated, free, or just a plain webcam border PNG, you will find it here.

Let’s look at how to pick, make, and add a great frame to your camera.

A good overlay can change how people see your videos. We want to give you the best advice for your Twitch stream.

Our goal is to make things easy for every creator. Read on to learn all about these cool frames and how you can use them on social media, too.

What Exactly Is A Webcam Border and Why Do You Need One?

What Exactly Is A Webcam Border and Why Do You Need One?

A webcam border overlay is a digital frame that sits right on top of your camera feed. Think of it like a nice picture frame for your live stream video. It makes your video feed look much better and much more fun to watch. You might see these frames often on a popular Twitch stream or on a big YouTube channel. They are very helpful for any creator who wants their video to stand out from the crowd.

A simple webcam overlay can do a lot of heavy lifting for your channel. When you have a nice frame, your viewers will know that you care about your gaming footage. You can use a static webcam overlay pack or an animated one. Let’s look at why you need one.

Elevating Your Stream’s Visual Identity

Making your live stream look nice gives you a strong visual identity.

When you have a good layout, people remember your channel better. A matching twitch overlay and webcam overlay show that you care about your content. It adds polish to your brand, much like a good logo does. A cool stream overlay package makes everything match perfectly.

If you have a neat interface, your viewers will like it more. It helps you look like a top creator. You can share your screen on social media and look great. Your Facebook and Instagram fans will love the new look. A clear visual identity helps you grow fast.

Hiding Messy Backgrounds and Cropping Edges

Sometimes, your room might be messy. A good frame helps hide the rough edges of your camera shot. You can crop your camera source in OBS Studio and put a webcam border overlay right on top of it. This makes everything look clean.

You do not have to worry about people seeing the messy corners of your room. A solid transparent overlay will cover the bad spots and only show your face. This makes your setup look much better. You can focus on your Twitch stream instead of cleaning your room.

Hiding the bad edges makes your gaming footage look sharp and clear.

Adding Important Stream Labels (Recent Subscriber, Follower, etc.)

A webcam border is not just for looks. Many stream overlays have blank spaces for stream labels.

You can show the name of your last subscriber, latest follower, or top donor. These cool widgets fit right into the interface of your frame.

It helps you say thank you to your fans while you play your gaming footage.

A good layout will have room for alerts and other text. You can put your Discord link right on the frame, too. Adding alerts to your overlay makes your viewers feel special. Every big creator uses labels to say thank you.

Top Design Styles For Your Next Webcam Border

Top Design Styles For Your Next Webcam Border

When you want to download a new frame, you have many fun styles to pick from. Every person likes something different for their twitch stream. Here are some top styles you can choose for your setup. We will look at minimal styles, bright styles, and moving styles.

Minimalist and Clean Borders

A clean design is very popular right now. These static webcam overlays just use simple lines and basic colors. They do not distract from your face or your gaming footage. If you want a nice transparent overlay that looks simple and neat, a clean webcam border PNG is a great pick.

It adds just enough polish to look good. Clean stream overlays are great for any creator. You can find many free webcam overlays that use this simple style. A clean frame works well for Facebook gaming and YouTube videos.

Neon and Cyberpunk Overlays

If you play fast action games, you might really like a neon style. These frames have bright, glowing colors that pop out on the screen. A neon frame fits perfectly with a dark twitch layout. You can also find grungy or grunge styles if you want a rough, cool look.

A grunge style looks a bit messy on purpose, which fits some games. A grungy style is very fun to look at. A bright neon overlay catches the eye very fast. Many streamers use neon lights to make their live stream look cool.

Animated Vs. Static Borders: Which is Better?

You have to choose between moving frames and still frames. An animated frame has moving lights or shifting colors.

A webcam overlay animated free can look very flashy and fun. Still frames are just pictures, like a simple PNG or SVGs file.

Still frames use much less computer power. Animated ones look cooler but might slow down an older computer. A static webcam overlays pack is safe for slow computers. You must pick the one that fits your computer setup. If you want a fast game, a plain PNG frame is the best choice.

How to Create A Custom Webcam Border For Free?

How to Create A Custom Webcam Border For Free

You do not always have to buy one. You can make free webcam overlays yourself. Here is how you can build your own frame without spending any money at all. You can use basic tools on your computer.

Using Canva For Easy Static Designs

Canva is a great browser tool for beginners. You can start with a blank page and add shapes. They even have some free twitch template designs. Just make sure the middle is clear so your camera can show through.

You can add your social media names like Facebook or Instagram right on the frame. You can also type out your discord link. Canva lets you download your work very fast. It is very easy to make a static webcam overlays pack in just a few minutes.

Designing in Photoshop Or Photopea

If you know how to use more tools, try Photoshop.

Photopea is a free tool on the internet that works just like it in your browser. You can draw your frame, add cool effects, and make a custom transparent overlay. You can even bring in an ai image to trace. It is a good way to make sure your frame looks exactly how you want it to look.

You get to control every logo and pixel. You can make a neon frame or a grunge frame yourself.

Exporting With A Transparent Background (PNG & WebM)

When you save your design, you must save it the right way. For a still picture, save it as a PNG file. This keeps the background see-through.

If you made an animated frame, you should save it as a WebM file. This format works great for video and keeps the file size small so your live stream stays fast. You can also save some parts as SVGs if you need them. Remember that a transparent overlay needs a clear middle.

A solid middle will block your webcam feed. Always check your export settings.

Best Places to Download A High-Quality Webcam Border

Best Places to Download A High-Quality Webcam Border

If you do not want to make your own, you can find a webcam border free download on the internet. There are many places to get a great HD frame. Let’s look at where you can download them for your channel.

Premium Marketplaces (Nerd Or Die, OWN3D)

Some websites sell very high-quality designs. Sites like Nerd Or Die or OWN3D have big packs. These packs come with alerts, a webcam overlay, and a full twitch stream layout.

They give your channel a lot of polish. You do have to pay for these, but they look very professional. They are perfect if you want a complete Twitch overlay setup. You will get a lot of widgets and a nice interface. The cost is worth it for a top creator.

Hiring Custom Designers on Fiverr Or Upwork

You can also pay someone to make a frame just for you.

Websites like Fiverr have many artists. You can tell them what you want, like a specific logo or a certain color. They will build a custom interface for your stream. This way, no one else will have the same frame as you. They might even make a cool AI video intro for you.

A custom layout makes your setup very special. You can ask the artist to make the frame animated or grungy.

Finding Free Community Resources

If you want free webcam overlays, check out community sites. Many people share their work in a Discord community or on YouTube. You can find a webcam overlay animated for free or a simple webcam border PNG if you look hard enough.

Just make sure the art is royalty-free before you use it on your channel. Sometimes you can even find a cool AI image frame made by fans. A good Discord community shares many free Twitch items. Streamers love to help each other out.

You can download a great free Twitch template today.

How to Add Your New Webcam Border in OBS Studio?

How to Add Your New Webcam Border in OBS Studio?

Once you have your frame, you need to put it on your video. OBS studio is the best program for this. Here is how to set it up perfectly. It is very simple to do.

Adding the Image or Media Source

First, open OBS Studio. If your frame is a picture, add an “Image” source.

If it is moving, add a “Media Source.” Then, select your download file. Make sure the transparent overlay sits on top of your camera source. You want your face to show in the middle. The overlay must cover the edges of the webcam. The PNG file must be the top layer.

Aligning and Grouping Your Camera and Border

Next, click and drag the edges of your frame so it fits around your camera source. Once it looks perfect, you can group them. Select both the webcam and the frame, right-click, and choose “Group.”

Now, when you move your camera around the screen, the frame will move with it! This keeps your setup nice and neat. You can resize them together without messing up your layout. This makes managing your stream overlays much easier.

FAQ’s:

What File Formats Are Best For Webcam Border Overlays?

For still frames, a PNG file is best because it keeps the background clear. For moving frames, WebM is the top choice because it is a small file size but keeps the HD video quality. Both are very easy to download. You can also use SVGs for some very simple flat designs.

What Dimensions Should My Webcam Border Be?

Most cameras are in a 16:9 ratio. A common size is 1920×1080 pixels. Your frame should match this size so it fits perfectly around your video feed without looking stretched. A matching size means your HD gaming footage will look perfect inside the frame.

How Do I Make Sure the Middle of my Webcam Border is Transparent?

When you make your frame, you must delete the background layer in the middle. When you save it as a PNG or WebM, the middle will stay empty so your face can show through the hole. A good transparent overlay has a completely clear center.

Do I Need an Animated Webcam Border?

No, you do not need one. A moving frame looks very cool, but a simple, still webcam border PNG also works great. It is up to what you like best for your channel. A static webcam overlay pack is fine for most streamers. Many top channels use plain frames.

Can I Use A webcam Border on Zoom Or Microsoft Teams?

Yes! You can use a program like OBS Virtual Camera to send your framed video straight to Zoom or Teams. This makes your work calls look very professional. You can even use a nice logo in your frame for business calls.

How Do I Add A Webcam Border Overlay to My Webcam Feed Using OBS?

Just add your camera as a source first. Then, add an Image or Media Source for your frame. Put the frame layer above the camera layer so it sits on top. It is very simple to do in OBS studio. You just drag the overlay layer above the camera source layer.

Can Webcam Borders Be Used For Both Gaming and Non-Gaming Streams?

Yes, they work for any kind of video. Whether you are showing gaming footage, chatting with viewers, or doing a podcast, a nice frame makes your video look better. Social media loves clean frames. An ai video podcast can look great with a custom layout.

Why Doesn’t My Webcam Fit Perfectly Inside the Border I Downloaded?

Sometimes the size is wrong. You might have to crop the sides of your camera feed in OBS studio to make it fit. You can do this by holding the Alt key and dragging the edges of your camera. This will crop your video to fit the twitch overlay frame perfectly.

Conclusion

Getting a good webcam border is a very smart move for any creator. It frames your face nicely and hides any messy spots in your room. Whether you pick a free twitch template, a cool neon design, or a simple webcam border PNG, it makes your live stream look much better.

You can easily find free webcam overlays online or make your own using simple tools in your browser. Then, just add it to your camera source in OBS studio, and you are ready to go. A nice twitch overlay or stream overlays package will make your channel look great.

Go ahead and download a new frame today to make your next video shine! Remember to share your new look on social media like facebook and instagram. Your fans will love the new interface and alerts. Have fun making your stream look amazing!

Categories
Design

Best Stream Designs to Grow Your Live Streaming Channel Today

At Designers Choice, we are passionate designers with years of hands-on experience. We created this platform to be the resource we always wished we had. This is a place where great skills meet fresh ideas.

We know the hard parts of turning creative ideas into reality.

It takes a lot of hard work. From finding the perfect materials to staying ahead of design trends, we have seen it all. That is why we offer top-quality products, smart solutions, and trusted facts. We make sure everything is perfect for fellow professionals who demand the best.

Our main goal is to help you bring your boldest visions to life. We want you to succeed in everything you do.

We are backed by a community that values deep creativity, hard work, and doing things right, just as much as you do.

If you want to be a great content creator, you know that live streaming is growing very fast today. To stand out, you need the right tools.

Good stream designs change how people see you right away. They give you a professional look from the very start.

When someone clicks on your Twitch channel, they choose in just a few seconds. A nice stream overlay helps make a great first impression.

We will show you how to find and use the best stream designs today. We will even talk about how to get stream designs free of charge.

Whether you play games on major platforms or host talk shows, your stream graphics matter a lot.

Why High-Quality Stream Designs Matter For Your Growth?

Why High-Quality Stream Designs Matter For Your Growth?

Establishing Your Unique Brand Identity

Your brand is how people remember you. In the busy streaming world, a matching look helps a lot. It tells people exactly who you are.

When you use a custom stream overlay, you show off your true style. This style can be dark and moody. It can also have very bright colors.

It is all up to you and what you like. A good stream design links your Twitch stream to your social media pages. This means your Twitch banners will match your Twitter and Instagram. When you have a consistent design, fans always know it is you. They do not get confused.

They see your page and know they are in the right place. You want to pick specific design elements and stick with them.

Do not change your look every single day. This sets you apart from the large crowd of content creators.

The biggest streamers always have a clear look. You can look at their twitch panels and know exactly who they are without even reading the name. This is the first step in the right direction for your channel.

Increasing Viewer Retention and Engagement

You want people to stay and watch your live stream. You also want them to talk a lot in the chat. This is called viewer engagement.

Good stream designs keep eyes on the screen for a long time. For example, a bright goal bar shows people what you are working towards.

When they see the goal bar fill up, they feel happy. They might even help you reach it faster.

An animated stream overlay can catch a viewer’s eye right away.

You can also add a chat box to your screen. When fans see their own words pop up on the stream overlay, they talk more. You can even set up fun sound effects that play when someone follows you.

These custom widgets make the show very fun. Little things like twitch emotes make people smile and laugh. When the show is fun, people stay longer. They do not get bored. They want to see what happens next.

This helps your twitch channel grow much faster.

Looking Professional to Potential Sponsors

When your channel gets bigger, companies might want to pay you to show their products. These companies want to work with a content creator who looks serious. A messy screen looks very bad. A clean stream design gives you a professional look.

It shows you care a lot about your twitch channel. If you use a nice twitch stream overlay, sponsors know you put hard effort into your work.

They will trust you much more. They will look at your stream panels below the video to see your links.

If those stream panels look great, the sponsor feels happy. You do not need to spend a lot of money to look good.

You can even find stream designs free online that look very nice. But you must put the pieces together neatly in your obs studio. Make sure your webcam frames are straight. Make sure your stream alerts are not too loud.

Doing this simple work shows you are ready for the next level.

Essential Elements of Modern Stream Designs

Essential Elements of Modern Stream Designs

Stream Overlays (Webcam Borders and Gameplay Frames)

A stream overlay sits directly on top of your video. It acts just like a picture frame for your live streaming show.

One very important part is the webcam overlay. Webcam frames make your camera video look neat and tidy.

They hide messy edges around your room.

They also separate your face from the background game. Gameplay frames do the same thing for the video game you are playing. If you stream on Facebook Gaming, a nice border makes the game pop out more.

You can find many free stream overlays to start with. Later, you can get custom stream overlays made just for you. Setting these up is very simple. You just add them as a media source in your popular broadcasting software. You can move them around on your OBS scenes until they look just right. A good twitch overlay helps viewers focus on what is important. It is a key piece of your stream package.

Stream Screens (Starting Soon, BRB, and Ending Layouts)

You cannot always be in front of the camera. Sometimes you need a short break. This is where stream screens help you. A “Starting Soon” screen is great for the first time you go live each day. It gives fans a few minutes to join the Twitch stream before you start talking.

You can put a timer and some cool sound effects on this screen. A “Be Right Back” screen is for when you need to get water or go to the restroom. It tells viewers you are not gone forever.

Finally, an end scene tells everyone the show is completely over.

You can use this end scene to list your social media links one last time. Many streamers use an animated stream overlay for these screens to keep things moving. You can build these screens in OBS Studio or Twitch Studio.

Having these screens ready makes you look like one of the biggest streamers on the internet.

Animated Alerts and Notifications

Stream alerts are very fun to watch. They pop up on the screen when someone does something nice for you.

For example, if someone gives you money or shares your video, an alert shows up. You can have alerts for new followers, too.

Animated alerts and notifications make your live stream super exciting. You can use moving pictures and loud sound effects.

When a fan sees their name on the stream overlay, they feel very special. You can set these up using tools like Stream Elements or Own3D Pro.

These tools link directly to your streaming platform. You just copy a link and paste it right into your OBS Studio.

Many free overlays include neat alert boxes. You can pick bright colors or dark, edgy design styles.

Whatever you pick, make sure the alerts match your main stream graphics. Matching helps build a very consistent design for your brand.

Information Panels and Channel Banners

When a fan scrolls down below your video, they see small boxes with text. These are called twitch panels or stream panels.

They are very useful for your fans. You use them to share your daily schedule, chat rules, and links to your social media.

You can also list the gear you use, like your Stream Deck or computer camera. Good stream panels keep everything perfectly organized.

You should also think about your Twitch banners. This is the big picture at the very top of your channel page.

It works just like a big billboard on the highway. Your banners and panels should closely match your Twitch stream overlay.

You can buy a full stream package that has everything you need in one box. This makes it very easy to get a professional look fast.

If you do not want to buy one, you can find free stream overlay packs online. Just make sure the graphical elements look nice together.

Custom Emotes and Subscriber Badges

Twitch emotes are tiny, funny pictures that fans type in the chat. They are a massive part of the streaming world.

Fans truly love to collect and use them every day. When someone pays money to subscribe to your channel, they get special emotes. They also get a little badge right next to their name in the chat box. You can have badges that change based on how many months they have been a fan.

Getting custom emotes is a great way to build your brand fast. You can draw them yourself or pay an artist to help.

You should make emotes that show your face or inside jokes from your stream. Emotes create high viewer engagement.

Fans will type them very fast when something funny happens. This makes the chat box move fast and look exciting.

It is a big reason why people stay and watch. Custom widgets that show emotes floating up on the screen are also very popular right now.

How to Source the Best Stream Designs For Your Budget?

How to Source the Best Stream Designs For Your Budget?

DIY: Creating Your Own Graphics (Top Software Picks)

If you want to save your money, you can make your own stream design. Many people do this when they first start live streaming.

You do not need to be a big expert. There are easy tools you can use today. Some people even use simple programs like Windows Explorer to sort their image files before building their scenes. For the actual drawing part, you can use online photo editors.

If you want moving parts, you might need stronger tools.

Some big teams even use Unreal Engine to make 3D graphics, but that is very hard for beginners. For a simple twitch overlay maker, look for websites that let you drag and drop shapes easily. You can add your own bright colors and text. You can build webcam frames and an end scene in just a few hours. Making your own free stream overlays is fun and helps you learn how things work behind the scenes.

Free Vs. Premium Pre-Made Templates

If you do not want to make your own art, you can download premade stream overlays. There are two main types: free and premium.

Free stream designs are great for your first time online. Websites offer free overlays that look very nice. You can find a basic stream overlay or even a full stream overlay pack. The good thing is you do not spend any money at all. The bad thing is that many other people might use the same design.

Premium stream overlays cost money, but they look much better. They often come as a huge Twitch overlay package. You get the stream overlay, stream alerts, twitch panels, and neat scene transitions all in one file.

Places like Own3D Pro or GetRekt Labs sell amazing premium options. Some packages, like the own3d brave series, are extremely popular right now. Spending a little money can push your channel to the next level.

Hiring A Professional Stream Designer (What to Look For)

If you want a look that is totally yours, you must hire a real artist.

A professional stream designer will make custom stream overlays just for you. No one else in the world will have them.

When you hire someone, you tell them exactly what you want to see.

You can ask for an edgy design or cool neon elements. You can tell them the exact bright colors you like best.

When looking for an artist, always check their past work first. You want to see if their style matches what you want for your Twitch channel.

Look for artists who make clean design elements and smooth scene transitions. A good artist will give you everything you need for OBS Studio. They will give you files that are easy to add as a media source.

Hiring someone costs the most money, but it is the absolute best way to get a perfectly consistent design.

Trending Stream Designs For 2026

Trending Stream Designs For 2026

Minimalist and Clean Aesthetics

In 2026, many of the biggest streamers really like simple looks. We call this a minimalist style. It means you do not put too many things on the screen. The game and your webcam overlays take up most of the space. The Twitch stream overlay is very thin and small.

The chat box is small or hidden away. This style is great because it does not distract the viewers. They can focus purely on the live stream action.

Clean aesthetics make your channel look very neat.

You use simple fonts and only one or two colors. This trend is very popular on major platforms right now.

Even a free stream overlay can look highly professional if it is kept simple. It is a very smart choice for any content creator.

3D and High-Fidelity Animated Elements

On the other side of simple, we have big 3D designs. Computers are very fast now.

Streamers can use strong tools like unreal engine to put wild 3D graphics on their screen. You might see big 3D coins drop when someone gives a tip. You might see 3D characters dancing in the corner.

High-fidelity means the pictures look almost real.

These animated stream overlays are amazing to watch. They create massive viewer engagement every single day. Fans love to see the cool stream alerts pop up. Building these takes a whole lot of skill. You usually need to buy a premium stream overlay package to get this big look.

Or, you can hire top studios like getrekt labs to make them for you. If you want to shock people, this is the style to pick for your OBS scenes.

Retro and Pixel Art Styles

Everything old is new again today. Retro designs are huge in 2026. This means making your twitch stream look like an old video game.

You use pixel art, which is art made of tiny, visible squares. It looks just like games from the older days. This style is very charming.

It is a great fit if you play old games on your streaming platform. You can find a twitch overlay package that looks like an old arcade machine.

The stream panels can look like old computer menus. You can even use sounds that beep and boop. Pixel art is a fun, edgy design choice.

It brings a lot of happy feelings to the crowd of content creators. Many most popular overlays use this fun throwback style.

It is a guaranteed way to make your channel feel warm and friendly.

FAQ’s:

How Much Do Custom Stream Designs Typically Cost?

The cost changes a whole lot.

A simple custom twitch overlay might be twenty dollars.

A massive stream package with custom widgets, animated stream overlays, and custom emotes can cost hundreds of dollars. It depends on the artist you pick and how much work they have to do.

What Software Is Best For Creating My Own Stream Designs?

To make pictures, many people use free online photo editors or cheap drawing apps.

To put those pictures on your live stream, you need popular broadcasting software. Most people say OBS Studio is the very best. You can also try Twitch Studio if you want something very easy to set up.

Will Animated Stream Designs Slow Down My Stream?

They can, if your computer is slow. Moving pictures take more power to run. If you use a very heavy animated stream overlay, your game might slow down. It is smart to test your OBS scenes before you play. If things run poorly, try a static stream design instead.

Where Can I Find Free Stream Designs to Get Started?

There are many websites made just for streamers. A quick web search for a free stream overlay will show you hundreds of choices. You can download stream overlay packs for free. Just remember that many other people use these same free overlays, so they are not perfectly unique.

What is the Standard Resolution For A Stream Overlay?

Most computer screens use a size called 1920 by 1080 pixels. This is the standard HD size. Your stream graphics should match this size perfectly. When you make a background or a full-screen overlay, always make it 1920×1080.

This makes sure it fits perfectly in your OBS studio window.

Conclusion

At Designers Choice, our big mission is to empower you to bring your boldest visions to life.

Setting up your channel with the right tools is the first big step. Good stream designs make a huge difference in how fast you grow online.

Whether you pick a free stream overlay or pay money for a custom Twitch overlay, make sure it fits you well.

Use your OBS Studio to set up neat webcam frames and fun stream alerts. Give your viewers a great reason to stay and chat.

Pick bright colors, keep a consistent design, and always try to look professional. Check for upcoming events to theme your overlays around.

The streaming world is very big, but with the right look, you will shine bright. You can use tools like OBS overlays and stream widgets to make your stream better. Start building your perfect stream package today and watch your channel reach the next level.

Categories
Marketing

How to Create Effective Content: A Simple Step-By-Step Guide

At Designers Choice, we know how hard it is to turn great ideas into real results. We want to help you build things that work well.

You need to make pages that people actually want to read.

That is what effective content is all about. It helps you reach your target audience and meet your business goals smoothly. We share top-quality ideas and trusted tips for professionals who want the best outcomes.

Our mission is to help your marketing team succeed in every way. We believe in creativity and hard work, just like you do.

In this guide, we will show you the exact steps to build a strong marketing strategy. We will walk through the content creation process together.

This is a great way to grow your brand awareness today.

What Exactly is Effective Content?

What Exactly is Effective Content?

It is not just about putting random words on a web page.

Effective content is a specific piece of content that gets real results for your company. It clearly answers questions for the reader.

It helps your potential customers solve their daily problems fast. When you write good content, people stay on your page much longer.

This lowers your bounce rates greatly. It also tells the search engine that your site is very helpful and trustworthy.

Good writing is a huge part of your online success. It is the best way to show your brand voice to the world.

A strong piece of content is always simple, clear, and highly useful.

Defining the Core Elements of Success

Your work must have a clear purpose. Quality content always matches what the user wants to read right now. Good user experience is a big part of your plan. Focus on your friendly brand voice. Speaking clearly to your right audience builds trust for better digital marketing results.

The Difference Between “Good” Content and Effective Content

Many can write a basic blog post easily. But the most effective content makes the reader take action fast. It is a powerful part of your content strategy. Effective writing brings in heavy organic traffic and creates leads. It offers true value and actionable insights for all readers.

Why You Need an Effective Content Strategy Today?

Why You Need an Effective Content Strategy Today?

You need a strong content strategy to win online right now. It is a great way to show people what your brand is all about clearly.

When you share valuable content, people notice you fast. This makes your daily marketing efforts work much better. You cannot just guess what to post on your site. You need a real plan to stick to.

This plan helps your marketing team know exactly what to do at the right time. An editorial calendar keeps everything neat and organized.

Planning saves you time and stops you from making silly mistakes. It helps you build a loyal group of followers who love your work.

  1. Building Brand Authority and Trust: When you share helpful facts, you become a thought leader in your field. People start to trust what you say quickly. Building brand authority takes hard work. Give your target audience exactly what they need. Share original content to prove you offer a clear value proposition.
  2. Driving Organic Traffic and SEO Value: Search engine optimization is how people find you. If you want free visitors, you need steady organic traffic. Search engines look for the best pages. Use relevant keywords in your text to rank higher. A single piece of content can bring thousands of people to your site.
  3. Boosting Lead Generation and Conversions: Lead generation is how you turn readers into buyers. You want visitors to sign up for your email newsletters. Effective content marketing guides people to do exactly that. Write about their daily pain points so they feel heard. This helps you reach your big business goals faster.

How to Create Effective Content? Step-by-Step

How to Create Effective Content?

The content creation process does not have to be hard at all. You just need to take it one easy step at a time.

A clear step-by-step path makes everything simple for your marketing team. You will learn how to make things that people want to read and share today. We will look at the best practices to help you succeed quickly.

Let us look at how to build your solid plan from the ground up. You will see that making a great page is just like building a simple house.

You need a strong base and good tools. If you use the right tools, your site will grow very fast.

  1. Understand Your Target Audience and Their Pain Points: The first step is to know who is reading your pages. Speak directly to the right audience. Think about what daily problems they have. These tricky problems are their pain points. Look at different stages of their buying journey. This tells you exactly what they need right now.
  2. Conduct Thorough Keyword and Topic Research: Know what words people type into the main search engine. Deep keyword research is very important. Look for open content gaps where rivals miss out. You can fill those gaps perfectly with your own content. Find relevant keywords that fit your main topic well to get views.
  3. Create Compelling Headlines and Hooks: Your page title is the first thing people see online. It has to catch their eye. If the headline is boring, people click away fast. This action hurts your site’s bounce rates. Write a strong hook in the first lines. A strong start is a huge part of your content plan.
  4. Structure Your Writing For Readability (Formatting Matters): No one likes to read a giant, messy wall of text. Break things up neatly. Use short paragraphs and clear headings. This simple trick creates a good user experience. Add visual content like pictures. Do not forget to use correct alt text on your images.
  5. Include Clear Calls to Action (CTAs): Tell the reader exactly what to do next. Do not leave them guessing. Ask them to read another blog post or sign up for email marketing. A clear call to action points them right. Always put a strong button at the end. This fits your marketing goals perfectly.

What Makes Content Marketing Effective?

What Makes Content Marketing Effective?

Content marketing is only good if it works well for your business. It has to bring you real value every single day.

Effective content marketing means you get back much more than you put in. You want to see real, steady growth in your brand awareness.

It is not just about posting random things on your site. It is about sharing a specific piece of content that does a specific job for your company.

Let us look at exactly why it works so well. When you map out your plan, everything falls into place. Your marketing team can then work faster and smarter. You will see better results with much less stress.

  1. A Clear Link Between Content and Business Goals: Every post should help your company grow bigger. Tie your daily work directly to your business goals. If you want sales, write about your products. Your marketing strategy falls apart if there is no clear link. Know why you are making a specific type of content before typing.
  2. A Focus on Buyer Intent and Content Purpose: Why is someone searching for a topic? Know their true intent. Some want to buy, others want simple facts. Match your work to their daily needs. Answer questions clearly to provide actionable insights. This proves you offer highly valuable content. Keep the main purpose in clear focus.
  3. Distribution That Matches Format and Audience: Put your hard work where people will see it. Sharing on social media is a great way to get eyes on your page. Use the right platforms. If your target audience likes to read, send email newsletters. Smart distribution is a massive part of your content success.

The Best Formats For Delivering Effective Content

There are many different formats you can easily use today.

You do not have to stick to just one simple style. Trying out different types of content helps you see what works best.

Some people like to read, while others like to listen or watch. You should mix things up to keep people interested in your brand.

Let us talk about the best ways to share your smart ideas with the world. Picking the right layout makes a huge difference. When you package your ideas well, people share them more often. This brings more eyes to your brand authority. Do not be afraid to test out new styles.

  1. Long-Form Blog Posts and Articles: A long blog post is great for teaching people new things. It gives you space to explain hard topics in simple words. Search engines love long articles. They are perfect for daily search engine optimization. Long guides act as the most effective content for steady organic traffic.
  2. Engaging Video and Audio Formats: Videos are very popular in the digital landscape right now. People love to watch short clips daily. Audio podcasts are a great way to share fresh industry trends. Moving visual content grabs attention fast. Turn your best written work into a short video to reach busy people.
  3. Interactive Elements and Infographics: People like to click and play with fun things. Quizzes keep users on your site longer. Infographics are pictures that show facts clearly. They make hard data easy to read. Infographics are highly shared on social media updates. This boosts your daily marketing efforts.

How to Measure the Success of Your Effective Content?

How to Measure the Success of Your Effective Content?

You cannot just publish a page and forget about it forever. You have to carefully track how well it does online.

If you do not check the numbers, you will not know if your plan is actually working. You need to use good analytics tools to see the real truth.

Measuring your results helps your marketing team see what to do next.

Let us look at the numbers that really matter for your growth. Checking your stats should be a weekly habit. It shows you what pages people love the most. Then, you can easily create more things just like that.

This keeps your site growing fast.

Tracking Traffic and Engagement Metrics

See how many people visit your site daily. Use tools like Google Analytics to watch your traffic grow. Check your bounce rates to see if people leave too fast. Look at likes and simple shares on your social media posts.

These numbers clearly show whether you are making truly good content.

Monitoring Conversion Rates and ROI

Making money is better than just getting views. Track your page conversion rates. See how many visitors turn into real leads.

If you spend money on your content creation, you want to see a return on investment. This proves that your content strategy works very well.

Using Analytics to Refine Your Strategy

Numbers tell a clear story. Use this data to fix your plans. If a certain piece of content does well, make more like it.

You can use a/b testing to see which page title works best. This simple A/B testing helps you improve over time.

15 Step-by-Step Tips For Effective Content Writing

Tips For Effective Content Writing

Writing well takes lots of practice and hard work. But if you follow a set path, it gets much easier. We have put together fifteen simple tips to help you write better pages starting today. These easy steps cover everything from finding good ideas to checking your final draft.

If you use these rules, your work will always hit the right mark.

Let us go through each step one by one carefully. Having a checklist makes the job simple. You will never feel stuck or lost if you follow this guide.

These tips form the strong base of any good digital marketing plan. Grab a pen and take some notes!

  1. Know Your Buyer Persona: Know who will read your work. A buyer persona is a picture of your perfect customer. Think about their age and what they need help with. Speaking right to your right audience makes them feel special. This helps build a strong bond with your growing brand.
  2. Generate Content Ideas: You always need fresh topics. Look at what rivals are doing to find big content gaps. Ask your team what questions buyers ask most. Keep a long list of these topics in your phone. This means you will always have something good to write about.
  3. Choose A Content Type: Not every topic should be a long article. Pick the exact right content types for your message. Think about what different formats fit your topic best. A complex topic might need deep case studies to prove your point. Matching the format to the idea makes your work stronger.
  4. Conduct Keyword Research: Find the exact words people type into the search engine daily. Good keyword research gives you a clear map. Place these relevant keywords naturally in your text. This helps the search engines know what your page is about so they can show it to people quickly.
  5. Create A Content Marketing Plan: A plan keeps everything strictly on track. Your content marketing plan outlines what you will publish and exactly when. It cleanly maps out your big marketing goals. A solid strategy stops you from making random posts that do not help your business grow.
  6. Write A Compelling Title: The title makes the very first impression. Keep it short, clear, and punchy. The promise to solve a big problem in the title itself. If the title is weak, your great content will sit there unread. Pick the one that sounds the most helpful.
  7. Structure Your Content Appropriately: Break your typed text into small blocks. Use clear headings to separate your main points. This helps the reader scan the page very quickly. Add bold bullet lists. A clean structure provides a very good user experience. If your page looks messy, people will leave fast.
  8. Include Storytelling: People remember fun stories much better than dry facts. Tell a short story to explain your main point clearly. Stories make your brand voice feel very human and real. When you share a good story, you turn boring information into a truly memorable lesson.
  9. Optimize Your Content For SEO: Fine-tune the page for the main search engines. Put your main keyword in the title and the very first paragraph. Write clean meta descriptions. Make sure your bright images have proper alt text. This careful search engine optimization gives you the very best chance to rank.
  10. Include CTAs: Every single web page must ask the reader to take a clear step. Tell them to sign up for email marketing, buy a product, or read another post. Put a bright button at the bottom of the text. Make the next step very clear and super easy to take.
  11. Edit and Proofread Your Content: Never publish your raw first draft. Read it over carefully to fix any bad mistakes. Look for tiny spelling errors. Make sure your sentences are short and simple to read. Good editing turns sloppy text into high-quality content. A fresh pair of eyes helps a lot.
  12. Make Your Writing Visually Appealing: A page needs more than just plain words. Add bright pictures or clean charts. Nice visual content breaks up the text. Use proper alt tags on all your added images. When a page looks beautiful, the reader will trust your brand authority much more.
  13. Serve Your Content to the Right Audience: Put your link right in front of people daily. Share your new web link on your daily social media posts. Send it out through clean email newsletters. Post it where your potential customers hang out. Getting the work to the right audience is half the battle won.
  14. Package Your Content: Make your hard work look professional before you share it online. Put a bright cover image on your new blog post. Write a catchy summary for your fast social media updates. Good packaging makes your work look like highly valuable content. It tells the reader you put real effort in.
  15. Measure and Analyze the Results of Your Content: Once the new page is live, watch the daily numbers. Use your simple analytics tools to track the web views. See if the page helps you safely reach your set business goals. Always use this raw data as part of your content review to get better over time.

FAQ’s:

What Makes Content Truly Effective?

Effective content does a specific job well. It solves a real daily problem for the reader while helping the business grow. It is very easy to read and clearly tells the user what to do next. When you offer real answers, you create the most effective content possible.

How Long Should Effective Content Be?

The word length heavily depends on the topic. Big guides might need 3,000 words. The rule is to make it as long as it needs to be to answer the question fully. Do not add silly fluff. Quality content matters much more than just a high word count.

How Often Should I Publish to Maintain an Effective Content Strategy?

Post as often as you can keep the quality very high. It is much better to post one amazing piece of content a week than five bad ones. Consistency is the main key. Use a clean editorial calendar and a shared content calendar to carefully plan your dates.

How Does Competitive Analysis Improve Content Effectiveness?

Looking at direct rivals shows what works. You can quickly spot content gaps where they missed something big. You can then clearly write a better page to fill that exact gap. This helps you steal their organic traffic safely. It is part of your content plan.

Can AI Tools Help Me Write Effective Content?

Yes, tools can speed up the daily content creation process. They are great for fixing poor grammar. But they cannot replace real human thoughts or deep case studies. You must still fully add your own unique brand voice. The best original content comes from a real human brain.

How Long Does It Take to See ROI From Effective Content?

Seeing a true return on investment takes time. Usually, you wait three to six full months to see steady results from search engine optimization. But sharing your own content on social media can get quick traffic right away. Stay patient and keep working on your daily marketing efforts.

Conclusion

Making great, helpful pages is a vital part of your entire business plan. It strictly takes time, deep patience, and a highly solid strategy.

But the hard, steady work heavily pays off when you see your daily organic traffic grow. Always heavily focus on helping your target audience nicely fix their daily problems. Keep your daily writing very simple and super easy to read for everyone.

Track your site numbers closely with good analytics tools to clearly see what works. Take pride in your work as part of your daily routine.

If you closely stick to these simple rules, you will definitely see real success in the broad digital landscape. Do not rush the creation process at any point. Let us get straight to work and build something purely amazing today!

Categories
Fonts

The Ultimate Guide to Playfair Display Font Pairing For Elegant Design

As passionate designers with years of hands-on experience, we created Designers Choice to be the exact resource we always wished we had.

This is a special place where high-level expertise meets true inspiration.

We know the daily challenges of turning your bright creative ideas into actual reality. It can be hard to source the perfect materials or to stay ahead of fast-moving design trends.

That is why we have gathered a huge collection of top-quality products, smart new solutions, and trusted insights. All of these things are made for fellow professionals who demand the very best. At Designers Choice, our big mission is to empower you to bring your boldest visions to life.

You are always backed by a community that values creativity, fine craftsmanship, and clear excellence just as much as you do.

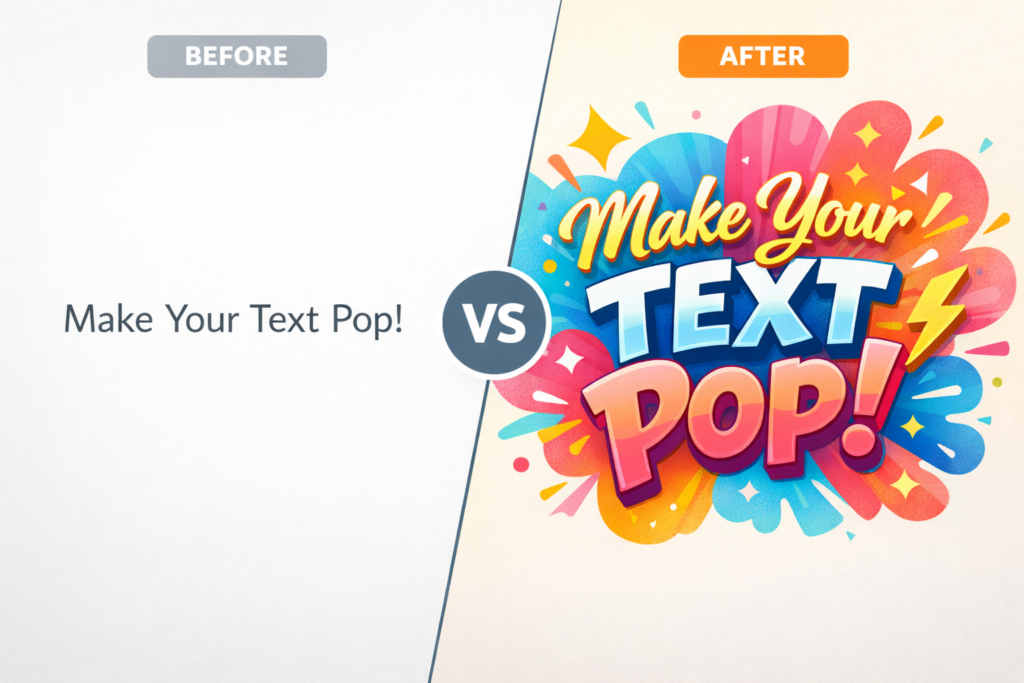
Today, we want to talk about the beautiful art of graphic design, specifically focusing on your letters and words. Picking the perfect font is a huge deal. It changes how people read your words.

One very famous choice is the Playfair display font.

When you want your work to look amazing, finding a good Playfair display font pairing is a big step. Maybe you are working on a Playfair display font pairing Canva project for your new social media post.

Or maybe you are planning a massive web design job for a client. We want to help you make the best choices.

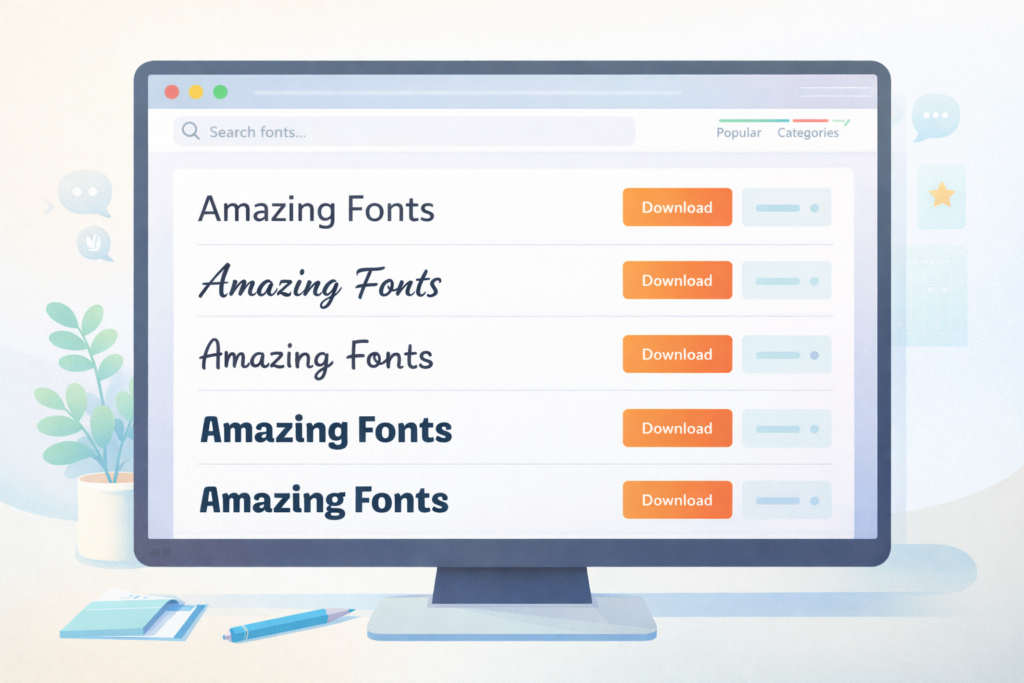
Sometimes, picking fonts from the Google Fonts website or from Adobe Fonts feels hard because there are so many font options.

You might feel lost looking at all the names of these fonts. Do not worry!

We will teach you how to make a great Playfair display font pairing. We will talk about different Google font pairings and show you exactly what to do.

Grab your notebook, log into your Canva account, and let us start learning about making your words look brilliant!

Why is Playfair Display Font Pairing So Important?

Why is Playfair Display Font Pairing So Important?

When you work on website design, the letters you pick matter a lot.

A font pairing is when you choose two different fonts and put them together on the same page.

Think of a good font pairing like a happy family. The members of the happy family look a little different, but they stand perfectly together.

Or, think about decorating a beautiful Christmas tree. You want the shiny lights and the round ornaments to look like a perfectly packaged present when you are done. The fonts you pick must look right together.

If you just pick random fonts, your website might look messy. We want to avoid a messy look for a good reason.

People like clean, pretty pages. When you choose a good Playfair display font pairing, your text becomes easy to read.

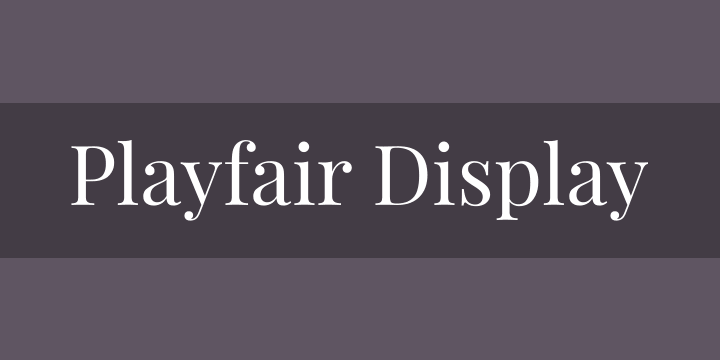
Let us look closely at why this particular font is so loved by designers everywhere.

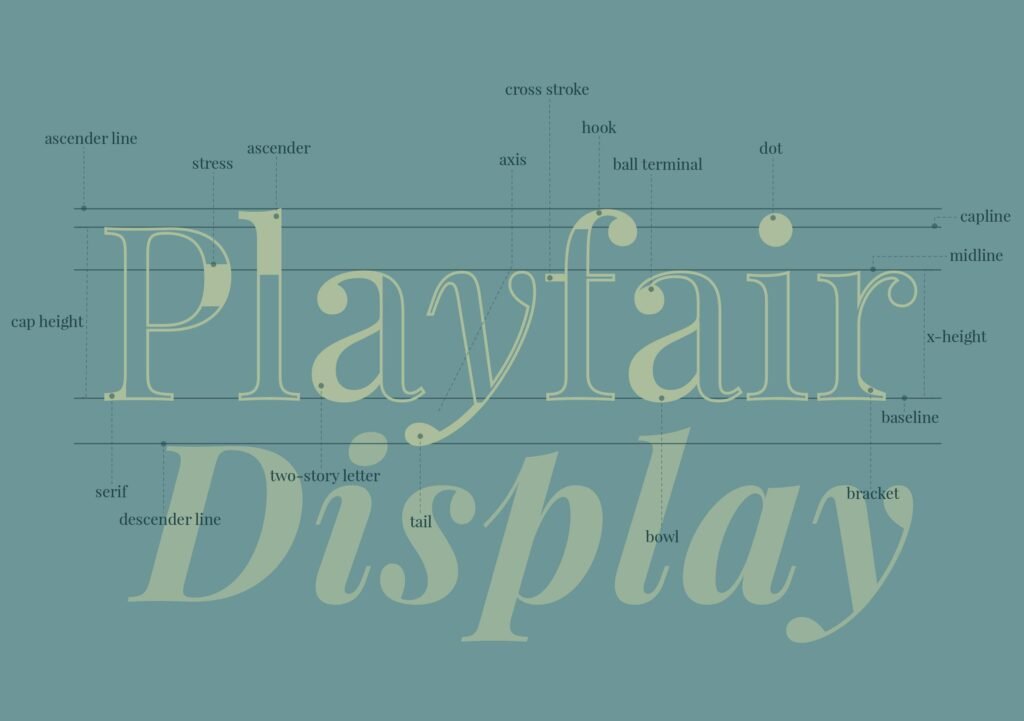
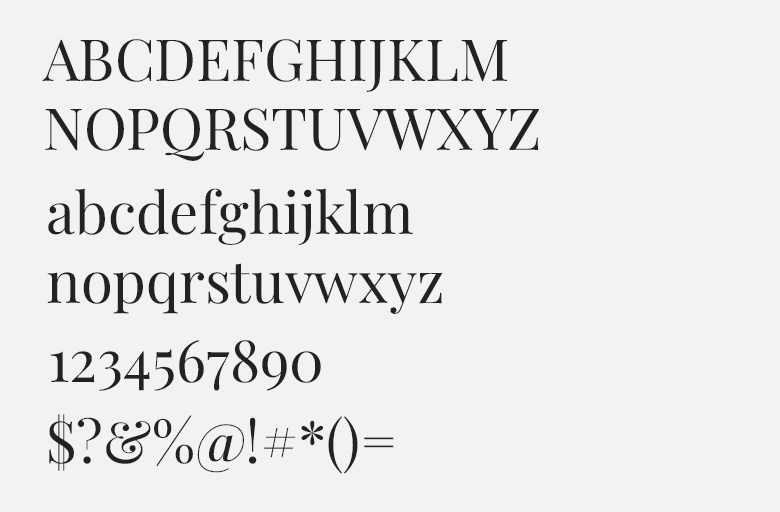
The Anatomy of Playfair Display

First, we need to look closely at the letters.

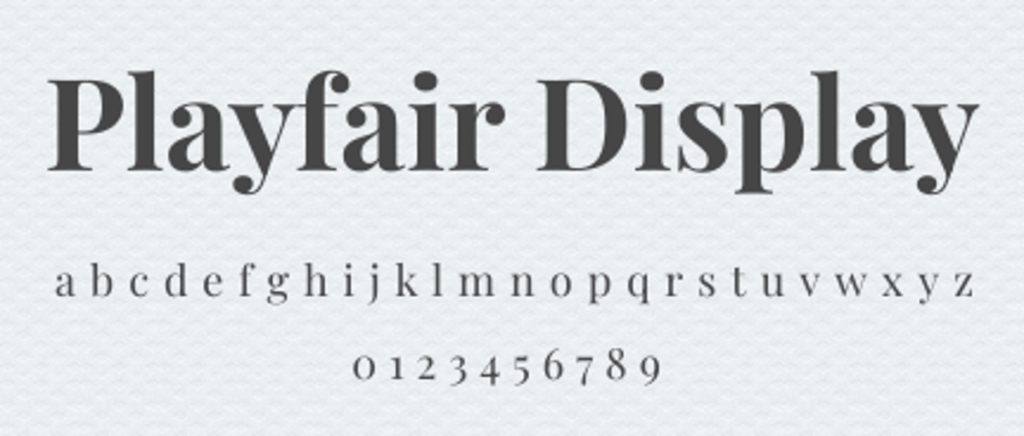
Playfair display is a classic serif font. But what is a serif font exactly? A serif font has tiny little lines or “feet” at the ends of the tall letters.

If you look at the letter ‘T‘ or ‘H‘, you will see extra little lines hanging off the edges. This gives it a very classic and old-school look.

Many classic aesthetic fonts have these little feet.

But Playfair display is special. If you zoom in, you will notice the playful curves of a font that feels both old and new. The thick parts of the letters are very thick. The thin parts of the letters are very thin.

This creates a very beautiful look. It is known as a beautiful Playfair display font for this exact reason. Other fonts like EB Garamond or Cormorant Garamond also have feet, but Playfair is often thicker and rounder.

Even fonts like DM serif display or Libre Baskerville look a little different. Playfair is truly a big favorite.

Creating Contrast and Visual Hierarchy

When we put two fonts together, we need to create an important distinction between the big title and the small text.

This is called visual hierarchy. Visual hierarchy tells the reader what to look at first, second, and third.

You want the big title to shout out loud, and the small text to speak in a normal, quiet voice.

To make visual hierarchy work, you need contrast. Contrast means things look very different from each other.

Sometimes, the best font combinations happen when you use fonts from opposite ends of the spectrum. You might take a heavy, fancy font and put it next to a thin, simple font. The Playfair display font is very fancy.

So, you usually want to pair it with something simple.

If you try to pair it with another highly detailed font, it might look confusing. You want clear, perfect lines for the small text.

The Best Playfair Display Font Pairing Options

The Best Playfair Display Font Pairing Options

Now we will look at the exact fonts you should use.

If you want to make your website design look fantastic, you need the best Google font pairings.

There are many font options out there, but these are our favorite picks. We will show you how to use them to make your text look great.

Playfair Display & Lato (The Classic Balance)

Lato is a wonderful choice to pair with Playfair Display.

Lato is a very simple font. It does not have the tiny feet on the ends of the letters. It is very clean and round. When you put Playfair display at the top in big letters and Lato at the bottom in small letters, you get a beautiful balance. It is a very safe and reliable Playfair display font pairing.

Many designers use Lato because it looks so friendly. It feels like the nice person next door. When you read a lot of text written in Lato, your eyes do not get tired. This makes it a great choice for long paragraphs.

You can easily find Lato on the Google Fonts website, and it is completely free to use.

Playfair Display & Montserrat (Modern & Chic)

If you want a look that is very fresh, you should try Montserrat. Montserrat is a famous Canva font.

If you open your Canva account right now, you will see it near the top of the list. Montserrat is wide and bold.

It does not look like the modern lines of quicksand light or palanquin light, which are very thin. Instead, Montserrat stands up strong and tall.

When you use a Playfair display font pairing Canva design with Montserrat, your picture will look like it belongs in a fancy magazine.

The big, thick curves of Playfair look amazing next to the wide, simple shapes of Montserrat.

It is a great choice for businesses that want to look very high-end and smart.

Playfair Display & Open Sans (Maximum Readability)

Sometimes, the most important thing is simply making sure people can read your words. If you are writing a very long article, you need a font that is easy on the eyes. Open Sans is the absolute best for this.

It is the most user-friendly font for long paragraphs.

When you use Open Sans for your body text, the reader can speed through the words without any trouble.

Open Sans is plain and simple. It lets the fancy Playfair display title take all the attention. This is a very smart Playfair display font pairing because it does exactly what it is supposed to do. It makes the page look nice while keeping everything perfectly easy to read.

Playfair Display & Source Sans Pro (Clean & Professional)

Source Sans Pro is another fantastic option. It looks very neat and tidy. It is not exactly a more masculine font, but it feels very serious and ready for business. If you are making a website for a bank, a lawyer, or a big office, this is a wonderful pairing to use.

Instead of using a crazy handwriting font or a clean script font, you stick to Source Sans Pro for a serious look. The Playfair display gives the page a bit of beauty, while Source Sans Pro shows that you mean business.

This Playfair display font pairing is highly trusted by many professional graphic design experts.

Playfair Display & Roboto (Versatile & Strong)

Roboto is a very strong, sturdy font. It was actually made for screens, like your mobile phone or your tablet computer.

Because it was made for screens, it always looks perfectly sharp.

When you pair Roboto with Playfair display, you get a design that looks modern but still has a nice, classic touch. This Playfair display font pairing works very well for real life applications.

If you are building a social media post or an app, Roboto makes sure your small words are clear. Playfair display makes sure your big words are loud and pretty. It is a win-win situation for any design project.

How to Use Playfair Display in Web Design?

How to Use Playfair Display in Web Design?

Using these fonts correctly takes a little bit of practice. In design school, teachers spend a lot of time showing students how to put words on a page. You cannot just throw the letters up there and hope for the best.

You need a plan. Here are some simple rules to help you out.

Best Practices For Headings Vs. Body Text

The biggest rule is to know the difference between your headings and your body text. A heading is the big title at the top.

The body text is the small block of words you read in a paragraph.

Playfair display is almost always better as a heading. Because it has those pretty, playful curves, it looks amazing when the letters are huge.

If you use it for the small body text, the tiny details get blurry and hard to read. So, keep Playfair Display for the big titles.

Then, pick a simple, plain font for the body text.

This is a very important distinction to make. If you are using Canva Pro, you can easily save your Playfair Display font pairing choices so you never forget which one is the heading and which one is the body text.

Adjusting Weights and Sizing For Web Accessibility

Web accessibility means making sure everyone can read your website, even if they do not have perfect vision.

To do this, you must pay attention to the size and weight of your text. Weight means how thick or thin the letters are.

If you want a very bold look, you can use Playfair display black. This version is super thick and heavy.

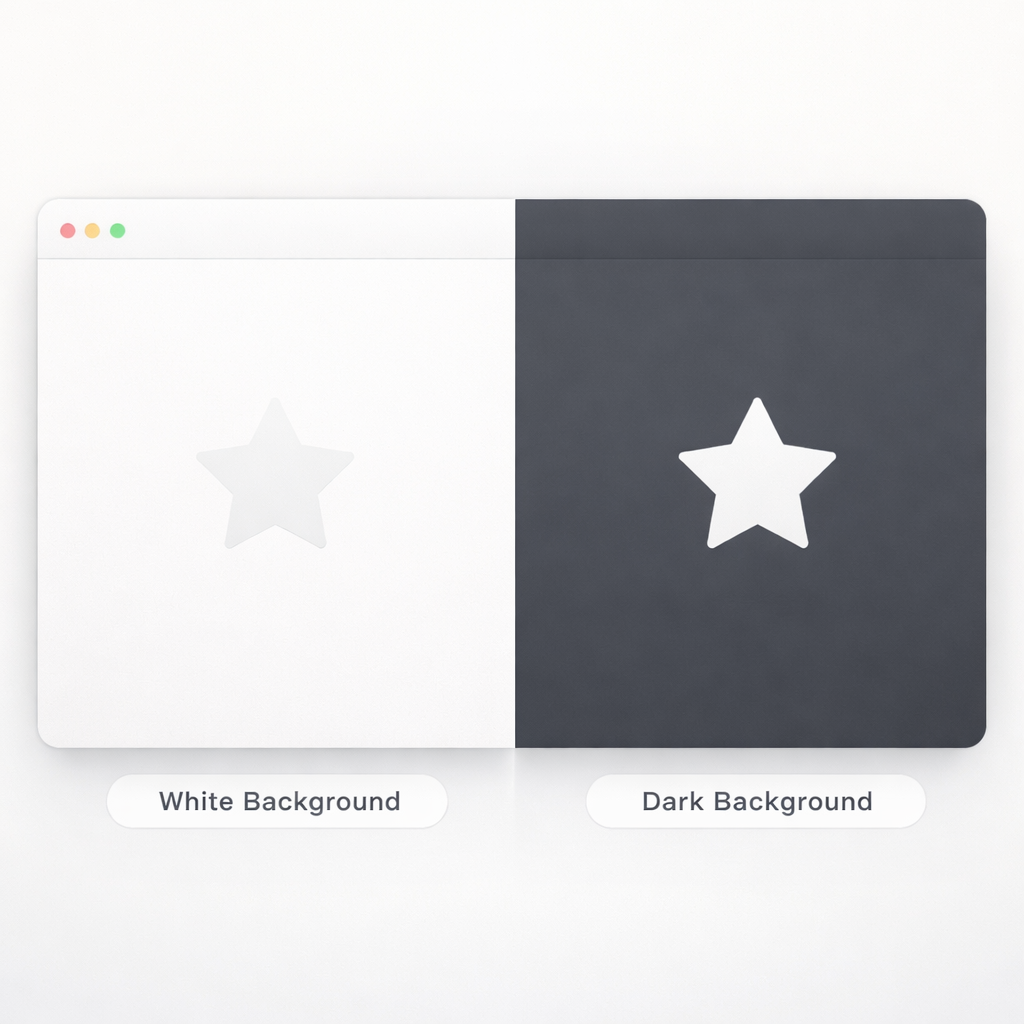
It stands out perfectly against a white background. Always make sure your small body text is big enough to read comfortably.

Never make the text too tiny. Good web design means thinking about the reader first. Also, think about your color palettes.

Do not put light gray text on a white background. Make sure the dark text pops against the light background for easy reading.

Examples of Great Playfair Display Font Pairing in Action

Examples of Great Playfair Display Font Pairing in Action

Sometimes, it helps to see examples of how people use these font combinations in the real world. Let us look at two different types of websites and see how they use Playfair display to look amazing.

Fashion and Lifestyle Blogs

Imagine a popular blog written by a quirky girl who loves talking about clothes, makeup, and travel.

She uses beautiful girly brand colors like soft pink and light gold. She wants her whole website to have a sweet, girlish flair.

To do this, she might choose the Kerry Showit website template.

For her big titles, she uses Playfair display.

It looks fancy, like a famous fashion magazine. To add a feminine handwriting touch to her logo, she might use a classic cursive script.

She might search for a fun font pairing or a beautiful Google font duo.

She could use a handwritten font like Homemade Apple or MS Madi for her name. But for the articles themselves, she uses a simple font to balance it out. She does not use a really unusual pair like Playfair and Dela Gothic because that would be too loud. Instead, she keeps it soft and pretty.

This creates a wonderful vibe for her readers.

Corporate and Portfolio Websites

Now, think about a big company doing large commercial projects. Maybe an architect office or a financial group.

They might want a more traditional style. They use dark blue and gray colors. Their website needs to look smart and serious.

They use Playfair display for the big titles on the homepage.

It gives them a smart, rich look. But they pair it with a strong, simple font like Roboto or Lato. They might even try something like radio Canada or Gowun Bantang if they want a hidden gem font.

But they would stay away from anything silly. They do not want a font with a handwritten look. They might compare fonts like Montagu Slab or Libre Bodoni, but they know Playfair display is the safest, best choice.

This creates a highly professional website design that clients will trust.

FAQ’s:

What Type of Font is Playfair Display?

Playfair display is a serif font. This means it has little decorative lines, or “feet,” attached to the ends of the letters. It is known as a classic serif font with thick and thin strokes. The letters look very fancy and elegant.

What is the Absolute Best Font to Pair with Playfair Display?

There is no single absolute best font, because it depends on your specific project. However, fonts like Lato, Montserrat, Open Sans, Roboto, and Source Sans Pro are among the very best choices. These simple, clean fonts balance out the fancy, detailed look of Playfair display.

Is Playfair Display Good For Body Text?

No, we do not recommend using it for body text. Because it has so many thick and thin details, it can be very hard to read when the letters are small. It is much better to use it for big headings and large titles. Use a plain, simple font for your long paragraphs of body text.

Can I Pair Playfair Display with Another Serif Font?

Yes, you can, but it is tricky. Putting two serif fonts together can sometimes look messy.

For example, pairing Playfair with EB Garamond, Cormorant Garamond, DM Serif Display, or Libre Baskerville might make the page feel too crowded. Usually, it is safer to pair a fancy serif font with a plain font that does not have the little feet. This creates a nice contrast.

If you do use two serif fonts, make sure they look very, very different from each other. But usually, sticking to opposite styles is the best choice. For a really unusual pair, some try using an old font with a bold font like League Spartan or Archivo Narrow, but simple is often better.

Is Playfair Display Free to Use For Commercial Projects?

Yes! One of the best things about this font is that it is completely free. You can find it on the Google Fonts website.

Google Fonts offers many free fonts with great font licenses. This means you can use it for your own personal blog, or you can use it for big commercial projects where you make money. You do not have to pay extra money to use it on your website or in your print designs.

Conclusion

We hope this very long and detailed guide helps you with your next big graphic design project. Finding a Playfair display font pairing does not have to be a hard job. When you use the tips we shared today, you can make beautiful, easy-to-read pages.

Always remember the simple rules: use Playfair display for your big, bold headings, and choose a clean, simple font for your small body text.

Whether you are building a playful fashion blog using bright color palettes or putting together a serious business website, these font combinations will serve you well. Take some time to try out different Google font pairings.

Open up your Canva Pro or free Canva account, start a blank page, and play around with the names of these fonts. Try pairing it with Lato, Montserrat, or Open Sans. See which one looks best to your own eyes.

At Designers Choice, we believe that great design should be easy and fun. By sharing our deep hands-on experience and trusted insights, we aim to give you the perfect tools for success. We are thrilled to be part of your creative journey.

Keep practicing your skills, keep testing out new ideas, and never stop making beautiful things. The perfect text layout is just a few clicks away!