Categories
Canva

Do Canva QR Codes Expire? FREE QR Code + Optimization Tricks

In today’s digital world, QR codes are a smart way to connect printed things like business cards, product packaging, and flyers to online content.

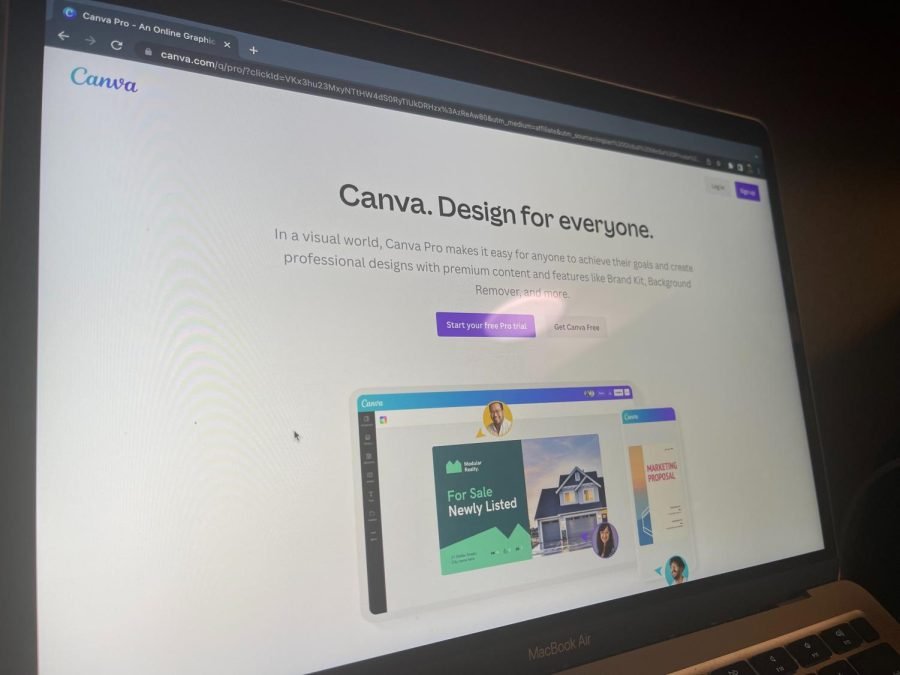
When you use Canva’s design platform, you can easily add a QR code to your Canva designs with their free QR code generator.

This makes it simple to share your website, social media profiles, contact information, or extra details with your target audience.

Many people wonder, “Do Canva QR codes expire?” Knowing how long your QR code will work is important for your marketing strategy and for reaching potential customers.

In this article, you’ll get valuable insights about Canva QR codes, how they work, and how to make sure your marketing materials always lead to the right online content.

Let’s find out how you can use QR codes for better results in your business and personal projects!

Understanding QR Codes

Understanding QR Codes

What Are QR Codes?

A QR code (quick response code) is a two-dimensional barcode that stores information in a pattern of black squares arranged on a white background. Invented in 1994 by Masahiro Hara of Denso Wave, these codes were initially used for tracking automotive parts.

Today, they’ve evolved into versatile tools that store various types of data, including website URLs, contact information, and text.

QR codes can be scanned using smartphone cameras, making them an easy solution for directing users to online content.

The technology behind QR codes allows them to store significantly more information than traditional barcodes, with error correction capabilities that ensure functionality even if parts of the code are damaged.

Static Vs. Dynamic QR Codes

When creating a QR code, you’ll encounter two main types: static and dynamic QR codes. Understanding the difference is essential for your marketing campaigns and determines whether your QR codes will expire.

Static QR codes contain fixed information that cannot be changed after creation. Once generated, the linked content remains permanent.

These codes are:

  • Free to create with most QR code generators
  • Simple to implement
  • Valid indefinitely (they don’t expire on their own)
  • Unable to be edited after creation
  • Not trackable for analytics purposes

Dynamic QR codes, on the other hand, offer greater flexibility. They contain a short URL that redirects to the actual destination, allowing you to:

  • Change the destination URL without creating a new QR code
  • Track scans and gather analytics about usage
  • Implement features like password protection
  • Schedule content changes or expiration dates
  • Achieve better results through data-driven optimization

How Canva’s QR Code Generator Works?

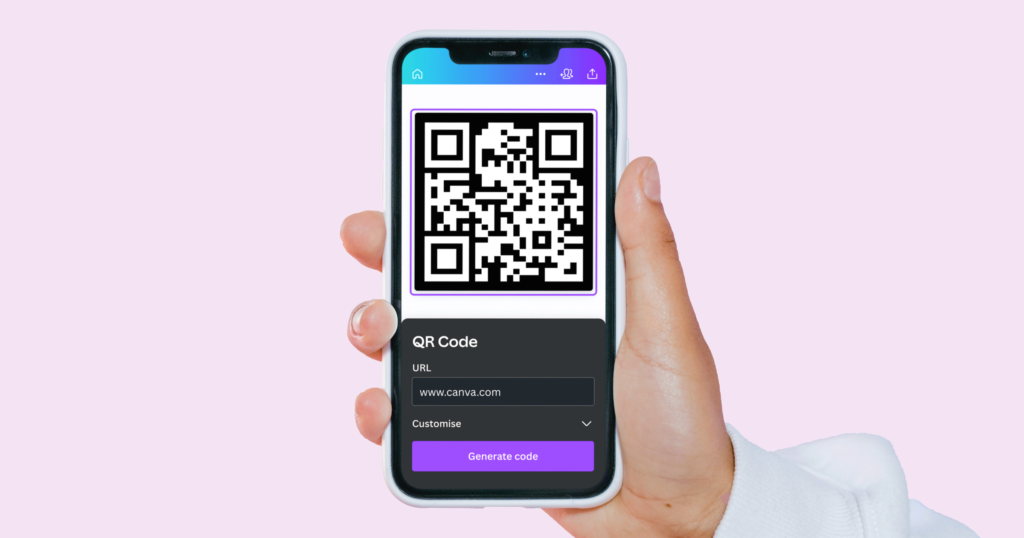
Canva provides a free QR code generator within its design platform that creates static QR codes. The process involves simple steps to integrate QR codes directly into your Canva designs.

When you generate a QR code through Canva, you’re creating a static code that embeds the information permanently.

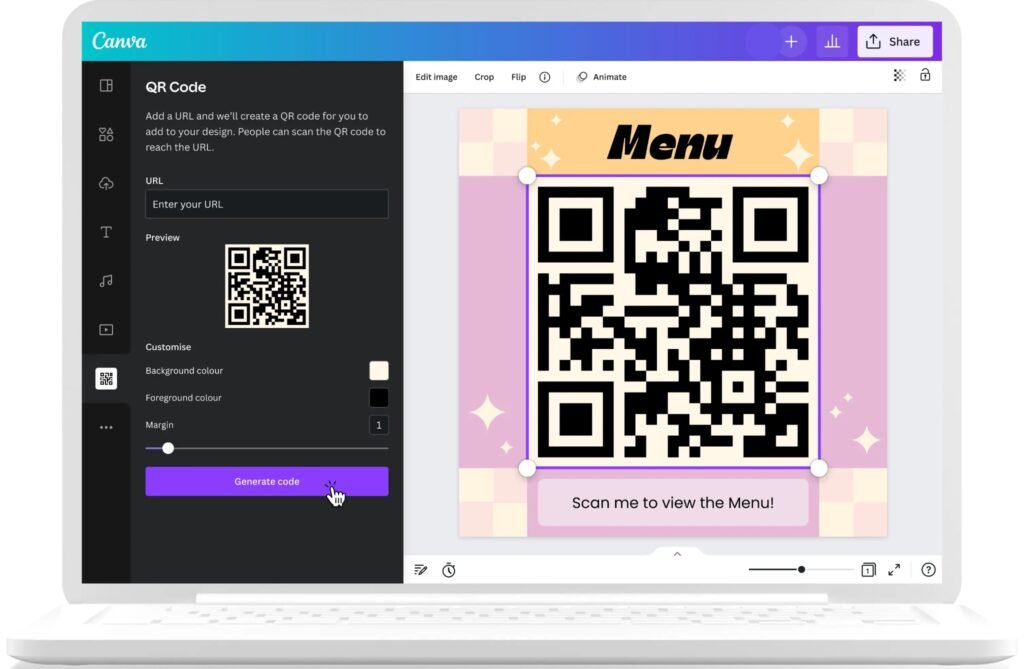
The QR code generator in Canva allows you to:

  • Add URLs to direct users to websites
  • Create QR codes for contact information
  • Integrate codes directly into your design files
  • Customize the appearance to match your brand colors (with some limitations)
  • Export designs with embedded QR codes for print or digital use

While the QR code itself is a key part of your design, you can enhance the surrounding visuals to make it more appealing. Mastering a few design tricks can make your final product look more professional.

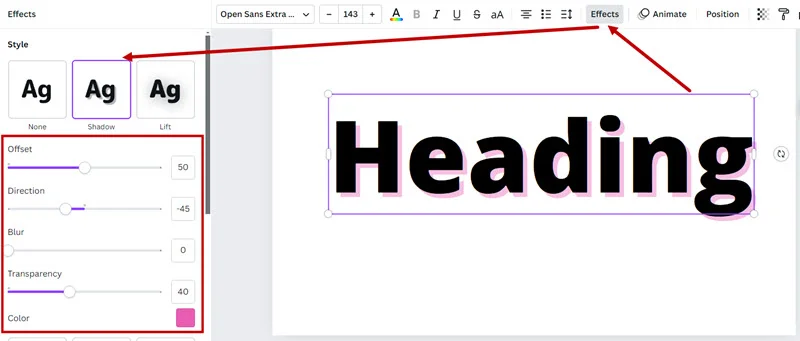
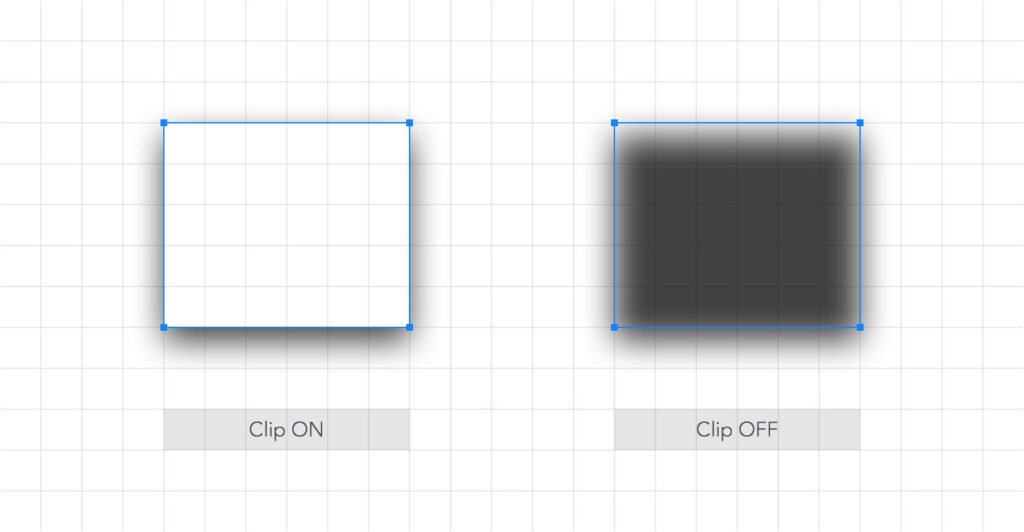
For example, you can learn how to replace an image in Canva or how to flip an image in Canva to perfect your layout. For more advanced visual effects, you might want to know how to fade an image on Canva or even how to add a shadow in Canva to make your QR code pop.

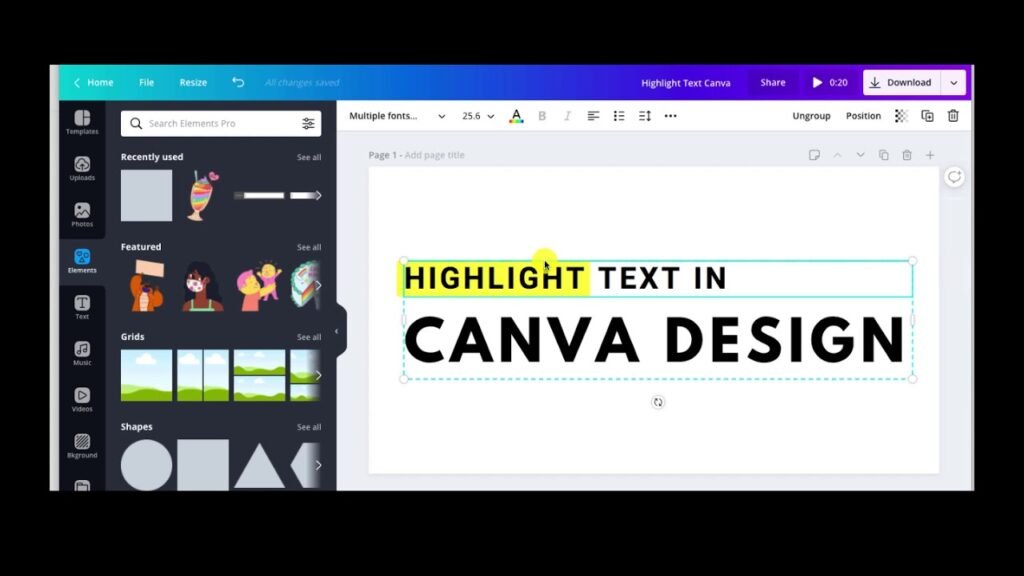
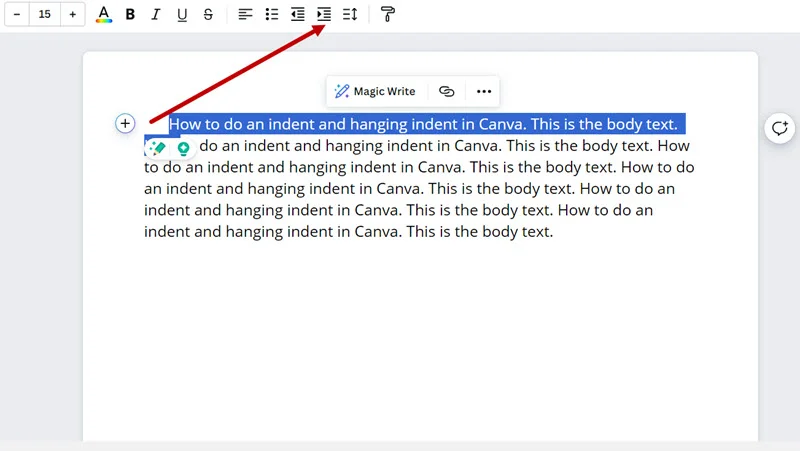
If you’re working with text elements, knowing how to curve text in Canva or how to highlight text in Canva can also elevate your design.

Where Can You Use A Canva QR Code?

Where Can You Use A Canva QR Code?

Canva Print Ads

QR codes enhance print advertisements by creating interactive experiences. By adding a QR code to your Canva-designed print ads, you provide additional information beyond what fits in the physical space.

These codes can link to product demonstrations, promotional offers, or detailed specifications, giving potential customers immediate access to valuable insights about your offerings.

Canva Business Cards

Business cards remain a networking staple, but space limitations can be challenging. QR codes on business cards created in Canva offer an elegant solution for sharing more than just basic contact information.

A single QR code can function as a digital address book entry, linking to your portfolio, social media profiles, or even scheduling tools, making your networking efforts more effective.

Canva Custom Invitations

Event invitations benefit tremendously from QR codes.

When designing custom invitations in Canva, including a QR code can link guests to:

  • Event registration pages
  • Digital maps with directions
  • Gift registries
  • RSVP forms
  • Photo galleries from previous events

This technology streamlines the guest experience while providing event hosts with valuable data about attendee engagement.

Social Media Content

Canva-designed social media content often needs to direct audiences to specific destinations.

QR codes can connect your visual content to:

  • Landing pages for promotions
  • Product pages
  • Newsletter sign-ups
  • App downloads
  • Contest entries

This integration creates seamless pathways from social media engagement to concrete action.

Canva-Designed eBooks

Digital publications created in Canva can use QR codes to enhance the reader experience.

Within eBooks, QR codes can link to:

  • Video tutorials that complement written content
  • Interactive worksheets
  • Community forums for discussion
  • Updated resources as information evolves
  • Audio versions of written content

Do Canva QR Codes Expire?

Do Canva QR Codes Expire?

Official Statement From Canva On QR Code Longevity

According to Canva’s official statement: “Your QR code will not expire unless you want to change the link or you break the link behind it.

Our QR Code Generator allows you to create static QR codes which are valid forever”. This confirms that Canva QR codes themselves do not have built-in expiration dates.

Since Canva creates static QR codes, the code pattern itself remains functional indefinitely. This means that as long as the destination URL remains active and unchanged, your QR code will continue working without any time limitation.

The Difference Between Expiration and Functionality

While Canva QR codes don’t technically expire, there’s an important distinction between a code’s technical longevity and its practical functionality. A QR code can remain technically valid forever but become functionally useless if the linked content changes or disappears.

The static nature of Canva QR codes means they permanently encode whatever URL or information you initially provide. If that destination changes in any way, the QR code will still attempt to direct users to the original location, potentially resulting in errors or misdirection.

Common Reasons Why Canva QR Codes Stop Working

Common Reasons Why Canva QR Codes Stop Working

Many things can make Canva QR codes stop working.

  1. URL Or Link Changes: The most frequent cause of QR code failure is URL modification. If you rebrand your website, restructure your site architecture, or change your domain name, any existing QR codes pointing to old URLs will lead to errors. This limitation is inherent to static QR codes like those created in Canva.
  2. Website Removal Or Downtime: QR codes are only as reliable as the content they link to. If your website experiences downtime or if you remove specific pages, users scanning your QR code will encounter errors. This is particularly problematic for temporary marketing campaigns where landing pages may be discontinued after the promotion ends.
  3. Access Restriction Changes: Changes to access permissions can render QR codes ineffective. If content that was previously public becomes password-protected or moved behind a paywall, users scanning an existing QR code will be unable to access the intended information.
  4. Domain and Hosting Issues: Expired domains, hosting transfers, or server configuration changes can break QR code functionality. When creating marketing materials with QR codes, consider the technical infrastructure supporting your linked content and its long-term stability.
  5. 404 Errors and Broken Links: As websites evolve, pages may be removed or URLs changed, resulting in 404 errors. A QR code linking to a non-existent page provides a poor user experience and reflects negatively on your brand’s attention to detail.

Creating Long-Lasting QR Codes in Canva

Creating Long-Lasting QR Codes in Canva

Making QR codes that last is easy with a few steps in Canva.

Step-by-Step QR Code Creation Process

  • Creating a QR code in Canva involves these simple steps:
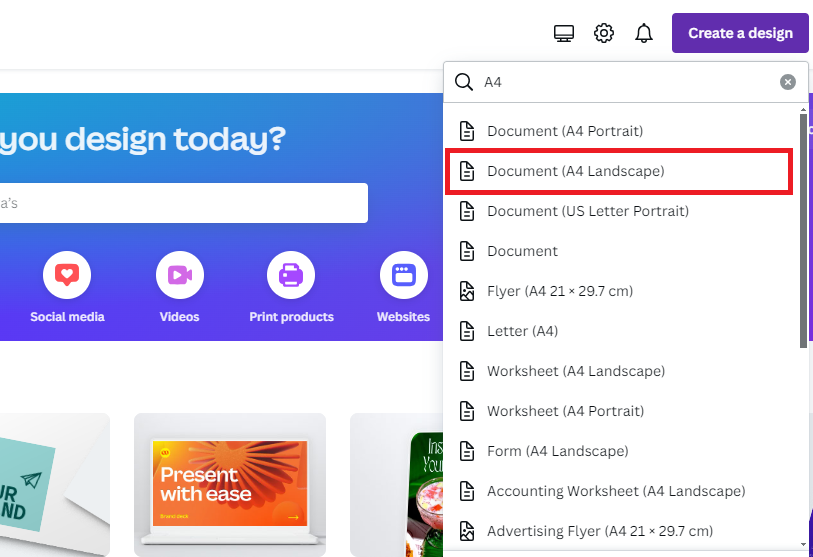
  • Open Canva and create your design or select an existing template
  • Click on the “Apps” button in the side panel and search for “QR Code
  • Select the QR Code generator app
  • Enter the URL or information you want to encode
  • Click “Generate” to create your QR code
  • Customize size and position within your design
  • Download or publish your completed design with the embedded QR code

When entering your URL, consider using permanent links that won’t change over time. For business websites, avoid linking to pages that might be restructured or renamed during site updates. You can learn how to slice in Canva or how to cut out an image in Canva to make your visuals unique.

Best Practices For QR Code Longevity

To maximize the lifespan of your Canva QR codes:

  • Link to stable, long-term URLs rather than temporary campaign pages
  • Consider using URL shorteners that allow for destination changes (though these may eventually expire)
  • Use your domain’s root or key landing pages that are unlikely to change
  • When possible, create dedicated, permanent pages specifically for QR code destinations
  • Maintain a consistent website structure to avoid breaking links
  • Print QR codes at appropriate sizes (minimum 1×1 inch) with adequate resolution (300 DPI minimum)
  • Ensure high contrast between the QR code and the background for better scanning
  • Include a call-to-action near your QR code to encourage scanning

How to Test Your Canva QR Code?

Before finalizing any design with a QR code:

  • Download a preview of your Canva design
  • Scan the QR code with multiple devices and browsers
  • Verify that the linked content loads correctly and quickly
  • Check the mobile experience of the destination page
  • Test scanning in different lighting conditions
  • Consider distance testing based on the intended scanning environment

Regular testing ensures your QR codes continue functioning as expected, especially after website updates or changes.

Alternatives To Canva For QR Code Generation

Alternatives To Canva For QR Code Generator

There are many tools to create QR codes besides Canva. These options fit different needs.

Dynamic QR Code Services

For greater flexibility, consider dedicated dynamic QR code generators like:

  • QR Code Dynamic, which offers both static and dynamic options
  • Uniqode’s QR code generator, which provides advanced tracking capabilities
  • Other specialized services with enhanced features beyond what Canva offers

These services create QR codes that point to a redirect URL, allowing you to change the final destination without creating new codes.

Benefits of Premium QR Code Services

Dedicated QR code generators offer advantages over Canva’s basic functionality:

  • Analytics and tracking of scan data
  • Ability to edit destination URLs
  • Scheduled content changes
  • A/B testing capabilities
  • Geolocation targeting
  • Device-specific content delivery
  • Password protection options
  • Expiration date settings

These features provide valuable insights for refining your marketing strategy and improving target audience engagement.

Comparing Canva With Dedicated QR Code Generators

While Canva offers convenience for designers already using the platform, dedicated QR code services provide superior functionality.

A common question is about affordability; to understand the investment, it’s helpful to know how much Canva Pro costs and whether there are ways to get Canva Pro for free. Ultimately, deciding if Canva Pro is worth it depends on your specific needs.

FeatureCanvaDedicated QR Services
QR Code TypeStatic onlyStatic and dynamic
URL EditingNot possiblePossible with dynamic codes
AnalyticsNoneComprehensive tracking
Design IntegrationSeamless with CanvaMay require importing
CostFree with CanvaOften requires subscription
CustomizationBasicAdvanced customization options
TrackingNoYes, with scan metrics

Maintaining Functional QR Codes For Business Use

Maintaining Functional QR Codes For Business Use

Regular Testing and Maintenance

Implement a testing schedule to verify QR code functionality:

  • Monthly checks for critical marketing materials
  • Testing after website updates or changes
  • Periodic scanning of printed materials in circulation
  • Browser and device compatibility verification

This maintenance helps identify issues before they impact potential customers.

Updating QR Codes When Needed

When content changes necessitate new QR codes:

  • Create replacement codes in Canva or a dynamic QR service
  • Update digital materials promptly
  • Plan for physical material replacement when practical
  • Consider using dynamic QR code services for future campaigns to avoid this issue

QR Code Analytics and Tracking

While Canva doesn’t provide tracking capabilities, you can implement measurement strategies:

  • Use Google Analytics with UTM parameters for destination URLs
  • Create dedicated landing pages for each QR code to track traffic
  • Implement form submissions or special offers to measure conversion
  • Use vanity URLs that redirect to trackable destinations
  • Consider future campaigns with dynamic QR codes for better insights

FAQ’s:

Can I Set An Expiration Date On A QR Code Created in Canva?

No, Canva creates static QR codes without expiration functionality. For codes with planned expiration, you’ll need a dynamic QR code generator that offers this feature.

What Happens If I Delete My Canva Account? Do My QR Codes Stop Working?

QR codes created in Canva will continue functioning even if you delete your account. The code itself is embedded in your final design and operates independently of your Canva account status.

Can I Track How Many Times A QR Code Created in Canva is Scanned?

No, Canva’s QR codes don’t include tracking capabilities. For analytics on scan rates, you’ll need a dynamic QR code service or to implement Google Analytics with specific parameters on your landing page.

Is It Possible To Edit the URL In A QR Code After It Has Been Created In Canva?

No, Canva creates static QR codes where the URL is permanently encoded. To change the destination, you must create a new QR code with the updated URL.

How Long Do QR Codes Last On Canva?

Canva QR codes don’t expire on their own. They will remain functional as long as the linked content continues to exist at the same URL. The limiting factor is not the code itself but the stability of the destination.

Conclusion

Canva QR codes don’t technically expire, but their functionality depends entirely on the stability of the content they link to.

As static QR codes, they permanently encode whatever information you provide at creation, making them suitable for long-term, stable URLs but less ideal for content that might change.

For basic marketing materials with enduring destinations, Canva’s free QR code generator offers a convenient, integrated solution.

However, for sophisticated marketing campaigns requiring analytics, URL flexibility, or advanced features, investing in a dedicated dynamic QR code service will yield better results.

Regardless of which QR code generator you choose, remember that regular testing and maintenance are essential for ensuring your codes continue functioning correctly.

By following the best practices outlined in this article, you can create QR codes that effectively connect your audience to your digital content for as long as you need them to.

Categories
Canva

How To Highlight Text In Canva & Canva App: Fast 1 Minute Guide

Text highlighting in Canva helps make important information pop in your designs.

Whether you’re creating social media graphics, presentations, or posters, knowing how to highlight text can take your work to the next level.

This guide will show you three easy ways to highlight text in Canva, plus tips to make your highlights look great.

Mastering this skill is just as important as knowing other key techniques, like how to flip an image in Canva or understanding if Canva images are copyright-free.

Understanding Text Highlighting In Canva

Understanding Text Highlighting In Canva

What Is Text Highlighting?

Text highlighting is putting a colored background behind words to make them stand out.

Just like using a yellow marker on paper, digital text highlighting in Canva makes certain words or phrases catch people’s attention. You can highlight a single word, a few words, or even an entire text box.

Why Highlight Text In Your Designs?

When you have lots of text in your design, people might not read everything. Highlighting helps point out the most important information. For example, if you’re making a flyer for a sale, you might highlight the discount amount or date so people notice right away.

Benefits of Text Highlighting

Text highlighting offers many advantages in your Canva designs:

  • Makes important information stand out
  • Helps organize your content by importance
  • Adds color and visual interest to your design
  • Guides the reader’s eye to key points
  • Makes your message easier to remember
  • Creates visual breaks in long text

How To Highlight Text In Canva?

How To Highlight Text In Canva?

Highlighting text in Canva is easy, thanks to its many design tools. You start by picking your text box. Then, choose how you want to highlight it. You can use the built-in Background Effect, add shapes and elements, or get creative with the Drawing Tool.

Each method lets you change things like highlight color, transparency, or padding. Mastering text formatting is as fundamental as knowing how to indent in Canva for creating clean, professional layouts.

Below, we will explore three main ways to highlight text in Canva. Let’s discover these useful techniques.

Method 1: Using The Background Effect

This is the quickest way to highlight text in Canva:

  1. Open your Canva design and click on the text box you want to highlight.
  2. Look at the top menu and click on “Effects.”
  3. In the panel that opens on the left sidebar, scroll down and find “Background.”
  4. Click on “Background” to apply a highlight to your selected text box.
  5. Now you can customize your highlight:
    • Use the Roundness slider to make the corners more or less rounded
    • Use the Spread slider to adjust how far the highlight extends from your text
    • Use the Transparency slider to make the highlight more or less see-through
    • Click on the color box to open the color picker and change the highlight color

Remember, this method will highlight the entire text box, not just specific words within it.

Method 2: Using Shapes and Elements

For more control over what you highlight, try using shapes:

  1. In your Canva design, click on the “Elements” tab in the left menu.
  2. Search for “square shape” or “rectangle” in the search bar.
  3. Pick a shape and drag it onto your design.
  4. Resize the shape to fit behind the text you want to highlight.
  5. Change the color of the shape by clicking on it and using the color picker at the top.
  6. If the shape is covering your text, right-click on the shape and select “Send to back” so your text appears on top.
  7. Adjust the opacity of the shape if needed using the transparency slider in the toolbar.

This method is great for precision, similar to the control needed when you how to cut out an image in Canva or want to how to fade an image on Canva to blend elements seamlessly.

Method 3: Using The Drawing Tool

For a more hand-drawn highlight effect:

  1. In your Canva design, click on the “Draw” button in the left sidebar.
  2. Select the highlighter tool (it looks like a marker).
  3. Choose a color for your highlight from the color palette.
  4. Adjust the thickness using the slider.
  5. Carefully draw over the text you want to highlight by clicking and dragging your cursor.

This method works well if you want a more natural, hand-drawn look, but it requires a steady hand.

Key Points To Consider When Putting Highlight

Key Points To Consider When Putting Highlight

When highlighting text in your Canva design, keep these important points in mind:

  • Make sure the text is still easy to read after highlighting it
  • Don’t highlight too much text, or nothing will stand out
  • Choose a highlight color that works well with your text color
  • Keep enough padding (space) between your text and the edge of the highlight
  • Be consistent with your highlight style throughout your design
  • Consider how the highlight fits with the rest of your design

Mistakes To Avoid When Putting Highlight

Here are some common mistakes to avoid when highlighting text in Canva:

  • Using too many different highlight colors in one design
  • Making the highlight too bright or distracting
  • Highlighting too much text (when everything is highlighted, nothing stands out)
  • Not leaving enough space between the text and the edge of the highlight
  • Using a highlight color that makes the text hard to read
  • Inconsistent highlighting styles across your design
  • Placing highlights that don’t align properly with the text

Tips For Effective Text Highlighting

Tips For Effective Text Highlighting on canva

Striking text highlighting needs careful planning. Your design choices are also impacted by the tools at your disposal, so it’s wise to consider how much Canva Pro costs to see if its advanced features are right for you.

Choosing The Right Colors For Highlighting

The color of your highlight can make a big difference:

  • Use colors that match your brand or design color scheme
  • Make sure there’s enough contrast between the text color and highlight color
  • Yellow, pink, and light blue are popular highlight colors because they’re bright but still allow text to be read easily
  • Try using lighter shades for a subtle highlight effect
  • Avoid using dark highlight colors with dark text
  • Test your highlight colors to make sure the text is still easy to read

Creating Consistent Highlight Styles

Consistency helps make your design look professional:

  • Use the same highlight color throughout your design (or colors with a clear purpose)
  • Keep the roundness setting the same for all highlights
  • Use the same amount of padding (space between text and highlight edge)
  • Create a style guide for your highlights if you’ll be using them in multiple designs
  • If you’re highlighting different types of information, use a consistent color system

Combining Highlighting With Other Text Effects

Highlighting can work well with other text effects:

  • Combine highlights with bold text for extra emphasis. You can also learn how to curve text in Canva for more dynamic designs.
  • For a layered look, try pairing highlights with a subtle text shadow, a technique we explain in our guide on how to add shadow in Canva.
  • Using custom fonts can also enhance your designs. If you’re wondering, “can you upload fonts to Canva,” the answer is yes, and it’s a great way to maintain brand consistency.
  • When working with longer passages, knowing how to wrap text in Canva is another essential skill.

Troubleshooting Common Highlighting Issues

Why Can’t I Highlight Specific Words?

One limitation in Canva is that the Background effect can only highlight an entire text box, not specific words within it.

Here are some solutions:

  • Break your text into multiple text boxes, with separate ones for the highlighted words
  • Use the shapes method (Method 2) to place highlights behind specific words
  • Try the drawing tool method (Method 3) to manually highlight specific words
  • Create separate text elements for the words you want to highlight

Fixing Misaligned Highlights

If your highlights don’t line up properly with your text, try these fixes:

  • Make sure your text box is properly aligned (use the alignment options in the toolbar)
  • If using shapes, zoom in to position them more precisely
  • Group your text and highlight them together after positioning them correctly
  • Use the keyboard arrow keys for fine adjustments to the position
  • Check that your text padding and line spacing are consistent
  • Try adjusting the spread of the highlight if using the Background effect

Solutions For Common Problems

Here are solutions for other common highlighting issues:

  • If the highlight color looks different than expected, check your screen brightness
  • If you can’t find the Background effect, make sure you’ve selected a text box first
  • If the highlight isn’t visible, check that it’s not the same color as your background
  • If the highlight looks pixelated when downloaded, try using a PNG format
  • If the highlight appears in the wrong layer, use the “Position” options to adjust it
  • If the highlight doesn’t appear in your download, make sure all elements are within the page boundaries

FAQ’s:

Can I Highlight Text In Canva On Mobile Devices?

Yes! The Canva mobile app lets you highlight text just like the desktop version.

Tap your text box, then find the “Effects” button at the bottom. Scroll to the “Background” option to add a colored highlight behind your words. You can also use shapes from the “Elements” tab to create custom highlights on your phone or tablet.

How Do I Remove A Highlight From Text If I Change My Mind Later?

Removing highlights is easy. If you used the “Background” effect, click the text box, open the “Effects” toolbar, and turn off “Background.” For shape highlights, just click the colored box or line and press the Delete key or trash icon. Your text will stay exactly as it was before.

Can I Adjust The Opacity Of The Text Highlight In Canva?

Yes! Use the “Transparency” slider to make highlights see-through. For “Background” highlights, find the slider in the “Effects” menu. If you used shapes, click the shape and adjust the slider in the top toolbar. This helps make dark highlights lighter so your text stays easy to read.

Is It Possible To Animate Highlighted Text In Canva Presentations?

Absolutely! Click your highlighted text or shape, then press the “Animate” button in the top menu. Choose effects like “Fade In” or “Slide” to make your highlights move. This works great for making parts of your presentation pop during slideshows.

How Do I Ensure The Highlighted Text Remains Legible With Darker Highlight Colors?

Pair dark highlights with bright white or light-colored text. Make the text bold using the “Font” menu, and use the “Transparency” slider to soften the highlight. Adding a subtle shadow effect (from the “Effects” menu) also helps words stand out against dark backgrounds.

Conclusion

Highlighting text in Canva is an easy way to make your designs more effective.

Whether you use the Background effect, shapes, or the drawing tool, highlights help your important information get noticed.

Remember to keep your highlights consistent, choose colors carefully, and make sure your text stays easy to read.

With the methods we’ve covered in this article, you can now add great-looking highlights to your Canva designs. Try these techniques in your next project to make your message clearer and your design more eye-catching.

At Designers Choice, we hope this guide helps you create better designs.

Keep checking our website for more helpful tips and tutorials on making the most of design tools like Canva.

Categories
Canva

How to Landscape in Canva: A Step-by-Step Guide

Have you ever made a Canva design that’s tall and narrow but wished it was wider? That’s where landscape mode comes in!

Imagine turning your design sideways to create more space for photos, text, or graphics. Whether you’re creating a website banner, a slide for a class project, or a social media post, switching to landscape orientation helps your work look its best.

In this guide, I’ll show you how to use Canva’s resize button to flip your original design into a new orientation-no fancy skills needed.

You’ll learn to set custom size dimensions, use Canva Pro features (or the free version), and tweak your layout after resizing. Even if you’re new to design, these steps will help you master landscape format quickly. Let’s dive in and turn your ideas into wide, eye-catching creations!

Understanding Landscape Orientation In Canva

Understanding Landscape Orientation In Canva

What is Landscape Orientation?

Landscape orientation means your design is wider than it is tall. Think of it like a TV screen or a picture of mountains. The width is greater than the height. In simple terms, when we talk about landscape orientation, we mean the page is set up so it’s wider than it is tall.

For example, if a design is 1000 pixels by 800 pixels, it’s in landscape format because 1000 (width) is bigger than 800 (height).

Benefits of Using Landscape Mode

Using landscape mode has many good points:

  • It gives you more space from left to right
  • It works better for designs that will be seen on computer screens
  • It’s great for website headers, banners, or wide photos
  • Many social media covers use landscape formats

When you pick the right orientation for your project, it makes your design look better and work better for what you need.

How To Landscape In Canva?

How To Landscape In Canva?

Let’s go through the steps to make your design landscape in Canva:

Step 1: Open Your Design

First, log into your Canva account. You can either open an existing design that you want to change, or start a new one. If you’re starting fresh and know you want a landscape format, you can pick a template that’s already in landscape mode or set custom dimensions from the start.

Step 2: Go To The Resize Tool

Once your design is open, look at the top menu. You’ll see a button called “Resize” in the upper left corner. Click on this button to open the resize options.

Note: The full resize feature is only for Canva Pro users. If you don’t have Canva Pro, don’t worry – I’ll show you a free way to do this later.

Step 3: Choose Your Landscape Format and New Dimensions

After clicking “Resize,” you’ll see options to change your design’s size. You can:

  • Pick from preset sizes (like A4 Landscape or 1920 x 1080 pixels)
  • Enter custom dimensions in the “Custom size” fields

For landscape format, make sure the width (first number) is bigger than the height (second number). For example, if your design is currently 800 x 1000 pixels, you could make it 1000 x 800 pixels to switch to landscape.

If you want to keep the same ratio but just flip the orientation, simply swap the width and height numbers.

Step 4: Select Resize Options

After setting your new dimensions, Canva will show you a preview of how your design will look. You’ll have two options:

  • “Copy & Resize” – This makes a new design with the new dimensions while keeping your original design unchanged. Your original design will stay open in its original tab, and the new resized design will open in a new tab.
  • “Resize This Design” – This changes your current design to the new dimensions. This option doesn’t make a copy, so your original design will be replaced.

Choose the option that works best for you.

Step 5: Adjust and Finalize Your Design

After resizing, you’ll need to check how your design elements look in the new layout. You might need to move text, images, or other elements to make them fit better in the landscape format.

While adjusting, you may need to learn how to replace an image in Canva or even how to flip an image in Canva to get the perfect fit.

Sometimes, you might even want to know how to cut out an image in Canva to create a more dynamic layout. Resize and reposition things until your design looks good in its new orientation.

How To Make A Document Landscape In Canva?

How To Make A Document Landscape In Canva?

Making a document landscape in Canva follows the same steps as changing any design to landscape:

  1. Open your document in Canva
  2. Click the “Resize” button at the top
  3. Enter new dimensions where the width is larger than the height
  4. Click “Continue
  5. Adjust your layout as needed

For documents like flyers, brochures, or reports, remember that landscape format gives you more horizontal space but less vertical space.

This means you might want to organize your text in more columns or learn how to indent in Canva to make good use of the space..

Converting Existing Designs To Landscape

Converting Existing Designs To Landscape

Using The Resize Or Magic Switch Feature

The easiest way to change an existing design to landscape is with Canva’s “Magic Switch” feature (also called “Resize”). This feature lets you change the orientation with just a few clicks:

  • Open your design in Canva
  • Click “Resize & Magic Switch” at the top of the screen
  • Select “Custom size” from the menu
  • Click on either the width or height field
  • Choose “Landscape” from the quick options that appear
  • Click “Continue” and then select “Copy & resize” or “Resize this design

This method is fast and easy, but it requires Canva Pro.

If you’re wondering Is Canva Pro is worth it, features like this can be a major time-saver. You can learn more about how much Canva Pro costs or even find out how to get Canva Pro for free to test these features.

Manual Dimension Adjustment Process

If you’re using the free version of Canva, you can still make landscape designs by following these steps:

  1. Create a new design with landscape dimensions
    • From Canva’s home page, click “Create a design
    • Click “Custom size” and enter dimensions where the width is larger than the height
    • Click “Create new design
  2. Copy elements from your original design
    • Open your original design in a new tab
    • Select all elements (click on each one while holding Shift)
    • Copy them (Ctrl+C or Cmd+C)
    • Go to your new landscape design
    • Paste the elements (Ctrl+V or Cmd+V)
  3. Adjust the elements to fit the new layout

This method takes more time than using the Magic Switch feature, but it works with the free version of Canva.

Landscape Design For Special Projects

Landscape Design For Special Projects

Creating Landscape Posters

Landscape posters are great for showing wide scenes or displaying lots of information side by side.

To create a landscape poster in Canva:

  1. Start a new design with landscape dimensions (for a standard poster, try 24″ × 18″).
  2. Choose a template or start from scratch.
  3. Add your images, text, and other elements. For more advanced designs, you might want to learn how to slice in Canva for cool effects.
  4. Use the horizontal space to create a flowing layout from left to right.

Remember that people read from left to right, so put the most important information on the left side of your poster.

Designing Landscape Headers For Websites

Website headers need to be landscape because websites are usually wider than they are tall.

Here’s how to make a website header in Canva:

  1. Create a new design with dimensions around 1920 × 300 pixels (a common header size).
  2. Add your logo, navigation elements, and any featured text or images.
  3. Make sure the text is easy to read. A great way to do this is to learn how to highlight text in Canva.
  4. Check how your header looks at different screen sizes.

A good website header should be clean, show your brand clearly, and work well on both big and small screens.

Adjusting Elements After Orientation Change

Adjusting Elements After Orientation Change

Repositioning Design Elements

When you change from portrait (tall) to landscape (wide), your design elements might not be in the right place anymore.

Here’s how to fix that:

  1. Check the alignment of all elements – Are they centered, left-aligned, or right-aligned as they should be?
  2. Resize elements if needed – Some images or text boxes might need to be larger or smaller in the new layout. You may want to how to fade an image on Canva to blend it into the background.
  3. Move elements to follow a logical flow – In landscape format, layouts often work better when elements flow from left to right.
  4. Check spacing between elements – Make sure there’s enough space between all parts of your design.

Take your time with this step – proper layout is key to making your design look good.

Optimizing Visual Flow For Landscape Format

Visual flow means the way people’s eyes move through your design. In landscape format, people usually look from left to right.

Here’s how to make this work for your design:

  1. Put the most important information on the left side.
  2. Use elements like lines, arrows, or colors to guide the eye across the design. You can also play with text effects by learning how to curve text in Canva or how to outline text in Canva.
  3. Create a balance between the left and right sides of your design.
  4. Use the extra horizontal space for elements that work well side by side, like before-and-after images.

A good landscape design uses the width to tell a visual story from beginning to end.

Pro Tips For Landscape Designs In Canva

Pro Tips For Landscape Designs In Canva

Working With Free Vs. Pro Features

Canva’s free version has some limits, but you can still create great landscape designs. One common question is, “Can you upload fonts to Canva?” The answer is yes, but it’s a Pro feature.

With Canva Pro:

  • Use the Magic Switch/Resize feature to quickly change orientation
  • Resize multiple designs at once (up to 50 designs)
  • Access more templates and elements that work well in landscape mode

With Free Canva:

  • Create new designs with custom landscape dimensions
  • Copy and paste elements between designs
  • Use the available free templates and adjust them for landscape format

If you work with landscape designs often, Canva Pro’s resize feature can save you a lot of time. Consider the free trial to see if it helps you.

Saving and Exporting Landscape Designs

After creating your landscape design, you’ll want to save and export it properly:

  1. Save your design by clicking “File” then “Save” (Canva also saves automatically)
  2. To export, click “Share” then “Download
  3. Choose the right file format:
  4. Click “Download

For website headers or social media images, PNG is usually best.

For print materials like posters, PDF is better because it keeps the image quality when printed.

FAQ’s:

How To Change Portrait to Landscape In Canva?

To change a portrait (tall) design to landscape (wide) in Canva:

  • Click the “Resize” button
  • Enter new dimensions where the width is larger than the height (or swap your current dimensions)
  • Click “Continue” then choose “Copy & resize” or “Resize this design
  • Adjust your elements to fit the new layout

How To Make A Document Horizontal In Canva?

Making a document horizontal (landscape) in Canva is the same as changing to landscape orientation:

  1. Click “Resize
  2. Enter dimensions where the width is greater than the height
  3. Click “Continue
  4. Choose whether to create a new copy or resize the current design
  5. Adjust your layout as needed

How Does Resizing Affect The Layout and Elements In My Design?

When you resize a design:

  • Elements stay in the same relative positions
  • Some elements might look too big or small in the new format
  • Text might wrap differently
  • You’ll need to check and adjust the positions of all elements
  • Background images might be cropped or stretched

Always review your design after resizing to make sure everything looks right.

Can I Use The Resize Feature Without Canva Pro?

The built-in resize feature requires Canva Pro, Canva Teams, Canva for Education, or Canva for Nonprofits.

Without these, you can:

  1. Create a new design with landscape dimensions
  2. Copy and paste elements from your original design
  3. Adjust the layout

This takes more time but works with the free version of Canva.

Is There A Way To Save Custom Landscape Dimensions For Future Designs In Canva?

Yes! When you create a design with custom dimensions:

  1. Make your design
  2. Click “File” then “Save as template
  3. Give your template a name
  4. Click “Save

Now you can find this template with your saved dimensions whenever you start a new design.

Conclusion

Changing your designs to landscape in Canva opens up new possibilities for your projects.

Whether you’re making website banners, presentation slides, or social media graphics, landscape format can give your designs the space they need.

Remember that you can change to landscape format in Canva by using the Resize tool if you have Canva Pro, or by creating a new design with landscape dimensions if you’re using the free version.

After changing the orientation, take time to adjust your elements to make the best use of the landscape format.

With this guide, you now know how to landscape in Canva and how to make your landscape designs look great. Keep practicing, and soon changing orientations will be a simple part of your design process!

Categories
Canva

How to Indent in Canva & Canva Docs: Learn Fast & Easy (Guide)

Ever noticed how proper spacing makes text look polished?

As a designer, I’ve seen firsthand how indentation transforms messy paragraphs into clean, professional content.

While tools like Microsoft Word or Google Docs handle indents automatically, Canva requires a different approach.

Whether you’re creating social media graphics, presentations, or Canva Docs, mastering indents-like first-line or hanging indents-ensures your body text flows smoothly.

Many struggle with aligning text boxes or adjusting the left margin in Canva. Without a tab key or built-in hanging indent feature, even simple tasks like indenting the first line of a paragraph can feel tricky.

This guide breaks down manual techniques for Canva designs and toolbar shortcuts for Canva Docs, helping you tackle block indents, improve readability, and maintain consistency. Beyond indentation, knowing how to highlight text in Canva can also make key information stand out.

Let’s turn formatting hurdles into creative solutions.

Understanding Types of Indentation

Understanding Types of Indentation

Before diving into specific Canva techniques, let’s establish the different types of indentation you might need in your designs.

First-Line Indents

A first-line indent occurs when only the first line of a paragraph is indented while all subsequent lines remain aligned with the left margin. This indentation style is commonly used in books, articles, and formal documents to indicate the beginning of new paragraphs.

The standard first-line indent typically measures about 0.5 inches or 5 spaces from the left margin.

This style enhances readability by creating visual separation between paragraphs without requiring extra line spacing, making it particularly effective for body text in multi-paragraph documents.

Hanging Indents

A hanging indent (also called a negative indent) is the reverse of a first-line indent.

With this formatting style, the first line of text aligns with the left margin, while all subsequent lines are indented. Hanging indents are commonly used for bibliographies, references pages, and citation lists.

This indentation style makes it easier for readers to scan through lists of information by clearly highlighting the beginning of each entry.

Academic papers using APA or MLA formatting typically require hanging indents in their references sections, making this an essential skill for creating educational materials in Canva.

Block Indents

Block indentation occurs when an entire paragraph or section of text is uniformly indented from the left margin. This style creates visual separation between the indented text and surrounding content, often used for quotes, excerpts, or to establish a hierarchy of information.

In professional documents and presentations, block indents help organize information and direct the reader’s attention to specific content. They’re particularly effective when you want to emphasize certain sections without changing other text elements like font size or style.

How to Indent in Canva?

How to Indent in Canva?

Creating indents in Canva requires different approaches depending on whether you’re working with standard Canva designs or Canva Docs.

Before you even start with text, you might need to set up your page orientation by learning how to landscape in Canva.

Unlike Microsoft Word or Google Docs, Canva doesn’t offer a tab key function for automatic indentation.

For standard Canva designs (presentations, social media graphics, etc.), you’ll be manipulating various elements manually.

For instance, when creating presentations, you might also need to learn how to put a timer in Canva to keep your talk on track. While we’re focusing on text, it’s also useful to know how to replace an image in Canva or even how to flip an image in Canva to complete your design.

For standard Canva designs, you’ll need to use manual methods:

  1. Add a text box to your canvas using the Text tab in the toolbar
  2. Enter your text content
  3. For first-line indents, place your cursor at the beginning of the paragraph and add spaces manually
  4. For block indents, either add spaces before each line or adjust the position of the entire text box
  5. For hanging indents, you’ll need to use multiple text boxes (more on this later)

Canva Docs offers more formatting options through dedicated indent buttons in the toolbar. These make basic indentation more straightforward but still have limitations compared to traditional word processors.

The key is understanding that Canva treats text primarily as a design element. This is why you can do cool things like how to curve text in Canva or even how to flip text in Canva, but also why basic formatting works differently. You can even further customize your designs by exploring if you can upload fonts to Canva for a unique look.

How To Do A Hanging Indent In Canva?

How To Do A Hanging Indent In Canva?

Creating properly formatted hanging indents requires specific techniques depending on which Canva format you’re using.

Indenting in Canva Designs (Not Docs)

When working with text in Canva presentations or other design projects, you’ll need to employ manual techniques for indentation.

First-Line Indent

To create a first-line indent in a Canva design:

  • Add a text box to your canvas using the Text tab
  • Type or paste your text into the box
  • Ensure your text is left-aligned by clicking the alignment button in the toolbar
  • Position your cursor at the beginning of the first line of your paragraph
  • Press the space bar approximately five times (the equivalent of a standard tab indent)
  • Repeat this process for each paragraph requiring a first-line indent

While not as precise as dedicated word processors, this method creates an effective visual indent for your paragraphs.

Block Indents

For block indentation in standard Canva designs:

  • Add your text box to the canvas
  • Select the entire text block
  • Use the space bar to add spaces at the beginning of each line, or
  • Adjust the position of the text box by moving it to the right on your canvas

The second method gives you greater flexibility, similar to how you can freely position other elements after learning how to cut out an image in Canva. This control is key to a polished design.

Hanging Indent

Creating hanging indents in Canva designs requires separating your text into multiple elements:

  • Add a text box and enter your complete text
  • Cut the text below the first line using Ctrl+X (Windows) or Command+X (Mac)
  • Create a new text box and paste this text
  • Format both text boxes identically (same font, size, spacing, etc.)
  • Position the second text box directly below the first line
  • Move the second text box to the right to create the hanging indent effect
  • Use rulers or guides for precise alignment

While this requires more steps than in traditional word processors, it gives you complete control over the appearance and spacing of your hanging indent.

How To Indent Text In Canva Docs?

How To Indent Text In Canva Docs?

Canva Docs provides more text formatting options than standard Canva designs, making some indentation tasks easier.

Indent An Entire Paragraph

To create a block indent in Canva Docs:

  • Select the paragraph you want to indent
  • Locate the “Increase Indent” button in the toolbar (it appears as an arrow pointing right)
  • Click this button to move the entire paragraph to the right
  • To reduce the indent, use the “Decrease Indent” button

This creates a uniform block indent for the selected text with consistent spacing.

Indent The First Line

For first-line indentation in Canva Docs:

  • Place your cursor at the beginning of the paragraph
  • Click the “Increase Indent” button in the toolbar
  • Canva Docs will indent the first line by approximately 2em spaces
  • For additional indentation, you may need to add manual spaces

Note that Canva Docs limits how much you can indent using the toolbar buttons.

While great for basic documents, you might also want to know how to add a clickable link in Canva PDF when you export your document.

For even more interactivity, you could add a QR code, but it’s important to know if Canva QR codes expire before adding them to print designs.

Advanced Indentation Techniques

Advanced Indentation Techniques

Creating Hanging Indents Manually

For more precise control over hanging indents in Canva designs:

  • Create a text box containing your entire text
  • Duplicate this text box (Ctrl+D or Command+D)
  • In the first text box, delete everything except the first line
  • In the second text box, delete only the first line
  • Align both text boxes so the first line appears directly above the rest
  • Move the second text box to the right to create the hanging indent effect
  • Group both text boxes (select both and click “Group” in the toolbar) to keep them together

This technique gives you precise control over the spacing and alignment of your hanging indent.

Using Rulers and Guides

For consistent indentation across multiple text elements:

  • Enable rulers by going to File > Show rulers
  • Add guides to your canvas by clicking on the ruler and dragging down or across
  • Use these guides to align your indented text consistently
  • For hanging indents, place a vertical guide where you want your indented text to begin
  • Align all subsequent lines to this guide for visual consistency

Using rulers and guides ensures uniform indentation throughout your design. This is especially important for multi-page documents like presentations or when you want to learn how to create a lookbook in Canva, where consistency is key to a professional appearance.

Indent Limitations and Workarounds

Limitations often come up when using Canva for designs, especially with indentation.

Tab Key Limitations

Canva’s most significant limitation for text formatting is the absence of a tab key. Another common question is, “Does Canva have spell check?”.

While it does, its functionality differs from traditional word processors, reinforcing the need for manual proofreading.

Workarounds include:

  • Using a consistent number of spaces (typically 5) for first-line indents
  • Creating separate text boxes for complex indentation needs
  • Utilizing Canva Docs’ indent buttons for basic indentation functions

Solutions For Complex Formatting

When creating documents requiring complex indentation:

  • Consider drafting your text with proper formatting in Google Docs or Microsoft Word first.
  • For especially complex sections, you might create images of properly formatted text. Similarly, for visual effects you can’t achieve directly, knowing how to fade an image on Canva or how to slice in Canva can provide creative workarounds.
  • For bibliographies or references, create one properly formatted entry, then duplicate and modify it. Mastering other text effects, like learning how to outline text in Canva or how to add a shadow in Canva, can also make your reference pages more visually distinct.

Tips For Professional Documents

For creating professional-looking documents with proper indentation:

  • Maintain consistent indentation spacing throughout your document.
  • When using multiple text boxes, match font, size, spacing, and alignment exactly.
  • Group related text elements to prevent accidental misalignment. This is especially important in complex layouts where you might also be figuring out how to wrap text in Canva around images.
  • Consider using Canva Docs for text-heavy projects. If you’re frequently creating professional documents, you might wonder, “Is Canva Pro worth it?”. The Pro version unlocks features that can streamline your workflow. Knowing how much Canva Pro costs and how to get Canva Pro for free can help you decide.
  • Use alignment tools and guides to ensure precise positioning of text elements.

FAQ’s:

How Can I Create A First-Line Indent In Canva?

In standard Canva designs, add spaces at the beginning of the first line of your paragraph- approximately 5 spaces creates a standard first-line indent. In Canva Docs, select the first line and use the “Increase Indent” button in the toolbar to indent just that line.

Remember that Canva Docs limits how much you can indent the first line before it begins indenting the entire paragraph.

Can I Apply Different Indents To Different Paragraphs?

Yes! In Canva designs, you can customize indentation for each paragraph individually by adding different numbers of spaces or creating separate text boxes with different positioning.

In Canva Docs, select specific paragraphs and apply different levels of indentation using the toolbar options. This gives you flexibility to create varied formatting styles within a single document.

Is There A Way To Do A Hanging Indent In Canva?

Yes, though it requires a manual approach. The most effective method in standard Canva designs is to separate your text into two text boxes-one for the first line and another for subsequent lines. Position the first text box at the left margin and place the second text box with the remaining text indented to the right. In Canva Docs, you’ll need to use similar manual techniques as there’s no built-in hanging indent feature.

Can I Indent An Entire Paragraph In Canva?

Absolutely. In Canva designs, indent an entire paragraph by either adding spaces at the beginning of each line or positioning the entire text box with an offset from the margin.

In Canva Docs, simply select the paragraph and click the “Increase Indent” button in the toolbar. This creates a uniform block indent that can be useful for highlighting quotes or important sections of text.

Conclusion

While Canva doesn’t provide the same text formatting capabilities as traditional word processors, the techniques outlined in this guide give you the tools to create professional-looking indentation in all your projects.

Understanding the different indentation types and mastering the manual methods in Canva lets you create polished, readable documents.

Remember that Canva’s strength lies in its flexibility as a design tool.

A common concern for professionals is whether Canva images are copyright-free, and understanding the licensing is important.

With practice, you’ll create perfectly indented text that enhances your designs. Once you’ve mastered these skills, you can even learn how to sell Canva templates on Etsy. Many designers ask, “Can I sell Canva designs on Etsy?”, and the answer is yes—turning your design skills into a business.

Whether you need to format academic references with hanging indents, create professional documents with first-line paragraph indents, or emphasize quotes with block indentation, these methods will help you achieve consistent, professional results in all your Canva projects.

Categories
Canva

How To Flip Text In Canva: A Beginner’s 1 Minute Easy Guide

Ever tried flipping text in Canva only to find no flip button?

You’re not alone! While Canva’s toolbar lets you flip images and shapes easily, text needs a clever workaround.

If you’re new to flipping, you might want to learn how to flip an image in Canva first, as the same tool is used in this process. Don’t worry’ll show you how to use the flip tool by turning your text into a PNG image.

Whether you’re designing logos or social posts, these steps are simple enough for anyone. You’ll learn to download text, re-upload it, and flip it sideways or upside-down using the top menu.

No fancy apps or keyboard shortcuts needed-just Canva’s basic tools.

Let’s turn that text box into a mirror effect for your next project!

Understanding Text Flipping in Canva

Understanding Text Flipping in Canva

Why Direct Text Flipping Isn’t Available in Canva?

Canva doesn’t let you flip text directly with a flip button like you can with images.

This is because flipped text would be backward and hard to read! Most people need text to be readable from left to right, so Canva keeps it that way.

But sometimes for special designs, you might want flipped text for a mirror effect – and there are ways to make this happen.

Difference Between Rotating and Flipping Text

Before we start, let’s be clear about the difference:

  • Rotating: This turns your text in a circle. You can use the rotate handle that appears when you click on text in Canva.
  • Flipping: This creates a mirror image of your text – like seeing it backward in a mirror. To flip text, we need to turn it into an image first.

How to Flip Text in Canva?

How to Flip Text in Canva?

Method 1: Converting Text To Image For Flipping

Step 1: Create Your Text In Canva

First, open your Canva project and add a text box. Before finalizing, ensure your spelling is correct by checking if Canva has spell check.

Type your words and make them look how you want with the right font, size, and color.

If you want to use a unique font, you might ask, “Can you upload fonts to Canva?” The answer is yes, and it can give your design a custom feel.

You can also explore other text effects, like learning how to curve text in Canva or how to outline text in Canva to make it stand out.

For formatting, knowing how to indent in Canva or how to wrap text in Canva can also be very useful.

Step 2: Download Text As An Image

Now we need to turn your text into a picture:

  • Click the “Share” button in the top right corner
  • Select “Download
  • Choose “PNG” as the file type
  • Check the box for “Transparent background” so only your text downloads
  • Click “Download

When using images, it’s also important to know if Canva images are copyright-free to avoid any legal issues.

Step 3: Upload The Image Back To Canva

Bring that text image back to your design:

  • Click “Uploads” in the left menu
  • Click “Upload media” and find the text image you just downloaded
  • Once it appears in your uploads, click on it to add it to your design

If you ever need to change the image, you can learn how to replace an image in Canva with just a few clicks.

Step 4: Use The Flip Tool On The Uploaded Image

Now that your text is an image, you can flip it:

  • Select the text image
  • Look for the “Flip” button in the toolbar above your design
  • Click “Flip” and choose “Flip horizontal” to flip left to right, or “Flip vertical” to flip top to bottom

Step 5: Adjust The Flipped Text In Your Design

Move your flipped text where you need it. You might need to resize it or move it around to fit right in your design. For a different orientation, you might also want to know how to landscape in Canva.

Method 2: Screenshot Method (No Download Required)

Step 1: Add Text To Your Design

Create your text in Canva and make it look just how you want it.

This is a great time to experiment with different looks, and you can even learn how to highlight text in Canva to add emphasis.

Step 2: Copy To Clipboard Technique

Take a screenshot of your text:

  • On Windows: Use the Snipping Tool or press Windows + Shift + S
  • On Mac: Press Command + Shift + 4
  • Then paste it back into your Canva design

Step 3: Remove Background From Text Image

If you have Canva Pro, select the pasted image and use the Background Remover tool to make the background clear. This feature is a great reason to consider upgrading, but it’s always good to ask, “Is Canva Pro worth it?”

If you’re curious about the cost, you can check how much Canva Pro costs or even find out how to get Canva Pro for free.

If you don’t have Pro, you can still achieve a similar result by learning how to cut out an image in Canva using other tools.

Step 4: Flip The Text Horizontally Or Vertically

With your text now as an image, click on it and find the flip tool in the top toolbar. Choose “Flip horizontal” for a side-to-side flip or “Flip vertical” for an upside-down flip.

Creating Mirror Text Effects In Canva

Creating Mirror Text Effects In Canva

Creating a mirror text effect in Canva can make your designs stand out.

Duplicating and Flipping Text For Symmetry

To make cool mirror effects:

  • Create your text image using one of the methods above
  • Make a copy of it (select and press Ctrl+D or Command+D)
  • Flip one copy using the flip button
  • Place them together to create a mirror effect

Creating Reflection Effects With Transparency

For a water-like reflection:

  • Make your normal text.
  • Create a flipped copy below it.
  • Lower the see-through level (transparency) of the flipped copy to about 40-50%. To perfect this effect, you can also learn how to fade an image on Canva.
  • You can even add a slight blur to make it look more like water.

Aligning Mirrored Text Properly

Getting your mirror text to line up just right:

  • Use Canva’s line-up tools in the top menu
  • For side-by-side mirror effects, line both pieces up by their middle
  • For top-and-bottom mirror effects, line both pieces up by their sides
  • Look at the position numbers to make tiny adjustments

Advanced Text Flipping Techniques

Advanced Text Flipping Techniques

Combining Flipped Text With Animations

If you use Canva Pro, you can make your flipped text move:

  • Select your flipped text image.
  • Click “Animate” in the top menu.
  • Pick an animation that works well with mirror effects.
  • When you show or save as a video, your mirror text will come alive. For more dynamic video elements, you could also learn how to put a timer in Canva.

Adding Effects To Flipped Text

Make your flipped text pop:

  • Try adding shadows. Learning how to add shadow in Canva can give your text depth.
  • Make it glow.
  • Change how bright or dark it is.
  • Try different colors for cool effects. You can even try to learn how to slice in Canva for more advanced graphical effects.

Using Flipped Text In Various Design Projects

Flipped text works great in:

  • Logos
  • Social media posts
  • Book covers
  • T-shirt designs
  • Pictures with water
  • Any design where you want a mirror look

You can apply these skills to bigger projects, like learning how to create a lookbook in Canva or even discovering how to sell Canva templates on Etsy. If you’re selling digital products, it’s also helpful to know how to add a clickable link in Canva PDF.

Troubleshooting Common Issues During Flipping

When flipping text in Canva, you may face some common challenges.

Fixing Quality Problems With Flipped Text

If your flipped text looks fuzzy:

  • Take high-quality screenshots
  • When downloading, pick the best quality option
  • Don’t stretch the text image too big after flipping

Adjusting Colors of Flipped Text Images

If colors change after flipping:

  • Use the photo editor tools in Canva to fix colors
  • Adjust brightness and other settings
  • If colors look very different, try the download method instead of screenshots

Working With Colored Backgrounds

If your page background has color:

  • Use the Background Remover tool with Canva Pro
  • Without Canva Pro, make your text on a matching colored background before taking a screenshot
  • Make sure the sizes match up right

FAQ’s:

Can I Flip Or Rotate A Page Background in Canva?

You can’t flip a whole page background directly. But you can flip any image first, then set it as your background. Just upload your image, use the flip tool, and then set it as the background.

Can I Flip Text Vertically and Horizontally in Canva?

Yes! Once your text is an image, you can flip it both ways. First, flip it horizontally, then select it again and flip it vertically. This gives you a completely mirrored effect.

Will Flipping An Element In Canva Also Flip The Text Within It?

Yes, if text is part of a group or image, flipping the whole thing will flip the text too. This is why turning text into an image works for flipping.

Is It Possible To Set A Custom Pivot Point For Rotation In Canva?

Canva doesn’t let you pick where to rotate from. The rotate handle always turns things around the center of what you’ve selected.

Are There Any Keyboard Shortcuts To Flip Or Rotate Elements In Canva?

Canva doesn’t have keyboard shortcuts just for flipping. For rotation, you can hold Alt (Windows) or Option (Mac) while using the rotate handle to turn things in smaller steps.

Can I Flip Or Rotate A Video Or GIF In Canva?

Yes, you can flip videos and GIFs just like images! Select the video, click the flip button in the toolbar, and pick which way you want to flip.

For other interactive elements, you might wonder, Do Canva QR codes expire? It’s a good question to explore for marketing materials.

Conclusion

Now you know how to flip text in Canva!

Even though there’s no direct flip button for text, you can use these simple methods to create mirror effects.

Remember that text becomes an image when you flip it, so make sure your text looks perfect before you turn it into an image.

You can use these tricks for many fun projects – from logos to social media posts to special designs with mirror effects. For those looking to monetize their skills, you might ask, “Can I sell Canva designs on Etsy?”

With these techniques, your designs will be even more unique. The flip tool in Canva is very useful once you know how to use it with text!

With a little practice, you’ll be flipping text quickly and easily in the Canva app or website. You might even find yourself using the toolbar and flip options without thinking about it.

I hope this guide helps you make amazing designs with cool text effects!

Categories
Canva

How to Add Shadow in Canva: Easy 3 Click Step-by-Step Guide

Adding shadows in Canva makes your designs look cool and stand out! Whether you’re working on a school project or a social media post, shadows help text, images, and shapes pop off the screen.

With Canva’s easy tools, you can add drop shadow effects in just a few clicks.

On the top toolbar, you’ll find options to adjust the blur, opacity, and intensity of the shadow to match your style. Even if you’re using the free Canva account or the mobile app, creating shadow effects is simple.

This guide will show you how to make text shadows, add shadows to design elements like photos, and fix common issues like blurry shadows.

Let’s turn flat designs into awesome 3D creations!

Understanding Shadows in Canva

Understanding Shadows in Canva

What Are Shadows in Design?

Shadows in design are dark areas that appear when light hits an object. In Canva, shadows are effects that make your design elements look like they float above the page. When you add a shadow effect to your graphics or text, they stop looking flat and start looking 3D. This makes your designs look more real and helps parts of your design stand out from others.

Why Shadows Matter in Graphic Design?

Shadows are super important in design because they:

  • Make designs look more professional
  • Add depth so things don’t look flat
  • Help important things stand out
  • Make designs more fun to look at
  • Create space between different parts of your design

Even the simplest design can look much better with the right shadow. Your Canva projects will look more polished when you add shadows in the right places.

Basic Shadow Terminology in Canva

Here are the main words Canva uses for shadows:

  • Drop shadow: Makes things look like they’re floating
  • Glow: A soft light all around an object
  • Blur: How soft or sharp the shadow edges look
  • Intensity: How strong the shadow appears
  • Transparency: How see-through the shadow is
  • Opacity: Another word for transparency
  • Angle: Which way the shadow falls
  • Distance: How far away the shadow appears

Knowing these words will help you work with shadows in your Canva account.

Types of Shadows Available in Canva

Types of Shadows Available in Canva

Drop Shadows

Drop Shadows

Drop shadows are the most common type in Canva. They make your design elements look like they’re floating above the page.

To add a drop shadow to image elements, you select the image, click “Edit photo” in the top toolbar, and then choose “Shadows.”

Once you have your image selected, you can do more than just add shadows; you can also learn how to flip an image in Canva or even how to replace an image in Canva without starting over. 

The drop shadow effect is great for making things stand out. You can control how far and which direction the shadow falls, making your graphics look more professional.

Inner Shadows

Inner Shadows

Inner shadows make the edges of something look raised while the middle looks pushed in. Canva doesn’t have a built-in inner shadow button, but you can create this effect with other tools.

You can make inner shadows by being clever with outlines and transparency settings.

This gives your design elements an interesting 3D look.

Text Shadows

Text Shadows

Text shadows make your words pop off the page. When you add shadow text in Canva, the words stand out more and become easier to read.

To make your text even more dynamic, you can learn how to curve text in Canva or how to outline text in Canva for a bold effect. This is very helpful when your text is on top of a photo or a busy background.

Before finalizing, you might wonder, “Does Canva have spell check?” to ensure everything is perfect. To add shadows to text, you use the effects panel after clicking on your text box. You can then adjust how the shadow looks to match your design. You can even explore if you can upload fonts to Canva to truly personalize your typography.

Element Shadows

Element Shadows

Element shadows are for shapes and graphics.

Adding shadow to shape elements in Canva is a bit tricky because shapes don’t have the same shadow options as images.

While you’re working with various elements, you might want to learn how to put a timer in Canva for presentations or videos. Also, if you use QR codes, it’s useful to know if Canva QR codes expire

There are special ways to add shadow to shapes in Canva that we’ll show you later in this guide. These methods help make your shapes look more interesting and professional.

How to Add Shadow in Canva?

How to Add Shadow in Canva?

Adding shadows in Canva is easy and can be changed to fit what you want.

Adding Shadows to Text in Canva

Here’s how to add a shadow to Canva text:

  1. Click on your text to select it
  2. Click “Effects” in the top toolbar
  3. Select “Shadow” from the options
  4. Choose your shadow style
  5. Adjust the settings:
    • Offset (how far the shadow is)
    • Direction (which way it falls)
    • Blur (how soft the edges are)
    • Transparency (how see-through it is)
    • Color (what color the shadow is)

Besides shadows, you can also manage text layout by learning how to indent in Canva or how to wrap text in Canva for cleaner paragraphs.

For a unique look, you could even learn how to flip text in Canva. Try different settings to see what looks best. You can make bold shadows for headlines or subtle shadows for body text. A common task is to highlight text in Canva, which can be combined with shadows for emphasis.

Creating Shadows For Images and Elements

To add a drop shadow to image elements:

  1. Select your image in Canva
  2. Click “Edit photo” in the top toolbar
  3. Find “Shadows” in the sidebar options
  4. Choose a shadow type: drop, glow, or outline
  5. Adjust the settings:
    • Size of the shadow
    • Blur amount
    • Angle
    • Distance
    • Color
    • Intensity of the shadow

Mastering image manipulation is key.

For example, knowing how to cut out an image in Canva gives you clean objects to apply shadows to. Similarly, learning how to fade an image on Canva can complement your shadow effects beautifully.

The shadow will make your image stand out from the page. This works great for product photos, logos, and other graphics in your designs.

Customizing Shadow Properties

After adding a shadow, you can change these things to make it perfect:

  1. Size: How big the shadow is
  2. Blur: How soft or sharp the edges are
  3. Angle: Which way the light seems to come from
  4. Distance: How far the shadow extends
  5. Color: What color the shadow is (doesn’t have to be black!)
  6. Intensity: How strong the shadow looks

Moving these sliders helps you create exactly the look you want. Try small changes to see how they affect your shadow effect.

Using Shadow Effects With Templates

Canva has many templates with shadows already built in.

When using these templates, you can:

  1. Keep the shadows as they are
  2. Change the shadows to match your style
  3. Remove shadows you don’t want
  4. Add more shadows to other parts

If you get good at customizing templates, you might be interested in learning how to sell Canva templates on Etsy.

Looking at templates is a good way to learn how shadows work.

You can copy these ideas in your own designs to make them look better, such as when you create a lookbook in Canva.

Advanced Shadow Techniques in Canva

Advanced Shadow Techniques in Canva

Using advanced shadow techniques can improve your designs in Canva.

Creating Layered Shadow Effects

Layered shadows use more than one shadow to create cool effects.

Here’s how to make them:

  1. Add your first shadow to something
  2. Make a copy of it
  3. Add a different shadow to the copy
  4. Put them on top of each other
  5. Make the top one a bit see-through

This works well for text and makes a neat 3D effect that looks better than what Photoshop beginners can do!

Realistic Shadow Techniques

To make shadows look real:

  1. Make sure all shadows fall the same way
  2. Match the shadow size to the object size
  3. Use soft blur for most shadows
  4. Lower the opacity so shadows aren’t too dark
  5. Use dark gray instead of pure black for more natural shadows

Real shadows aren’t perfectly sharp or solid black. Softening your shadows makes them look more natural.

Colored and Gradient Shadows

For fun designs, try colored shadows:

  1. Add a shadow to your element
  2. Click the shadow color option
  3. Pick a color that matches your design
  4. Try a dark version of your main color

For gradient shadows:

  1. Create a shape that looks like a shadow
  2. Fill it with a gradient
  3. Put it behind your main element
  4. Adjust the blur and transparency

Colored shadows work well for fun projects and social media graphics.

3D Shadow Effects

To create a 3D effect:

  1. Add multiple shadows at different angles
  2. Use different distances for each shadow
  3. Change the blur amount between shadows
  4. Group everything so it moves together

This makes your design elements look like they’re floating at different heights. It’s great for important text or featured content in your blog graphics.

Troubleshooting Common Shadow Issues

  1. Fixing Blurry Shadows: If your shadows look fuzzy, check the blur setting in the effects panel and reduce it. Make sure your original image isn’t blurry-sharp images create clearer shadows. A related question is whether Canva images are copyright-free, which is important to know before using them. If shadows still look messy, try changing the distance or color so they don’t blend with the background. Download designs as PNG files for better quality.
  2. Adjusting Shadow Intensity: If shadows are too dark or light, use the intensity of the shadow slider in Canva. Move it left to make shadows lighter or right to make them darker. Lowering opacity also softens shadows, while increasing blur makes them look more natural.
  3. Mobile Vs Desktop Shadow Features: The Canva app (mobile) has fewer shadow options than the desktop version. For example, adjusting angle or distance might require the desktop’s top toolbar. On mobile, tap “More” in the edit menu to find shadow tools.
  4. Shadow Compatibility Across Formats: Shadows look best in PNG files (which keep the transparent background) or PDFs. For PDFs, it’s useful to know how to add a clickable link in Canva PDF to make them interactive. JPG files might make shadows look pixelated. You might also want to know how to landscape in Canva if you’re creating designs with different orientations. Always check how shadows appear after downloading.

Design Tips For Effective Shadows

Design Tips For Effective Shadows

Using shadows well can improve your designs.

Best Practices For Shadow Direction

In most designs, shadows should:

  • All fall in the same direction
  • Usually go down and to the right
  • Match other light effects in your design
  • Look natural and not too extreme

Most designers make shadows fall from the top-left to the bottom-right. This looks natural because it matches how we usually see shadows in real life.

Color Theory For Shadows

Choose good colors for your shadows:

  • Dark gray often looks more natural than black
  • Try using a darker shade of the object’s color
  • Blue-tinted shadows look cool and calm
  • Warm shadows (with brown/orange tints) look cozy

The color of your shadow can change how your whole design feels. Think about what mood you want when picking shadow colors.

Balancing Multiple Shadows in a Design

When using many shadows in one design:

  • Keep them all similar in style
  • Don’t make all shadows too dark
  • Use stronger shadows for important things
  • Use lighter shadows for background items

Too many strong shadows can make your design messy. Pick which parts need to stand out the most.

Shadows For Different Design Purposes

Different projects need different shadow styles:

  • Business Designs: small, neat shadows
  • Kids’ Content: fun, colorful shadows
  • Modern Designs: sharp, clean shadows
  • Old-Fashioned Styles: soft, blurry shadows

Think about who will see your design and what feeling you want to create before choosing your shadow style.

Canva Pro Vs Free: Shadow Features

Canva Pro Vs Free

Enhanced Shadow Options in Canva Pro

Canva Pro gives you more shadow options:

  • More shadow effect styles
  • Better quality shadows
  • More control over settings
  • Special templates with cool shadow effects

If you’re wondering about the cost, you can find out how much Canva Pro costs. If you make lots of designs with shadows, Canva Pro might be worth the money just for the better shadow tools!

Many users ask, “Is Canva Pro worth it?“, and the advanced shadow features are a big reason why it can be.

Maximizing Shadow Tools in Free Version

Even with free Canva, you can:

  • Add basic shadows to text and images
  • Use elements from the free library to create shadow effects
  • Try the shadow tricks we showed you
  • Save your shadow designs as templates to use again

The free version still has good shadow options that can make your designs look great. For those on a budget, it’s worth exploring how to get Canva Pro for free through trials or special programs.

Conclusion

Adding shadows in Canva is a simple way to make your designs stand out!

By using the effects panel and top toolbar, you can add drop shadows to text, images, and shapes, making them look 3D and professional.

Whether you’re on the app or desktop, adjusting the blur, intensity, or transparency helps create the perfect shadow effect.

Remember to keep shadows pointing the same direction for a natural look and try colors like dark gray instead of black.

Even with a free Canva account, you can make cool shadows, but Canva Pro offers more styles for advanced designs. Once you master these skills, you may wonder, “Can I sell Canva designs on Etsy?” The answer is yes, and your professional-looking designs will be a great start.

Practice these tricks on templates or your own graphics, and soon you’ll be creating eye-catching posters, social media posts, and more.

Shadows turn flat designs into something amazing-give them a try! 🎨

Categories
Canva

How Much Is Canva Pro: Worth The Price? (Plans, Features & More)

Canva is a popular design tool that helps people create eye-catching social media posts, school projects, and flyers-even if they’re not design experts.

But did you know it comes in two versions: a free plan and a paid subscription called Canva Pro?

If you’re curious about how much Canva Pro costs or whether its premium features like Magic Resize, Background Remover, and 1TB cloud storage are worth it, this guide is for you!

We’ll break down the pricing plans (including discounts for students and teachers), compare the free and Pro versions, and explain how tools like the Brand Kit or Magic Studio can save time. For those wondering, a detailed breakdown can help you decide if Is Canva Pro worth it.

Whether you’re a small business owner, a teacher making classroom posters, or just love designing, you’ll learn how Canva Pro’s advanced design tools and library of templates can turn your ideas into reality-without breaking the bank. Let’s dive in!

How Much Is Canva Pro?

How Much Is Canva Pro?

Canva Pro costs $12.99 per month if you choose the monthly payment option, or $119.99 per year with the annual subscription-saving you approximately 33% compared to paying monthly.

This paid subscription unlocks all of Canva’s premium features, including over 100 million stock images, videos, and audio tracks, advanced design tools like Background Remover and Magic Resize, plus 1TB of cloud storage for all your projects.

Understanding the copyright rules for these assets is also important; you can learn more about whether Canva images are copyright-free.

For teams and businesses, Canva offers different pricing structures. Canva Teams costs $100 per year per person with a minimum of 3 team members, making the starting price $300 per year.

This teams plan includes everything in Canva Pro plus additional collaboration features for team members working together on projects.

Why Choose Canva Pro?

Why Choose Canva Pro?
  1. Design Without Limits: Canva Pro removes the limitations of the free plan, giving you full access to over 100 million premium images, videos, templates, and design elements. The vast library of templates helps you create professional designs for social media posts, presentations, marketing materials, and more without starting from scratch. For instance, you can learn how to create a lookbook in Canva to showcase your products professionally. With Magic Studio features like Background Remover, Magic Edit, and Magic Write, you can transform your design skills and create professional-quality content in minutes rather than hours. You can even master simple tricks like learning how to fade an image on Canva to add a professional touch to your visuals.
  2. Build and Grow Your Brand: With Canva Pro’s Brand Kit feature, you can store your brand colors, fonts, and logos in one place for easy access. This ensures brand consistency across all your designs and saves time by allowing you to apply your brand elements with just one click. If you’re wondering you can upload fonts to Canva; the Pro plan makes it easy. You can create up to 1000 Brand Kits with the Pro plan, making it perfect for designers working with multiple clients or brands who need extra branding capabilities.
  3. Free Up More Time in Your Day: Canva Pro includes time-saving features like Magic Resize, which lets you automatically adapt your designs for different platforms and social media channels with just one click. Instead of recreating designs from scratch for each platform, you can create once and resize for all your needs. For example, learning how to landscape in Canva can be done in seconds. The background remover tool instantly removes image backgrounds without requiring advanced design skills or external software, and you can easily learn how to cut out an image in Canva with this feature.
  4. Work in One Place: Canva Pro gives you 1TB of cloud storage compared to just 5GB with the free plan. This means you can store all your design assets, templates, and finished projects in one place, accessible from any device. The collaboration features allow you to share designs with clients or team members, collect feedback, and make revisions all within the Canva platform, streamlining your workflow. You can even improve your PDFs by learning how to add a clickable link in Canva PDF.

Canva Free Vs Canva Pro: What’s The Difference?

Canva Free Vs Canva Pro: What’s The Difference?

What You Get With the Free Plan?

The free version of Canva provides access to basic design tools and a limited library of free templates, images, and fonts. You can create simple designs like social media posts, presentations, and flyers without paying anything. You can even perform basic edits and learn how to replace an image in Canva or how to flip an image in Canva using the free tools.

The free plan includes:

  • Access to over 2 million free templates
  • Basic editing tools for creating designs, including text effects like how to highlight text in Canva
  • 5GB of cloud storage for your projects
  • Limited selection of stock photos and graphic elements (about 4.5 million)
  • Ability to collaborate with others on designs
  • Access to basic AI creative tools
  • 24/7 customer support for technical issues

Limitations of the Free Plan

While Canva Free offers impressive capabilities, it comes with several limitations that may impact professional designers:

  • Limited access to premium templates and stock images
  • No background remover tool (except for one-time use)
  • No magic resize feature for adapting designs to different platforms
  • Limited brand kit functionality (only one brand kit)
  • Cannot create transparent PNG files easily
  • Limited storage space (5GB vs 1TB with Pro)
  • Limited access to Magic Studio AI features and advanced techniques like how to slice in Canva
  • Restrictions on premium elements

Canva Pro Pricing: How Much Is Canva Pro?

Canva Pro Pricing

Canva Free Plan

The free plan costs $0 and includes basic features suitable for casual users or beginners. You get access to thousands of templates, 5GB of cloud storage, and basic editing capabilities.

This free version of Canva is perfect for trying out the platform before committing to a paid subscription.

Canva Pro Plan – Monthly & Annual

Canva Pro is priced at:

  • $12.99 per month when billed monthly
  • $119.99 per year when billed annually (equivalent to $10 per month, saving about 33%)

The Pro plan includes all premium features:

  • Full access to 140+ million stock photos, videos, and audio tracks
  • 1TB of cloud storage for all your design assets
  • Background Remover tool for instant image editing
  • Magic Resize feature to adapt designs for different platforms
  • Magic Studio AI tools, including Magic Write and other advanced features
  • 1000 Brand Kits for managing multiple brands
  • Social media scheduling for content planning and features like learning how to put a timer in Canva for your video content.
  • Priority customer support when you need help

Canva For Teams (Canva Enterprise):

Canva Teams starts at:

  • $100 per year per person
  • Minimum of 3 people ($300/year total)
  • $14.99 per month for up to 5 users, according to some sources

Enterprise pricing is custom-based on the specific needs and number of users in your organization.

Enterprise plans include additional features like:

  • Enhanced brand controls for maintaining consistency
  • Team roles and permissions for managing access
  • Advanced security features for larger organizations
  • Dedicated customer support for enterprise users

Regional Pricing Differences

US/North America Pricing

In the United States and North America, Canva Pro costs:

  • $12.99 per month when billed monthly
  • $119.99 per year when billed annually

Canva Teams costs $100 per year per person, with a minimum of 3 people in the US

India and Asia Pricing

Pricing in India and parts of Asia is regionally adjusted:

  • India: ₹500 per month for Canva Pro
  • India: ₹380 per month per person for Canva Teams
  • Philippines: ₱349 per month for Canva Pro

Importantly, while Canva has raised prices in many regions, they have confirmed that pricing for users in India will remain unchanged for now.

Europe and UK Pricing

European pricing varies by country:

  • UK: £10.99 per month for Canva Pro
  • Other European countries have similar regional adjustments based on local currencies and market conditions

Who Should Get Canva Pro?

Who Should Get Canva Pro?

Canva Pro is ideal for:

  1. Freelance designers who need professional tools without the learning curve of more complex software. They can even monetize their skills by learning how to sell Canva templates on Etsy.
  2. Small business owners creating marketing materials for multiple platforms. For those wondering, Can I sell Canva designs on Etsy? The answer is yes, and Pro makes it easier.
  3. Social media managers handling content for various social media channels, who might want to know do Canva QR codes expire when planning campaigns.
  4. Content creators needing high-quality visuals regularly
  5. Marketers creating consistent brand materials across campaigns
  6. Anyone who uses Canva frequently and finds the free plan limitations frustrating

The paid subscription makes the most sense for regular users who need the advanced design tools, premium content, or who value the time saved with features like Background Remover and Magic Resize.

Canva Pro Vs. Canva Free: Which One Is Right For You?

Canva Pro Vs. Canva Free: Which One Is Right For You?

Choose Canva Free if:

  • You’re just starting with graphic design and building design skills
  • You create designs occasionally rather than regularly
  • You don’t need premium stock images or advanced features
  • You’re working with a very limited budget
  • You only need basic templates for simple designs

Upgrade to Canva Pro if:

  • You create designs regularly as part of your work
  • You need access to premium stock images and templates
  • You want to save time with features like Background Remover and Magic Resize
  • You need to maintain brand consistency with Brand Kit
  • You work with multiple clients or brands
  • You need more cloud storage for your growing design library
  • You want full access to Magic Studio AI features and text manipulations, like learning how to curve text in Canva or how to outline text in Canva.

Canva Pro Free Trial Options

Canva Pro Free Trial Options

30-Day Free Trial

Canva offers a 30-day free trial of Canva Pro, giving you full access to all premium features without any initial commitment.

This allows you to test all Pro features before deciding if the paid subscription is worth it for your specific needs.

There’s no obligation to continue after the trial period, and you can cancel anytime if you decide it’s not right for you. Many users search for how to get Canva Pro for free, and the 30-day trial is the best official way to do so.

Free For Educational & Non-Profit Use

Canva offers free access to premium features for certain groups:

  1. Teachers and Students: Educators can get Canva Pro for free through Canva for Education. Teachers need to verify their status with an education email. Students may get free access through their school’s account.
  2. Nonprofit Organizations: Registered nonprofits can apply for Canva for Nonprofits, which provides free access to Canva Pro features for their organization.

Best Canva Pro Alternatives in 2025

Best Canva Pro Alternatives

Many strong options are coming up as alternatives to Canva Pro in 2025.

Adobe Express

Adobe Express

Adobe Express (formerly Adobe Spark) offers similar functionality to Canva with:

  • Strong integration with other Adobe Creative Cloud products
  • More advanced editing capabilities for professional designers
  • Pricing starting at a competitive rate
  • Access to Adobe fonts and stock images
  • Steeper learning curve compared to Canva

VistaCreate

VistaCreate

VistaCreate (formerly Crello) provides:

  • Competitive pricing at $10/month
  • Extensive library of stock images and templates
  • Animated templates for dynamic content
  • Growing AI capabilities for faster design
  • Less name recognition than Canva

Snappa

Snappa

Snappa offers:

  • More affordable pricing options
  • Simpler interface focused on social media graphics
  • Thousands of templates for quick design
  • Fewer advanced features than Canva Pro
  • Faster onboarding for new users

Is Canva Pro Really Worth It?

Is Canva Pro Really Worth It?

Whether Canva Pro is worth it depends on your specific design needs and usage frequency.

For professionals creating designs regularly, the time saved with features like Background Remover and Magic Resize alone can justify the cost. Access to premium templates and stock images eliminates the need for separate subscriptions to stock photo sites.

Consider these factors when deciding:

  • How often do you create designs for work or personal projects
  • Whether you need premium templates and stock images
  • The value of your time (and how much time features like Magic Resize can save)
  • If you need brand consistency across multiple designs
  • Whether you need the extra storage space for your growing design library

For most regular users, the annual subscription offers the best value at effectively $10 per month, making Canva Pro quite affordable compared to other professional design tools like Adobe Creative Cloud while maintaining ease of use for all skill levels.

FAQ’s:

How Much Is Canva Pro Per Month?

Canva Pro costs $12.99 per month when billed monthly. This gives you full access to all premium features including over 100 million stock images, videos, and audio tracks, plus advanced design tools like learning how to add shadow in Canva.

Can I Pay Canva Pro Monthly?

Yes, Canva offers a monthly payment option at $12.99 per month. This provides flexibility if you don’t want to commit to an annual subscription, though you’ll pay about 33% more than with the annual plan.

How Much Does Canva Pro Cost Per Year?

Canva Pro costs $119.99 per year when billed annually, which breaks down to about $10 per month. This annual subscription saves you approximately 33% compared to paying monthly.

Can I Use Canva Pro Without Paying?

Yes, you can use Canva Pro without paying through:

  • The 30-day free trial (available to any new user)
  • Canva for Education (free for verified teachers and eligible students)
  • Canva for Nonprofits (free for registered nonprofit organizations)

What is the Cancellation Policy For Canva Pro?

You can cancel your Canva Pro subscription at any time.

If you cancel a monthly plan, you’ll retain Pro access until the end of your current billing cycle. For annual plans, you’ll maintain access until the end of your paid year. Canva does not offer prorated refunds for partial use of subscription periods.

Can I Upgrade From Canva Free to Canva Pro At Any Time?

Yes, you can upgrade from Canva Free to Canva Pro at any time.

Your account will immediately gain access to all premium features, and you’ll be billed according to the plan you select. Any designs you’ve created with the free plan, including those where you learned how to flip text in Canva or how to wrap text in Canva, will remain accessible.

Conclusion

Canva Pro offers significant value for designers, small businesses, and content creators who need professional-quality design tools without complex software.

At $12.99 per month or $119.99 per year, it provides access to premium features that save time and enhance design capabilities.

The decision between Canva Free and Canva Pro ultimately comes down to your specific needs, usage frequency, and budget.

For occasional users, the free plan may be sufficient. For professionals creating designs regularly, the time-saving features and premium content library make Canva Pro a worthwhile investment.

Before committing, take advantage of the 30-day free trial to test all the premium features and determine if they justify the cost for your particular situation.

Whether you choose the free plan, Pro, or Teams, Canva remains one of the most accessible and powerful design tools for all skill levels in 2025, with pricing options to fit various budgets and requirements.

Categories
Canva

How To Get Canva Pro For Free: A Beginner’s Guide (100% WORKING)

Creating cool designs shouldn’t cost money.

As someone who loves making graphics, I know how Canva Pro helps turn ideas into professional designs fast.

This guide shows simple ways to use Canva Pro for free-perfect for teachers, students, or anyone wanting premium features like Magic Studio or background remover without paying.

You’ll learn about the 30-day free trial (no tricks!), special programs for schools, and tips to make the free version work harder.

Whether you’re designing social media posts, educational templates, or logos, these 2025-approved methods help you unlock high-quality tools.

Teachers can get free access for group projects, while students use .edu emails for student access. Even nonprofits get free templates and advanced collaboration tools! Let’s dive in.

Understanding Canva Pro and Its Benefits

Understanding Canva Pro and Its Benefits

What is Canva Pro?

Canva Pro is the premium version of Canva that offers enhanced design tools, content creation capabilities, and collaboration features.

It’s designed for professionals who need more advanced options than what the free version provides. With Canva Pro, users gain access to premium templates, unlimited storage, and sophisticated design elements that simplify the creation of professional designs. For those wondering about the investment, you can learn more about how much Canva Pro costs.

The paid subscription for Canva Pro typically costs $14.99 per month, which might be a significant investment for individual designers, small businesses, or those just starting their side hustle in graphic design.

Many users often weigh whether the features justify the cost, a question explored in detail in this article on whether Canva Pro is worth it.

Key Features of Canva Pro

Canva Pro includes several premium features that set it apart from the free version:

  • Background Remover: Instantly remove image backgrounds with a single click. This is a powerful tool for creating clean, professional graphics. If you need to master this, here’s a guide on how to cut out an image in Canva.
  • Magic Studio: Access to AI-powered design tools like Magic Write and other advanced features.
  • Premium Content: Over 141+ million stock photos, graphics, videos, and audio tracks. It’s important to understand the usage rights so that you might ask, Are Canva images copyright-free?
  • Brand Kit: Upload and store your logos, fonts, and brand colors to ensure consistent design. For more on this, see if you can upload fonts to Canva.
  • Resize Designs: Quickly adapt designs for different platforms and formats with just one click. You can also change the orientation of your entire design with guides on how to landscape in Canva.
  • Advanced Collaboration Tools: Improved workflows for team projects.
  • 100GB Storage: Significantly more space for your design files compared to the free version.
  • Social Content Planner: Schedule and post content directly to social media platforms. You can also generate QR codes for your campaigns, but you may wonder, Do Canva QR codes expire?
  • Premium Templates: Access to over 5+ million templates compared to 2.2+ million in the free version. You can even create your own and learn how to sell Canva templates on Etsy or ask the broader question, “Can I sell Canva designs on Etsy?”.

Beyond the main features, Canva Pro allows for more intricate design manipulations. For instance, you can learn how to add a shadow in Canva to give depth to your elements. Text manipulation is also more advanced; you can discover how to curve text in Canvahow to outline text in Canva, and even how to flip text in Canva. For text layout, knowing how to wrap text in Canva and how to indent in Canva is very useful.

Comparing Free Canva Vs. Canva Pro

Comparing Free Canva Vs. Canva Pro

Before diving into how to get Canva Pro for free, it’s important to understand what you’re missing with just the free version of Canva:

FeatureCanva FreeCanva Pro
Templates2.2+ million5+ million
Stock media library4.7+ million141+ million
Storage5GB100GB
Background RemoverNoYes
Magic Studio AI toolsLimited messages per month10x more messages
Brand KitLimited color savingComplete brand management
Transparent backgroundsNo (white background only)Yes
Resize designsNoYes (one-click resize)
Social schedulingNoYes

The free version is excellent for basic design needs, but the premium features in Canva Pro significantly enhance productivity and design quality.

For example, manipulating images is more robust in Pro.

You can learn basics like how to replace an image in Canva or how to flip an image in Canva. More advanced techniques include learning how to fade an image on Canva and how to slice in Canva.

Get Canva Pro Free With The 30-Day Trial

Get Canva Pro Free With The 30-Day Trial

How To Sign Up For The Canva Pro Free Trial?

Getting started with a free trial of Canva Pro is straightforward.

Here’s how to do it:

  1. Visit the Canva website through a special affiliate link that offers a 30-day trial (standard trials are usually shorter)
  2. Click on “Start your free Pro trial” button
  3. Sign up using your Google, Facebook, or email account
  4. Choose between a monthly or yearly plan (remember, you won’t be charged during the trial)
  5. Enter your payment details (required, but you won’t be charged until the trial ends)
  6. Start enjoying all premium features of Canva Pro for 30 days

The extended 30-day trial gives you plenty of time to create professional designs and test all the premium features. For instance, you could spend time learning how to put a timer in Canva for your video projects or figure out how to highlight text in Canva for your presentations.

Managing Your Free Trial to Avoid Charges

To ensure you don’t get charged after your free trial ends:

  1. Make a note of when your trial expires
  2. Set a reminder a few days before the trial ends
  3. If you decide not to continue, follow these steps to cancel:
    • Log in to your Canva account
    • Click on the settings icon (cog) in the top right corner
    • Select “Billing & plans.”
    • Click on the three dots next to your Canva Pro subscription
    • Select “Cancel plan.”
    • Click on “Continue cancellation.”
    • Provide a reason for cancellation
    • Click “Continue cancellation” again
    • Confirm by clicking “Cancel subscription.”
    • Click “OK” when you see the cancellation confirmation

What to Expect After the Trial Period Ends?

After your free trial ends, one of three things will happen:

  1. If you cancel before the trial ends, your account will revert to the free version of Canva, but you’ll retain access to all designs you’ve created
  2. If you don’t cancel, you’ll be charged for the plan you selected (monthly or yearly)
  3. If payment fails, your account will automatically downgrade to the free version

Even after downgrading to the free version, you’ll still have access to all your created designs, but premium elements will be watermarked if you try to edit them.

You’ll also lose access to features like creating interactive PDFs, so be sure to learn how to add a clickable link in Canva PDF during your trial.

Canva Pro For Students and Teachers

Canva Pro For Students and Teachers

Eligibility For Canva For Education

Eligibility For Canva For Education

Canva offers a special program called Canva for Education, which provides free access to Canva Pro features for eligible educational institutions.

To qualify, you must be:

  • A certified K-12 (primary or secondary) teacher currently in a teaching position
  • A certified K-12 school librarian
  • A certified K-12 learning support assistant or teacher
  • A certified K-12 curriculum specialist
  • A teacher at a technical or vocational school serving primary or secondary students
  • Part of a formally accredited K-12 school, school district, or department of education

It’s important to note that Canva for Education is not currently available for higher education institutions like colleges and universities. However, Canva does offer a separate “Canva for Campus” product for these institutions.

How to Apply With Your Educational Email?

Applying for Canva for Education is simple:

  • Visit the Canva for Education page
  • Sign up using your verified educational email domain for instant access
  • If you don’t have a verified email, upload proof of your teaching certification or employment status
  • Wait for verification (usually takes up to 48 hours)

Once approved, you’ll have access to all Canva Teams features, which include everything in Canva Pro plus education-specific tools.

Benefits of Canva For Education

Canva for Education offers numerous benefits specifically designed for educational environments:

  • Free access to all Canva Teams features for teachers and students
  • Educational templates for lesson plans, presentations, and more
  • LMS integrations for seamless classroom use
  • Ability to create and assign group projects
  • No paywalls or surprise charges – it’s 100% free
  • Tools to create whiteboards, presentations, and videos
  • Ability to set up sequenced lessons for students to follow at their own pace
  • Professional development training resources
  • Collaboration tools for student teams

The program makes visual communication easy in educational settings, allowing teachers to create engaging content and students to demonstrate their learning through creative projects.

Canva Pro For Nonprofits

Canva Pro For Nonprofits

Eligibility Requirements For Nonprofit Organizations

Canva offers free access to Canva Teams (which includes all Canva Pro features) for eligible nonprofit organizations through the Canva for Nonprofits program.

To qualify, your organization must be:

  • A registered charity or nonprofit organization
  • Working for the public good
  • Operating with ethical practices

How to Apply For Canva For Nonprofits?

The application process for Canva for Nonprofits is straightforward:

  • Fill out the application form on the Canva website
  • Submit documentation proving your nonprofit status
  • Wait for verification from Canva’s team
  • Receive an email confirmation once approved

The verification process typically takes a few weeks, after which your organization will gain free access to premium features.

Free Features Available to Nonprofit Organizations

Nonprofit organizations receive access to:

  • All Canva Teams premium features (100% free)
  • Up to 50 user accounts for your team members
  • 100GB of storage for design files
  • Brand Kit tools for consistent branding across materials
  • Premium templates and media library
  • Collaboration tools for team projects
  • Social media scheduling features
  • Background Remover and Magic Resize tools

These tools can significantly enhance a nonprofit’s visual communication strategy without straining limited budgets.

For example, a nonprofit could create a professional marketing portfolio by learning how to create a lookbook in Canva.

Alternative Methods To Access Canva Pro Features

Alternative Methods To Access Canva Pro Features

Using Referral Programs For Free Access

While Canva has changed its referral program over time, there are still opportunities to earn free access to premium features:

  • Canva’s affiliate program allows content creators to earn commissions by promoting Canva
  • By becoming a Canva affiliate, you can potentially earn enough to cover your subscription
  • The application process requires you to demonstrate experience creating content about Canva

How To Get A .edu Email Address?

Some users attempt to access Canva for Education by obtaining a .edu email address.

Here’s what you should know:

  • In the US, .edu email addresses are issued to students and faculty of colleges and universities
  • Some websites claim to offer methods for non-students to obtain .edu emails
  • These methods typically involve applying to community colleges and creating an account

However, I must emphasize that misrepresenting your status as an educator or student violates Canva’s terms of service. Canva actively verifies eligibility for their education program, and dishonest applications risk account termination.

Tips For Maximizing The Free Version Of Canva

Tips For Maximizing The Free Version Of Canva

If you can’t access Canva Pro for free through legitimate channels, here are strategies to get the most from the free version:

  1. Use Free Background Remover Tools: Need to delete a photo’s background? Try removing BG or Picsart! These tools use AI magic to erase backgrounds in seconds. Just upload your photo, let the tool work, then add it back to Canva. Perfect for making logos or social media posts stand out.
  2. Find Free Photos & Graphics: Sites like Unsplash and Pixabay offer high-quality images for free. Download photos of nature, people, or educational templates, then upload them to Canva. No need to pay for premium content is 100% free to use.
  3. Keep Designs Organized: Use folders in Canva to sort projects like school assignments or group projects. Archive old designs you don’t need anymore to save space. Think of it like tidying your room- everything stays easy to find.
  4. Make Free Templates Your Own: Canva’s 2.2+ million free templates are a great start. Change colors, add your logos, or swap fonts to make them unique. For example, turn a basic poster into a cool class project by adding your photos. It’s also helpful to know if Canva has spell check to ensure your designs are error-free.

FAQ’s:

Can I Cancel My Canva Pro Free Trial Early?

Yes, you can cancel your Canva Pro free trial at any time during the 30 trial. Your account will continue to have Pro access until the trial period ends, after which it will revert to the free version.

Can I Extend My Canva Pro Free Trial?

Officially, Canva doesn’t offer extensions to the free trial. Once your 30-day trial ends, you’ll need to either subscribe to a paid plan or revert to the free version. Some users report success with contacting customer support in special circumstances, but this isn’t guaranteed.

Does Canva Offer Discounts For Educators Beyond K-12?

While Canva for Education is limited to K-12 institutions, Canva does offer a separate “Canva for Campus” product for higher education institutions. This isn’t free by default, but educational institutions can contact Canva for potential special pricing.

Can I Use Canva Pro Features Offline?

Canva is primarily a web-based tool that requires internet access. However, the Canva mobile app allows you to download designs for offline viewing. For full editing capabilities, you’ll need an internet connection.

Can I Switch From Canva Free To Canva For Nonprofits Later?

Yes, if your organization qualifies as a nonprofit, you can apply for the Canva for Nonprofits program at any time. Once approved, your existing Canva account will be upgraded to include all premium features at no cost.

Conclusion

Access to premium design tools shouldn’t be limited by budget constraints. Through this guide, I’ve provided multiple legitimate methods to get Canva Pro for free through the 30-day trial, education programs, and nonprofit initiatives.

For teachers and students in K-12 settings, Canva for Education offers a permanent solution with free access to premium features.

Nonprofit organizations can similarly benefit from the Canva for Nonprofits program. For everyone else, the 30-day free trial provides an excellent opportunity to use premium features for a limited time.

If none of these options work for you, remember that the free version of Canva still offers powerful capabilities that, when combined with creativity and some workarounds, can produce professional-quality designs.

As someone who has spent years in the design field, I’ve learned that while premium tools can enhance efficiency, they’re not a substitute for creativity and skill.

Whether you’re using Canva Pro or the free version, focus on developing your design fundamentals, and you’ll create impressive visual content regardless of which version you use.

Categories
Canva

Canva Pro Review: Is Canva Pro Worth It? Let’s Break It Down (Honest Review)

Have you ever made a social media post, school presentation, or colorful graphic? If yes, you’ve probably used Canva’s free version.

But what if you need more-like fancier templates, tools to remove photo backgrounds, or ways to save your brand colors? That’s where Canva Pro comes in! Many people, especially small business owners who create lots of designs, ask: Is Canva Pro worth the money?

In this article, we’ll break down everything about Canva Pro. We’ll compare its premium features to the free plan, talk about prices, and help you decide if upgrading makes sense for you.

Whether you’re a teacher making classroom posters, a student designing projects, or someone who just loves creating graphics, we’ll show you how Canva Pro can save time, keep your designs consistent, and unlock cool tools like Magic Resize or unlimited storage.

Let’s find out if it’s worth the upgrade!

What is Canva Pro?

What is Canva Pro?

Canva Pro is the paid version of Canva that gives you more tools, templates, and features than the free plan.

Difference Between Canva and Canva Pro

The free version of Canva lets you make basic designs with some templates and tools. You get 5GB of storage and can use many free templates.

Canva Pro gives you much more:

  • Over 100 million stock photos and design elements
  • All premium templates
  • 1TB of storage (that’s 200 times more than the free plan!)
  • Background remover tool to easily cut out an image in Canva
  • Magic resize to quickly change design sizes
  • Brand kit to save your colors and fonts
  • Tools to work with team members

History and Development of Canva Pro

Canva started in Australia in 2013. The founders wanted to make design easy for everyone, not just professional graphic designers.

Today, Canva has over 220 million users worldwide. The company added Canva Pro to give more features to people who needed them for work or business. As of 2023, Canva reported $2 billion in revenue and continues adding new features like AI tools and better video editing.

Canva Free Vs. Canva Pro: Feature Comparison

Canva Free Vs. Canva Pro

Choosing between Canva Free and Canva Pro depends on what you need for your design projects. Let’s see what you get with each version of Canva.

Design Elements and Templates

Free Plan:

  • Access to over 1 million free templates and images
  • Basic design elements
  • Limited fonts and graphics

Canva Pro:

  • Access to over 100 million stock photos, videos, graphics, and audio files
  • All premium templates
  • More fonts and design elements
  • Magic Write AI tool for creating text content

Brand Kit and Team Features

Free Plan:

  • Basic design capabilities
  • Limited team features

Canva Pro:

  • Brand kit to save your brand colors, logos, and fonts
  • Team folders for sharing designs
  • Ability to set up brand templates
  • Better tools for team members to work together

Storage and Organizational Tools

Free Plan:

  • 5GB of storage
  • Basic folder organization

Canva Pro:

  • 1TB of storage (that’s 1000GB)
  • Unlimited folders to organize your work
  • Better ways to find your designs

Publishing and Sharing Capabilities

Free Plan:

  • Basic export options (PNG, JPG, PDF)
  • Standard sharing features

Canva Pro:

  • Content planner to schedule social media posts
  • Post directly to social media channels like Facebook, Instagram, Twitter, Pinterest, and LinkedIn
  • More export options and higher quality downloads
  • Schedule posts ahead of time

Canva Pro Pricing Structure

Canva Pro Pricing Structure

Before deciding if Canva Pro is worth it, you should know how much Canva Pro costs.

Monthly and Annual Subscription Options

As of May 2025, Canva Pro costs:

  • $12.99 per month if you pay monthly
  • Less if you pay yearly (around $119.99/year, which saves about 25%)

Team Pricing and Enterprise Solutions

If you need Canva for a team:

  • Canva for Teams starts at $14.99 per month for the first 5 users
  • Additional users cost extra
  • Enterprise pricing is custom and requires contacting sales

Free Trial Information

You can try Canva Pro for free:

  • 30-day free trial with full access to all features
  • No cost during the trial period
  • You can cancel anytime before being charged

For those wondering how to get Canva Pro for free beyond the trial, options exist for students, teachers, and non-profits.

Key Benefits of Canva Pro

Key Benefits of Canva Pro
  1. Expanded Design Resources: Canva Pro gives you over 100 million stock photos, videos, and graphics to make your designs look professional. You get premium templates for social media posts, logos, and flyers that aren’t available in the free version. Want to use your fonts? Canva Pro lets you upload custom fonts to match your brand’s style. You also get audio files and video clips to create eye-catching animations or slideshows.
  2. Time-Saving Features: The background remover tool lets you delete unwanted parts of photos in one click-perfect for product pictures or Instagram posts. Magic Resize automatically adjusts designs for different platforms (like turning a Facebook post into a Pinterest pin). The Magic Write AI tool helps write captions or blog post ideas fast. With so many ready-to-use templates, you don’t waste time starting from scratch.
  3. Brand Consistency Tools: Keep your brand colors, logos, and fonts the same across all designs using the Brand Kit. Lock templates so team members can’t change your brand’s look. Upload your fonts to make sure every social media graphic matches your style. This helps small businesses look professional without hiring a graphic designer.
  4. Collaboration Capabilities: Share team folders so everyone can access designs, like flyers or social media posts. Set permissions to control who can edit or view files. Work together in real-time- see changes instantly as teammates edit. Leave comments directly on designs to give feedback without messy emails.

Potential Limitations of Canva Pro

Potential Limitations of Canva Pro

Canva Pro has great features, but it also has some drawbacks.

  1. Comparison to Professional Design Software: Canva Pro isn’t as powerful as tools like Photoshop for detailed edits. You can’t tweak tiny design details or create complex illustrations. Printing very large posters? Canva might not work as well as Adobe software. It’s better for quick social media graphics than advanced projects.
  2. Value For Different User Types: Casual users making occasional birthday cards may not need Pro’s premium features. Professional graphic designers might miss tools like vector editing in Photoshop. But small business owners save money by creating logos and ads without hiring help. Social media managers love Pro for scheduling posts and resizing graphics fast.
  3. Learning Curve Considerations: While easier than Photoshop, Canva Pro still has lots to learn. Features like Magic Write or team folders take time to master. The interface is friendly, but finding all the buttons and tools can feel overwhelming at first.

Who Should Consider Canva Pro?

Who Should Consider Canva Pro?
  1. Small Business Owners and Entrepreneurs: Create logos, flyers, and social media posts without paying a designer. The Brand Kit keeps your business looking consistent. Save money- Pro costs less than hiring someone for every project.
  2. Marketing Teams and Content Creators: Make Instagram posts, infographics, and blog images quickly. Use Magic Resize to adapt one design for Facebook, Pinterest, and more. Schedule posts ahead of time instead of doing it daily.
  3. Educators and Non-Profit Organizations: Teachers get Canva for Education free Pro needed. Nonprofits can apply for discounts to create posters or event graphics. Students use Pro features through their school’s account.
  4. Casual Designers and Hobbyists: Stick to the free plan if you only make a few designs a month. Upgrade to Pro temporarily for projects like party invites or YouTube thumbnails. Try the 30-day free trial to test premium tools.

Alternatives to Canva Pro

Alternatives to Canva Pro

There are many alternatives to Canva Pro that fit different needs and budgets.

Free Graphic Design Tools

Other options instead of paying for Canva Pro:

  • Keep using Canva’s free plan
  • Try other free tools like Adobe Express (limited features)
  • Use open-source alternatives (but they might be harder to learn)

Professional Design Software Options

If you need more powerful tools:

  • Adobe Creative Cloud (Photoshop, Illustrator, InDesign) – more expensive but more powerful
  • Affinity Designer/Photo – one-time payment instead of subscription
  • GIMP – free but has a steeper learning curve

Canva Vs Other Premium Design Platforms

Canva Vs Other Premium Design Platforms

How Does Canva Pro Compare to Adobe Creative Cloud?

Canva Pro vs Adobe:

  • Price: Canva Pro is much cheaper (about $120/year vs $600+/year for Adobe)
  • Ease of use: Canva is easier to learn and use
  • Power: Adobe has more advanced tools and capabilities
  • Templates: Canva has more ready-to-use templates
  • Professional standard: Adobe is still the industry standard for professional design
  • Learning time: You can learn Canva much faster than Adobe products

Verdict: Is Canva Pro Worth It?

Is Canva Pro Worth It?

Value Assessment Based on User Needs

For small business owners:

  • Usually worth it if you make designs at least weekly
  • The time saved with Magic Resize and background removal pays for itself
  • Brand kit helps keep your business looking professional

For content creators:

  • Worth it if you post to social media channels regularly
  • The content planner and scheduling tools save much time
  • Premium stock photos and elements improve your content quality

For teachers:

  • Check if you qualify for Canva for Education (100% free)
  • If not, Pro might be worth it for creating better classroom materials

For casual users:

  • Might not be worth it if you only make a few designs per month
  • Consider the monthly option for busy periods only

Making the Most of Your Canva Pro Subscription

If you decide to get Canva Pro:

  • Use the brand kit to save time and stay consistent
  • Take advantage of the background remover for product photos and headshots
  • Try Magic Write for creating text content
  • Use Magic Resize instead of recreating designs for different platforms
  • Organize with folders to find designs easily
  • Schedule social media posts directly from Canva

FAQ’s:

Is Canva Pro Worth It For Beginners?

Yes, it can be – especially if you want to create professional-looking designs without learning complex software. The templates and easy-to-use tools help beginners make great designs quickly. If you plan to make lots of graphics, the time saved with Pro features is worth the cost.

Can I Cancel Canva Pro At Any Time?

Yes, you can cancel Canva Pro anytime. If you have a monthly subscription, you won’t be charged after canceling. If you paid annually, check Canva’s refund policy, as you might not get money back for unused months.

Does Canva Pro Offer Additional Fonts and Elements?

Yes! Canva Pro gives you access to more fonts, elements, graphics, stock photos, videos, and audio files than the free version.

You can also upload your own fonts to use in your designs. You can also apply effects by learning how to add a shadow in Canva.

What Happens To My Designs If I Cancel Canva Pro?

Your designs stay in your account, but you lose access to Pro features and elements. This means:

  • Designs with premium elements will show watermarks if edited
  • You can’t use the background remover or Magic Resize
  • You keep access to your files but can’t use Pro features on them

Is Canva Pro Worth It For One-Time Projects?

For a single project, you might consider the monthly subscription and cancel afterward. The 30-day free trial is perfect if your project fits within that timeframe. Think about how many designs you need and if Pro features would save enough time to justify the cost.

Does Canva Pro Work Offline?

No, Canva requires an internet connection to work. This is one limitation compared to desktop software like Photoshop. You need to be online to access and edit your designs.

Conclusion

After looking at all aspects of Canva Pro, I can say it’s worth it for most people who make designs regularly. The time-saving features alone can make up for the cost if you use Canva often.

For small business owners and social media managers, Canva Pro is almost always worth the money. The brand kit, premium elements, background remover, and Magic Resize features save hours of work each month. Teachers and students should check if they can get Canva for Education for free first. Non-profits should also look into free or discounted access.

For casual users who just make a few designs now and then, the free version might be enough. But if you find yourself hitting the limits of the free plan, the Pro version will make your design work faster and better.

The best way to decide is to try the 30-day free trial of Canva Pro. You’ll quickly see if the extra features are helpful for your specific needs.

Remember that good design helps your business, social media, or projects stand out. If Canva Pro helps you create better designs faster, then yes – it’s worth it!

Categories
Canva Fonts

Top 15 Irish Fonts Which Bring Ireland’s Art To Your Designs

Irish fonts are special letter styles that show off Ireland’s history and art. These fonts use designs from Celtic culture, like curly knots, fancy patterns, and old Irish traditions. When you pick an Irish font, your work gets a unique look that feels connected to Ireland’s stories and art.

These fonts are great for projects like St. Patrick’s Day cards, logos for businesses, or book covers with Irish themes. They add cultural significance and a touch of sophistication to your designs.

For example, fonts with intricate letterforms or decorative elements make social media graphics or greeting cards stand out.

At Designers Choice, we’ve found the best Irish fonts on Canva to help you create professional designs.

Whether you’re making party posters, wedding invites, or certificates, these fonts mix old Celtic art with a modern look. Try them to give your work authenticity and a dash of Irish elegance!

What Are Irish Fonts?

What Are Irish Fonts?

Irish fonts are typefaces that come from Ireland’s writing history.

They’re based on old styles of writing that Irish monks and scholars used hundreds of years ago. These fonts have special looks that remind us of Celtic art, ancient manuscripts like the Book of Kells, and the unique writing styles from medieval Ireland.

Most Irish fonts fall into a few main groups: Celtic fonts with fancy knot designs, Gaelic script fonts that were used in Ireland for many years, Uncial fonts with round letter shapes, and newer fonts that mix old Irish styles with modern looks.

What makes a font “Irish” isn’t just where it comes from, but how it looks. True Irish fonts have special curves, fancy decorations, and unique letter shapes that connect them to Ireland’s artistic past.

They often show the same kinds of designs you’d see in old Irish art, with twisting patterns and beautiful details.

15 Best Irish Fonts On Canva For Authentic Celtic Designs

Best Irish Fonts On Canva For Authentic Celtic Designs

Canva offers many great Irish fonts that bring Celtic flair to your designs. Here are 15 top choices that work well for many projects:

Vast Shadow

Vast Shadow

Vast Shadow is a font with thick, strong letters and a big shadow behind each one. The shadow makes the words look important, almost like a headline in a newspaper. This font is perfect for creating posters, logos, or invitations that need a touch of elegance and authenticity.

Vast Shadow can remind people of vintage Irish pub signage or old book covers from Ireland. It pairs well with decorative elements like Celtic knots or other Celtic fonts.

This font is also great for St. Patrick’s Day projects or anything related to Irish culture. Its boldness helps your words get noticed.

Londrina Shadow

Londrina Shadow

Londrina Shadow is a playful font with chunky, rounded letters and a shadow that adds a 3D effect.

This makes your text look fun and friendly, which is perfect for greeting cards, social media graphics, or book covers for kids. The style is modern but can be used with celtic art or celtic culture themes for an Irish touch.

Londrina Shadow is easy to read and brings a sense of joy to your designs. It’s also great for making invitations or certificates that need a little extra flair. The shadow makes your words stand out on any background.

Quebab Shadow

Quebab Shadow

Quebab Shadow is a sans-serif font with thick letters and a strong shadow that gives it a bold, modern look.

This font is great for logos, certificates, and signage where you want your text to be clear and easy to read.

The shadow effect adds depth, making your words pop out, which is perfect for commercial use or social media graphics.

Quebab Shadow can be paired with celtic fonts or decorative elements to add a touch of sophistication and authenticity.

It works well for both modern and vintage designs, especially if you want to show off Irish culture.

Bungee Shade

Bungee Shade

Bungee Shade is a fun, energetic font with big letters and a deep shadow that makes your text look like it’s jumping off the page.

This font is perfect for event posters, St. Patrick’s Day graphics, or signage that needs to grab attention. The boldness and decorative elements give your design a modern look, but you can also use it with Celtic knots or other Irish symbols for authenticity.

Bungee Shade is easy to read and adds a touch of flair to any project. It’s also great for greeting cards and book covers that need to stand out.

Intro Rust Base Shade

Intro Rust Base Shade

Intro Rust Base Shade is a font with a rough, vintage feel and a shadow that adds a 3D effect.

The letters look a little worn, like old Irish pub signs or vintage book covers. This font is perfect for projects that want to show cultural significance or a connection to Celtic culture. Use it for logos, certificates, or invitations that need a touch of authenticity and boldness.

The shadow makes your text pop, while the rustic style adds sophistication. It works well for both modern and old-fashioned designs.

Rig Solid Bold Halftone

Rig Solid Bold Halftone

Rig Solid Bold Halftone is a thick, bold font with a dotted shadow that gives it a cool, textured look.

This makes your text look modern and stylish, perfect for social media graphics, posters, and signage. The halftone shadow adds a decorative element, making your words stand out with flair.

Rig Solid Bold Halftone can be used for book covers, certificates, or any project that needs a touch of sophistication and boldness.

It pairs well with Celtic fonts or Celtic art for an Irish vibe. The font is easy to read and great for commercial use.

Rig Solid Medium Fill

Rig Solid Medium Fill

Rig Solid Medium Fill is a strong, solid font with medium-thick letters and a subtle shadow for depth.

The clean lines make it easy to read, which is great for logos, invitations, or certificates.

This font adds a touch of elegance and modern look to your designs, but you can also use it with Celtic decorative elements for authenticity.

Rig Solid Medium Fill is perfect for book covers, signage, or social media graphics that need to stand out. The shadow effect gives your words a 3D feel, adding flair to any project.

Rampart One

Rampart One

Rampart One is a bold font with sturdy letters and a shadow that makes your words look strong and important. This font is perfect for certificates, signage, or logos that need to show strength and cultural pride.

Rampart One can remind people of Irish castles or ancient manuscripts, making it great for book covers or projects about Irish culture.

The shadow adds depth and helps your text stand out on any background. It’s also good for social media graphics and greeting cards that need a touch of sophistication and authenticity.

Chromium One

Chromium One

Chromium One is a modern font with shiny-looking letters and a shadow that adds a 3D effect. The style is sleek and easy to read, making it great for social media graphics, event posters, or book covers.

Chromium One adds a touch of sophistication and flair to your designs, while the shadow makes your words pop out. You can use this font with celtic art or decorative elements for an Irish look.

It’s also good for logos, certificates, and signage that need a modern touch with a bit of boldness.

Agnets

Agnets

Agnets is a modern, bold font with a unique style that mixes decorative elements and a modern look.

Its letters have sharp, artistic shapes with intricate details, making it stand out in logos, social media graphics, or signage.

Though not a traditional Irish font, Agnets adds boldness and flair to designs, especially for projects needing a touch of sophistication.

It works well for commercial use, like branding or posters, thanks to its eye-catching letterforms.

While it doesn’t include Celtic knots or Gaelic script, Agnets brings a creative, modern twist to typography, perfect for making your work look fresh and stylish.

Stenciliqo Extruded

Stenciliqo Extruded

Stenciliqo Extruded is a stencil-style font with thick letters and a strong 3D shadow. The letters look like they were cut out and lifted off the page, which is perfect for signage, certificates, and logos.

This font adds a touch of celtic art and boldness to any project, making it great for book covers or greeting cards with an Irish theme. The shadow effect helps your words stand out and gives your design a modern look.

Stenciliqo Extruded is also easy to read and works well for commercial use.

Krisper Wireframe

Krisper Wireframe

Krisper Wireframe is a creative font with letters that look like they are made from thin wires, with a shadow for extra depth.

This gives your text a modern and unique look, perfect for book covers, greeting cards, and social media graphics.

Krisper Wireframe adds a touch of sophistication and flair to your designs. You can use it with celtic knots or decorative elements for an Irish feel. The font is easy to read and brings a sense of elegance and authenticity to any project.

Canter 3d

Canter 3d

Canter 3D is a tall, thin font with a 3D shadow that makes your text look stylish and modern. The clean lines and shadow effect add a touch of sophistication and celtic culture to your designs.

Canter 3D is great for event posters, signage, and certificates that need to stand out. The font is easy to read and works well with decorative elements like celtic knots or celtic art. Use it for book covers, logos, or greeting cards that need a modern look with a bit of Irish flair.

Charu Chandan Unicode 3d

Charu Chandan Unicode 3d

Charu Chandan Unicode 3D is a font with bold, rounded letters and a strong 3D shadow. The style is playful and easy to read, making it great for social media graphics, book covers, and greeting cards.

The shadow effect gives your words a sense of depth and makes your design feel modern and authentic. Charu Chandan Unicode 3D can be paired with Celtic fonts or decorative elements for an Irish touch.

It’s also good for certificates, signage, and commercial use.

UKIJ Kawak 3D

UKIJ Kawak 3D

UKIJ Kawak 3D is a fun font with thick letters and a deep 3D shadow that makes your text stand out.

This font is perfect for posters, logos, and signage where you want to grab attention. The style brings a touch of Celtic flair and boldness, making your designs pop with a modern look.

UKIJ Kawak 3D is easy to read and works well for book covers, greeting cards, and social media graphics. You can use it with celtic art or decorative elements for extra authenticity and sophistication.

These fonts all use shadows and 3D effects to make your words pop, adding depth, flair, and a touch of sophistication to any project.

They are great for Irish-themed designs, Celtic culture, and anything that needs to stand out and be noticed!

Types of Irish Fonts

Types of Irish Fonts

Many types of Irish fonts show the rich culture and art of Ireland.

  1. Celtic Fonts: Celtic fonts show off the beautiful art style of ancient Celtic culture. They often have fancy knot designs and curved lines that twist and turn. These fonts look like the art you might see in old Irish books or stone carvings. They’re perfect for projects that need to feel magical or ancient. Fonts like Enchant and Celtoria belong in this group.
  2. Gaelic Script Fonts: Gaelic script fonts come from the old writing system used in Ireland for hundreds of years. This type of writing was used in Ireland from the 16th century until about 100 years ago. Gaelic fonts have some special letter shapes that look different from regular letters we use today. TF-Gaelic and Old Norse are good examples of this style.
  3. Uncial Fonts: Uncial fonts have round, curved letters that look like they were written with a broad pen tip. Irish monks used this style when writing religious books in medieval times. These fonts look fancy but are still easy to read. Piera and Agnets show the uncial style well.
  4. Modern Irish-Inspired Fonts: These newer fonts take ideas from traditional Irish writing but update them for today’s designs. They keep some Celtic or Gaelic features but make them work better for modern projects. They often have better readability while still looking Irish. Fonts like She Dance and Ring of Kerry mix old Irish style with new design ideas.

Characteristics of Irish Fonts

Characteristics of Irish Fonts

Distinctive Design Elements

Irish fonts stand out because of their special designs inspired by Celtic culture. They often include Celtic knots-twisty patterns that look like braided ropes-woven into the letters.

Many letters have decorative elements at the ends, like small curls or dots, giving them a fancy look. Some letters connect, almost like they’re holding hands, which makes the text flow smoothly.

The shapes are often round and curvy, similar to handwriting, and some letters look different from regular alphabets, like a “d” with a loop or a “g” with a tail. These features help Irish fonts feel tied to Ireland’s artistic history and Celtic art.

Insular Script Features

Many Irish fonts are based on Insular script, a writing style from 600 AD used by Irish monks. This script has triangle-shaped tops on tall letters (like “b” or “h”) and wide, rounded parts in letters like “b,” “d,” or “q.”

When monks wrote, they’d start a line with big letters that slowly got smaller, creating a “fading” effect. They also added dots or marks to change how letters sounded. The letters look like they were written with a flat-tipped pen, giving them thick and thin lines.

These features come from old manuscripts like the Book of Kells, written on animal skin pages.

Typography and Letter Forms

Irish fonts have unique letter shapes that make them different from regular fonts. Letters are often wider and rounder, making them look friendly and artistic. Capital letters might have extra swirls or decorations, like a crown on a king.

The spacing between letters is sometimes wider, giving the text room to breathe. Some letters, like “s” or “r,” have unusual shapes- for example, an “s” that looks like a snake or an “r” with a hook. Letters also mix thick and thin lines, as if they were drawn with a brush.

These details help Irish fonts feel both old-fashioned and special, perfect for logos, book covers, or St. Patrick’s Day projects.

Historical Background of Irish Fonts

Historical Background of Irish Fonts

Origin and Development

Irish fonts started with the writing of Irish monks in the 600s AD. These monks created beautiful handwritten books using special writing styles. They combined Roman letter shapes with their own Celtic art style to make something new and beautiful.

The most famous example is the Book of Kells, made around 800 AD. This amazing book shows the highest level of Irish lettering skill. The monks used colored inks and gold to make letters that were also pieces of art.

As time went on, these handwritten styles were turned into printing fonts. Even as printing became common, Ireland kept using its own special letter styles that were different from what was used in other European countries.

Gaelic Type History

Gaelic type became the main way to print Irish language materials from the 1500s until the 1900s. This special type style was used for books, newspapers, and official documents in Ireland.

The Queen Elizabeth font, created in 1571, was one of the first fonts made specially for printing Irish. For hundreds of years after that, most things printed in the Irish language used some form of Gaelic type.

In the 1900s, Ireland slowly shifted away from using Gaelic type for everyday printing. But today, these font styles are making a comeback for special designs that want to show Irish culture and history.

Cultural Significance

Irish fonts are more than just letters – they represent Ireland’s cultural identity. When Ireland was trying to keep its culture strong while under British rule, these special letter forms became important symbols of Irish independence and cultural pride.

Even today, Irish fonts appear on signs throughout Ireland, especially in areas where the Irish language is still spoken daily. They’re used for road signs, pub names, and shop signs in Dublin and across the country.

For Irish people around the world, these font styles create an immediate connection to their heritage and homeland. Using an Irish font on a design instantly links it to thousands of years of Irish cultural history.

Popular Uses For Irish Fonts

Popular Uses For Irish Fonts

St. Patrick’s Day Projects

Irish fonts work perfectly for St. Patrick’s Day designs. They add authentic Irish style to:

  • Party invitations with shamrock designs
  • Food and drink menus for March 17th celebrations
  • Posters and flyers for St. Patrick’s Day events
  • Social media graphics announcing holiday specials
  • T-shirts with fun Irish sayings and symbols

The right Irish font makes these items feel more truly connected to Irish tradition rather than just using green colors.

Branding and Logo Design

Businesses with Irish connections often use Celtic fonts for their brand identity:

  • Irish pub and restaurant logos that need authenticity
  • Celtic jewelry brand names that show craftsmanship
  • Tourism companies focused on Irish travel
  • Music groups performing traditional Irish music
  • Irish cultural organizations and festivals

These fonts give immediate visual clues about a business’s Irish connections and values.

Invitations and Cards

Irish fonts add special meaning to personal items like:

  • Wedding invitations for couples with Irish heritage
  • Greeting cards celebrating Irish holidays or events
  • Birth announcements for families wanting to honor their Irish roots
  • Certificates of Irish ancestry or family trees
  • Special occasion cards with Celtic blessing texts

The elegant curves and decorative elements of Irish fonts add beauty to these important personal items.

Publishing and Print Media

Books and printed materials use Irish fonts for:

  • Books about Irish history, folklore, or fiction
  • Chapter titles in books about Celtic topics
  • Poetry collections featuring Irish writers
  • Magazines about Irish culture and traditions
  • Educational materials teaching about Ireland

These fonts help readers immediately understand the Irish connection of the content they’re about to read.

Where To Find Irish Fonts?

Where To Find Irish Fonts?

Free Irish Font Resources

You can find free Irish fonts in several places:

  • FontSpace offers 89 free Irish style fonts you can download
  • 1001 Free Fonts has a section with 138 Celtic Irish fonts
  • Google Fonts includes some options with Celtic style
  • Canva’s free plan includes several Irish-inspired fonts
  • Free font websites often have basic versions of Celtic typefaces

These free options give you a good starting point for projects with limited budgets.

Premium Irish Font Collections

For higher quality and more complete Irish font families:

  • MyFonts marketplace has professional Irish fonts with full character sets
  • Creative Market offers handcrafted Irish fonts from independent designers
  • Adobe Fonts includes premium Celtic typefaces in their subscription
  • Font foundries like Fontfabric create high-quality Irish fonts with special features
  • Professional type designers sell Irish font packages with multiple styles and weights

Premium fonts usually have better letter spacing, more character options, and higher quality details.

Font Marketplaces

These online stores sell both free and paid Irish fonts:

  • Etsy has many affordable Irish font bundles, including some for Canva
  • Creative Fabrica regularly features Celtic font collections
  • DesignCuts sometimes offers discounted Irish font packages
  • FontBundles includes Irish options in their regular deals
  • Individual type designers’ websites often sell directly to customers

Buying fonts from these marketplaces helps support the designers who create and maintain these special typefaces.

How To Use Irish Fonts In Design?

How To Use Irish Fonts In Design?

Pairing With Other Typefaces

When using Irish fonts in your designs:

  • Pair a fancy Irish headline font with a simple body text font for good readability
  • Use a Celtic font for the first letter of paragraphs and a regular font for the rest
  • Match an Irish script with a clean sans-serif font for modern contrast
  • Choose fonts from the same designer for heading and text that work well together
  • Consider using an Irish font for someone’s name and a standard font for their contact information

The right pairing keeps your design looking professional while still having Irish character.

Color Combinations

Colors that work well with Irish fonts include:

  • Green and gold – traditional Irish colors that feel authentic
  • Deep blues and greens – reminding readers of the Irish countryside
  • Earth tones like brown and cream – giving an aged manuscript look
  • Black on cream background – mimicking traditional book printing
  • White on deep green – creating a strong contrast for readability

The right colors help strengthen the Celtic feel of your Irish font choices.

Best Practices For Readability

To keep Irish fonts readable:

  • Use larger sizes for very decorative Irish fonts
  • Add more space between lines when using Celtic fonts
  • Limit the use of the fanciest fonts to short headings or titles
  • Make sure there’s a strong contrast between the font and the background
  • Test your design on different screens to check that details remain clear

Remember that communication is still the main goal, even when using decorative Irish fonts.

FAQ’s:

What Makes A Font “Irish”?

A font becomes “Irish” when it includes elements from Ireland’s writing history. This means it might have features from Celtic art like knot patterns, follow the style of Gaelic script that was used in Ireland for centuries, or look like the handwriting in ancient Irish manuscripts. True Irish fonts connect to Ireland’s artistic traditions through their letter shapes, decorative elements, and overall style.

Are Irish Fonts and Celtic Fonts The Same?

Not exactly. Celtic fonts represent the broader Celtic culture that includes Ireland but also Scotland, Wales, Cornwall, Brittany, and the Isle of Man. Irish fonts specifically connect to Ireland’s writing traditions. Many Celtic fonts work well for Irish projects because Ireland is part of Celtic culture, but some Celtic fonts may include symbols or styles from non-Irish Celtic regions.

Which Irish Fonts Work Best For Professional Designs?

For professional designs, choose Irish fonts that balance authenticity with clarity. Saint George works well for formal certificates or logos. Garamond with Celtic elements adds sophistication to business cards or letterheads.

For corporate materials, consider less decorative Irish fonts that maintain readability while still showing Irish flair. The best professional Irish fonts keep their cultural connections without sacrificing clarity.

Do Irish Fonts Support Special Characters?

Many modern Irish fonts include special characters needed for the Irish language, like vowels with the fada (á, é, í, ó, ú).

Premium Irish fonts usually offer better language support than free versions. Check the font’s character map before purchasing to make sure it includes all the letters and symbols you need, especially if you’ll be typing actual Irish text rather than just English with an Irish look.

How Can I Create Authentic Irish-Looking Typography?

To create authentic Irish typography, start with a genuine Irish font like those based on uncial or insular scripts. Add appropriate spacing between letters and lines.

Consider adding Celtic decorations like knots or spirals as accents rather than overwhelming the text.

Study examples from the Book of Kells or other Irish manuscripts for inspiration. Sometimes authenticity comes from restraint – using decorative elements carefully rather than everywhere.

Conclusion

Irish fonts bring the beauty and history of Celtic culture to your design work. These special typefaces connect your projects to Ireland’s rich artistic past through their unique letterforms and decorative elements.

Whether you’re creating something for St. Patrick’s Day, designing a logo with Irish roots, or making greeting cards with Celtic flair, the right Irish font adds authenticity and visual interest.

Canva makes it easy to access many Irish fonts for your design needs. From traditional styles based on ancient manuscripts to modern interpretations with fresh looks, these fonts help you create work that stands out.

Remember to balance the fancy features of Irish fonts with good readability, and pair them with colors and other design elements that strengthen their Celtic character.

Irish fonts aren’t just letters – they’re connections to thousands of years of artistic tradition that continue to inspire designers today.