Categories
Canva Fonts

Best Western Fonts On Canva To Make Any Cowboy Proud [Researched]

Looking to add some Wild West charm to your designs?

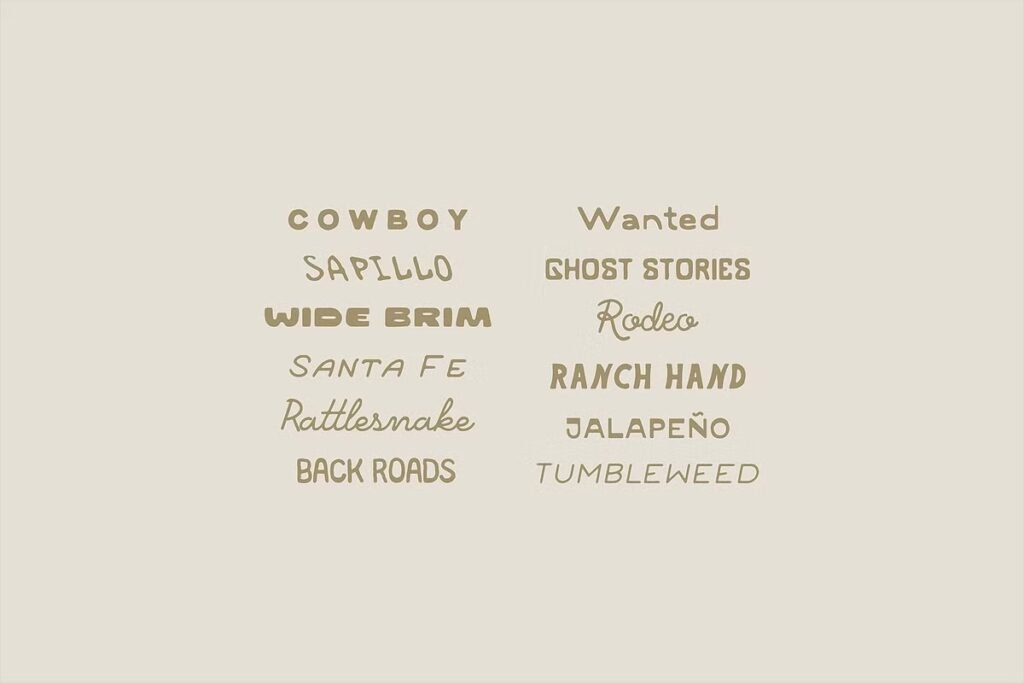
Western fonts on Canva let you mix that rugged, frontier vibe with modern style effortlessly. Picture bold lettering that feels straight out of a vintage saloon sign or a dusty cowboy movie poster-these fonts bring character to logos, social media posts, event invites, and more.

Whether you’re designing a menu for a BBQ joint, a poster for a rodeo-themed party, or Instagram graphics with a rustic edge, Canva’s collection has you covered.

These fonts aren’t just for “cowboy” projects, though. Their bold serifs, weathered textures, and retro appeal work wonders for brands wanting to feel authentic, adventurous, or handcrafted. The best part? You don’t need to be a typography expert to use them.

From free options like Rye and Chunk Five to premium picks like Silver Stone, this guide walks you through 20 standout fonts and how to pair them, tweak colors, and make your designs pop.

Let’s dive into the fonts that’ll give your work that unmistakable Western flair, horseback riding required.

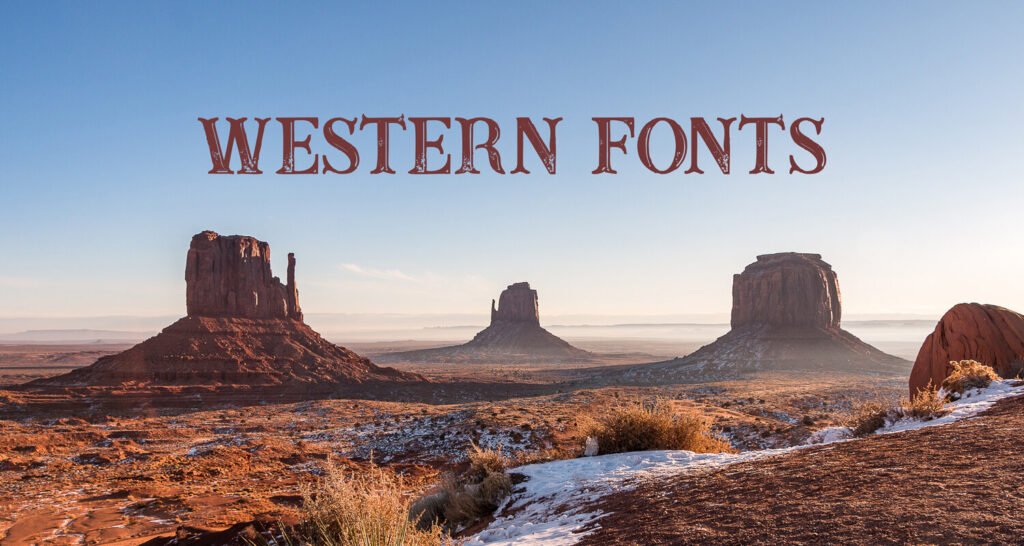
What Are Western Fonts?

What Are Western Fonts?

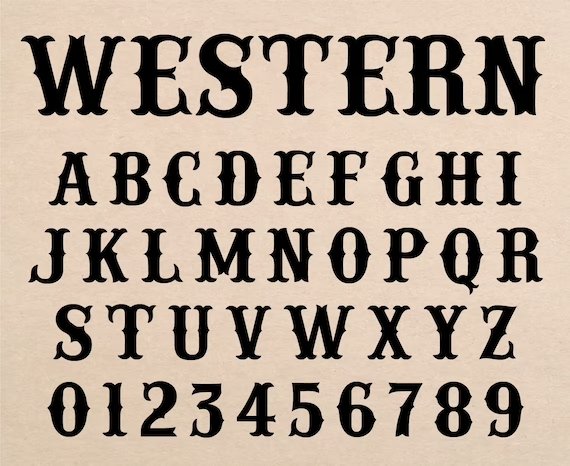
Western fonts are a special type of letters. They come from the 19th and early 20th centuries.

This style is inspired by American West writing. These fonts show the Wild West spirit with bold features related to cowboy life. They started from wood type used in old printing. These fonts were made to stand out in busy towns. They were perfect for wanted posters and shop signs.

Today, Western fonts on Canva mix old roots with modern use. They offer a range of styles, from vintage looks to new designs. These designs give a Western vibe.

This rich tradition of typography is still important today. It can be used in many design projects, like rustic branding and themed events.

Characteristics of Western Fonts

Characteristics of Western Fonts

Western fonts have unique traits that give them a special look and tough feel. Knowing these traits helps designers pick the right Western font for their work.

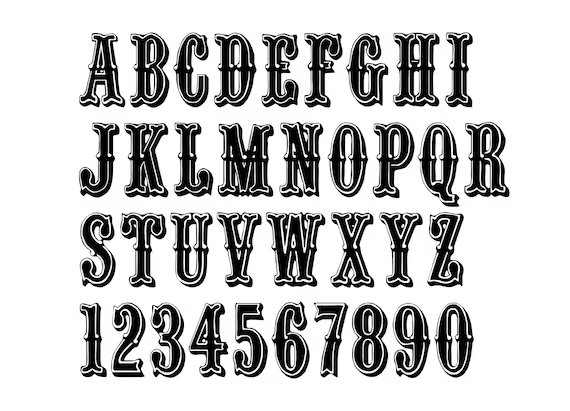
The most clear feature of Western fonts is their bold, large serifs.

Unlike the smooth serifs in regular books, Western serifs are often thick and pointed. These strong serifs shape the western fonts’ look and add to their rugged style.

Weight balance is another important trait of Western fonts. They have heavy, bold letters that stand out on posters and signs in the American West. This boldness is still key today, making them great for headlines and display text.

Many Western fonts also have decorative parts, like spurs (small edges from letter lines), split serifs (forked ends), and fancy designs. These details give character and link to handmade signs from the frontier days.

Many Western fonts use narrower shapes, especially in capital letters. This narrow design helped printers fit more words on posters and ads while keeping them easy to read.

This practical choice became a key part of Western typography’s style.

20 Essential Western Fonts Available On Canva

Essential Western Fonts Available On Canva

Canva has a rich collection of Western-inspired typefaces. These range from bold and strong styles to detailed and handmade ones.

Let’s take a closer look at these specific fonts and how you can use them.

Alfa Slab One

Alfa Slab One

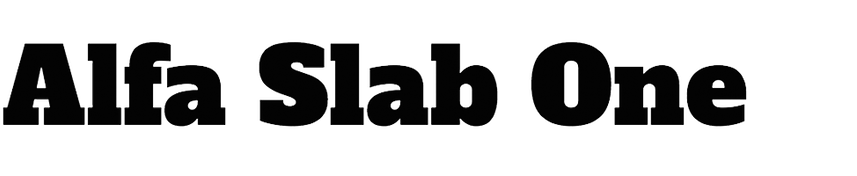
Alfa Slab One has a bold and strong look. Its thick slab serifs and weight give it power. This font shows the feel of the Wild West. It has a solid look but still feels modern. The clean lines make it great for new designs.

The heavy slab serif style is good for headlines. It grabs attention and makes titles stand out. You can find Alfa Slab One for free on Canva. It works very well for logos, posters, and more. This font adds a strong Western vibe with a fresh touch.

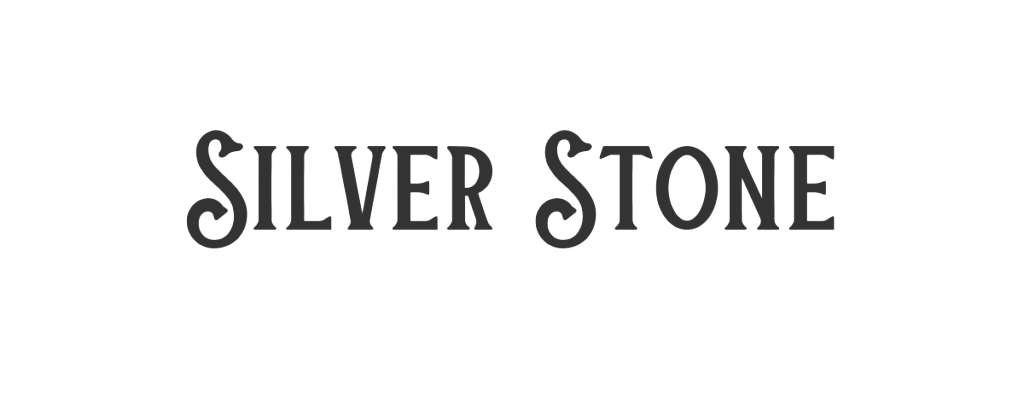
Silver Stone

Alfa Slab One

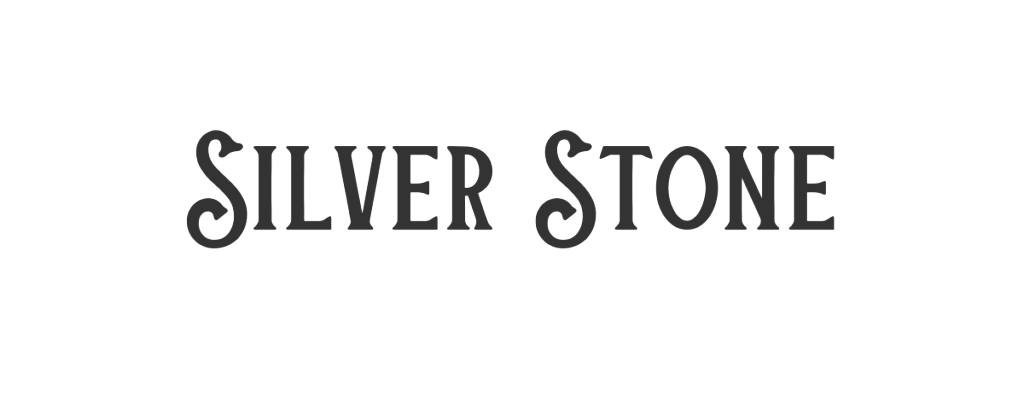
Silver Stone has a worn, rough look. It reminds people of the tough land in the American West. This special Canva font looks like letters cut from stone. The small flaws give it real charm. Its old-time style is great for designs that need a vintage western feel.

Silver Stone works well with projects about nature, adventure, or rustic brands. It links directly to the free spirit of the Wild West.

Chromium One

Chromium One

Chromium One has a design that looks shiny and feels industrial. It adds a unique twist to Western fonts. This font is bold, which is common in Western styles. It also has a smooth and precise look.

On Canva, Chromium One gives a fresh take on Western letters. It is great for modern brands. These brands want to show their Western roots but do not want to seem too old-fashioned. The special shine of this font works well for projects that need a fancy or high-end Western look.

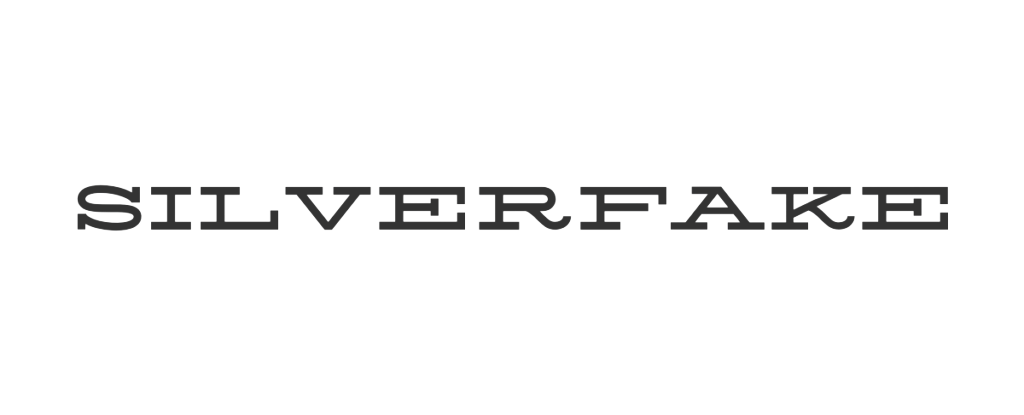
Silverfake

Silverfake

Silverfake gives a classic Western look. It has thick letters and strong shapes. You can find it for free on Canva.

This font shows the style of old Western signs. It looks solid and reliable. Silverfake’s bold letters are easy to read, even when small.

This makes it good for many uses. The font is great for event flyers, product tags, and any design needing a simple Western style.

Asset

Asset

Asset is a font that only uses uppercase letters.

It has a sharp look similar to metal carvings. This free font on Canva gives a strong and bold feel. It quickly shows the rough spirit of the frontier.

Its narrow shape helps designers make strong headlines without taking up too much space. Asset is great for designs aimed at men, outdoor brands, and projects needing a tough western vibe.

Rye

Rye

Rye is a special font that has medium contrast. It is inspired by old wood type from the American West. The font has unique pointed ends and small flaws. These features show the true feel of hand-made print from the frontier time. You can use Rye for free on Canva.

It is one of the best western fonts for making a real Wild West vibe. This font works great for themed menus, event posters, and branding. It is perfect for places that want to show off their western roots.

Bevan

Bevan

Bevan changes the old slab serif style to a bold and narrow look. This free font on Canva has a strong weight and a modern feel.

It is ideal for designs that need a bit of western style. Its thick and even lines make strong headlines and titles that grab attention. Bevan is great for social media posts, book covers, and branded content. It ensures that both clarity and strength match well with western charm.

Chunk Five

Chunk Five

Chunk Five delivers exactly what its name promises-chunky, ultra-bold letterforms with substantial slab serifs. This free font on Canva commands attention through its sheer weight and presence.

The font’s bold, no-nonsense approach makes it perfect for headlines where maximum impact is required. Chunk Five creates an immediate western feel while maintaining clean lines that function well in contemporary contexts, from posters to social media graphics.

Brim Narrow

Brim Narrow

Brim Narrow Combined is a font that brings old western style to Canva. It has a unique narrow shape and big, rounded ends.

This special font looks like hand-painted signs from old towns. Its slim design uses space well and keeps the western look that makes it stand out.

Brim Narrow is great for making real western vibes. It works well for event invites, themed diners, and retro branding projects.

Vast Shadow

Vast Shadow

Vast Shadow has a shadow effect that adds depth and shape to western-style text. You can find it for free on Canva.

This unique font makes letters seem to jump off the page. The shadow effect reminds us of old sign painting from the American West.

In those designs, shadows made things look more interesting and easier to see. Vast Shadow is great for eye-catching headers, posters, and social media images that need more flair.

Sancreek

Sancreek

Sancreek is a tall and narrow font that has a unique western look. This free font on Canva shows special shapes that remind us of old wooden buildings. It has tall lines and nice details that reflect the frontier style.

Its unique look makes it great for titles and headers. Sancreek works best in places where height is more important than width.

This includes book covers, posters, and tall signs with western themes.

Weston

Weston

Weston is a stylish font with clean lines. It has a modern look that fits Western styles. You can find it in regular and bold on Canva. This gives designers many choices while keeping the Western feel.

Weston’s subtle style is great for brands that want to show their roots. They can do this without going overboard on the theme. This font is perfect for classy projects that need a touch of a Western vibe. It avoids the full cowboy look while still being effective.

Carlsons Slab

Carlsons Slab

Carlson’s Slab delivers a robust, solid presence with its substantial slab serifs and strong horizontal emphasis.

This premium Canva font creates an immediate impression of stability and reliability-qualities associated with frontier craftsmanship.

Its clean lines and consistent weight make it highly versatile for various applications. Carlson’s Slab works particularly well for logo design, product packaging, and branded materials for businesses wanting to convey trustworthiness with Western character.

Riotic

Riotic

Riotic has a worn and old look that fits western style. It brings to mind the tough life of the frontier. This special font on Canva feels strong and rough. Its uneven edges show it has been through tough weather. The unique texture is great for making a real western feel.

Riotic is perfect for designs about the outdoors, adventure brands, and any project needing strength.

Using this font helps make the message stand out with its tough look.

Ultra

Ultra

Ultra is one of the boldest Western fonts available on Canva. It has a strong weight and presence. This font is inspired by neon signs.

However, it keeps its Western serif style. Ultra makes a big impact in any use. Its thick letters grab attention easily.

Yet, it still holds the Western style due to its serif design. Ultra is great for headlines and short phrases. It works best where visibility is key. You can use it for posters, social media graphics, and eye-catching signs.

Canter 3d

Canter 3d

Canter 3D gives a three-dimensional look to western text. It has a special 3D effect built in. This font on Canva makes letters seem real and full. The 3D effect takes ideas from old signs but feels fresh and new.

Canter 3D is great for ads, event posters, and social media posts. It helps western style stand out from regular fonts.

Shining Bright

Shining Bright

Shining Bright adds a fun, joyful touch to western fonts.

This top font on Canva has a light and playful style. It still keeps the feel of the old west. Its unique look is great for happy projects. Shining Bright is perfect for event invites and ads. It also works well for social media posts.

Here, western style needs to show excitement instead of toughness.

TS Country NP

TS Country NP

TS Country NP delivers authentic cowboy style with its strong, distinctive character.

Available for free on Canva, this font captures the spirit of hand-painted signage from country stores and rural establishments across the American West.

Its slightly irregular letterforms add genuine character that references handcrafted typography.

TS Country NP excels in creating authentic western atmosphere for themed events, rustic branding, and projects requiring genuine frontier feel.

Elders

Elders

Elders combines rugged character with modern design sensibilities. This premium Canva font features letterforms that appear carved or chiseled, creating a distinctive texture that references frontier craftsmanship.

Its bold presence conveys strength and reliability-qualities associated with the pioneering spirit. Elders works particularly well for masculine-themed designs, outdoor brands, and projects where conveying resilience and solidity enhances the message.

Space Cowboy

Space Cowboy

Space Cowboy offers a unique fusion of futuristic elements with traditional western character.

This premium Canva font creates an unexpected twist on western typography by blending sci-fi influences with frontier style.

Its distinctive approach makes it perfect for contemporary projects that reference western heritage while looking forward.

Space Cowboy excels in creative applications where traditional western fonts might feel too conventional, opening new possibilities for western-inspired design.

Top Western Fonts for Different Projects

Top Western Fonts for Different Projects

Western Fonts For Logos

When picking western fonts for logo design, focus on impact and use. Alfa Slab One has a bold look with clean lines. It is great for branding across many uses. Carlsons Slab gives a classy choice. It shows professionalism while keeping western style without being too themed.

For unique logos, Silver Stone brings texture and charm. Weston gives a fresh spin on western style. It works well for brands wanting subtle hints of the frontier instead of obvious cowboy themes. In the end, the best font for your logo shows your brand’s character.

Think about the rugged feel of Riotic, the classic touch of Brim Narrow, or the modern style of Bevan.

Western Fonts For Posters and Invitations

Posters and invites look great with western fonts. Vast Shadow is eye-catching because of its 3D effect. It is perfect for event signs. Rye gives a true western vibe, inspired by wood type. This links back to the American West.

For wedding invites, use bold fonts like Chunk Five for titles. Pair it with smooth fonts like Weston for the text. Event posters shine with standout choices like Ultra or Canter 3D. These fonts are easy to spot from afar. The size of posters shows unique details like serifs and texture.

This creates feelings that range from rustic charm to a bold frontier spirit.

Western Fonts For Social Media

Social media graphics need clear Western fonts. These fonts should create a strong visual impact right away.

Bevan is great for titles. Its bold style and clean lines make it easy to read on any device. Alfa Slab One helps create a strong look for ads. Sancreek gives a unique Western feel to quotes and the main text.

For Instagram stories and posts, think about how Western fonts go with images. Silverfake looks good with nature scenes. Space Cowboy offers an interesting mix with modern pictures.

Remember that social media thumbnails are small. So, avoid fonts that are too detailed. They can be hard to read when made smaller.

How to Use Western Fonts Effectively?

How to Use Western Fonts Effectively?

To use Western fonts well, think about pairing them with matching typefaces to make reading easier.

Pairing Western Fonts With Other Typefaces

Western fonts make strong points as display fonts. They often need other fonts for body text. When you mix fonts, make sure there is a clear difference between the Western headline font and the other typefaces.

For example, if you use a thick serif like Chunk Five, pair it with a simple sans-serif for body text. This helps make things look more separate and clear. Avoid using fancy Western fonts in long texts. Instead, use them for headlines and normal serif or sans-serif fonts for easier reading in paragraphs. Think about history too: classic Western fonts like Rye or Sancreek work well with old-style serifs.

Meanwhile, newer styles like Weston go great with modern sans-serifs. This blends Western style with today’s design trends.

Color Combinations For Western-Style Designs

Color plays a big role in how western fonts are seen. Old color choices come from the American frontier. These colors include earth tones like brown and tan for realness. Deep blue and rich red remind us of old printed items.

To make a strong impression, use colors that stand out. Dark letters on light backgrounds show off their unique shapes. Light letters on dark backgrounds make them look bolder. Metallic touches work well with fonts like Chromium One or Silver Stone. They add a shiny look to these fonts. Distressed fonts like Riotic can look better with slight color changes. This can give them a worn feel and add depth to your designs.

Popular Western Font Combinations

Popular Western Font Combinations

Classic Cowboy Combinations

For a real western feel, good font pairings are key. Brim Narrow works well as a headline font. It pairs nicely with TS Country NP for subheadings. This creates a unified look.

For cowboy-themed designs, use Buffalo Gal with a clean serif font.

This mix gives great style and is easy to read. Event materials do well with Vast Shadow for titles. Pair it with Rye for supporting text.

Both of these fonts have western roots but differ in style and flair. These pairs keep the theme strong and help show importance using different weights and styles.

Modern Western Pairings

Modern designs can use Western styles and still look fresh. Pairing Alfa Slab One with a clean sans-serif gives a nice mix.

It keeps the Western feel with its slab serif shape. Space Cowboy with a neat sans-serif links old frontier style and today’s look.

For elegant choices, Weston with a light sans-serif makes an interesting contrast. It hints at Western fonts but stays modern.

These pairings work well by focusing on key parts of Western fonts, like thickness and size. They do not try to copy all old cowboy styles.

FAQ’s:

How Do I Find Western Fonts In Canva?

To locate Western fonts in Canva, start by selecting the text tool and clicking on the font dropdown menu. Type keywords like “western,” “cowboy,” “slab,” or specific font names like “Rye” or “Vast Shadow” into the search bar.

Canva will display all available fonts matching your search terms. You can also browse through the “Slab Serif” category, where many western-style fonts are categorized. Remember that some Western fonts may be premium options requiring a Canva Pro subscription.

Can I Upload Custom Western Fonts To Canva?

Yes, you can upload custom western fonts to Canva if you have a Canva Pro subscription.

First, acquire your western font file in a compatible format (TTF, OTF, or WOFF). Next, go to the Brand Kit section in your Canva account. Click on “Upload a font” and select your western font file from your computer.

Once uploaded, the font will appear in your Brand Kit fonts and be available for use in all your designs, allowing you to expand your western typography options beyond Canva’s built-in library.

What Makes A Font Look “Western”?

A font looks “western” through several key characteristics: prominent slab serifs (thick, block-like serifs), exaggerated weight contrasts, decorative elements like spurs or bifurcated serifs, and proportions typical of 19th-century advertising typography.

Many western fonts feature condensed uppercase letters, weathered or distressed textures, and stylistic references to hand-painted signage or wood type printing common in the American West. These elements combine to create typography that evokes the spirit of the Wild West through visual associations with historical frontier documents and signage.

Are Western Fonts Only Suitable For Cowboy-Themed Designs?

Western fonts are not just about cowboy themes. They work well in projects about frontier history. Their strong look fits many uses. This includes restaurants that focus on traditional ways. It also suits outdoor brands that show toughness.

Craft businesses can use them to highlight the handmade quality. Some places want to express American heritage, and these fonts help with that. Modern Western fonts like Weston and Bevan offer light hints of the frontier. They fit well in today’s designs without being too loud.

Which Western Fonts Are Best For Readability?

For maximum readability, certain Western fonts perform better than others, particularly at smaller sizes.

Alfa Slab One maintains excellent legibility thanks to its clean lines and consistent weight.

Bevan offers good readability while maintaining Western character through its slab serifs. Weston, with its more refined approach to Western style, provides better readability for longer text blocks compared to more decorative options.

For body text, avoid highly decorative western fonts like Sancreek or those with extreme textures like Riotic, instead reserving these for headlines where their distinctive details can shine without compromising legibility.

Conclusion

Canva has Western fonts that mix old style with new design. These fonts range from the bold Chunk Five to the worn Silver Stone.

They capture the spirit of the Wild West while still being useful today. To use Western fonts well, you need to know their special traits.

You should think about where to use them, like in logos or social media posts. Smart choices in colors and layouts can make designs stand out more. These fonts show strong values of boldness and skill that work in many areas.

At Designers Choice, I use my years of work in typography for branding, print, and digital media. I want to highlight these special letter styles that tell unique stories for today’s designers.

Categories
Canva

Canva Mail Merge: How to Create Personalized Designs in Bulk

As a designer, you know the power of personalization. Whether you’re creating certificates, name tags, or custom social media graphics, the ability to produce tailored designs at scale is a game-changer.

At Designers Choice, I’ve spent years refining workflows to help fellow professionals turn creative ideas into reality-without sacrificing quality or efficiency. Canva’s mail merge, powered by the bulk create feature, is one of the most effective tools for automating design personalization.

This guide will walk you through every step, from preparing your spreadsheet to generating bulk certificates and beyond, using keywords like csv file, upload data, dynamic fields, and more.

What is Canva Mail Merge?

What is Canva Mail Merge?

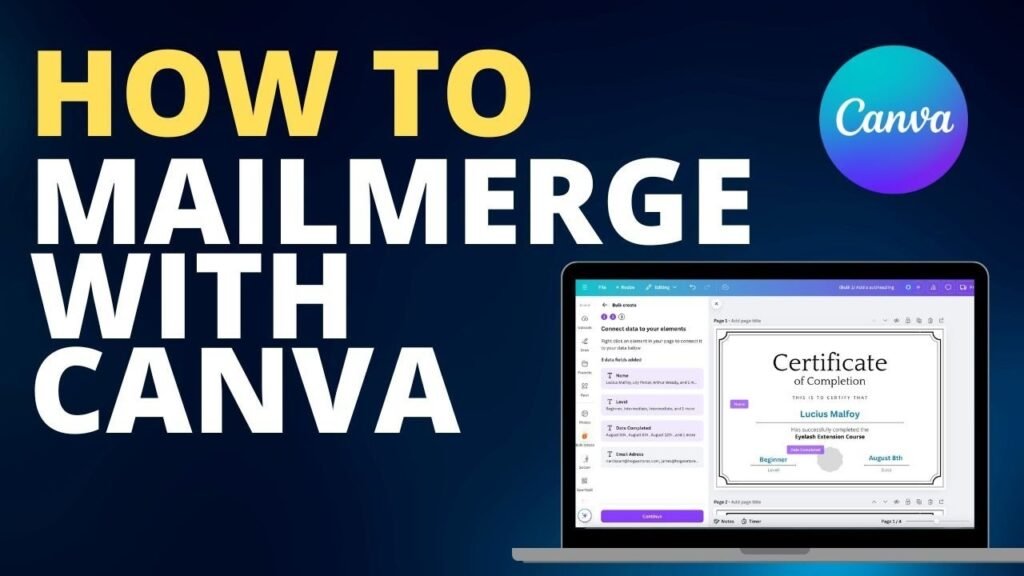
Canva mail merge is a process that lets you automatically fill in personalized details-like recipient’s name, email address, or job title-across multiple designs using a single template and a data source such as an excel spreadsheet or csv file. This approach is ideal for professionals who need to create bulk certificates, business cards, invitations, or any design where each copy needs unique information.

Understanding the Bulk Create Feature

The bulk create app in Canva Pro and Canva Teams enables you to upload data from a csv file, google sheets, or manually entered spreadsheet, and then connect each data field to text boxes or image frames in your canva template.

This means you can generate dozens or even hundreds of personalized designs in just a few clicks.

Benefits of Using Mail Merge in Canva

  • Save time by automating repetitive design tasks.
  • Ensure accuracy by pulling the recipient’s name, last name, email address, and more directly from your spreadsheet.
  • Produce professional, consistent results across all your templates.
  • Easily download your bulk designs as PDF files or images for email, print, or sms distribution.

Getting Started With Canva Mail Merge

Starting with Canva Mail Merge is easier than you think.

Prerequisites For Using Canva Mail Merge

  • Access to Canva Pro, Canva Teams, Canva for Education, or Canva for Nonprofits.
  • Your data is organized in a spreadsheet, with separate columns for each data field (e.g., first name, last name, email address).
  • A Canva template ready for dynamic fields.

Accessing the Bulk Create Tool in Canva

  • Open your design in Canva on desktop.
  • Go to the editor side panel, select Apps, then find the Bulk Create app under More from Canva.
  • For Canva Sheets users, you can start bulk create directly from your selected data range.

Preparing Your Data for Mail Merge

Creating A Spreadsheet With Your Data

Start with a spreadsheet in excel or google sheets. Each row should represent an individual recipient, and each column should represent a dynamic field such as first name, last name, email, or course name. Save or export your spreadsheet as a csv file for easy upload.

Formatting Requirements For CSV Files

  • Use clear headers for each column (e.g., first name, last name, email address, certificate title).
  • Avoid special characters that might interfere with mail merge.
  • Ensure there are no blank rows or columns in your csv file.

Manually Entering Data in Canva

If you have a small list, you can manually enter data within the bulk create app. Click on the table, add your dynamic fields, and input recipient details directly- ideal for quick projects like name tags or small batches of certificates.

Designing Your Template

Adding Placeholders To Your Design

In your Canva template, add text boxes or image frames where you want personalized information to appear. Label each placeholder clearly so you can easily connect it to the correct data field during the mail merge process.

Best Practices For Template Creation

  • Use separate text boxes for each dynamic field (e.g., one for first name, one for last name).
  • Leave enough space for longer names or data entries.
  • Test your template with sample data to ensure proper alignment and formatting.

Testing Your Template Design

Before running your full mail merge, preview your design with sample data. This helps catch issues with text overflow, image alignment, or formatting errors-saving time and ensuring your bulk certificates or business cards look professional.

Step-By-Step Guide To Canva Mail Merge

Step-By-Step Guide To Canva Mail Merge

Setting Up Your Template

Start by opening your Canva template and adding text boxes or image frames where personalized details like first name, last name, or email address will go. Label each placeholder clearly (e.g., “Name,” “Course Title”) to match the data fields in your spreadsheet.

For certificates or name tags, ensure your design has enough space for longer names and aligns elements like logos or borders properly.

Uploading Your Data

Prepare your csv file or google sheets with separate columns for each dynamic field (e.g., “First Name,” “Email”). Save the file as a .csv or .xlsx format, then go to Canva’s bulk create app and click Upload Data. Select your file-Canva supports up to 300 rows and 60 columns per upload. For smaller projects, manually enter data directly into the app’s table.

Connecting Data to Design Elements

Click on each placeholder in your template (e.g., a text box for “Recipient’s Name”), then select Connect Data from the menu. Map it to the corresponding column in your spreadsheet, like linking the “First Name” column to the name field. Repeat for images by connecting image URLs from your CSV to frames in your design. Ensure headers in your spreadsheet match placeholder labels exactly to avoid errors.

Previewing and Editing Your Designs

Use Canva’s preview feature to check each design for issues like text overflow or image alignment.

Scroll through generated pages to spot mistakes-for example, a last name spilling outside a certificate’s text box. Adjust font sizes, frame dimensions, or spacing directly in the template, then re-preview until all elements look polished.

Generating Your Bulk Designs

Once satisfied, click Generate to create all designs at once. Canva will produce individual pages for each row in your spreadsheet.

Download them as PDF files for printing certificates or PNG images for social media posts.

For events, use Activity Messenger to send designs via email or SMS directly from the app.

Common Use Cases For Canva Mail Merge

Common Use Cases For Canva Mail Merge
  1. Creating Personalized Certificates: Mail merge is perfect for generating bulk certificates. It allows you to insert each recipient’s name, course title, and date automatically—ideal for workshops, events, or online courses.
  2. Designing Custom Business Cards: Upload data with separate columns for first name, last name, job title, and email address to quickly create professional business cards for your team or clients.
  3. Making Customized Invitations and Postcards: Personalize invitations or postcards with the recipient’s name, address, and event details-saving hours compared to manual editing.
  4. Producing Name Tags and Place Cards: Bulk create name tags or place cards for conferences, weddings, or events, with each guest’s name and table number dynamically inserted from your spreadsheet.
  5. Generating Customized Social Media Graphics: Use mail merge to create social media posts with personalized messages, names, or dynamic fields for marketing campaigns or client outreach.

Advanced Techniques

  1. Merging Images with Frames: Include image links in your CSV file to automatically populate frames in your Canva template with recipient photos, logos, or QR codes- ideal for certificates, badges, or branded graphics.
  2. Adding Links to Your Designs: Insert personalized URLs or email addresses into text boxes or buttons within your design. This is useful for email templates, certificates with verification links, or event invitations.
  3. Working with Large Data Sets: Canva’s bulk create supports up to 300 rows and 60 columns per upload. For larger projects, split your data into multiple spreadsheets and repeat the mail merge process.

Troubleshooting Canva Mail Merge

Troubleshooting Canva Mail Merge

Common Issues and Solutions

Issue: Data doesn’t appear in your design after uploading a CSV file or Google Sheets.

Solution: Check if your dynamic fields (e.g., first name, last name) in Canva exactly match the column headers in your spreadsheet. For example, if your CSV uses “First_Name” but your template uses “First Name,” Canva won’t connect them. Rename headers or template placeholders to align.

Issue: The bulk create app shows errors like “Your designs didn’t get built.”

Solution: Reduce your data size. Start with 5-10 rows to test, then scale up. Remove extra columns or special characters (like commas in names) that confuse the system.

Data Formatting Problems

Problem: Canva ignores parts of your uploaded data.

Fix: Ensure your CSV file uses separate columns for each field (e.g., “First Name” and “Last Name” in two columns, not combined). Avoid blank rows or merged cells, as these disrupt the mail merge. Save files as .CSV or . XLSX-other formats like .ODS may fail.

Problem: Numbers or dates appear incorrectly.

Fix: Format all cells in your spreadsheet as “Text” to preserve leading zeros (e.g., “001”) or special date formats. Canva reads raw data, so mismatched formatting (like mixing text and numbers) causes errors.

Image Alignment Fixes

Problem: Images from your CSV file crop poorly or overflow frames.

Fix: Resize image frames in your Canva template to match the aspect ratio of your photos. For example, if your CSV links square profile pictures, use square frames-not rectangles. Adjust frames under the “Elements” tab before connecting data.

Problem: Text overlaps images after merging.

Fix: Use Canva’s alignment tools (Position > Align) to center text boxes or images. For complex layouts, add manual line breaks in your template to create space around dynamic fields.

By addressing these issues, you’ll streamline your bulk certificates, name tags, or social media graphics workflows, ensuring smooth merges every time.

Alternative Methods

Exploring other methods can make your design work more flexible.

Using Canva With Other Mail Merge Tools

For those needing to send bulk certificates, name tags, or invitations beyond Canva’s built-in features, tools like Activity Messenger bridge the gap between design and delivery.

After creating personalized templates in Canva Pro or Teams using dynamic fields and uploading data from a CSV file or Google Sheets, Activity Messenger lets you automate distribution via email or SMS while retaining your brand’s polish.

This integration ensures each recipient gets their customized design-like certificates with their first name and last name-directly to their inbox or phone, complete with tracking for opens and clicks.

It’s ideal for schools, events, or businesses wanting seamless workflows from Canva templates to real-world impact.

Comparing Canva Mail Merge to Microsoft Mail Merge

FeatureCanva Mail MergeMicrosoft Mail Merge
PlatformOnline (Canva Pro/Teams)Desktop (Word/Outlook)
Design FlexibilityHigh (graphics, images)Moderate (text-focused)
Data SourcesCSV, Google SheetsExcel, Access, CSV
Output FormatsPDF, PNG, JPGDOCX, PDF, Email
Best ForVisual designs, graphicsLetters, documents

FAQ’s:

Can I Use Mail Merge in Canva For Free?

No, Canva’s mail merge (bulk create) is only available for Canva Pro, Canva Teams, Canva for Education, or Canva for Nonprofits users. Free accounts can’t access this feature, but you can start a free 30-day Pro trial to test it.

What Types of Documents Can I Create With Canva Mail Merge?

You can create personalized certificates, business cards, invitations, name tags, social media graphics, and more. Any design requiring unique details like first name, last name, or email address can be automated using a CSV file or Google Sheets.

How Do I Ensure My Data is Correctly Formatted For A Canva Mail Merge?

Use a spreadsheet with separate columns for each field (e.g., “First Name,” “Email”) and save it as a CSV file. Avoid blank rows, special characters, or merged cells. Headers should match placeholders in your Canva template exactly.

How to Send Certificates Through Email, Outlook, and Mail Merge?

After generating bulk certificates in Canva, download them as PDFs. Use Activity Messenger or Outlook’s mail merge to send them via email by linking your recipient list. Outlook requires attaching files manually, while Activity Messenger automates delivery.

Could I Use Canvas Messages Just Like Email?

No, Canva isn’t an email client. You can design email templates or certificates, then download and send them via Outlook, Gmail, or tools like Activity Messenger. For SMS, use third-party apps to distribute designs.

Conclusion

Canva Mail Merge, powered by the bulk create app, empowers designers to efficiently produce personalized, professional designs at scale.

From uploading your CSV file or Google Sheets, mapping dynamic fields, to downloading bulk certificates, business cards, and social media graphics, every step is streamlined for creativity and excellence.

Whether you’re working solo or as part of canva teams, this workflow saves time, reduces errors, and ensures your recipients receive designs tailored just for them. At Designers Choice, I’m passionate about helping you turn your boldest visions into reality-one bulk create at a time.

Categories
Canva

Does Canva Have Spell Check? [Easy Ways To Find Out]

Creating professional designs isn’t just about choosing the right fonts or layouts-it’s also about making sure your text is clear and error-free.

Spelling errors and grammar mistakes can make even the best Canva design look unprofessional and hurt your brand’s credibility.

That’s why having a reliable spell check and grammar checker is so important for every designer.

While Canva offers a user-friendly platform with plenty of templates, many users still wonder: does Canva have spell check built in?

The answer isn’t straightforward, but there are several ways to catch spelling and punctuation errors in your Canva projects.

You can use your web browser’s spell checker, like the one in Google Chrome, or add the Grammarly extension for a more powerful grammar and punctuation checker.

Some designers prefer copying their text into Google Docs or Microsoft Word to use their spell check features before pasting it back into Canva.

No matter which method you choose, using a spell checker helps keep your blog post, social media graphic, or business presentation polished and professional. With these tools, you can focus on creativity while letting technology handle spelling, commas, and other common mistakes.

Does Canva Have Spell Check?

Does Canva Have Spell Check?

The answer to “Does Canva have spell check” has evolved.

Historically, Canva lacked a built-in spell checker, requiring users to rely on workarounds. However, Canva now offers Magic Write, an AI-powered feature that includes grammar checker and spell checker functionality.

This powerful grammar checker instantly identifies and fixes spelling, grammar, or punctuation errors while working in Canva Docs.

The spell check capability helps users create error-free content for various applications, including school essays, research articles, business reports, and blog posts.

That said,

The full spell checker functionality is primarily integrated into Canva Docs rather than the main design interface. For standard design projects, users may still need additional methods to ensure text accuracy.

For instance, knowing how to highlight text in Canva is a useful skill for manual proofreading within a design.

Let’s explore all available options for spell checking in Canva.

How to Spell Check in Canva?

How to Spell Check in Canva?

Canva does not have a built-in spell-check tool. However, there are easy ways to check your spelling.

Method 1: Using Canva’s Magic Write Feature

Canva’s Magic Write feature provides AI-powered spell check and grammar checking capabilities within Canva Docs.

This powerful grammar checker automatically detects spelling errors, grammar issues, and punctuation errors as you type.

While you’re working with text, you might also find it helpful to learn how to indent in Canva for better formatting.

To access this spell checker:

  • Open Canva Docs
  • Type or paste your text
  • Highlight the text requiring spell check
  • Select “Magic Write
  • Choose “Fix spelling” to scan and correct errors

This spell check option saves time by instantly identifying problems while maintaining your writing flow. The grammar checker component also helps improve overall sentence structure and clarity.

Method 2: Using Browser’s Built-in Spell Checker

Most web browsers include basic spell check functionality that works within Canva’s text fields. This browser-based spell checker can identify common spelling errors while working directly in the Canva design interface.

For Google Chrome users:

  • Open Chrome settings via the three-dot menu
  • Search for “spell
  • Enable spell check functionality

Once activated, the browser spell checker will highlight spelling errors with a red underline while typing text in Canva. Right-clicking the underlined word provides correction suggestions. This method provides real-time feedback without switching between applications.

Method 3: Using Grammarly Extension

The Grammarly extension offers robust spell check and grammar checking capabilities that work directly within the Canva interface. This popular browser extension functions as both a spelling checker and a punctuation checker.

To use Grammarly with Canva:

  • Install the Grammarly extension for Chrome, Firefox, or Safari
  • The extension will automatically check text as you type in Canva
  • Spelling errors and grammar issues appear with underlines
  • Hover over underlined text to see correction suggestions

The Grammarly extension provides more comprehensive checking than basic browser tools, identifying complex grammar issues, punctuation errors, and stylistic improvements in addition to spelling.

Method 4: Copy and Paste to External Tools

For thorough spell checking, copying text from Canva to dedicated writing tools offers comprehensive error detection.

This method works well for text-heavy designs or critical projects.

While you’re perfecting your text, you might also explore creative text effects, like learning how to curve text in Canva.

Process:

  • Select and copy text from your Canva design (Ctrl+C on Windows, Cmd+C on Mac)
  • Paste into Google Docs, Microsoft Word, or the Grammarly web app
  • Use these platforms’ spell check and grammar tools
  • Make necessary corrections
  • Copy the corrected text and paste it back into Canva (Ctrl+V on Windows, Cmd+V on Mac)

This approach uses specialized writing tools’ advanced capabilities. Similarly, for advanced text styling, you might want to know how to wrap text in Canva or even how to flip text in Canva for unique design effects.

Method 5: Manual Proofreading Techniques

Manual proofreading remains valuable even with technological assistance. Beyond text, the visual elements are just as important.

For example, knowing how to replace an image in Canva or how to flip an image in Canva can be important for design consistency.

Effective techniques include:

  • Reading text backward to focus on individual words rather than the content
  • Printing designs for physical proofreading
  • Having another person review your work
  • Reading text aloud to catch awkward phrasing and errors
  • Taking a break before the final review to approach with fresh eyes

Manual proofreading catches context-specific errors that automated tools might miss. This is also a good time to check your image edits, such as whether you know how to cut out an image in Canva correctly or how to slice in Canva for creative effects.

Step-By-Step Guide To Spell Checking With Magic Write

Step-By-Step Guide To Spell Checking With Magic Write

Opening Your Design

To begin spell checking with Canva’s Magic Write:

  • Log into your Canva account.
  • Open Canva Docs by selecting it from the homepage menu.
  • Create a new document or open an existing one. You may want to set your orientation first, so learning how to landscape in Canva can be a useful first step.
  • For text from a design project, copy it first and paste into Docs for checking.

The Magic Write spell checker functions primarily within Canva Docs rather than directly in design projects, making this intermediary step necessary for accessing the full spell check capabilities.

Selecting Text

Once your text appears in Canva Docs:

  • Click and drag to highlight the text requiring spell check
  • Ensure all relevant content is selected
  • For long documents, consider checking in manageable sections

Text selection activates the Magic Write menu, providing access to the spell checker and other text enhancement functions.

Using Magic Write To Fix Spelling

With text selected:

  • Click the “Magic Write” option that appears
  • Choose “Fix spelling” from the menu options
  • Wait briefly while the powerful grammar checker scans your text
  • The spell checker automatically identifies and suggests corrections for spelling errors, punctuation errors, and grammar issues

The Magic Write spell checker leverages AI technology to detect a wide range of text issues beyond simple spelling, including grammar problems and punctuation inconsistencies.

Reviewing Corrections

After Magic Write processes your text:

  • Review each suggested correction carefully
  • Accept appropriate changes
  • Consider context for specialized terms or brand names that might be falsely flagged
  • Check that formatting remains consistent after corrections

This review step remains essential, as even advanced spell checkers occasionally suggest inappropriate corrections for specialized terminology or creative language choices.

Using Third-Party Tools For Spell Checking

For additional verification:

  • Copy your corrected text (Ctrl+C/Cmd+C)
  • Paste into another checking tool like Grammarly or Word
  • Address any issues missed by Magic Write
  • Return the finalized text to your Canva design

This multi-tool approach provides comprehensive error detection for critical projects.

Using Third-Party Tools For Spell Checking

Using Third-Party Tools For Spell Checking

Setting Up Grammarly For Canva

Setting Up Grammarly For Canva

Grammarly offers powerful spell check capabilities directly within your browser:

  • Visit the Grammarly website or browser extension store
  • Download and install the extension for your web browser
  • Create a Grammarly account or log in
  • The extension automatically activates when working in Canva
  • Spelling errors appear with red underlines
  • Grammar issues show with other colored underlines
  • Click the underlined text to view correction suggestions

The Grammarly extension works seamlessly across Canva’s interface, providing real-time feedback on spelling errors, punctuation errors, and grammar issues.

Using Google Docs For Spell Checking

Using Google Docs For Spell Checking

Google Docs offers robust spell check functionality:

  • Open Google Docs in a separate browser tab
  • Create a new document
  • Copy text from your Canva design
  • Paste into Google Docs
  • Spelling errors automatically appear with red underlines
  • Right-click underlined words for correction options
  • Use Tools > Spelling and grammar for comprehensive checking
  • Copy corrected text back to Canva

Google Docs’ spell checker catches many common errors and works well for checking longer text passages before finalizing them in Canva.

Using Microsoft Word For Spell Checking

Using Microsoft Word For Spell Checking

Microsoft Word provides industry-standard spell checking:

  • Open Microsoft Word
  • Create a new document
  • Copy text from Canva
  • Paste into Word
  • Use the Review tab > Spelling & Grammar
  • Address flagged issues
  • Copy corrected text back to Canva

Spell Checking On Mobile Devices

Spell Checking On Mobile Devices

Options For The Canva Mobile App

The Canva mobile app presents challenges for spell checking:

  • The Magic Write feature may be accessible in the mobile Docs interface
  • Mobile keyboard spell checkers provide basic functionality
  • Red underlines typically indicate spelling errors detected by your device
  • Tap underlined words to view correction options

Mobile spell checking tends to be more limited than desktop options, but it provides basic error detection for on-the-go design work.

Workarounds For Mobile Spell Checking

For more thorough mobile spell checking:

  • Copy text from your Canva mobile design
  • Paste into a mobile word processor or email app
  • Use that app’s spell check functionality
  • Copy corrected text back to Canva
  • Alternatively, send yourself the text to check on a desktop device

These workarounds help overcome the limitations of mobile spell checking for important projects.

Tips For Error-Free Canva Designs

Tips For Error-Free Canva Designs

Pre-Writing Best Practices

Prevent spelling errors before they occur:

  • Draft important text in a dedicated word processor with spell check before adding to Canva
  • Create a style guide with commonly used terms and brand-specific spellings
  • Maintain a list of frequently misspelled words relevant to your industry
  • Use simple, clear language when possible
  • Be consistent with spelling conventions (American vs. British English)

Preparation minimizes errors and streamlines the design process, reducing time spent on corrections later.

Final Proofreading Checklist

Before finalizing any Canva design:

  • Check all headlines and prominent text first – these errors are most noticeable
  • Verify proper names, brand terms, and technical terminology
  • Review punctuation, especially commas and apostrophes
  • Confirm consistent capitalization in headings
  • Check for proper spacing after punctuation
  • Verify numbers and dates
  • Review fonts for consistency and legibility
  • Print complex designs for final review when possible

This systematic approach catches errors that might slip through automated spell checkers.

FAQ’s:

Does Canva Have A Built-In Spell Checker?

Yes, Canva now offers spell check functionality through its Magic Write feature in Canva Docs. This powerful grammar checker can fix spelling, grammar, and punctuation errors. However, the spell checker isn’t directly integrated into the main design interface.

Is Magic Write Available On The Free Version Of Canva?

Magic Write has limited functionality in Canva’s free version. Full access to the spell checker and grammar features may require a Canva Pro subscription.

Magic Write has limited functionality in Canva’s free version. Full access may require a Canva Pro subscription.

If you’re wondering how much Canva Pro costs, it’s best to check their site for current pricing. You can also research how to get Canva Pro for free through special offers.

Ultimately, deciding if Canva Pro is worth it depends on your needs.

Does Canva Support Spell Check In Multiple Languages?

Canva’s Magic Write feature supports spell checking in multiple languages, though English has the most comprehensive support. Browser-based spell checkers and tools like Grammarly also offer multi-language functionality depending on your settings.

Which Browser Extensions Work Best For spell checking in Canva?

Grammarly consistently ranks as the most effective browser extension for spell checking in Canva, providing comprehensive error detection. LanguageTool offers a free alternative with solid functionality.

Can I Spell Check Canva Designs On Mobile?

The Canva mobile app has limited native spell check capabilities. Users can use device keyboard spell checkers or copy text to other mobile apps for checking, then paste corrected text back into Canva.

Is Canva’s Spell Check Reliable For Long Documents?

For extensive text, it’s advisable to use dedicated word processing software like Google Docs or Microsoft Word in conjunction with Canva’s Magic Write. This combined approach ensures thorough error detection.

Is Canva’s Grammar Checker Free To Use?

Basic grammar checking via Magic Write is available in Canva Docs, but may have usage limits on free accounts. Premium features of the spelling and grammar checker may require a Canva Pro subscription.

Conclusion

The question “Does Canva have spell check?” has a nuanced answer. While Canva now offers spell checking through Magic Write in Canva Docs, designers still benefit from supplementing this with additional methods for comprehensive error detection. Whether you’re creating a presentation where you need to know how to put a timer in Canva or designing templates for sale, error-free text is important.

Whether using Canva’s built-in capabilities, browser-based spell checkers, specialized extensions like Grammarly, or external tools like Google Docs and Microsoft Word, maintaining error-free text remains essential for professional designs.

The methods outlined in this guide provide multiple layers of protection against spelling errors, punctuation mistakes, and grammar issues.

Keep in mind that no matter how advanced a grammar checker may be, a final human review is essential; the synergy of technological help and meticulous proofreading yields well-refined outcomes that boost your brand’s credibility and influence.

Categories
Canva

How To Wrap Text In Canva: A Simple 1 Min Step-By-Step Guide

Text wrapping in Canva helps you make your designs look neat and professional. It means making your text flow nicely around images or shapes, instead of just sitting in a plain box.

While you are working with images, you might also find it useful to know how to flip an image in Canva or even how to replace an image in Canva to get your composition just right.

Even though Canva doesn’t have an automatic text wrapping tool, you can still wrap text by resizing your text boxes with the white pill handles and placing them next to your images or shapes.

You can also use the toolbar to change the font, adjust alignment, and play with spacing so your paragraph fits well.

For more advanced text edits, learning how to highlight text in Canva can also make important information stand out.

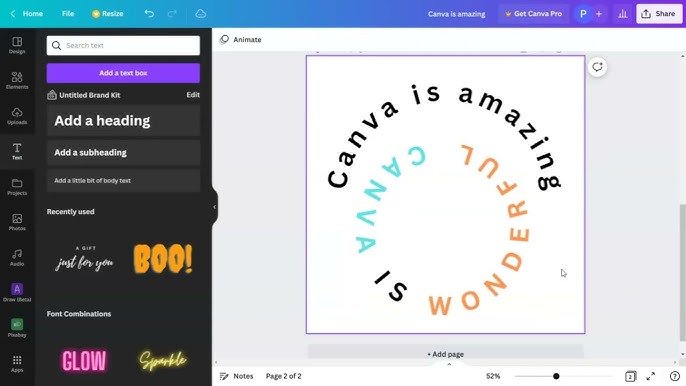
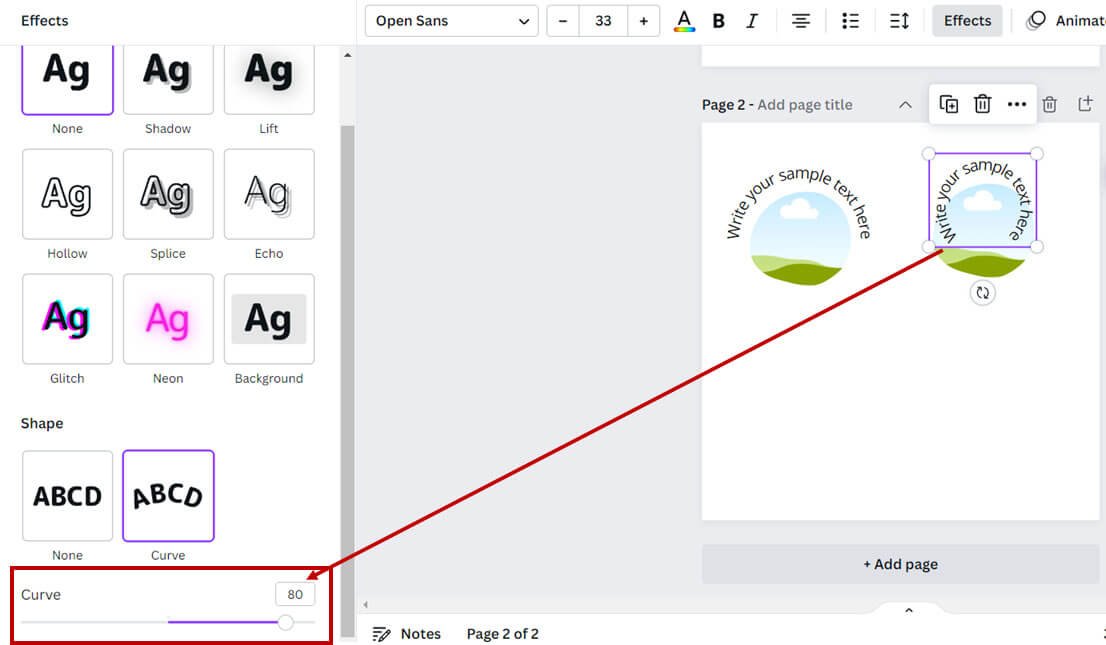
For special shapes, like circles, you can use the Effects tool to curve your text and make it wrap around the shape.

This way, your designs look better and are easier to read, whether someone is viewing them on mobile devices or a computer.

With a few simple steps, you can use text wrapping to make your Canva projects stand out and share your ideas clearly.

What is Text Wrapping and Why Use It?

What is Text Wrapping and Why Use It in canva?

Text wrapping helps text flow around pictures and design parts.

This creates a more natural look. It makes the layout look better by linking words with images. This shows how they relate to each other.

For instance, you could be designing a promotional graphic and need to know how to put a timer in Canva to build anticipation; wrapping text around it would integrate it smoothly.

Text wrapping also uses space better, especially when there is not much room. It helps give a clean and nice look.

Canva does not have an automatic text wrap like Microsoft Word.

However, it has other ways to get similar results with some changes you make. Learning these skills gives you more choice and control over your designs.

Types of Text Wrapping Possible in Canva

Types of Text Wrapping Possible in Canva

Canva offers several approaches to text wrapping, each suitable for different design scenarios. Understanding these options helps you select the most appropriate technique for your specific project needs.

The first method involves manipulating text boxes around your images or shapes. By adjusting the size and shape of your text boxes, you can create the illusion of text wrapping around objects. This technique works well for rectangular images and simple shapes.

Sometimes, you might want to alter the image itself, and learning how to slice in Canva can offer more creative possibilities.

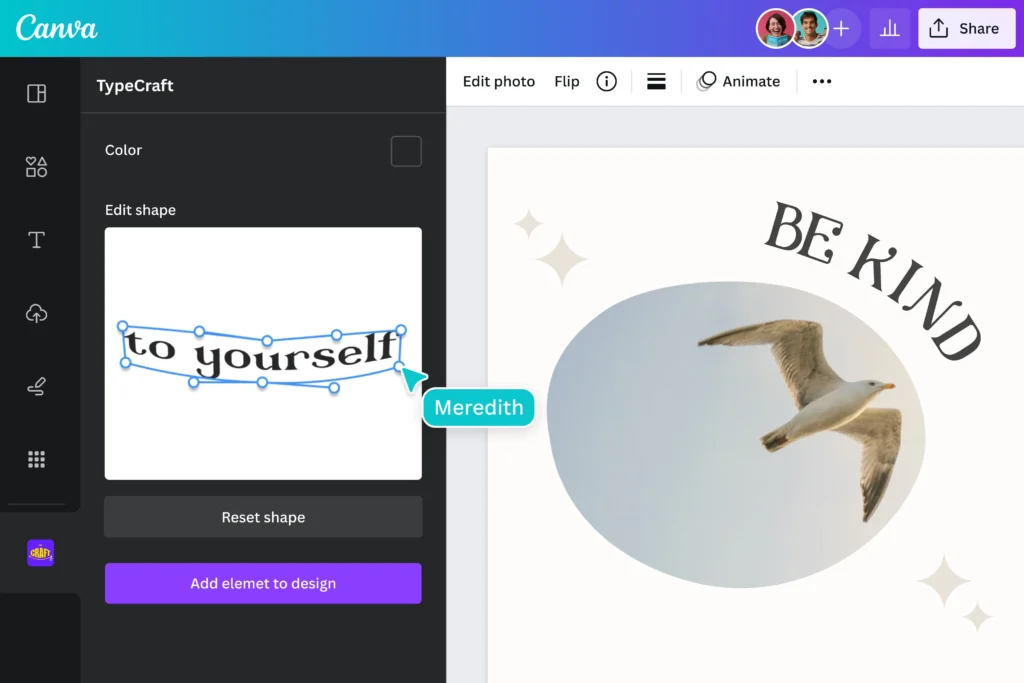
For circular or oval objects, Canva offers a specialized text curving tool found in the Effects panel.

This feature, which is detailed in guides on how to curve text in Canva, allows text to follow the contour of circular shapes, creating an organic flow. More complex wrapping effects can be achieved by using multiple text boxes positioned strategically around your images.

While more time-consuming, this approach offers the greatest control over text placement and flow.

For advanced designs, you can create custom text wrapping by duplicating shapes and positioning them carefully to create the illusion of text flowing around complex forms. This technique requires more effort but produces highly customized results for unique design challenges.

Text Wrapping Vs. Standard Text Formatting

Understanding the differences between text wrapping and standard text formatting helps clarify when each approach serves your design needs best.

Standard text formatting in Canva involves working with rectangular text boxes where text flows in straight lines from top to bottom.

For more structured paragraphs, you may find it useful to learn how to indent in Canva. The text box maintains its shape regardless of other elements on the canvas. This approach works well for simple designs or when text needs to maintain strict alignment.

Text wrapping, by contrast, creates a more dynamic relationship between text and other design elements. The text adapts to the contours of images or shapes, creating visual interest and a more integrated composition.

Wrapped text draws the viewer’s attention to both the text and the object it surrounds, establishing a stronger connection between these elements.

When deciding between these approaches, consider your design objectives. Standard formatting provides clarity and simplicity, while text wrapping offers visual interest and space efficiency.

Professional designers often combine both techniques within a single project, using standard formatting for headings and important information while employing text wrapping for body text around images.

The Significance of Text Wrapping in Design

The Significance of Text Wrapping in Design

Enhancing Readability and Comprehension

Text wrapping makes reading easier. It helps the eye move smoothly across the page. When text flows around images, it keeps the reader interested.

Good text wrapping shows how text and pictures relate to each other. This helps readers understand better.

It also makes it easier for the brain to take in what they read. By changing text boxes and aligning images well, you can create space.

This space stops things from looking messy. It keeps readers focused instead of feeling lost in big blocks of text.

Elevating Design Aesthetics

Text wrapping makes simple layouts look better.

It allows text to flow around images nicely. This creates a look that is more polished than plain boxes. To further refine your text, you might want to learn how to add shadow in Canva for a subtle, professional touch.
Using this method helps blend text and pictures. This results in a nice, balanced design that looks professional.

Furthermore, text wrapping adds space between design parts. This space gives rhythm and movement.

It helps keep viewers interested in your design.

Ensuring Consistency and Cohesion

Consistent text wrapping techniques throughout a multi-page document or across a brand’s marketing materials create a recognizable visual language that strengthens brand identity. For larger projects, such as learning how to create a lookbook in Canva, this consistency is key.

When viewers encounter similar wrapping patterns across different designs, they subconsciously register this consistency as professional and trustworthy. Text wrapping helps establish and maintain visual hierarchy by controlling how text interacts with focal elements. This consistent approach to organizing information guides viewers to process content in the intended sequence, improving communication effectiveness.

Accommodating Different Mediums

Text wrapping techniques can be adapted for various design formats, from social media posts to print materials.

When creating shareable documents, knowing how to add a clickable link in Canva PDF can make your designs more interactive. 

Understanding how to modify your approach for different canvas sizes ensures your designs translate effectively across mediums.

For mobile devices, thoughtful text wrapping becomes even more critical due to limited screen space. Properly wrapped text maintains readability on smaller screens while preserving the relationship between text and images.

When designing responsive layouts, text wrapping techniques must be adjusted to account for how text and images will reflow on different devices. Canva’s positioning and alignment tools help ensure your wrapping strategies work across various viewing contexts.

Facilitating Accessibility

Strategic text wrapping improves accessibility by creating a clear visual separation between content sections. This organization helps users with cognitive disabilities navigate your design more easily.

Proper spacing achieved through careful text wrapping enhances readability for users with visual impairments who may use screen magnification. The clear delineation between text and images reduces confusion and eye strain.

How To Wrap Text In Canva?

How To Wrap Text In Canva?

Step 1: Open Canva and Create A New Design

Start by logging into your Canva account and selecting “Create a design” from the home page. Choose a template that suits your project needs or create a custom-sized canvas by entering your desired dimensions.

If you need to switch orientations, you can learn how to landscape in Canva easily. For optimal text wrapping results, consider the amount of content and imagery you’ll need to accommodate. Larger canvases typically offer more flexibility for text wrapping techniques, while smaller formats require more precise text box adjustments.

Before adding any elements, plan your layout mentally or sketch it on paper. Deciding where images and text will interact helps you anticipate which text wrapping approaches will work best for your specific design.

Step 2: Insert Text and Image

Upload your image by clicking the “Uploads” button in the left sidebar or select from Canva’s extensive library of stock photos and graphics.

Position your image on the canvas where you want it to serve as the focal point for your text wrapping. For a clean look, you may want to cut out an image in Canva before placing it.

Add text by clicking the “Text” option in the left toolbar.

Choose from heading, subheading, or body text options based on your content hierarchy needs.

For text wrapping, you’ll often need multiple text boxes, so don’t worry about fitting all your content into a single text element.

If you’re planning to wrap text around a circular object, consider using a circular image or shape from the “Elements” section.

Circular text wrapping requires a different technique than wrapping around rectangular images.

Step 3: Adjust The Text Box

With your text added to the canvas, it’s time to shape it around your image.

Select your text box and look for the white pill handles that appear on its edges. These handles allow you to resize and reshape the text box to flow around your image. For basic text wrapping, create a text box that extends to one side of your image.

Type or paste your content, then adjust the width of the text box using the white pill handles until the text aligns neatly alongside your image.

Canva automatically reflows text within the box as you adjust its dimensions. Experiment with different text box shapes-wide and short, tall and narrow-to see how the text flow changes and which arrangement best complements your image.

Step 4: Position Text Around The Image

Move your text box into position beside your image, leaving an appropriate margin of space between them. This space creates visual breathing room that prevents your design from feeling crowded. To soften the edge of an image, you might want to learn how to fade an image on Canva.

For more complex wrapping, you’ll need to create multiple text boxes that follow the contours of your image. Position each text box strategically to create the illusion of continuous text flowing around the image.

Use Canva’s alignment tools (accessible when you select multiple elements) to ensure your text boxes maintain consistent distances from your image.

This precision creates the professional appearance of true text wrapping.

Step 5: Use Spacing and Line Height Adjustments

Fine-tune your text wrapping by adjusting paragraph spacing and line height. Select your text box and look for these options in the text formatting panel at the top of the screen.

Increasing line height (the space between lines of text) can improve readability, especially when text wraps around irregular shapes.

Similarly, adjusting paragraph spacing helps create visual separation between content sections.

For multi-paragraph text, consider using different spacing settings depending on how close the text comes to your image.

Paragraphs directly adjacent to images may benefit from increased line height to create more visual separation.

Step 6: Duplicate Text Boxes (Optional)

For longer content that needs to wrap around multiple sides of an image, consider duplicating your text boxes. This approach gives you greater control over how text flows throughout your design.

To duplicate a text box, select it and press Ctrl+D (Windows) or Cmd+D (Mac). Alternatively, right-click and select “Duplicate” from the context menu. Position the duplicate text box where the next segment of text should appear.

When using multiple text boxes, maintain consistency in font, size, color, and spacing to create the illusion of continuous text flow.

Any variations in these properties will disrupt the wrapping effect and call attention to the separate text boxes.

Advanced Text Wrapping Techniques

Advanced Text Wrapping Techniques

Wrapping Text Around A Circle

Canva offers a specialized feature for wrapping text around circular objects. Select your text, click on “Effects” in the top toolbar, then choose “Curve” under the Shape section.

Adjust the curve radius using the slider that appears. A smaller radius creates a tighter curve, while a larger radius produces a gentler arc. Experiment with this setting until your text follows the contour of your circular object naturally.

For text that needs to wrap completely around a circle, you may need to create two curved text elements-one for the top arc and another for the bottom. Adjust each separately to create a complete circular text wrapping effect.

Creating Complex Wraps With Multiple Text Boxes

For irregular shapes or complex images, create a series of text boxes that follow the contours of your object. This approach requires more manual adjustment but offers precise control over your text placement.

Start by positioning text boxes around the straightforward sections of your image. Then add additional text boxes to accommodate protrusions or indentations in the shape. Adjust each text box individually to create a cohesive wrapping effect.

Use Canva’s grouping feature to keep your carefully positioned text boxes together. Select all related text boxes, right-click, and choose “Group” from the context menu. This prevents accidental disruption of your text wrapping arrangement.

Using The “Effects” Tool For Text Shaping

Beyond the curve effect, Canva’s Effects panel offers additional text transformations that can enhance your wrapping techniques. You can even learn how to flip text in Canva for more creative options.

Explore options like wave, circle, and arch to create more dynamic text arrangements around your images.

Combine different effects for more complex wrapping scenarios. For example, use curved text for circular elements and standard text boxes for straight edges within the same design.

Remember that not all fonts support all text effects equally well.

If you want to use your own fonts, it’s good to know if you can upload fonts to Canva. Sans-serif fonts typically work better for curved text, while serif fonts may distort or become less readable when heavily manipulated.

Test different font options to find the most effective combination for your specific design.

Design Tips For Effective Text Wrapping

Design Tips For Effective Text Wrapping

Utilizing Canva’s Grid and Alignment Tools

Enable Canva’s grid feature by clicking the menu icon in the top-right corner and selecting “Show grid.” This overlay helps you position text boxes with precision, creating more professional text wrapping effects.

Use alignment tools to maintain consistent spacing between your text and images. Select both elements, click “Position” in the top toolbar, and explore alignment options that help create a balanced, professional appearance.

When working with multiple text boxes, use the grid to ensure they align perfectly with each other. This precision creates the illusion of continuous text flow even though you’re using separate text elements.

Combining Text and Shapes For Visual Interest

Include shapes from Canva’s Elements section to create more dynamic text wrapping opportunities. Simple shapes like circles, triangles, or custom organic forms provide interesting contours for text to wrap around.

Layer semi-transparent shapes between your text and images to create depth and visual interest. This technique adds sophistication to your text wrapping while maintaining readability. Experiment with contrasting shape styles against your text wrapping patterns.

For example, wrap text fluidly around rigid geometric shapes, or use structured text blocks around organic, flowing images.

Ensuring Contrast and Readability

Maintain a strong contrast between your text and background to ensure readability. To help your text stand out, you can learn how to outline text in Canva. Even the most elegant text wrapping fails if viewers struggle to read the content.

Consider adding a subtle shadow or highlight to text that wraps close to complex images. This effect creates visual separation that enhances readability without disrupting your wrapping design.

Test your text wrapping designs at various zoom levels to ensure readability across different viewing contexts.

What looks perfectly spaced at 100% zoom might appear crowded or disconnected at other magnifications.

Implementing Visual Hierarchy

Use different text formatting styles to establish hierarchy within your wrapped text. Vary font size, weight, or color to indicate the relative importance of different content sections.

Position your most important content where the text wrapping creates natural focal points. Areas where text curves dramatically or creates interesting negative space naturally draw the viewer’s eye.

Consider how your text wrapping affects the overall flow of information through your design. The wrapping pattern should guide viewers through your content in a logical, intuitive sequence that supports your communication goals.

Troubleshooting Common Text Wrapping Issues

Troubleshooting Common Text Wrapping Issues

Fixing Alignment Problems

If text appears misaligned around your images, check that you’re using the white pill handles to precisely adjust each text box. Small misalignments can disrupt the professional appearance of your text wrapping.

When text wrapping looks uneven, enable Canva’s rulers and guides (available in the View menu) to ensure consistent spacing between text and images throughout your design.

For stubborn alignment issues, try grouping and ungrouping elements, then realigning them. Sometimes this reset helps resolve positioning conflicts between text boxes and images.

Dealing With Text Overflow

When text extends beyond your desired wrapping area, adjust the text box size or break your content into additional text boxes. Balancing content volume with available space is important for effective text wrapping.

If reducing the text box size causes awkward word breaks or hyphenation, try rewording your content to better fit the available space.

A common question is, “Does Canva have spell check?” Knowing this can help you proofread any changes. 

Often, slight content edits can resolve visual flow problems without compromising your message.

For designs with strict space limitations, consider using font size or line height adjustments before resorting to content cuts. Sometimes, a one-point reduction in font size or a slight decrease in line height provides enough space without affecting readability.

Font Compatibility Concerns

Some fonts may display inconsistently when used with Canva’s curve and other text effects. If your wrapped text appears distorted, try alternative fonts with similar aesthetic qualities but better technical performance.

Decorative or script fonts often present challenges for text wrapping due to their complex letterforms. For critical text wrapping elements, consider using cleaner sans-serif fonts that maintain legibility when manipulated.

When wrapping text in designs for both digital and print use, test fonts that perform well across mediums.

It’s also vital to ensure you have the right to use your chosen visuals; you can learn more about whether Canva images are copyright-free in our related article.

Some fonts that display beautifully on screen may lose definition when printed, compromising your carefully crafted text wrapping.

FAQ’s:

Does Canva Have A Built-In Text Wrap Feature?

Canva does not have an automatic text wrap feature like Microsoft Word.

This often leads users to wonder how much Canva Pro costs and if it includes more advanced features.

Instead, you’ll need to manually adjust text boxes around images or use the curve effect for circular wrapping.

While this requires more effort, it also offers greater creative control over exactly how your text interacts with images and shapes.

How Can I Wrap Text Around Multiple Objects?

To wrap text around multiple objects, create separate text boxes for each area where text needs to flow. Position these text boxes strategically around your objects, adjusting their size and shape using the white pill handles.

Maintain consistent spacing and formatting across all text boxes to create the illusion of continuous text flow.

Can I Wrap Text Around Shapes As Well As Images?

Yes, you can wrap text around shapes in Canva using the same techniques as for images.

For geometric shapes, create text boxes that follow the straight edges. For circular or organic shapes, use the curve effect for text that follows rounded contours. More complex shapes may require a combination of techniques or multiple text boxes.

What’s The Easiest Way To Align Text in Canva?

The easiest way to align text in Canva is to use the alignment tools in the top toolbar. Select your text box, then click on “Position” to access options for aligning to the top, bottom, left, right, or center of your canvas.

For more precise alignment relative to other elements, select both the text and the reference object before using the alignment tools.

How Can I Adjust Text Spacing When Wrapping?

To adjust text spacing when wrapping, select your text box and look for the line height and spacing options in the text formatting panel.

Increasing line height creates more space between lines, while paragraph spacing affects the gap between paragraphs.

For fine-tuning, you can also adjust letter spacing (tracking) or the space between specific character pairs (kerning) in the advanced text options.

How Can I Ensure My Text is Readable After Wrapping?

To ensure readability in wrapped text, maintain adequate contrast between your text and background, use fonts designed for readability at your chosen size, and leave sufficient space between text and images.

Avoid extreme curving or distortion that might compromise legibility, and always test your design at various zoom levels to confirm that text remains clear from different viewing distances.

Conclusion

Text wrapping in Canva can change simple designs into smart, neat works. These works share your message well and look good too.

Although Canva does not have an automatic text wrap tool, you can still gain control manually.

Many users ask, “Is Canva Pro worth it?”, and some even seek ways to get Canva Pro for free. This guide shows how to do it effectively. By learning how to move text boxes, use curves for round shapes, and apply smart methods for tough wrapping tasks, you will boost your design skills a lot.

Good text wrapping means not only using the right tools but also thinking about how easy it is to read.

It also means keeping visual order and overall design in mind. The next time you work on a design in Canva, try these text wrapping tips.

They may make your work better. With practice, you’ll get a feel for when and how to use different wrapping styles for the best results.

For those looking to monetize their creations, a common question is, “Can I sell Canva designs on Etsy?”. If so, the next step is learning how to sell Canva templates on Etsy. Your designs will impress with a level of skill that shows you are a true design expert.

Categories
Canva

Are Canva Images Copyright Free? A to Z Content Licensing Guide

Canva has become a go-to tool for creating social media graphics, promotional materials, and professional designs, but its image licensing terms often raise questions.

Are Canva images truly copyright-free?

While you retain ownership of original designs, stock images from Canva’s library come with specific rules under their content license agreement.

Free and Pro content can be used for commercial projects, social media posts, and more, but each type has distinct permissions.

Free users get a non-exclusive license for most images, while Pro subscribers unlock premium elements with fewer restrictions.

However, third-party rights may apply to certain assets, and redistributing unaltered content is prohibited. Understanding these terms helps avoid legal issues while maximizing Canva’s creative potential.

What is Canva and Its Image Library?

What is Canva and Its Image Library?

Canva is a free-to-use online graphic design platform that enables users to create a wide range of visual content such as social media posts, presentations, posters, and logos with ease. It offers a user-friendly drag-and-drop interface along with thousands of customizable templates to help both beginners and professionals create unique designs quickly.

Mastering a few simple techniques, like learning how to replace an image in Canva or how to flip an image in Canva, can significantly speed up your workflow. Canva’s image library includes millions of free and premium stock photos, illustrations, and graphic elements that users can include in their designs directly from the platform.

These images cover various themes and categories, making it easy to find the perfect visual for any project.

Overview of Canva’s Design Platform

Canva is a graphic design platform that has transformed how designers create content for both personal projects and commercial use.

The platform offers an intuitive interface where users can create everything from social media posts to presentations, videos, and print materials without needing extensive design expertise.

You can even manage specific design elements, like learning how to landscape in Canva for different orientations or exploring advanced edits, like understanding how to slice in Canva.

Since its launch, Canva has grown to become one of the most widely-used design tools available today. The platform offers both a free version of Canva with substantial capabilities and Canva Pro, a subscription service that unlocks additional features and content.

This accessibility has made quality design more accessible to individuals, small businesses, and large organizations alike.

Types of Images Available On Canva

Canva’s image library contains millions of photos, illustrations, and graphic elements categorized by their licensing terms:

  • Free Content: Available to all Canva users, including those on the free version, these images can be used for various purposes according to Canva’s content license agreement.
  • Premium Images: Marked with a crown icon, these are available to Canva Pro subscribers or for individual purchase by free users through a one-time license fee.
  • AI-generated Content: Starting June 2024, Canva introduced AI-generated images in its free content library, marked as “AI image generated by Canva” in the source information.

You can further customize these visuals by learning how to fade an image on Canva for a subtle effect or how to cut out an image in Canva to isolate subjects.

Are Canva Images Copyright Free?

Are Canva Images Copyright Free?

The simple answer is no – Canva images are not entirely “copyright free.”

Instead, they come with specific licensing terms that grant users certain rights to use the content.

When you use images from Canva’s library, you’re agreeing to follow the terms outlined in their content license agreement.

Free users have access to a substantial portion of Canva’s library, but this doesn’t mean the content is free from copyright.

Rather, Canva has secured licenses that allow you to use these images within specific parameters. Similarly, Canva Pro subscribers gain access to premium content, but these images still come with licensing terms rather than being completely free from copyright restrictions.

For those weighing the benefits, it’s helpful to understand how much Canva Pro costs and explore if you can get Canva Pro for free through special programs.

The key concept to understand is that “free to use” doesn’t equate to “free from copyright.”

Each piece of content in Canva’s library comes with license terms that specify how you can and cannot use it in your designs.

Copyright Status of Canva Images

Copyright Status of Canva Images

Free Vs. Premium Images

The copyright status varies between free content and premium images in Canva:

  • Free Content: Available to all Canva free users, the content can be used in both personal and commercial projects under the Free Content License. According to the content license agreement, Canva grants users “a perpetual, non-exclusive, non-transferable worldwide license to use the Free Content for the Permitted Uses“. You also cannot trademark a logo featuring a graphic from the Canva library. Nonetheless, it is possible to utilize basic shapes and lines from Canva to design unique icons from the ground up, similar to the way oblong shapes and straight lines were employed to represent coffee beans in the example. This means you can use these images in your designs, but certain restrictions still apply.
  • Premium Images: These images, marked with a crown icon, are available to Canva Pro subscribers. If a free user wants to use a premium image, they must pay a one-time license fee for that specific design. Premium images generally come with more flexible usage rights but still have licensing restrictions.

The distinction between free and premium content isn’t about who owns the copyright but about the specific licensing terms Canva has negotiated with content creators.

Canva Pro and Canva For Teams Licensing

Canva Pro subscribers receive access to over 75 million premium images, videos, graphics, and audio files. This subscription model allows designers to use premium content across multiple projects without paying individual licensing fees for each piece of content.

With Canva Pro, users benefit from:

  • Full access to the entire stock photo and media library
  • The ability to use premium content in numerous designs
  • Regular updates to the content library with fresh stock images

For many, the question of Is Canva Pro worth it? comes down to the frequency of use and the need for premium assets.

For businesses and organizations, Canva for Teams offers similar benefits with added collaboration features, allowing multiple designers to access the same resources efficiently.

Understanding Canva’s License Agreement

Canva’s Content License Agreement (CLA) is the definitive document outlining what users can and cannot do with Canva content.

This agreement covers all types of content on the platform, including photos, icons, illustrations, video, audio, fonts, and templates.

Since fonts are a key part of design, many users wonder, “Can you upload fonts to Canva?” The Pro plan allows this, giving you greater brand consistency.

Key aspects of Canva’s license agreement include:

  • Perpetual License: Canva generally grants a perpetual license, meaning you can continue using the content in your designs indefinitely.
  • Non-Exclusive: The license is non-exclusive, so other users can use the same content in their designs.
  • Non-Transferable: With some exceptions, the license cannot be transferred to others.
  • Worldwide: The license applies globally, allowing you to use the content regardless of location.

The agreement distinguishes between different content types and their permitted uses, making it essential to understand which specific license applies to the content you’re using in your designs.

Legal Usage Of Canva Images

Legal Usage Of Canva Images

Personal Projects and Usage Rights

For personal projects, Canva offers considerable flexibility.

Both free and premium images can be used for:

  • Social media posts for personal accounts
  • School projects and academic work
  • Personal blogs and websites
  • Non-commercial creative projects

Even when using Canva images for personal projects, it’s important to follow the limitations outlined in the license agreement. For instance, you cannot claim ownership of the original images or redistribute them as standalone assets.

Commercial Usage Guidelines

Commercial use of Canva images is permitted, with specific guidelines:

  • Both Free and Pro users can sell designs that include Canva images on printed merchandise like posters, mugs, and tote bags.
  • Users can design and sell certain digital products like e-books, photo books, and magazines, or create designs for clients. For example, fashion brands can learn how to create a lookbook in Canva to showcase their collections.
  • The designs sold must be your own work, not just unmodified stock images from Canva’s library.

According to Canva’s CLA, “The designs printed on the merchandise you sell must be your own work. To make a design your own, you should include other elements like icons, graphics, vectors, and stickers… so the original media becomes a part of a unique composition”.

Attribution Requirements

Attribution requirements vary depending on the type of content:

  • Free Content: Free-to-use content within Canva generally does not require attribution. However, it’s considered good practice to provide attribution when possible, especially in academic or professional contexts.
  • Canva Pro Content: Pro content must be attributed as the license states you cannot take credit for the work. Not including an attribution would imply you were the creator.

To properly attribute Canva content, you should include the creator’s name, mention Canva as the source, and state the license type. Place the attribution near the content, in a caption, or in a credits section.

Limitations and Restrictions

Limitations and Restrictions of canva images

What You Cannot Do With Canva Images?

While Canva provides generous usage rights, there are important restrictions:

  • You cannot use Canva images in ways that violate the license agreement.
  • You cannot claim copyright ownership of unmodified Canva content.
  • You cannot use the content in ways that are defamatory or illegal.
  • You cannot use images featuring models or property in ways that suggest endorsement without proper releases.
  • You cannot use Canva images for logos or trademarks without significant modifications. This often involves unique text arrangements, and mastering skills like how to curve text in Canva or how to outline text in Canva can help create a distinct look. You can also learn how to flip text in Canva or how to add a shadow in Canva to further customize your typography.

Understanding these limitations ensures your usage of Canva content remains within legal boundaries.

Reselling and Redistribution Rules

To make money from your Canva templates, look into the Canva Creators program. This program lets creators sell their designs. It can be a great way to earn income. Many people use this option to share their work.

Joining the program is simple and helpful for earning cash. With Canva, you can turn your ideas into profit easily.

For those looking to sell on other platforms, it’s important to understand how to sell Canva templates on Etsy legally by creating original and valuable designs.

One of the most important restrictions concerns reselling and redistribution:

“What users cannot do under any circumstances, is sell Content on a standalone basis. This means you can’t put an illustration or image from Canva’s Content library on a T-shirt and sell it as-is”.

This means you cannot:

  • Download Canva stock images and resell them as stock photos
  • Create a collection of Canva elements and sell them as your own graphics
  • Share Canva Pro content with non-subscribers to avoid licensing fees

Instead, you must include Canva content into your own unique designs before selling products featuring those designs.

Template and Product Restrictions

Canva also places restrictions on how templates and products can be used:

  • Existing templates on Canva cannot be resold as-is. If you want to sell your template, “the safest approach is to create a template from scratch”.
  • When creating digital products like e-books or print-on-demand items, the Canva content must be integrated into your original design. Features like knowing how to add a clickable link in Canva PDF become essential for interactive digital products. Similarly, if you’re adding dynamic elements, you might question, “Do Canva QR codes expire?”, which is important for marketing materials.
  • You cannot include Canva content into a competing product or service.

These restrictions ensure that Canva’s content is used as intended-as elements within your creative work, not as products themselves.

Best Practices For Using Canva Images

Best Practices For Using Canva Images

To ensure you’re using Canva images correctly and legally, follow these best practices:

  1. Read the License Agreement: Familiarize yourself with Canva’s Content License Agreement to understand what you can and cannot do with their content.
  2. Check Image Types: Be aware of whether you’re using free content or premium images, as they come with different licensing terms.
  3. Create Unique Designs: Rather than using stock images as-is, incorporate them into original compositions with other design elements. This includes text styling, and knowing how to wrap text in Canvahow to indent in Canva, or how to highlight text in Canva can improve your layouts.
  4. Keep Track of Usage: Maintain records of which images you’ve used and how, especially for commercial projects.
  5. Provide Attribution When Needed: Even when not strictly required, consider crediting the source of images, particularly for Canva Pro content.
  6. Stay Updated on Policy Changes: Licensing terms may change over time, so periodically review Canva’s latest agreements. Before finalizing, always double-check your text. A common question is, “Does Canva have spell check?”, and while it does, manual proofreading is still recommended.
  7. Consider Upgrading to Pro: If you frequently use Canva for commercial projects, a Canva Pro subscription might be more cost-effective than purchasing one-time licenses.

FAQ’s:

Are All Canva Images Free To Use?

No, not all Canva images are free to use. Canva offers both free content available to all users and premium images (marked with a crown icon) that require either a Canva Pro subscription or individual purchase through a one-time license fee.

Even the free content comes with specific licensing terms that dictate how it can be used.

Can I Use Canva Images For Commercial Purposes?

Yes, you can use Canva images for commercial purposes, subject to the terms of the content license agreement.

Both Free and Pro users can include Canva images into designs sold on merchandise or used in client work. However, you cannot sell unmodified Canva content as standalone products.

Can I Sell Canva Designs On Etsy?

Yes, you can sell products featuring your Canva designs on platforms like Etsy, provided you follow certain rules.

If you’re wondering, “Can I sell Canva designs on Etsy?“, the key is that your designs must be your own work, not just unmodified Canva templates or images. You can create unique designs using Canva elements and sell them on products like t-shirts, mugs, or digital downloads.

Do I Need To Credit Or Attribute Canva Images?

Attribution requirements depend on the type of content:

  • Free content generally does not require attribution, though it’s good practice to provide credit when possible.
  • Canva Pro content must be attributed, as the license specifies you cannot take credit for the original work.

What’s The Difference Between Free and Premium Canva Images?

Free images are available to all Canva users without additional cost, while premium images (marked with a crown icon) are available to Canva Pro subscribers or for individual purchase by free users. Premium images often offer higher quality and more unique options.

Both types come with specific licensing terms that allow various uses while maintaining certain restrictions.

Can I Resell Canva Designs Or Images?

You cannot resell Canva images or elements as standalone products.

However, you can sell products featuring your original designs that include Canva elements. For instance, you cannot download a Canva illustration and sell it as stock art, but you can create a unique design using Canva elements and sell products featuring that design.

What Happens If I Use Canva Images Incorrectly?

Using Canva images in ways that violate the license agreement could lead to legal consequences, including:

  • Copyright infringement claims
  • Termination of your Canva account
  • Potential legal action by Canva or the original content creators
  • Removal of your products from sales platforms

Can I Use Canva Images After My Subscription Ends?

According to Canva’s policies, if you’ve used Pro content in a design while your subscription was active, you can continue to use that specific design after your subscription ends. However, you cannot create new designs using Pro content once your subscription has expired unless you purchase individual licenses for those elements.

Conclusion

Understanding the copyright rules of Canva images is important for designers. They want to use this strong platform well while respecting rights. Canva images are not completely “copyright-free,” but they have clear rules that allow many personal and business uses.

The main idea is that Canva’s content license tells how you can use their images legally. Both free and paid images come with these rules.

They usually allow use in personal projects, client work, and even products for sale. However, you must create your designs instead of just reselling the original ones.

Learning the license terms, knowing different image types, and following good practices for crediting sources lets you use Canva images safely. This way, there’s no need to stress about copyright issues.

For designers wanting more options and clear rules, a Canva Pro subscription offers access to premium content.

Whether you use the free version or Pro, staying updated on Canva’s licensing rules is best. It helps protect you while crafting great designs that connect with your audience. With the right information and methods, Canva can remain a key tool in your design toolkit for years ahead.

Categories
Canva

Can I Sell Canva Designs On Etsy? Easy Guide To Extra Income (2025)

Selling Canva designs on Etsy isn’t just a trend-it’s a huge opportunity to turn creativity into passive income.

With over 90 million active buyers on Etsy and Canva’s user-friendly graphic design tools, designers can create digital products like social media templates, wedding invitations, or business cards and sell them as customizable designs.

The best part? You don’t need advanced design skills or a Canva Pro account to start.

Whether you’re looking for a side hustle or a full-time venture, platforms like Etsy let you tap into profitable niches like Instagram templates or digital planners that are in high demand.

You can create a shop that stands out by doing good market research.

When working with your visuals, it’s helpful to know basics like how to replace an image in Canva to keep your workflow efficient.

Use Canva’s free fonts and design parts. Also, use Etsy SEO to help your store. Write clever product descriptions to attract buyers. Your Canva templates can reach many people around the world.

Ready to turn your ideas into a great passive income stream? Let’s dive in!

Guide to Selling Canva Designs On Etsy

Guide to Selling Canva Designs On Etsy

Can I Sell Canva Designs On Etsy?

Yes, you can sell Canva designs on Etsy, but with specific parameters.

You can sell templates you’ve created using Canva as digital downloads, allowing buyers to customize them for their needs. This process is straightforward once you learn how to sell Canva templates on Etsy.

However, you cannot simply resell Canva’s pre-made templates or stock elements as standalone products.

The key difference is that you must create original designs using Canva as your graphic design tool. Your digital products must represent your original work and creative input, not just unmodified Canva elements.

Can I Use Canva To Sell Printables On Etsy?

Absolutely! Canva is an excellent platform for creating printables to sell on Etsy. You can design everything from planners and journals to wall art and educational worksheets. Mastering simple techniques, such as how to landscape in Canva, can help you create a wider variety of printable layouts.

When creating printables, the first thing to remember is resolution quality-Canva’s default is 72 ppi, but for print-quality digital products, you’ll want to adjust your canvas size to achieve 300 ppi.

Many successful Etsy sellers use Canva to create high-quality printables, generating significant passive income through these digital downloads.

Can I Use Canva For My Business Logo?

Yes, you can use Canva to create a business logo for your Etsy shop or other business ventures.

Canva offers numerous design elements, free fonts, and graphic elements that make logo creation straightforward even for beginners.

If you want to use custom branding, it’s useful to know if you can upload fonts to Canva to truly make your logo unique.

For your Etsy shop, creating a professional shop icon (logo) helps establish your brand identity.

Using Canva’s free plan, you can design a 500×500 pixel icon for your shop, including your brand colors and typography.

Can I Use Canva Free To Sell On Etsy?

Yes, you can use a free Canva account to create templates for Etsy.

In fact, when creating templates for customers to edit, you must only use free elements. If you include Canva Pro elements in your designs, your customers will be forced to upgrade to Pro to access them.

For those considering the upgrade, understanding how much Canva Pro costs is a key factor.

The free plan gives you access to thousands of free elements, free fonts, and design tools- more than enough to create sellable templates.

However, a Canva Pro account does offer additional design elements, more storage, and advanced features that might enhance your template creation process.

Many wonder if Canva Pro is worth it, and the answer often depends on your business volume. There are also ways to learn how to get Canva Pro for free through various programs and trials.

Is It Legal To Sell Canva Designs On Etsy?

Is It Legal To Sell Canva Designs On Etsy?

Yes, selling Canva designs on Etsy is legal as long as you follow Canva’s licensing terms. It’s important to understand if Canva images are copyright-free before you start selling.

According to Canva’s Content License Agreement:

  1. You can sell designs where Canva elements are part of a larger, original composition
  2. You cannot sell unmodified Canva elements as standalone products
  3. You cannot sell existing Canva templates “as-is

For example, you can use Canva’s free elements to create a wedding invitation template and sell it on Etsy.

However, you cannot take a heart illustration from Canva and sell it as clipart without significant modification.

Canva’s free media use license allows for commercial use, but there are limitations. Always check the specific licensing for elements you use, especially stock photos with recognizable people or company logos.

Benefits Of Selling Canva Designs On Etsy

Benefits Of Selling Canva Designs On Etsy

Selling Canva templates on Etsy offers numerous advantages:

  1. Passive Income Potential: Once created, the same template can be sold repeatedly without additional work
  2. Low Startup Costs: No inventory or shipping required
  3. Accessibility: Canva’s user-friendly interface makes design creation possible even for beginners
  4. Large Marketplace: Etsy has over 90 million potential buyers
  5. Flexibility: Create templates at your own pace as a side hustle

Many successful template sellers earn $1,000-2,000 monthly, with top shops generating $20,000-30,000+ per month. Some individual templates created in just an afternoon have generated over $1,000 in sales.


What Kinds Of Canva Designs Sell Well On Etsy?

The most successful Canva templates on Etsy tend to fall into several high-demand categories:

  1. Social Media Templates: Instagram templates, Pinterest graphics, and content calendars. For dynamic content, you might want to learn how to put a timer in Canva.
  2. Wedding Invitations: Save-the-dates, RSVP cards, and wedding programs.
  3. Business Marketing Templates: Business cards, price lists, and real estate templates. Knowing how to create a lookbook in Canva is also great for showcasing products.
  4. Digital Planners: Budget trackers, meal planners, and fitness journals.
  5. Resume and CV Templates: Professional templates for job seekers.
  6. Specialized Templates: Templates for freelancers, RV rental agreements, homeschool curricula.

Niche-specific templates often perform better than generic ones. For example, laser cut files for specific crafts or specialized meal plans for dietary restrictions represent profitable niches with less competition.

How To Create and Sell Templates On Etsy?

How To Create and Sell Templates On Etsy?

Create Your Canva Account

Start by setting up your Canva account at Canva.com.

You can begin with a free Canva account and consider upgrading to a Canva Pro account as your business grows.

Set up your brand kit with your color palette for consistent designs.

Research The Market and Validate Your Product Ideas

Conduct thorough market research before creating templates.

Use Etsy’s search bar to see what’s trending-type “Canva template” and note the auto-suggestions. Look for listings with “bestseller” badges to identify high-demand products.

Pay attention to search results, prices, and the number of sales for similar products. Tools like Alura can help identify profitable niches by showing digital products sorted by sales volume.

Start Creating Canva Templates

Begin designing your templates using Canva’s graphic design tool.

Focus on creating customizable designs that solve problems for your target audience. You can get creative with your images by learning how to flip an image in Canva or how to fade an image on Canva.

For more advanced edits, you might explore how to slice in Canva or how to cut out an image in Canva to create unique compositions.

Use free elements if you want customers to edit the templates without needing a Pro account. Remember that Canva operates at 72 ppi by default. For printable designs, adjust your canvas size-multiply dimensions by 300 for print-quality output.

For example, an 8.5×11 inch document should be 2550×3300 pixels.

Fine-Tune Your Designs

Polish your templates by ensuring they follow current design trends while remaining practical and user-friendly. Adding visual effects, like learning how to add shadow in Canva, can make your designs pop. 

Test your templates by using them yourself to identify any usability issues. Make sure text is editable and all elements are properly aligned.

To perfect your text, you should know how to highlight text in Canva and how to indent in Canva.

For more stylistic text effects, you can learn how to flip text in Canvahow to curve text in Canva, or how to outline text in Canva. It’s also helpful to know how to wrap text in Canva for complex layouts.

Finally, check your work because you might ask yourself, “Does Canva have spell check“? The answer is yes, and it’s a lifesaver.

Set Up Your Etsy Shop

Create your Etsy account and set up your shop with a professional shop name and branding. Configure your shop settings for digital downloads and prepare compelling listing images that showcase your templates.

Use Canva to create professional listing images that highlight your templates’ features and benefits. Include mockups showing how the finished designs will look when used.

Share Canva Templates On Etsy

To share your Canva template on Etsy:

  • Create a shareable Canva template link by clicking “Share” and then “Template link“.
  • Create a PDF file containing the template link and instructions. Knowing how to add a clickable link in Canva PDF is essential for this step.
  • Upload this PDF file to your Etsy listing.
  • Set proper expectations about what customers will receive.

The PDF should include the shareable Canva template link, clear instructions on how to access and edit the template, and any other relevant information like printing recommendations.

For added functionality, you may want to know do Canva QR codes expire if you plan to use them in your delivery files.

Grow Your Etsy Shop

Launch with at least 20 listings to increase visibility.

These don’t need to be completely different products- you can create variations in color, layout, and style.

Optimize your listings with relevant keywords and compelling product descriptions to improve your Etsy SEO and search results ranking.

How To Find What Templates To Sell?

How To Find What Canva Templates To Sell on Etsy?

Identifying profitable niches requires strategic research:

  1. Search Etsy: Use the search bar and note auto-complete suggestions to identify high-demand topics
  2. Check Bestsellers: Look for “bestseller” badges on listings to spot successful products
  3. Analyze Competition: Low competition + high demand = ideal niche
  4. Follow Trends: Stay updated on design trends and seasonal needs
  5. Listen To Customer Requests: Pay attention to what potential buyers are asking for

Focus on solving specific problems for clearly defined target audiences. Specialized templates for professional groups (consultants, photographers, real estate agents) often sell better than generic ones.

Prerequisites For Selling Canva Templates On Etsy

Prerequisites For Selling Canva Templates On Etsy

To sell Canva templates on Etsy, you’ll need to consider a few important steps.

Creating An Etsy Seller Account

To start selling, you’ll need an Etsy account configured for selling. Visit Etsy.com and follow the steps to open your shop. Make sure to:

  • Set up shop policies for digital products
  • Configure payment methods
  • Create a professional shop name and brand identity

Tools and Skills Needed

Required tools include:

  • Canva account (free or Pro)
  • Computer with reliable internet
  • Basic design skills
  • PDF creation capability

While advanced design skills can help, Canva’s intuitive interface makes it possible for beginners to create sellable templates with practice and attention to detail.

Preparing Your Shop For Digital Products

Configure your Etsy shop settings for digital downloads:

  • Enable automatic delivery of digital products
  • Set up clear shop policies regarding templates
  • Create informative FAQ sections about your digital products
  • Prepare template delivery instructions

Pricing and Packaging Your Templates

How To Determine Pricing?

When setting prices:

  • Research similar products on Etsy
  • Consider your time investment
  • Factor in Etsy fees
  • Start competitively and adjust based on demand
  • Price based on value, not just competition

Most successful Canva templates on Etsy sell between $3-15, with bundles priced higher at $20-50.

Create Bundles

Increase your average order value by creating bundles of related templates. For example:

  • Complete social media template packages
  • Wedding stationery suites
  • Business branding kits

Bundles typically sell for 2-3 times the price of individual templates while providing perceived value to customers.

Use Discounts and Promotions

Use strategic promotions to attract interested buyers:

  • Offer limited-time sales
  • Create coupon codes for return customers
  • Provide quantity discounts
  • Run seasonal promotions
  • Offer freebies to build your email list

5 Best-Selling Canva Templates On Etsy

Best-Selling Canva Templates On Etsy

Finding the best-selling Canva templates on Etsy can help your shop stand out and make more money.

Social Media Templates

Social media templates help businesses maintain consistent branding across platforms.

Top-selling products include:

  • Instagram post and story templates
  • Pinterest pin templates
  • Social media content calendars
  • Quote graphics
  • Engagement post templates

These templates save time for social media managers and small business owners who need professional-looking content without design expertise.

Business Marketing Templates

Business templates help entrepreneurs present their services professionally:

  • Business cards
  • Media kits
  • Price lists
  • Real estate flyers
  • Email newsletter templates
  • Proposal templates

The business market is especially lucrative because these templates directly contribute to customers’ income generation.

Planner and Journal Templates

Planners and journals remain consistently popular:

  • Budget planners
  • Digital planners for tablet use
  • Habit trackers
  • Meal planners
  • Fitness journals
  • Goal-setting workbooks

According to Etsy search data, printable planners average 2,197,332 monthly views and sell for an average price of $4.93.

Resume and CV Templates

Job-seeking templates provide high value to customers:

  • Modern resume templates
  • CV designs
  • Cover letter templates
  • LinkedIn banner templates
  • Portfolio layouts

These templates help job seekers stand out while saving time on design work.

Wedding Invitations and Event Designs

Event designs represent a massive market:

  • Wedding invitation suites
  • Save-the-date templates
  • RSVP cards
  • Wedding newspaper templates
  • Event programs
  • Menu designs

Wedding templates are particularly profitable because customers are willing to pay premium prices for special occasions.

Canva’s Terms of Use: Rules For Selling Templates

Canva’s Terms of Use: Rules For Selling Templates

Understanding Canva’s terms of use is important if you want to sell templates.

A. Canva Licensing Options

Canva offers different licensing options:

  • Free Media License Agreement covers most free content
  • The One Design Use License applies to Pro content
  • Special licenses apply for content from partners like Pixabay and Pexels

Under the Free Media License Agreement, you can use Canva’s free content in commercial projects, including templates for sale, as long as they become part of a larger, original composition.

B. Commercial Use Guidelines

Canva allows commercial use of its platform with specific guidelines:

  • You can sell designs where Canva elements are part of a new composition
  • You can sell physical and digital products featuring your Canva-created designs
  • You cannot sell unmodified Canva elements or templates

Generally, both Free and Pro users can sell designs on merchandise and create certain digital products like e-books and magazines.

How To Avoid Violations?

To stay compliant:

  • Create designs from scratch rather than modifying existing templates
  • Don’t resell Canva elements on their own
  • Don’t claim Canva elements as your own work
  • Check licensing for specific elements, especially photos with people
  • Use only free elements if customers will be editing the templates

How To Optimize Your Canva Template Listings On Etsy?

How To Optimize Your Canva Template Listings On Etsy?

Implement these Etsy SEO strategies:

  • Research relevant keywords using Etsy’s search bar suggestions
  • Include keywords in titles, tags, and product descriptions
  • Create high-quality listing images that showcase your templates
  • Write detailed descriptions explaining template features and benefits
  • Respond quickly to customer questions
  • Encourage positive reviews from buyers

The first thing in your title should be your main keyword, followed by descriptive terms that potential buyers might search for.

How to Promote Your Canva Templates Outside of Etsy?

Expand your reach through:

  • Pinterest marketing with template previews
  • Instagram posts showcasing template usage
  • Facebook groups for entrepreneurs and content creators
  • YouTube tutorials demonstrating your templates
  • Email marketing to previous customers
  • Collaborations with influencers in your niche

Creating valuable content around your templates helps attract your target audience and position you as an expert.

How to Manage and Grow Your Etsy Business?

Scale your template shop by:

  • Regularly adding new listings
  • Updating existing templates to follow design trends
  • Building an email list of interested buyers
  • Tracking your sales and popular items
  • Expanding into complementary product types
  • Considering multiple platforms beyond Etsy

Template selling represents a huge opportunity for passive income, but requires consistent effort in the beginning to build momentum.

FAQ’s:

Can I Sell Canva Templates For Commercial Use?

Yes, you can sell Canva templates for commercial use. Buyers can purchase your templates and use them for their businesses. However, you should clarify in your listing whether your templates include free elements only or if they require a Canva Pro account to access certain features.

Can You Include Canva Pro Elements In Your Design?

You can include Canva Pro elements in your designs, but be aware that customers will need a Canva Pro account to access those elements. For maximum accessibility, many successful sellers use only free elements in their templates so all customers can use them regardless of their Canva subscription level.

Can I Use Canva Graphics For Print-On-Demand Designs?

Yes, you can use Canva to create designs for print-on-demand products like t-shirts, mugs, and tote bags.

Canva’s Content License Agreement allows both Free and Pro users to sell designs on printed merchandise as long as the Canva elements are part of a unique composition and not used standalone.

Is Selling Canva designs On Etsy Worth It?

Yes, selling Canva designs on Etsy is worth it for many designers.

With low startup costs, no inventory management, and the potential for great passive income, it’s an attractive business model. Some shops earn $1,000-2,000 monthly, with top performers making $20,000+ per month. Individual templates can generate over $1,000 in sales.

The key to success is creating high-quality, in-demand templates that solve specific problems for a clearly defined target audience.

Conclusion

Selling Canva templates on Etsy represents a significant opportunity for designers at all skill levels. The combination of low entry barriers, scalable passive income potential, and growing demand makes this business model particularly attractive in 2025.

Success requires understanding Canva’s licensing terms, creating truly valuable templates, and effectively marketing your digital products to the right audience. While competition exists, focusing on profitable niches and high-quality design will help your templates stand out.

The most successful sellers approach this business strategically-conducting thorough market research, creating customizable designs that solve real problems, and optimizing their listings with relevant keywords to attract potential customers.

If you’re ready to turn your design skills into a rewarding side hustle or even a full-time business, selling Canva templates on Etsy might be the perfect opportunity. Start with one type of template, master the process, and gradually expand your digital product offerings as you learn what resonates with your target audience.